


Contents
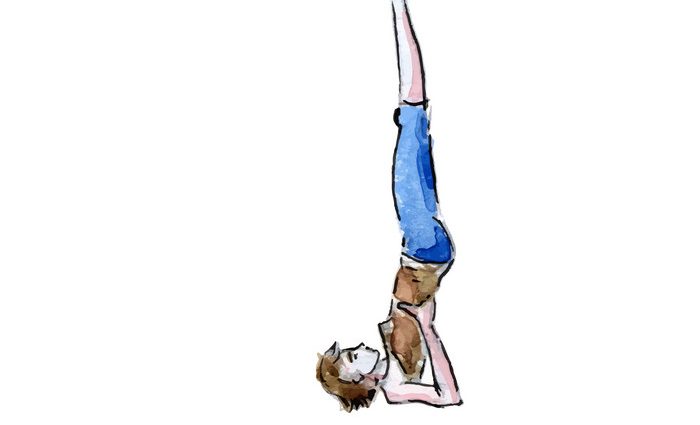
We all have a bit of yoga! After all, back in school, in physical education classes, we were taught to do a shoulder stand. You throw your legs up, hold yourself behind your back and wonder: your legs are at the top of you! This is Birch – Sarvangasana, one of the “golden” poses in yoga. Today we – but in an adult way – will understand the intricacies of performing this asana, find out what harm it can bring, and what benefit!
“Well! If I did Birch at school, then now I can, ”our reader will exhale. And he will be only partly right. Our spine, alas, is no longer so flexible, and so is the cervical region. Someone has accumulated sores, overweight. All this does not make the shoulder stand safe and easy to perform, as it was in childhood. But, of course, one must strive for Sarvangasana. But as? If you are new to yoga, we recommend that you still practice simple basic asanas for the time being (you will find them in our section of yoga poses). Then, when you feel confident in them, move on to more complex ones – namely, those that will prepare you for the Birch pose. For example, there is a wonderful pose of the Plow – Halasana. But about her a little later. And now let’s find out more about why Sarvangasana is so beautiful.
Features of the birch pose
It belongs to the most important postures of yoga. And it benefits the whole body at once, which is why it is called like this: Sarvangasana. “Sarva” is translated from Sanskrit as “all”, “whole”, “complete”. “Anga” means body (limbs). And, indeed, the Birch pose affects the entire human body. Sarvangasana stimulates the thyroid and parathyroid glands, improves blood supply to the brain, eyes and skin of the face, improves digestion and excretion, gives rest to our heart muscle and is even capable of rejuvenation.
For those who have diseases of the lungs and bronchi, who often suffer from a runny nose and colds – the Birch pose, as they say, is “what the doctor ordered”! Asthma, bronchitis, shortness of breath, weakened immunity are, in medical terms, direct indications for Sarvangasana. It also relieves headaches, digestive disorders, works with uterine displacement in women. And, by the way, it is generally considered a very “feminine” asana, as it debugs not only the menstrual cycle, but also the hormonal system as a whole. And the shoulder stand relieves increased anxiety, anxiety, fatigue and insomnia. It is able to restore clarity of thought, charge you with energy and good mood for the whole day. In detail, due to what this happens, we will analyze below (see the benefits of asana).
And here the temptation is great right away – right off the bat – to start practicing the Birch pose. Some call her the mother of asanas, others “queen”, “pearl”. And they are right. All this is so. But rarely does anyone sensibly and immediately warn of serious health problems that the Birch pose can bring. In order to achieve only a healing effect and remove all unwanted ones, you must be aware of contraindications and all the intricacies of performing a shoulder stand.
The benefits of exercise
Birch pose in yoga refers to inverted asanas. And they are very healing in their effect on the entire human body.
- The shoulder stand brings fresh blood to the head. And, therefore, brain cells are renewed, mental ability is enhanced, the head becomes light and clear (goodbye drowsiness and apathy!).
- Blood flows to the pituitary and pineal glands – important glands in the brain, on which our health directly depends. Both physical and mental.
- Improves hormonal balance. And this is how it happens. The pituitary gland is responsible for the production of hormones (it produces hormones that affect growth, metabolism and reproductive function). But you and I walk on our feet, the blood in the body flows down all the time, and the pituitary gland may not receive an accurate picture of the amount of hormones we need. And when we move into a stance, the blood rushes to the head, and the pituitary gland has all the necessary information. He “sees” which hormones we lack and begins the process of replenishing them.
- Reduces pressure on the walls of venous vessels. This is true for those who suffer from varicose veins. Asana helps eliminate the risk of varicose veins and prevents the development of the disease.
- Starts the rejuvenation process. Due to what is this happening? The shoulder stand, like all inverted asanas, changes the flow of energy in the human body. It is about prana and apana. Prana moves up, apana moves down. And when we get up in Sarvangasana, we just redirect the flow of these energies, we start the process of rejuvenation.
- Clears toxins. Lymph removes everything unnecessary from the body. And it flows only under gravity or during muscle work. If a person leads an inactive lifestyle, his muscles are flabby and not developed – the lymph, alas, stagnates. An amazing effect happens when we stand in a shoulder stand. Lymph under the force of gravity again begins to work and free the body from accumulated toxins.
- Improves metabolism.
- Very good for the female reproductive system. Asana restores health to the organs of the reproductive system and in men (just remember about contraindications. We do Sarvangasana if there are no problems in the cervical or thoracic spine, etc.).
- Turns on the parasympathetic nervous system, which is responsible for relaxation. After all, what happens when we do a handstand? Increased intracranial pressure. Here the body “wakes up” and starts the process of self-regulation. He begins to reassure us, saying that everything is fine, there is no danger. That is why, when we come out of this posture, there is such a pleasant feeling of bliss, relaxation. The parasympathetic nervous system has turned on in the body.
- Relieves nervous tension, stress and anxiety.
- Strengthens the work of the lungs, this in turn protects us from coughing and sore throats.
- Sarvangasana is a good prevention of colds and SARS, because during its implementation, the blood supply to the neck, throat, face increases, and the body’s resistance increases.
- Fills with energy, relieves fatigue, insomnia.
Exercise harm
If you are not sure about your health, we strongly recommend that you consult a doctor before mastering this asana. Make sure that you are not one of those who is contraindicated to do a shoulder stand. So, contraindications for Sarvangasana:
- increased intracranial pressure
- increased intraocular pressure
- retinal detachment
- hernias, protrusions in the cervical region (there is a chance to worsen the condition by entering and exiting the asana)
- cervical vertebrae injury
- traumatic brain injury
- diseases of the heart, liver and spleen
- previous strokes
There are also time limits:
- neck and shoulder pain
- full stomach and intestines
- stomach upset
- Strong headache
- otitis, sinusitis
- physical fatigue
- unprepared body
- pregnancy (only possible under the supervision of a competent instructor)
- menstruation period in women
How to do the birch pose
ATTENTION! The description of the exercise is given for a healthy person. It is better to start the lesson with an instructor who will help you master the correct and safe implementation of the shoulder stand. If you do it yourself, carefully watch our video tutorial! Wrong practice can be useless and even dangerous to the body.
Step by step execution technique
Step 1
We lay down on our backs. We move our hands behind our heads, put our legs behind our heads and lower our feet into our palms (Halasana – Plow pose).
Step 2
We try to round the back, directing the tailbone to the floor. We feel how the weight of the body shifts from the cervical region closer to the lumbar. We remain in this position for a while, let the back get used to it.
Attention! The legs may be slightly bent at the knees. But then gradually try to straighten them.
Step 3
When you’re ready for the next step, move your hands behind your back and join them in a tight lock. Point the stomach and chest towards the chin and forward, and with your feet come closer to the head, directing the tailbone up. These two opposite movements pull the spine up.
ATTENTION! We try not to pinch the neck, but rather lengthen it, following the top of the head forward.
IMPORTANT!
Since in this position there is a strong effect on the cervical region, in no case do we turn our head from side to side. If you find it difficult to breathe, in this case, try to pull your chest up!
Step 4
Further. We carry our hands behind our backs, rest on the floor with our elbows, and, helping ourselves with our palms, raise our legs up (one at a time – it’s easier). At the same time, we forcefully push our shoulders off the floor. The stomach and chest are again directed to the chin. And we take our legs back a little – so that one straight line forms from the shoulders to the feet.
We fix this position and hold it for three to five minutes.
ATTENTION! Beginners in yoga will be enough for one minute, even 30 seconds. But each time increase the time spent in the asana.
Step 5
We leave the asana. We do it in stages. First, very slowly lower the legs behind the head.
Step 6
Then we spread our palms to the width of the rug and slowly – vertebra by vertebra – lower our back down. We try to keep straight legs with the abdominal muscles.
ATTENTION! Slow is the key word. We are not in a hurry, we leave the birch smoothly and carefully.
Step 7
When the lower back is pressed against the mat, we fix it in this position and continue to lower our legs down to the floor. When we feel that the lower back begins to come off, we bend our knees and only then stretch them. So we compensate for the impact on the cervical region.
Pose Adjustment:
- The weight of the body is only on the shoulders!
- The throat should not be squeezed (cough, discomfort in the neck and head indicate that the weight of the body is not placed on the shoulders, but on the neck)
- Chin touches chest
- Elbows are as close together as possible
- Shoulders pulled away from ears
- Feet together
- Breathing slow and deep
- We take the pose smoothly, without jerking. And also get out of it
- Pain in the neck and lower back is unacceptable. In case of any discomfort, we leave Berezka
How to make shoulder stand easier
A very important point! So that the following conditions do not occur when you
- breathe heavily
- severe pain in the neck
- feet do not reach the floor (in Halasan)
we advise you to use a regular blanket. For beginners, this is generally a mandatory recommendation. So, we fold the blanket in four so that when we are light, the shoulder blades lie on the edge of the blanket, and the head on the floor. Thus, the neck will hang from the rug, it will not “break”. If one blanket is not enough, we take another blanket, and another one. Until you feel comfortable. We find the edge of the rug with our shoulders, make sure that the neck is extended (you can even help yourself with this: stretch your neck) and throw your legs behind your head. And then everything, as described above, in a step-by-step execution technique.
Compensatory asana for Beryozka
To unload the cervical region, relax it – we advise you to do a compensating asana immediately after the shoulder stand. This is the Pisces pose – Matsyasana.
Step by step execution technique
Step 1
Lie down on the mat, legs straight. We rise on our elbows, rest them on the floor and raise the center of the chest up, directing the crown to the floor.
Step 2
Set the head on the mat. We continue to strongly push off the floor with our hands and push the chest up with the back muscles. We feel an impulse in the back, which goes from the hands to the center of the chest.
Attention! And although you are standing on your head, there should be no tension in the neck. The weight rests on the elbows.
Step 3
Who is ready to go further, deeper – try to raise straight legs up 45 degrees in this position. Along with the legs, the thoracic region also rises. We stretch our arms along the line of the legs. And we hold this position for several respiratory cycles. We don’t hold our breath!
Step 4
We come out of the pose in stages. First, slowly lower the legs and arms. Then we put our head on the mat. We lower the chest. Then we put our palms on the back of the head and pull the chin to the chest.
Rest.
Yoga Newbie Tips
- Let’s talk about it again. Take your time to master this asana. If you are not ready or do it wrong, Sarvangasana will only hurt. And this is not a joke. It can lead to serious injuries of the cervical spine. We do not aim to intimidate you – only to warn. Be patient, start with exercises to strengthen the muscles of the back, abs, legs.
- Once again. How do you know that you are ready? If you have mastered simple poses and have been doing yoga for a year or two, then you can start. But even then – after you can confidently perform the pose of the Plow (Halasana). It is with the help of it that we enter the shoulder stand and exit this asana. So, the code key to mastering Sarvangasana is the Plow pose.
We hope that our video tutorials and step-by-step technique for performing Sarvangasana will be useful to you. Good practice!
We thank for the help in organizing the filming the yoga and qigong studio “BREATHE”: dishistudio.com