


Contents
The final step in working on Excel documents is often sending them to the printer. When you need to print all the data on a sheet, there are usually no problems with this. But what to do when we are dealing with a large table, and only a certain part of it needs to be printed.
You can customize the print area in Excel in different ways:
- set each time a document is sent to the printer;
- fix a specific area in the document settings.
Let’s take a look at both methods and see how they are implemented in the program.
Content
Method 1: Adjust the area each time before printing
This method is suitable if we want to print the document only once, so there is no need to fix some areas for the future. However, if we later decide to print the same document, the settings will have to be done again.
The algorithm of actions is as follows:
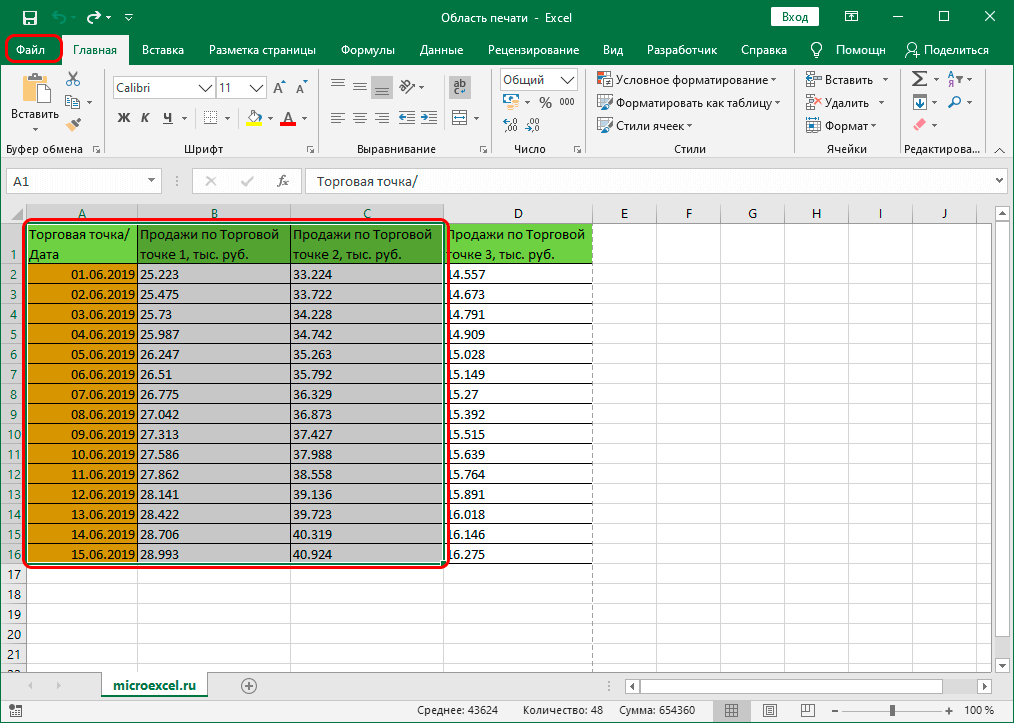
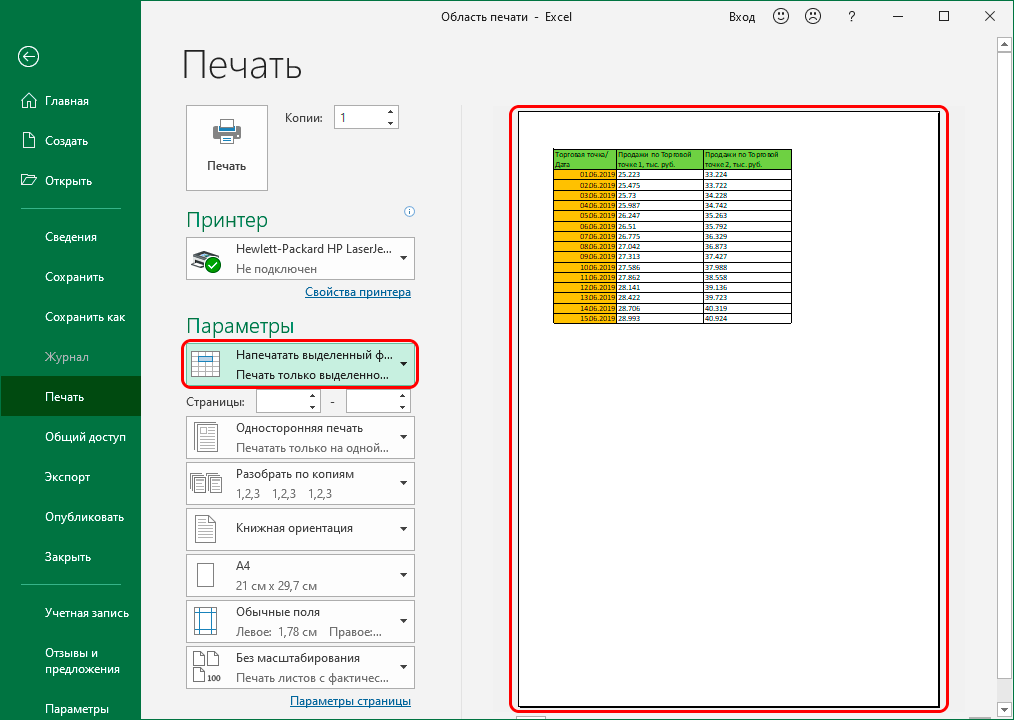
- In any convenient way (for example, using the left mouse button pressed), select the range of cells that we plan to send to print. Let’s say we need to print sales only for the first and second outlets. After selection, click on the menu “file”.

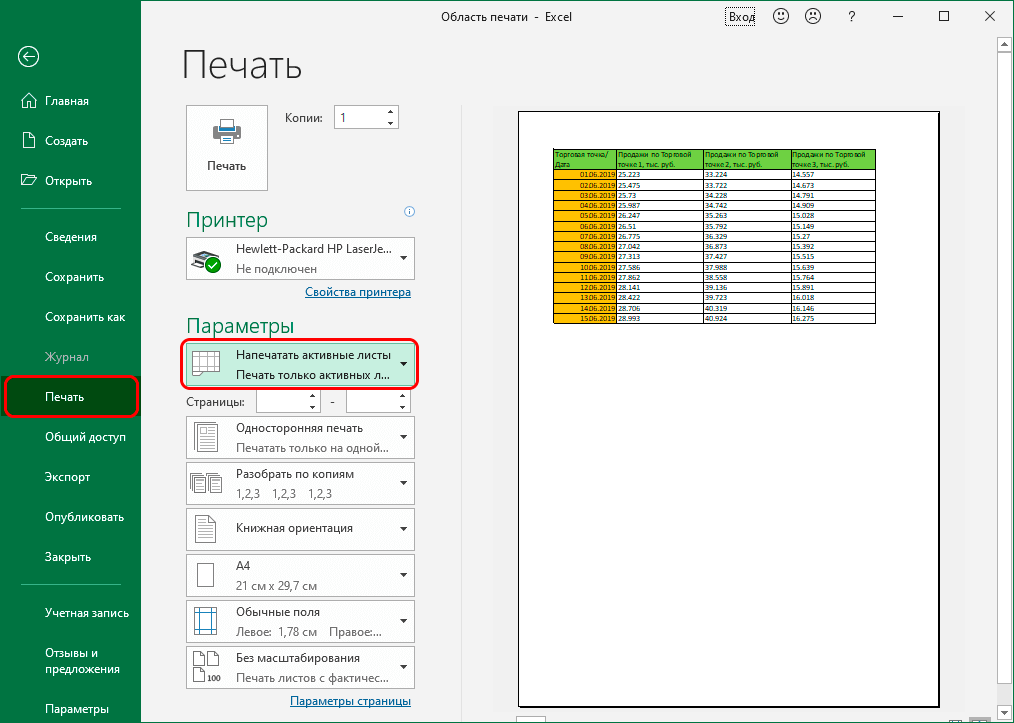
- In the list on the left, go to the section “Seal”. In the right part of the window, click on the current print option (located immediately below the name of the block “Parameters”).
- A list of possible print options will open:
- active sheets;
- the whole book;
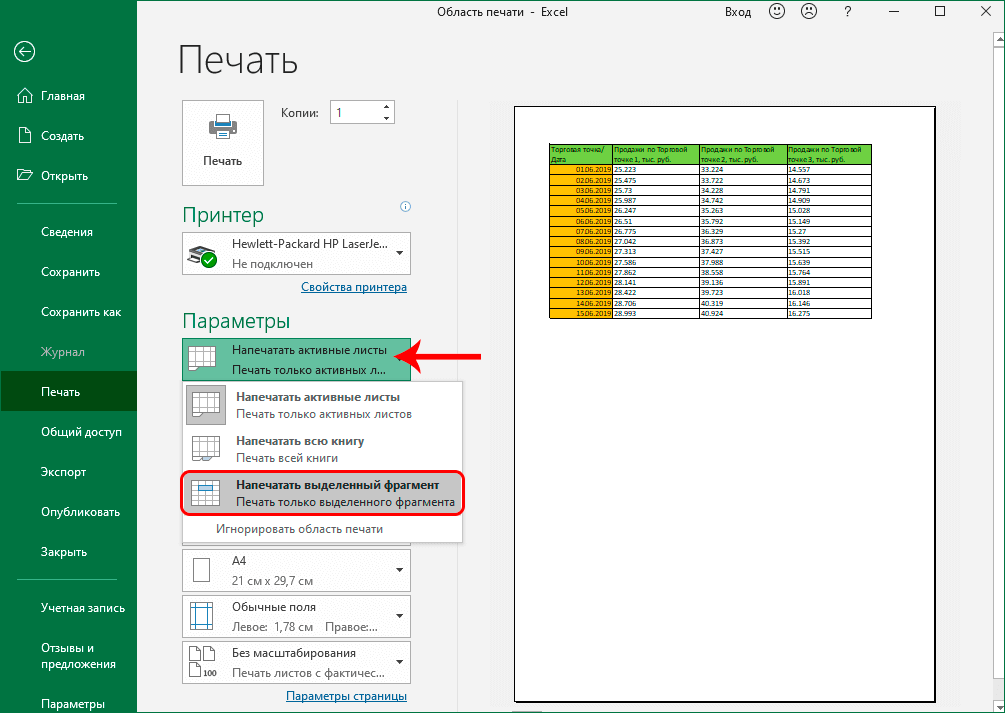
- selected fragment (we need it).
- As a result, only the part of the table selected by us will be displayed in the document preview area, which means that when the button is pressed “Seal” only this information will be printed on a sheet of paper.
Method 2: Fix a Constant Print Area
In cases where the work with the document is carried out continuously or periodically (including sending it for printing), it is more expedient to set a constant print area. Here is what we do for this:
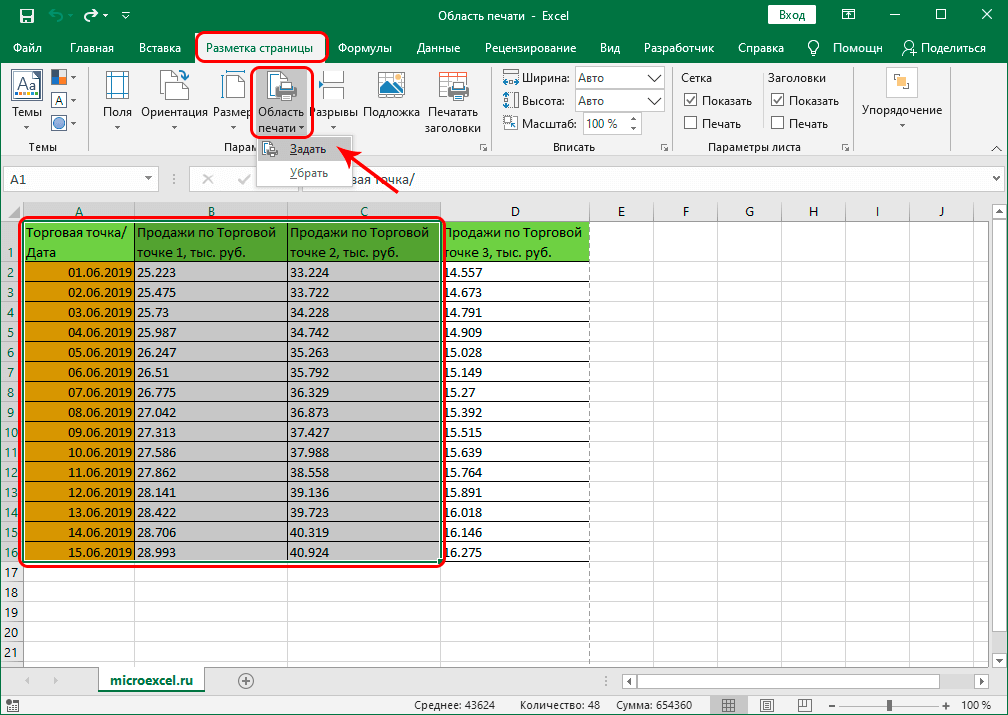
- As in the first method, first select the desired area of cells. Then switch to the tab “Page layout”where we click on the button “Print area” in the toolbox “Page settings”. The system will offer us two options: set and remove. We stop at the first one.
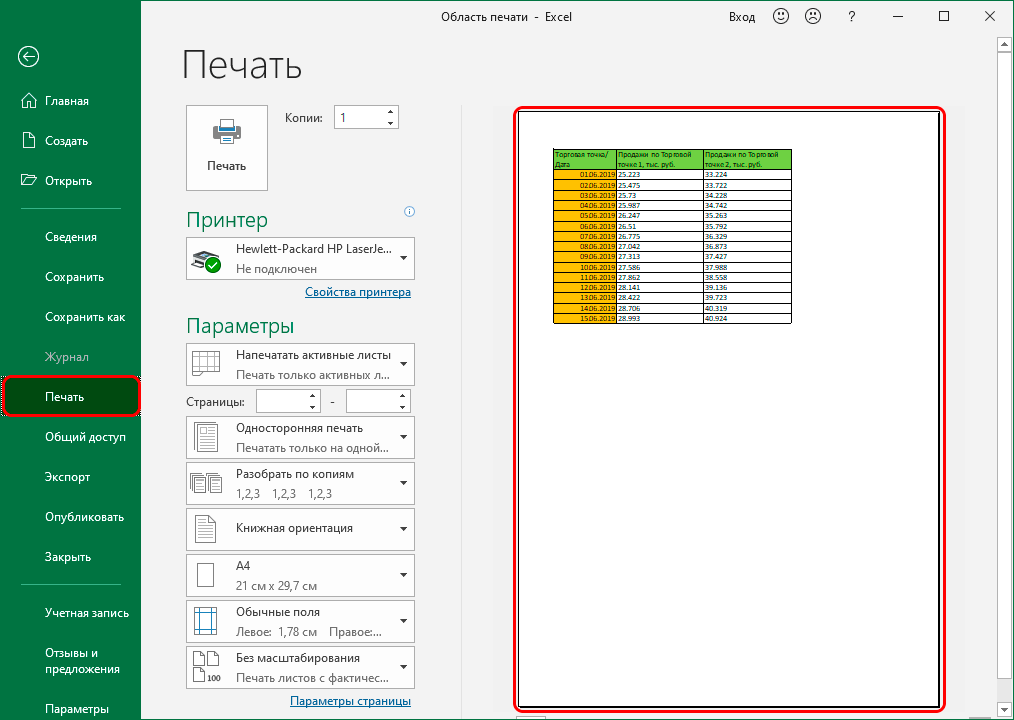
- Thus, we were able to fix the area of cells, which will be constantly printed until we decide to make any adjustments. You can check this in the preview area in the print options (menu “file” – section “Seal”).
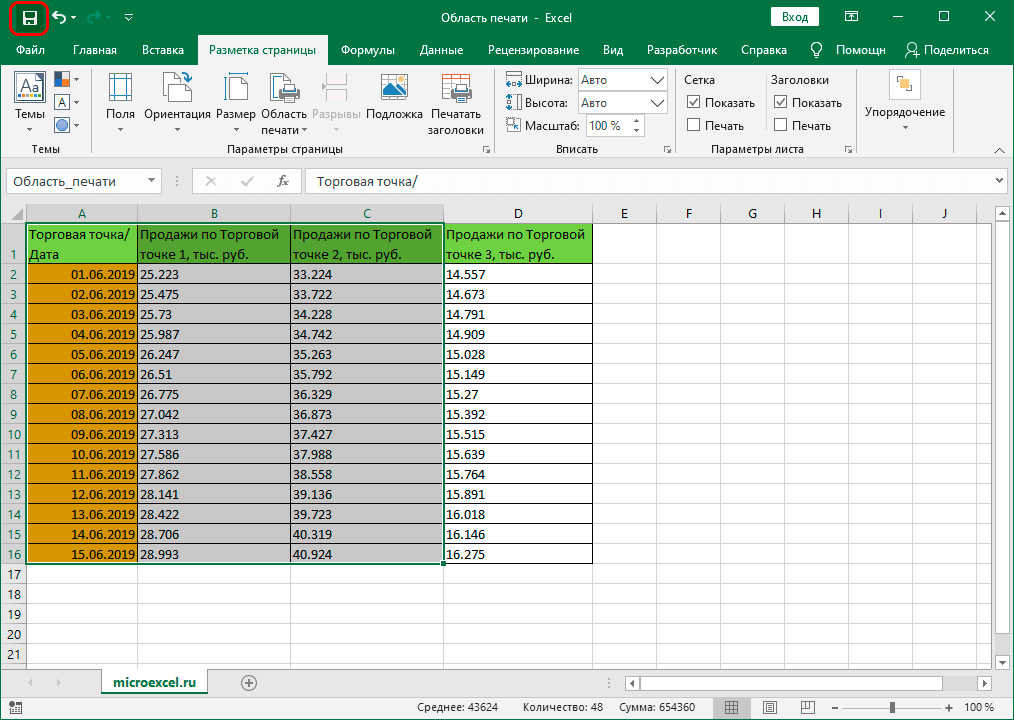
- It remains only to save the changes in the document by clicking on the appropriate button in the menu “file” or by clicking on the floppy disk icon in the upper left corner of the program.
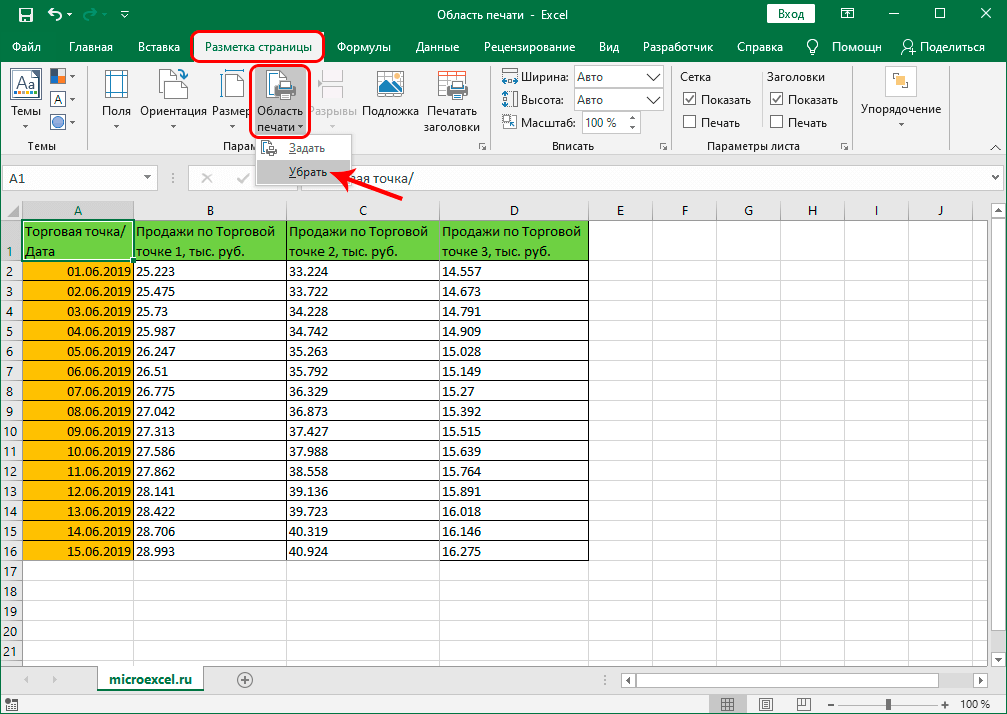
Removing pinning from the printable area
Let’s say we need to change the fixed print area or remove it altogether. To do this, switch back to the tab “Page layout” in the options that open after pressing the button “Print area” choose this time “Put away”. In this case, it is not at all necessary to pre-select any range of cells in the table.
We go back to the print settings and make sure that they are back to the original ones.

Conclusion
Thus, there is nothing complicated in setting a specific print area in Excel, and this procedure will take only a couple of minutes and clicks to complete. At the same time, if we plan to constantly work with the document and print it out, we can fix a specific area that will be sent to print each time, and we will no longer have to spend time on this in the future.