Contents
In the last lesson, we got acquainted with the types of charts in Excel, examined their main elements, and also built a simple histogram. In this lesson, we will continue to get acquainted with diagrams, but at a more advanced level. We will learn how to format charts in Excel, move them between sheets, delete and add elements, and much more.
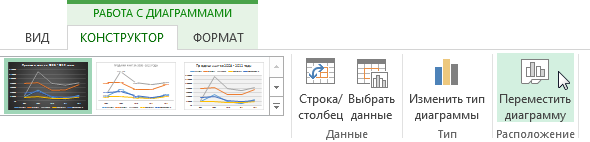
Chart layout and style
Having inserted a chart into an Excel worksheet, very often it becomes necessary to change some data display options. Layout and style can be changed on the tab Constructor. Here are some of the available actions:
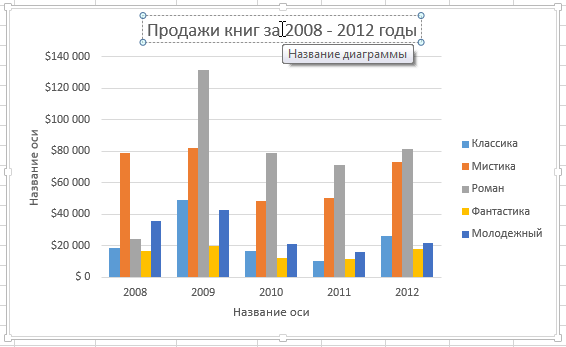
- Excel allows you to add elements such as titles, legends, data labels, and so on to your chart. Additional elements help to facilitate perception and increase information content. To add an element, click on the command Add Chart Element tab Constructor, and then select the one you need from the drop-down menu.
- To edit an element, such as a title, double-click on it and edit it.

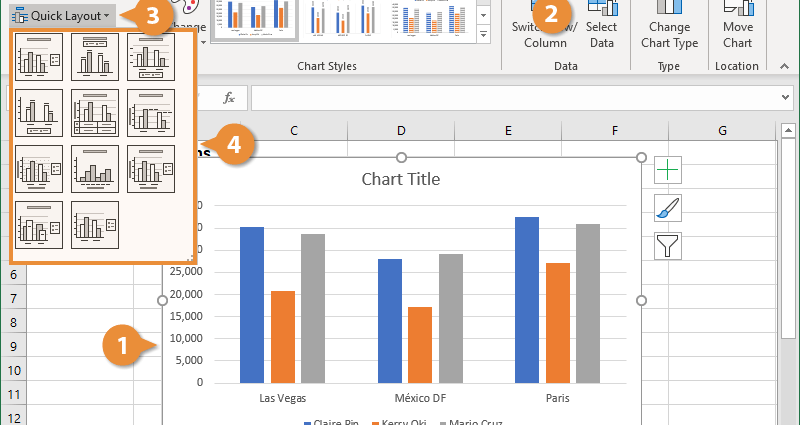
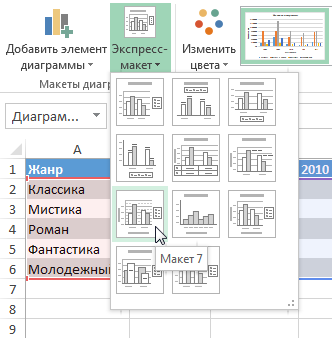
- If you don’t want to add elements individually, you can use one of the preset layouts. To do this, click on the command Express layout, and then select the desired layout from the drop-down menu.
- Excel has a large number of styles that allow you to quickly change the look of your chart. To use a style, select it in the command group Chart styles.
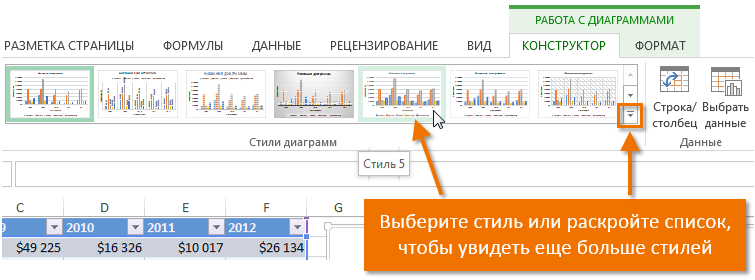
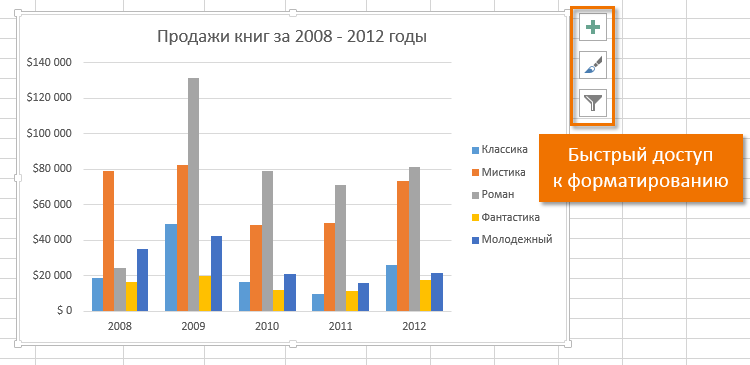
You can also use the formatting shortcut buttons to add elements to the chart, change the style, or filter the data.
Other Chart Options
There are many other ways to customize and style charts. For example, Excel allows you to redefine the original data, change the type, and even move the chart to a separate sheet.
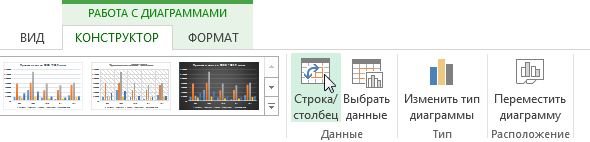
Changing rows and columns
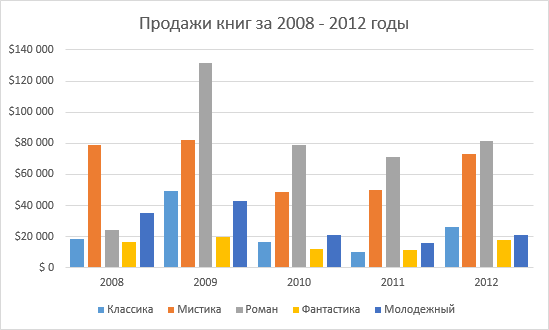
Sometimes you need to change how data is grouped in an Excel chart. In the following example, the information is grouped by year and the data series are genres. However, we can change the rows and columns so that the data is grouped by genre. In both cases, the chart contains the same information but is organized differently.
- Select the chart you want to change.
- On the Advanced tab Constructor press command Row column.
- Rows and columns will replace each other. In our example, the data is now grouped by genre and the data series has become years.
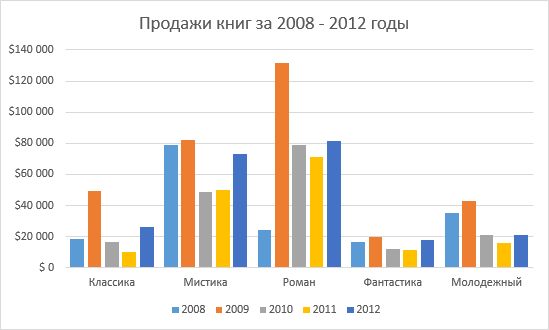
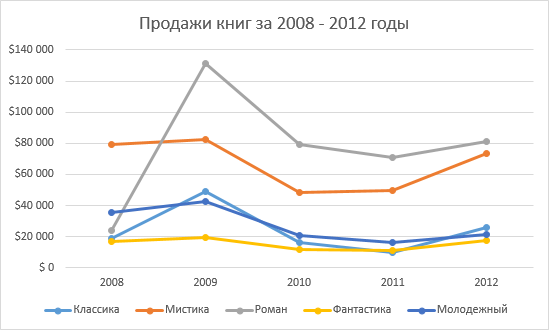
Change chart type in Excel
If you find that the current chart does not fit the existing data, you can easily switch to another type. In the following example, we will change the chart type from Histograms on Timetable.
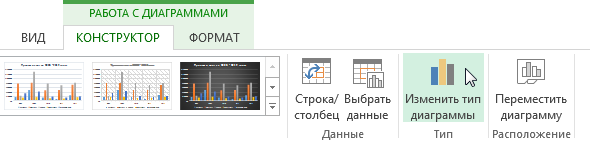
- On the Advanced tab Constructor click command Change chart type.
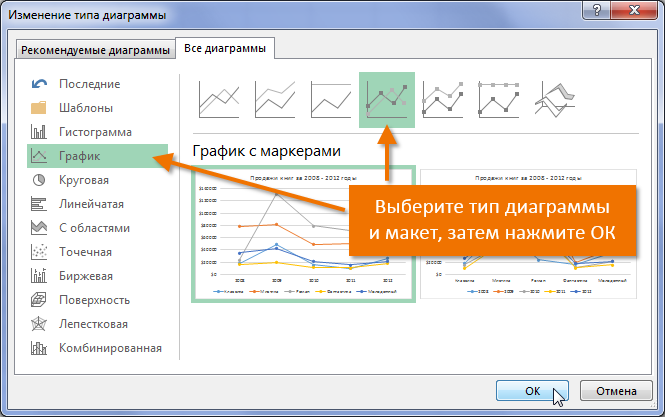
- In the dialog box that appears Change the chart type select a new chart type and layout, then click OK. In our example, we will choose Timetable.
- The selected chart type appears. In the current example, you can see that Timetable more clearly conveys the dynamics of sales during the available period.
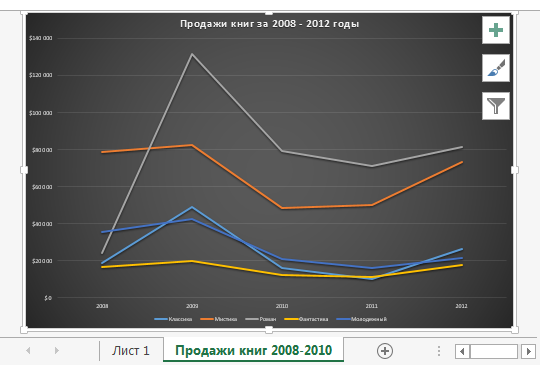
Move a chart in Excel
When pasted, the chart appears as an object on the same sheet as the data. In Excel, this happens by default. If necessary, you can move the chart to a separate sheet to better position the data.
- Select the chart you want to move.
- Click the Constructor, then press command Move Chart.
- A dialog box will open Moving a chart. Select the desired location. In the current example, we will place the chart on a separate sheet and give it a name Book sales 2008-2012.
- Press OK.
- The chart will be moved to the new location. In our case, this is the sheet we just created.