


Contents
- Step-by-step instructions for placing an image behind text in Excel
- How to add text inside/on top of a SmartArt shape
- Adding text over a photo
- How to make a background image in excel
- How to make a translucent image behind text
- How to insert a picture into an excel spreadsheet that does not cover the data
Many people know how to insert a picture into an Excel spreadsheet. But if they try to do it for the text, they won’t succeed. The fact is that the picture is inserted on a special layer, which is located above the text. So the image will overlap it. But what can be done in order to insert a picture behind the text so that it is its background?
And there is a function that allows you to achieve this result. It’s called headers. Now we will learn how to use it.
Step-by-step instructions for placing an image behind text in Excel
Let’s start with a general instruction that will describe all the necessary aspects, and then we will pay attention to specific tricks that can be performed with text and pictures. This will save time as there is no need to go further if the following information is not needed in a particular case. You can review it after a while, when you need to perform the action provided for in a particular section.
The method we have described is somewhat artificial and clearly not designed for this. But through the headers and footers, you can really insert a picture for the text. It all starts with the fact that we open an Excel workbook and look for the “Insert” tab on the ribbon.
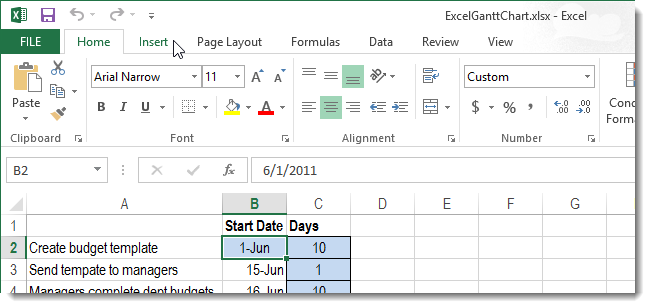
Next, we look for the “Text” section, in which you can find the “Headers and Footers” button. You need to left click on it.
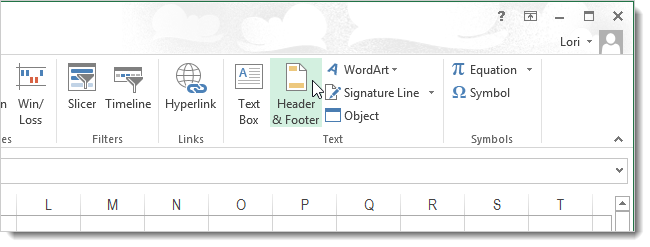
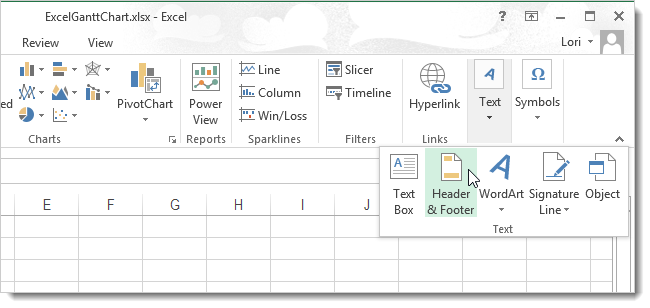
It is important to note that if the monitor is too large, this button may be collapsed. To access it in this case, you need to click on the corresponding drop-down menu.
This screenshot shows how all the elements of the group collapse into a single drop-down menu.
After clicking on the “Headers and Footers” button, another tab with parameters will appear. In the menu that appears, there is a function for inserting a picture. A person who needs to integrate an image into a document can find it in the Header Elements group.
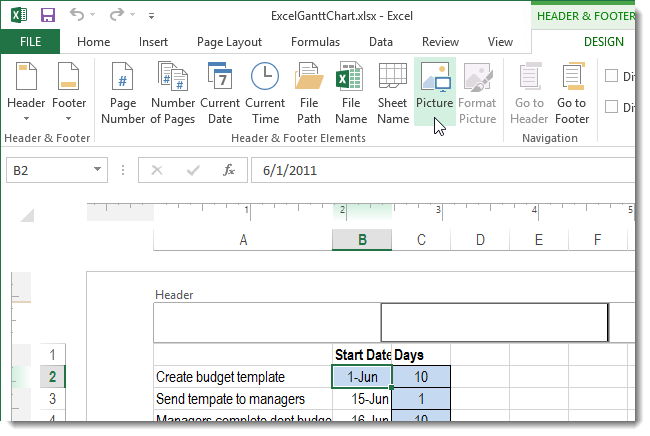
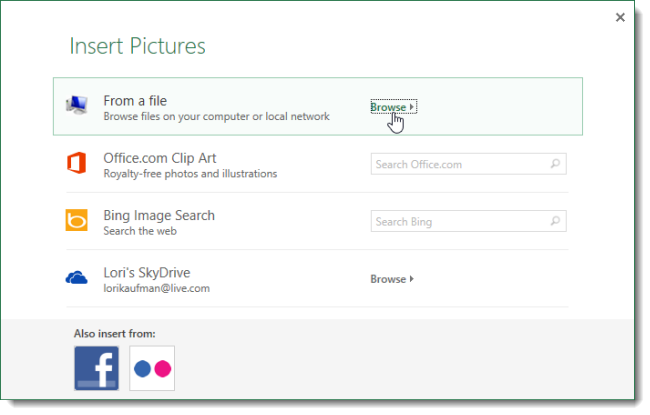
Next, a dialog box will appear in which there are many options for choosing the location of the image. Our picture is located directly on the computer, so we can find it through the “Browse” button, which is located next to the “From file” field.
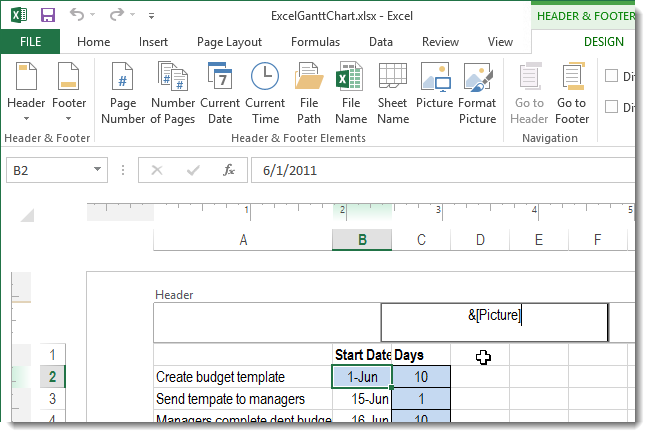
After that, we look for a suitable picture and insert it in the standard way, as it happens in all other programs. After the picture is inserted, you will be transferred to edit mode. During it, you will not see the picture itself. This shouldn’t scare you. The & sign will be displayed instead. In edit mode, you can position the picture in the place that suits. For example, we placed it exactly in the center of the document. You can also choose the location on the left, right, top, bottom, or any other within the document sheet.
After you left-click on any cell that is not included in the header, you will see how the selected image is located behind the cells. All their content will be shown on top.
The only aspect to consider is that if the image does not have bright colors, as well as their number is too large, then it will not be displayed well. Be prepared to distort the image added to the background in this way.

True, the user can, within certain limits, adjust the brightness of the picture. This is done on the same tab “Working with headers and footers”. The format of the picture is controlled through the button of the same name. And it is located in the “Header and Footer Elements” submenu.
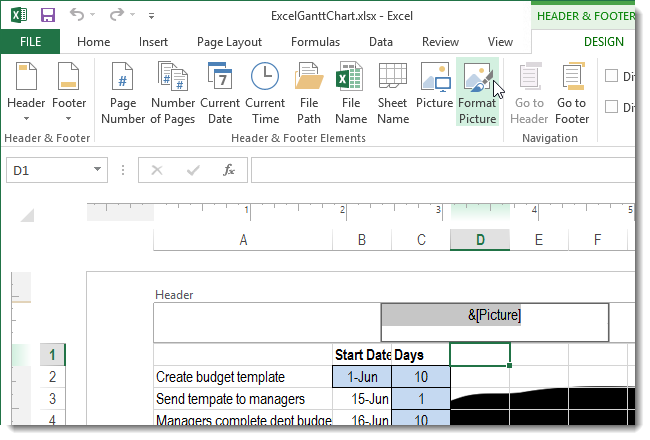
Next, a dialog box will open in which we are interested in the second tab. On it, in the field for selecting the color display mode, you need to find the “Substrate” button, and then confirm your actions (that is, click on OK).
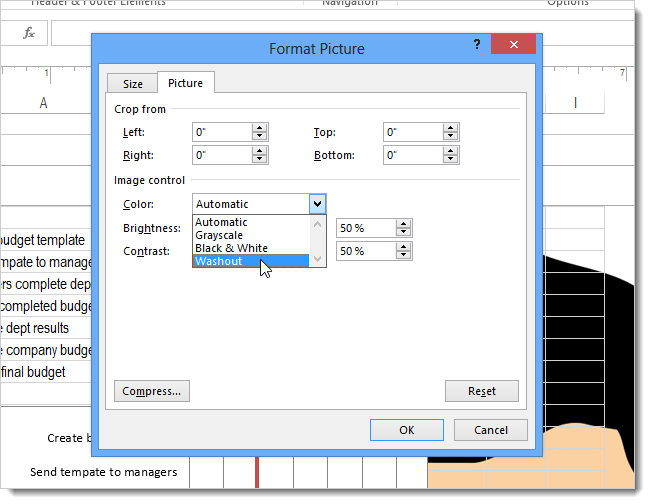
The picture will immediately become not so bright.
Not only a picture can be inserted as a background. Even text can be placed behind other cells. To do this, open the header and footer field, and then paste this text there. In this case, the color should be set to light gray.
And finally, to remove the background image, you do not need to bother too much. Simply open the header, select it, and then delete it in the standard way. After the left mouse click is made on any free cell outside the header or footer, the changes will be automatically saved.
How to add text inside/on top of a SmartArt shape
SmartArt is a very advanced version of Excel Shapes. It allows you to significantly improve the visualization of data, since it is characterized by much more modernity and conciseness. SmartArt shapes first appeared in Excel 2007.
Key Benefits of SmartArt Shapes:
- They are specifically designed to schematically represent a particular topic.
- SmartArt shapes are semi-automated, so they save a lot of time and energy for the user.
- Simplicity. This tool makes it possible to draw even complex circuits without any extra effort.

11
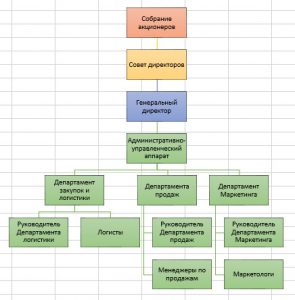
There are a huge number of ways to represent diagrams that this tool supports. Here are just a few of them: pyramid, drawing, cycles, processes, and others. In fact, most of the work has already been done for the person. It is enough just to have an idea in your head how the circuit should look like, and then fill out the template.
To understand how to add text on top of a SmartArt shape, you first need to understand how to do it in general. To insert an inscription into a picture, you must first select the appropriate element, then find the text area and click on it. Then you will be prompted to enter information and after entering you need to click on any empty space.
You can also paste information previously copied to the clipboard into the text input field.
There may be a situation where the text area is not visible. Then you need to find the button in the form of an arrow on the left side of the graphic element and click on it.
Now let’s talk directly about how to insert text on top of a SmartArt shape. The same method can be used to place it in any user defined location. To do this, you need to add the text field itself. You can find the button with which this is done in the “Insert” tab. The user can format it at his own discretion, for example, set the background text or adjust the thickness of the borders. This allows you to add an arbitrary uniform background to the text on top of the shape.
You can delete a text field in the same way as any other shape. You can also erase the text itself than make it invisible. If it needs to be hidden, the text is highlighted in the background color, and you’re done.
Adding text over a photo
There are two more methods that allow you to add text over photos. The first is the use of WordArt objects. The second is adding text as an inscription. Since it is no different from the one described above, you need to use the “Insert” tab.
The logic of actions will be the same, regardless of which particular office program a person works in – Word, Excel or PowerPoint.
The sequence of actions is very simple:
- Adding a photo to a spreadsheet.
- After that, you need to find the “Text” group on the “Insert” tab, where you find the appropriate design and provide the appropriate information. 12.png
- Then we look for the outer border of the object itself (not the text itself, but the object itself) with the cursor, click on it and, without releasing the mouse, move the text to the photo. Controls will also appear, with the help of which you can resize and rotate the inscription to any angle convenient for the user.
- Then we click on the photo (in the same way, on its outer border), and then we also select the inscription by holding down the Ctrl key. You will get two selected objects. That is, the sequence of actions is as follows. First, the image is selected, then Ctrl is pressed, and then a click is made on the text. After that, click on the “Group” button and in the drop-down menu click on “Group”.
The last action is necessary to make one out of two objects. If you need to leave them separated, then you can not take any steps.
How to make a background image in excel
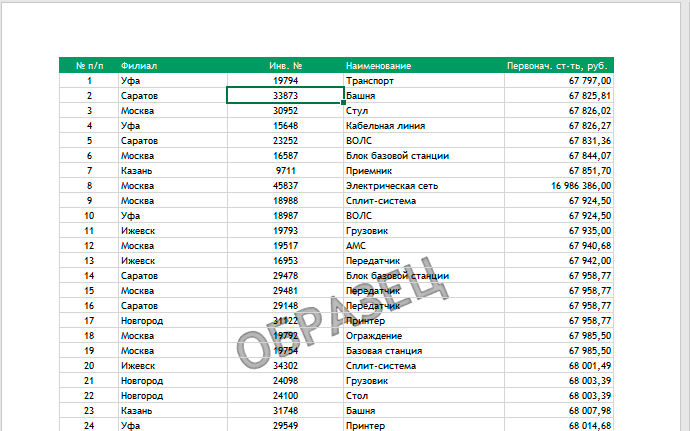
Detailed instructions on how to make a watermark in Excel were given above. To put it simply, you need to insert an image in the header or footer of the document. After that, adjust the parameters of the substrate, and we will get something like this.
There is no special function that would allow you to do this. But by adding an image to the header, we can implement similar functionality. But it is important to remember that, in principle, this is a crutch.
Modifying an existing underlay
To do this, you must remove the old backing and insert a new one. After that, it will be added to the background of the table.
Watermark
In fact, this is the same substrate, only which is made in the form of text. It can be either an existing picture with a text caption or one you made yourself. You can draw it in a graphic editor (for example, insert the website address), and then simply add it as a background. Everything, the watermark is ready.
You can also make the picture semi-transparent to even better simulate the effect of a watermark. Let’s take a closer look at what is needed for this.
How to make a translucent image behind text
A translucent picture is another way to make the text behind the picture visible if the latter has been overlaid on it. In this case, the user may not be aware of where the image is located above or below the text. Simply make the image semi-transparent, and then the text will automatically become visible. Watermarks can also be made in this way.
How to make a translucent image in Excel? Unfortunately, this cannot be done using Excel, because its task is not to work with pictures and text, but to process numerical, logical and other types of data. Therefore, the only way to make a semi-transparent image is to change the transparency settings of the image in Photoshop or any other graphics editor, and then paste the image into the document.
How to insert a picture into an excel spreadsheet that does not cover the data
There is one additional Excel feature that most users probably won’t use. These are the transparency settings for a particular color. This is exactly what a spreadsheet program can do.
True, management in this case is also not without restrictions. It’s about the transparency of the fill. Well, or again, use the previous method and first process the image so that it does not cover the data or download it from the Internet. Then copy it and paste it into your document.
As you can see, in general, Excel provides the ability to insert pictures for text. But of course, they are very limited and dictated by the fact that users of this program rarely express a desire to process tables in this way. Usually they are limited to standard functionality or they are completely neglected.
Excel has many more formatting options that are of practical use. For example, conditional formatting allows you to change the color of the fill (by the way, its transparency too), based on the information contained in the cell.
For example, the option with a header or footer is generally not bad, but due to the loss of image clarity, it is impossible to use it fully. The same applies to the transparency of the picture, which must first be processed in a graphics editor.
The only way to more or less overlay text on top of an image is to use the Word Art object. But this is inconvenient, and yet they are more pictures than text. True, here you can set the parameters in such a way that such objects look like text.
Thus, Excel is best used for its intended purpose. But if there is a need to do more than what is provided in the program, you can always find a way out.