


Contents
Excel is a universal program designed to automate the processing of complex information and create professional databases. The range of its application is incredibly wide, starting with the creation of tables for further printing and ending with the collection of marketing information, statistical data processing. A particularly interesting application of this program is writing full-fledged applications that work with the data that was entered by the user. They are called macros.
However, it takes time to get the hang of it all. And to become a professional, you need to start somewhere. Specifically, how to make spreadsheet data easier to read by someone who didn’t create it. For this, formatting elements are used, such as cell color, text color, borders, and column width.
Many Excel users have already learned how to create spreadsheets in this program, automate the processing of simple data, and do many other basic things. But without formatting, working with a spreadsheet will be incomplete. And the sheet itself will give the impression of an unfinished one. Therefore, you need to be able to format it.
What is Formatting in Excel
Formatting is not only setting the appearance, but also editing the data contained in the document. This tool can take a lot of creativity, as you can emphasize the main points while working with the spreadsheet, make the table easy to read and pleasing to the eye in a variety of ways.
The main criterion for a good table is that the necessary information in it should be read automatically, without a long search for the required text. When a user reads a quality Excel file, they don’t have to go through every cell to get the information they need. If this happens, then the formatting is done on the conscience. Here the question arises: what should be done in order to format an Excel spreadsheet? To do this, there is a set of tools that can be found on the Design and Layout tabs.
Why justify columns in Excel
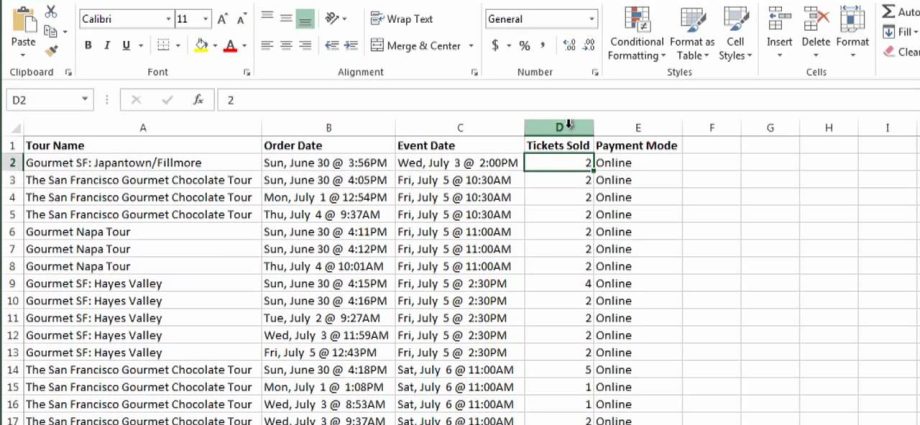
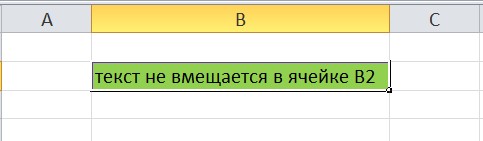
Firstly, as written above, so that the table looks beautiful and the necessary information is read immediately. Secondly, to fit all the text in the cell without additional changes. For example, if the line is too wide, then it simply crawls out of the cell, or a part simply becomes invisible. Both of these problems can be solved by justifying the columns.
How to justify columns in Excel
There are several ways the user can change the width of a column. The first is to move the cursor in such a way as to increase or decrease the corresponding column. The second is the use of special symbols on the coordinate panel, which are called markers. And finally, you can use the Cell Size menu, which is located on the “Layout” tab. Let’s look at each of these methods in more detail. The approaches to aligning columns in width also differ.
Changing the width of one column
A typical application of this principle is the need to make the header column larger. It pairs especially well with other formatting tools. For example, if you make the header column large and make it red with a special font, the person who opens the spreadsheet begins to intuitively understand where to look first. So, the “Mouse Drag” method is a typical example of this principle. But in fact, this is a different classification, so there are many more ways.
An example of another option is using the context menu. How can I change the width of a specific column in this way?
- Select the column that we need to increase or decrease on the coordinate line and right-click on it.
- In the menu that appears, click on the third item from the bottom “Column width …”. Three dots at the end of the paragraph signal that we should open an additional setting. Actually, that’s what happens. After clicking on this menu item, a dialog box pops up in which you need to specify the column width in specific points.
As you can see, several tools correspond to this principle at once.
Changing the width of multiple columns
The second principle of justifying columns in width is changing the width of several columns at once. This, of course, can be done by alternately editing the size of the columns, but this method is not very convenient and takes a lot of time. But it’s very easy to do so. Later we will talk in detail about what is needed for this.
Changing the width of all columns
If you change the width of absolutely all columns in the standard way, then it may take a lot of time to do this. You can, of course, change their width in the same way as for several, but here you also have to spend extra time. Excel has a separate method that allows you to increase or decrease the width of all columns of a sheet.
To do this, you must first select all of them, and then change the width. To do this, you can use the special rectangle icon, which is located at the intersection of the row coordinate axis and the column coordinate axis. After that, you need to edit the width of any of them. After that, the width will be changed automatically.
The second way to select absolutely all columns and rows is to press the key combination Ctrl + A. Each user can decide for himself what is best for him: use hot keys or a mouse.
Change column width by content
There are situations when it is not possible to completely fit the text in a cell. As a result, it overlaps other cells. If they have their own text or meanings, then part of the text is hidden from view. At the very least, it’s inconvenient. To solve the problem, you need to make the column width such that it fits the entire text.
This can be done by the methods described above, of course. But it is very long. There is a much faster way to do this. To do this, you need to move the mouse cursor over the same border that you want to drag, but instead of moving it, you need to double-click on it with the left mouse button. After that, the length of the column will automatically be aligned to the maximum length of the string that is included in it.

Method 1: Drag the mouse pointer
If you want to use the first method, then there is nothing complicated about it. It is enough to follow the steps described in this instruction, and the result will not be long in coming:
- Place the cursor on the column line so that it turns into an arrow, each end of which points in a different direction. The cursor will acquire such an appearance if it is hovered over the separator that separates one column from another.
- After that, click on the left mouse button and hold it. Drag the cursor to the place where this border should be placed. We see that the total width of the table is not modified in this case. That is, by expanding one column, we automatically narrow the others.
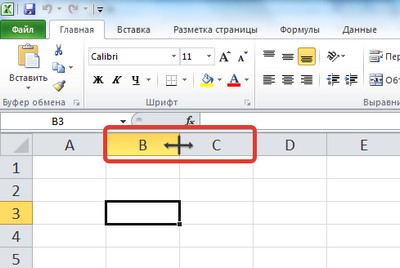
In this screenshot, we can clearly see where to place the mouse cursor in order to change the column width in Excel. This principle is the same, regardless of the version of the office suite used.
You can also hold down the Shift key while dragging a column line to a different position. In this case, the table width will automatically be changed according to the new column length. This method makes it possible to keep the existing sizes of other columns.
For example, if you expand a column to the left while holding down the Shift key, then the left column, which is directly adjacent to ours, will not shrink. The same applies to the right column, only in this case the size of the right column will not be modified. If you release this key on the keyboard, then when editing the size, the adjacent column will automatically narrow.
As the column width changes, a special tooltip will be displayed to tell you the current length. This allows for more precise control. 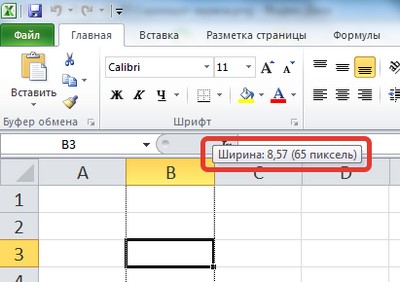
Method 2. Dragging markers on the coordinate ruler
Editing the table size using special markers on the ruler is no more complicated than the previous method. To do this, follow these instructions:
- Select the cell or range in which we need to make changes.
- To edit the width of the table or move the faces of the columns, you need to move the corresponding markers on the horizontal panel.
By the way, this method can also be used to edit line heights. You only need to move the markers that are on the vertical ruler.
Most often, setting the column width is enough by eye. There is no need to be very specific about this issue. If the columns appear to be the same size, then most likely they are. But in some cases, you need to set the exact sizes of the columns. In such a case, the following steps must be taken:
- Click the left mouse button on the column whose dimensions will be edited. Excel also provides the ability to set the desired column width for several objects at once. You can select several columns at once in the same way as selecting a range of values, only operations are carried out on the upper coordinate panel. You can also more flexibly customize columns that need to be precisely sized using the Ctrl and Shift keys. The first makes it possible to highlight specific columns, even those that are not adjacent. Using the Shift key, the user can quickly select the desired number of columns that are adjacent. To do this, press this button, make a mouse click on the first column, and then without releasing the keyboard, press the second last column. The selection order can change in the opposite direction.
- After that, we find the “Cell Size” group, which is located on the “Layout” tab. There are two input fields – width and height. There you need to specify numbers that correspond to the width of the column that you want to see. To confirm the changes, you need to click anywhere in the table or simply press the enter key on the keyboard. Finer width adjustment is also possible. To do this, use the arrows. Each time you click on them, the value will increase or decrease by one millimeter. Thus, if the original value requires minor adjustments, it is enough to simply touch it up a little on the keyboard without having to completely rewrite it.
Conclusion
Thus, there are a huge number of methods for editing the width of a column or cell. A similar principle can be applied to changing the row height. We considered several ways at once, but there are many more, as we already understood. In the same way, you can separate methods not by the tools used, but by the principles by which the column width is changed. And as we already understood, there are such:
- Changing the width of a specific column.
- Changing the width of multiple columns.
- Changing the width of absolutely all columns of the sheet.
- Editing the width of a column based on what text it contains.
Depending on the situation that exists, the method used will differ. We all know that in addition to Excel itself, there are several other similar programs, such as Google Sheets, Libre Office, WPS Office and others. All of them have approximately the same standard functionality, so all the principles and methods discussed in this article can be applied in other similar programs. But just in case, it’s better to check if a particular function works there, because certain differences are possible, especially if these applications function on different operating systems.