


Changing the order of cells is often necessary to perform when transforming tables, formatting text and all the contents of an electronic sheet in Microsoft Excel as a whole. Beginners sometimes have a problem with this issue, so in this article we will help get rid of such difficulties in several ways.
Method one: copy
Since there is no separate function specifically designed to transfer cells from one part of the sheet to another, you will have to use other methods. So the first one is copying. Produced step by step as follows:
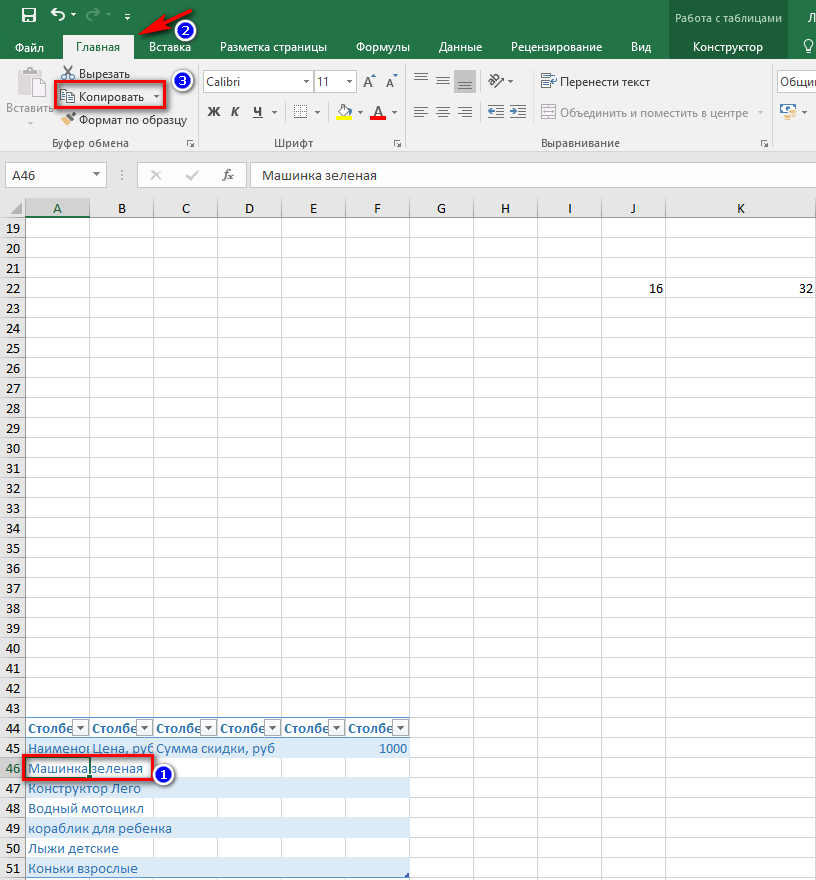
- We have a table with saved data. From it, you need to transfer several cells to an arbitrary part of the sheet. To do this, click on one of them, then in the toolbar in the “Home” tab we find the value “Copy”. You can also select a cell, right-click and select “Copy” from the context menu. A quick way to copy data is to simultaneously press the key combination “Ctrl +C “.
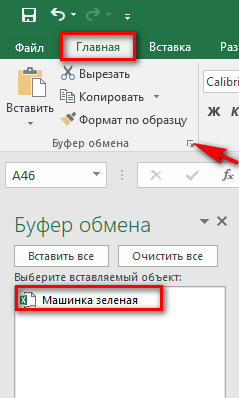
- Check if the value is copied. To do this, go to the “Clipboard”. It is located in the “Home” tab in the first block. We click on the down arrow and in the window that opens on the left we see the text or number just copied. This means that the data copying was successful.
Pay attention! If you click “Clear All”, then copying will have to be done again, because the data will be deleted.
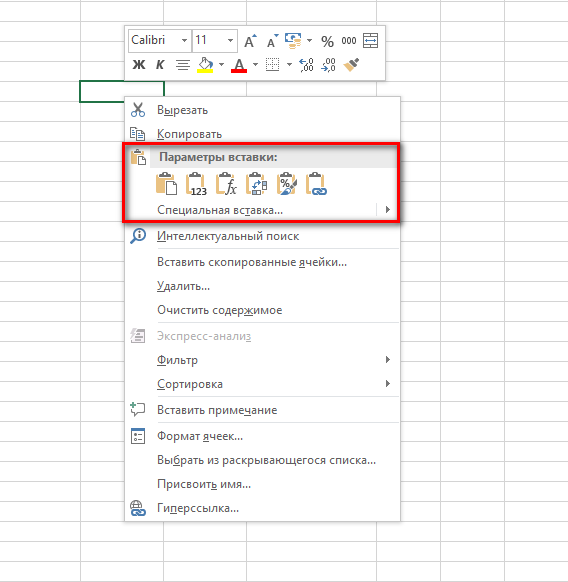
- Now on the sheet we select the place to which we want to move the contents of the cell, press the key combination “Ctrl + V” or call the context menu using RMB, where we click on the item “Insert”. You can use the Special Tab tool, which allows you to customize the pasting of the copied value.
- Similarly, all remaining cells are transferred, if necessary. To transfer the entire table as a whole, you must completely select the entire range. After all the elements have been transferred, you can format the old part of the sheet, which still has the original data.
Method two: cell shift
Otherwise it is called drag and drop. It is not difficult to perform it, the main thing is to make sure that all the data is copied, otherwise the transfer will be performed with distortion. Consider the details in the algorithm below:
- We move the mouse cursor over the border of the cell that needs to be moved to another part of the sheet. Note that the cursor should turn into a cross-shaped icon. After that, hold down the mouse button and drag the cell to the desired location.
- You can also move one cell several steps up or down. To do this, we also select the cell, move it to the right place, and then align the order of the remaining windows that have shifted due to the transfer.
With this method, the selected cells move to another area, while all the contents inside them are preserved, and the previous places become empty.
Third way: using macros
This option can be used if macros are installed by default in Excel, otherwise they will have to be added through the internal settings system. Let’s analyze the details of the chosen method:
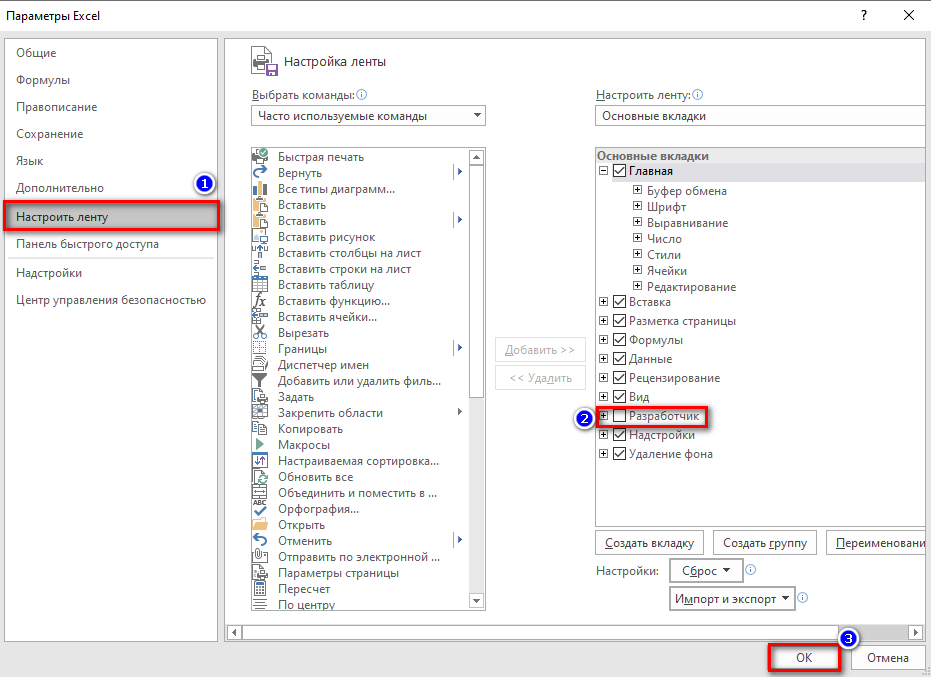
- Go to the “File” menu, then at the bottom of the list, go to the “Options” item.
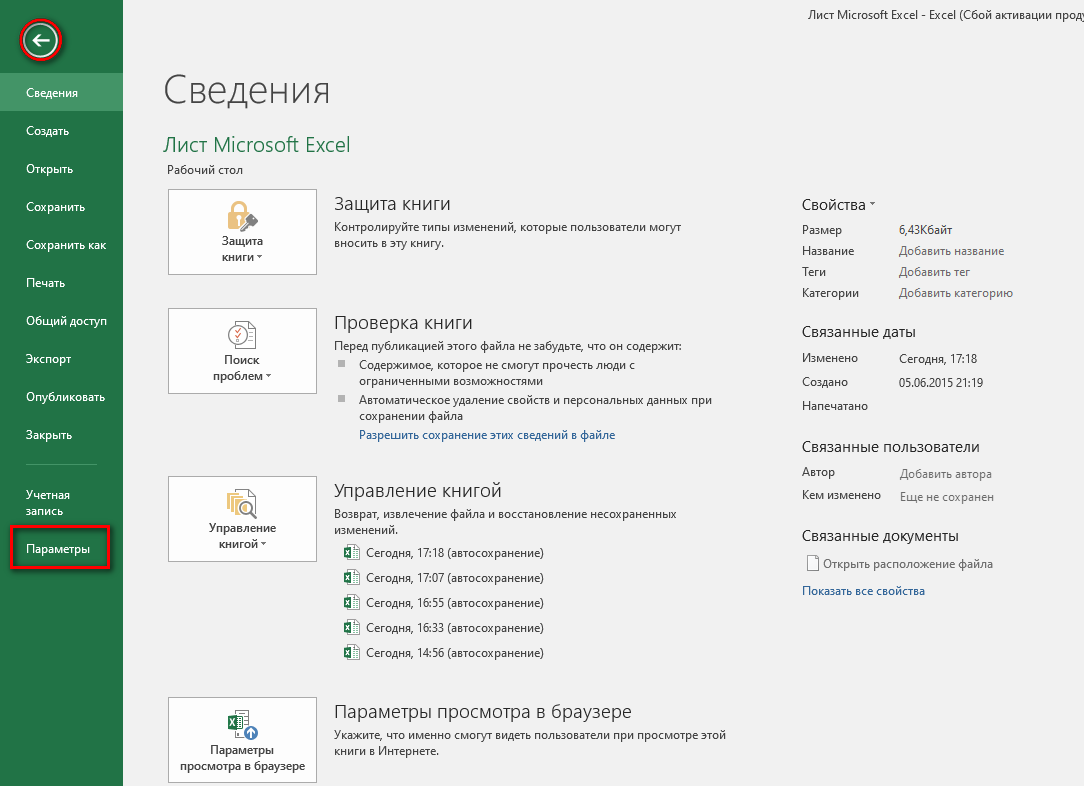
- The “Excel Options” window opens, here you need to click on the “Customize Ribbon” item and check the box next to the “Developer” item. We confirm our actions with the “OK” button.
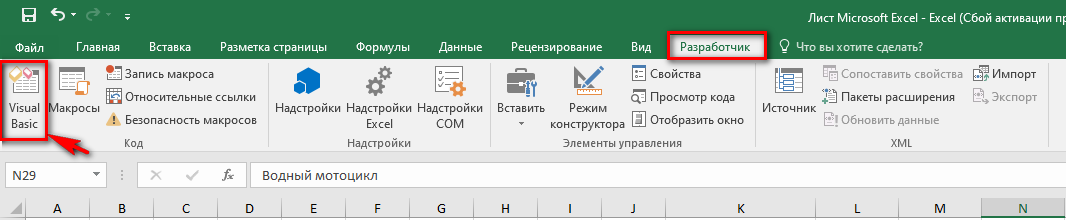
Immediately pay attention to the tab bar, a tab called “Developer should appear at the very end.
- After we switch to the “Developer” tab, in it we find the “Visual Basic” tool. Visual Basic is a custom data editor. You need to wait for the additional window to load.
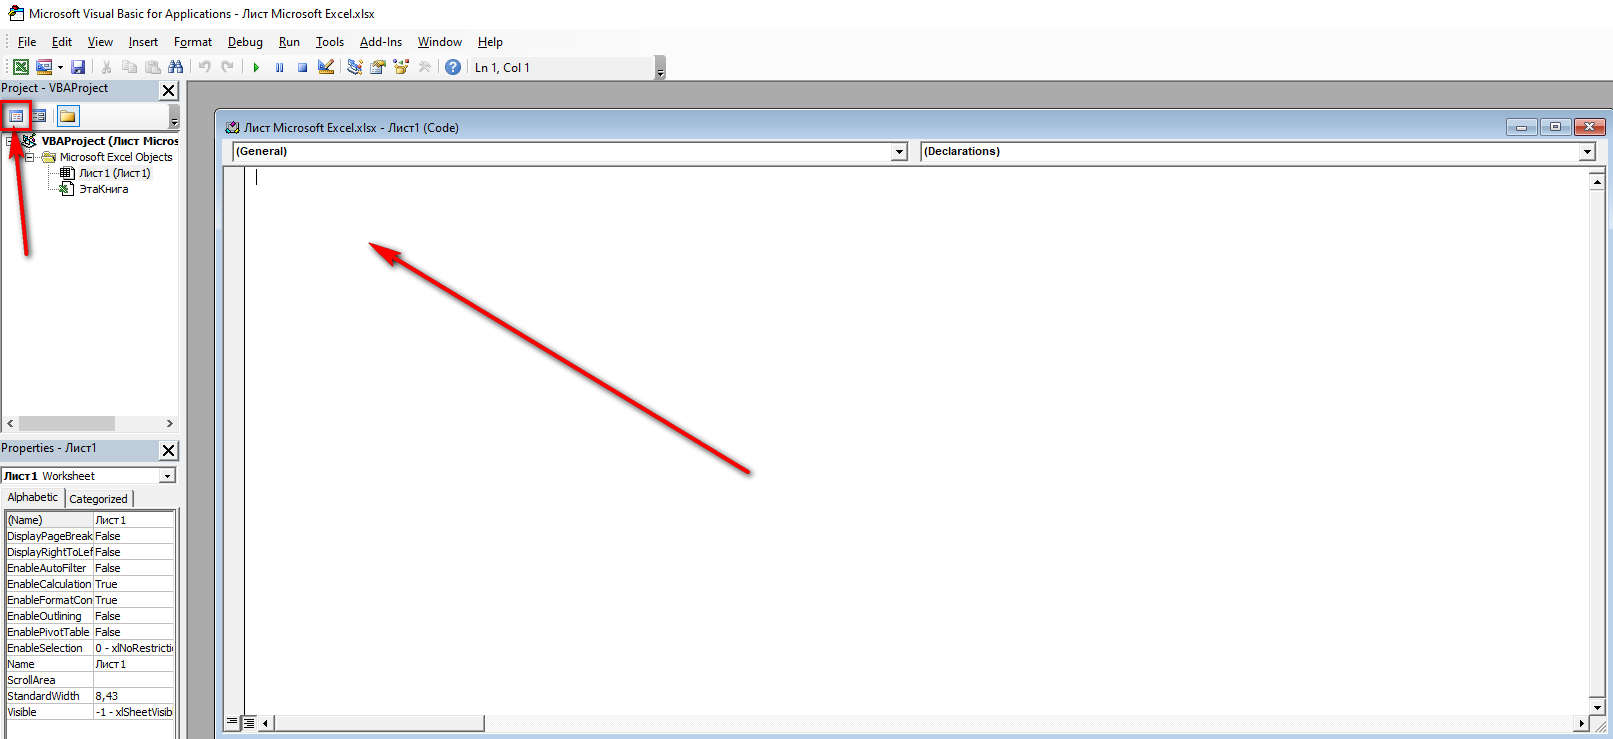
- After opening the auxiliary settings program, we are looking for the “Code” tool block, we will need it for correct editing. We find the section “View Code”, in the field that opens, insert a special code, which is indicated below:
Sub MoveCells()
Dim ra As Range: Set ra = Selection
msg1 = “Select TWO ranges of the same size”
msg2 = “Select two ranges of IDENTICAL size”
If ra.Areas.Count <> 2 Then MsgBox msg1, vbCritical, “Problem”: Exit Sub
If ra.Areas(1).Count <> ra.Areas(2).Count Then MsgBox msg2, vbCritical, «Проблема»: Exit Sub
Application.ScreenUpdating = False
arr2 = ra.Areas(2).Value
ra.Areas(2).Value = ra.Areas(1).Value
ra.Areas(1).Value = arr2
End Sub
- Next, press the “Enter” button to save the data. After saving, you can close the editor window and continue editing.
- Hold down the “Ctrl” key, then select the same number of rows and columns to get a uniform range on all sides. Now go to the “Macros” section in the toolbar, click on it, a window with the function opens. Click the “Execute” button.
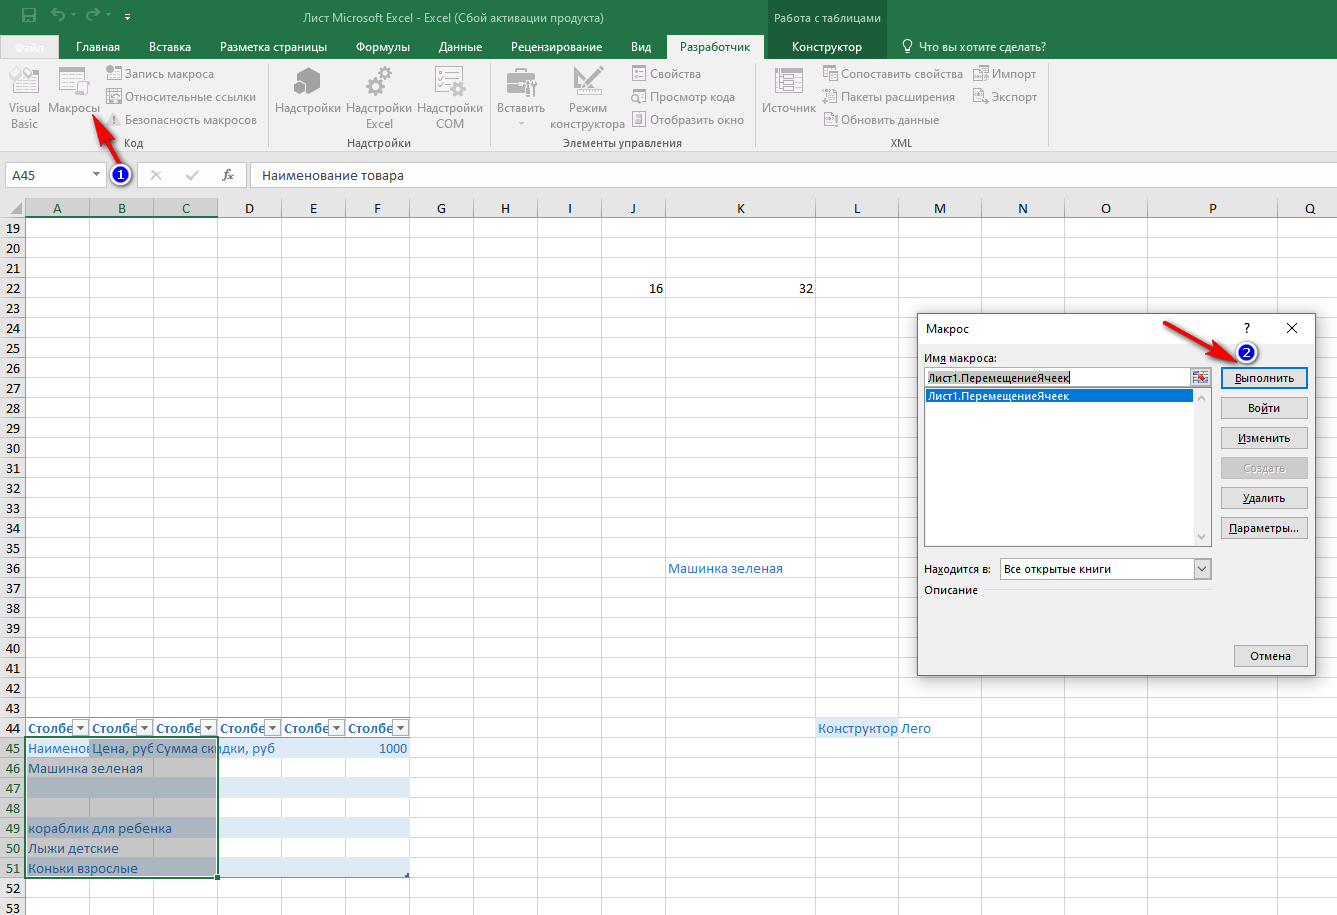
- The result of this process is a change in the location of cells within one sheet.
On a note! It is possible to transfer individual cells and their ranges from one Excel sheet to another, and only one multi-page file is used for this.
To summarize
For beginners, the first two options for transferring cells are more suitable. They do not require in-depth knowledge of Microsoft Excel and work in different versions of the spreadsheet. As for macros, the use of this technique is rather complicated, it is very important not to confuse anything, otherwise there is a high risk of making a mistake and completely formatting the entire page without returning data, so it is recommended to be extremely careful when transferring cells.