


Contents
Any, especially novice angler, is interested in the question of how to properly tie a float to a fishing line. In this case, a lot depends on the purpose of the gear and the type of float. In this article you can find the necessary information on how to do this.
Floats, according to the type of attachment, are divided into sliding and deaf. Sliding floats are used for long casts, when you need to shift the center of gravity of the tackle closer to the sinker. In addition, the float will not resist casting. After casting, the float returns to its working position. Deaf fastening of the float is practiced on ordinary float gear.
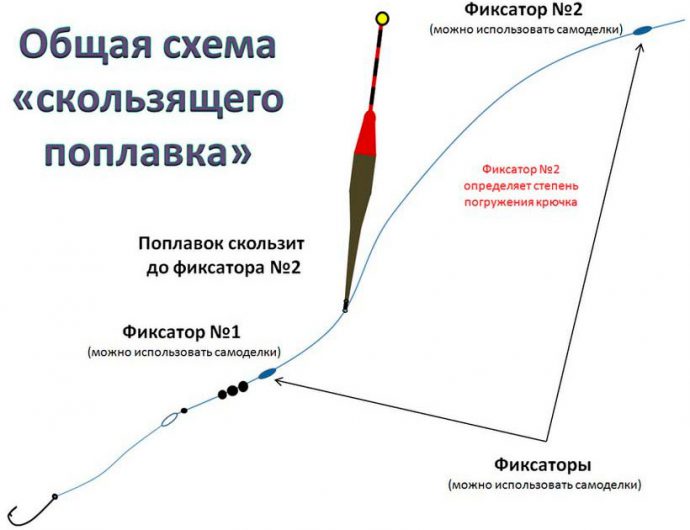
The sliding float attachment is characterized by two positions:
- Minimum depth. It is determined by a stopper attached to the fishing line and does not allow the float to fall below this point. This is necessary so that during the cast the float cannot knock down the bait or overlap with the fishing line.
- Maximum depth. It is also determined by a stopper attached to the main line. As soon as the tackle hits the water, the bait with the sinker goes to the bottom, dragging the fishing line with it. As soon as the float approaches the stopper, the movement of the fishing line will stop and the bait will be at the desired depth.
In both cases, the depth of fishing is regulated by the movements of the float. In this case, it is enough to move the stopper up or down and the fishing depth will immediately change.
How to tie a sliding and regular float
There is nothing complicated about this and any novice angler can do it.
Regular (deaf) float
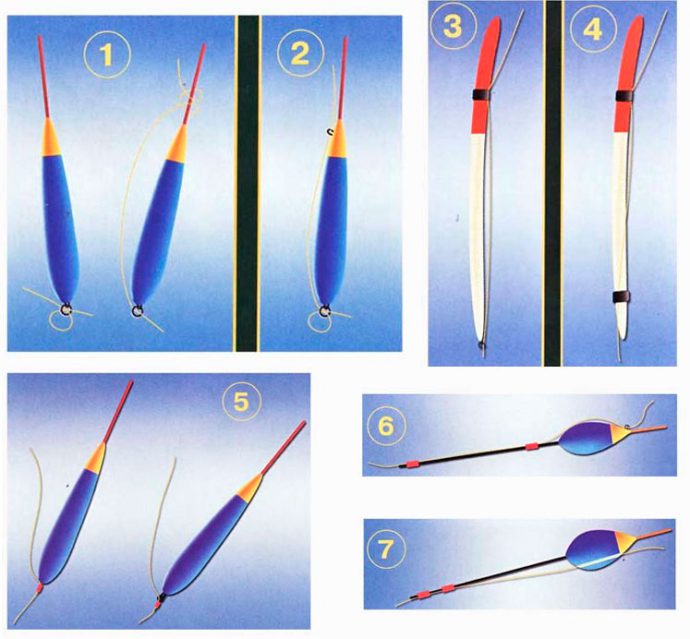
A lot depends on the design of the float itself. And yet, fastening is carried out using almost one universal method. It lies in the fact that the float is attached using a nipple, cambric or insulation from the electrical wire. But, almost all anglers use a nipple for this purpose. Given the fact that the nipple is made of rubber, it is preferable to use it, although rubber is not durable, but it will last for one season.
To secure the float, you need to put the nipple on the main fishing line. It is better to do this when no equipment is connected to the main line (sinker, hook, feeder). As soon as the ring from the nipple is dressed, you can begin to attach the main equipment, including the float. At the bottom of the float there is a special mount that is inserted into the nipple ring. Now, by moving the nipple along with the float along the line, you can adjust the depth of catching fish.
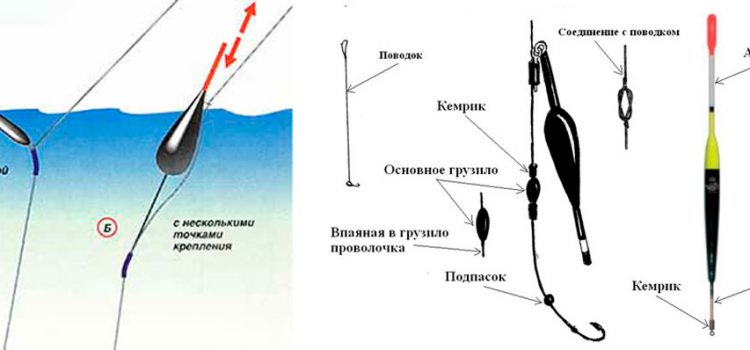
In the case of using a goose feather float, the nipple is put on directly on the body of the float in the lower part. And even better, if the lower part of such a float is fixed with 2 nipple rings, then the float does not dangle like that. At the same time, he does not lose his qualities, moreover, it will be more reliable.
sliding float
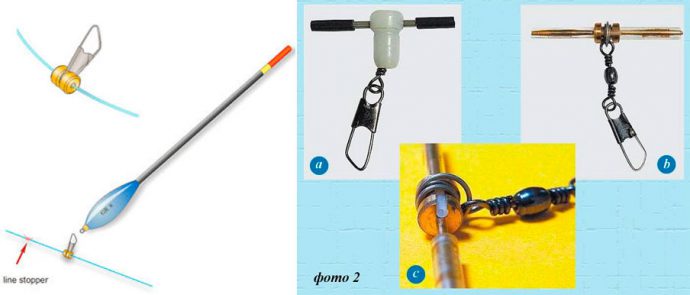
Such a float is not much more difficult to attach to the main line. First you need to fix the stopper, which regulates the depth of fishing. Then a float is put on the fishing line, using a special ring. There are designs of floats in which there is a through hole through which the fishing line is pulled. After that, the bottom stopper is attached to the fishing line. It is located at a distance of 15-20 cm from the main equipment. The float must move freely along the line, otherwise it will not be able to automatically set the fishing depth.
Beads or other suitable details can be used as stoppers. Better if they are made of rubber. In extreme cases, they can be purchased at the store for anglers.
After the stopper and float have taken their place, you can begin to attach the remaining elements of the gear.
Deaf fastening of the sliding float
There are times when fishing conditions change and you need to secure the sliding float tightly. This can be done in several ways. The first method is that the float ring is firmly attached to the fishing line with a piece of wire. At the same time, it is better to put a cambric on the attachment point, otherwise a piece of wire can cling to the main fishing line and twist the tackle. Given the fact that anglers take with them, so to speak, spare parts for fishing, it will not be difficult to do such an operation. But it may turn out that everything is there, but there is no piece of wire. Then you can resort to the second method, which is more suitable, since it can take a minimum of precious time. To do this, you need to form a loop and put it on the float, after which the loop, as it were, tighten. As a result, the float will be on the line. Moreover, this method does not interfere with regulating the depth of fishing.
For a closer look at how this works out in practice, it is better to watch the video.
Video “How to tie a float to a fishing line”
Attaching the float to the line. How to attach a float with your own hands