


Have you ever been given the task of creating a flowchart to map the business processes in an organization. Some companies pay for expensive, highly specialized software that builds flowcharts in just a few steps and clicks. Other businesses prefer to use existing tools that will be just as easy once you learn them. One of them is Excel.
Plan your steps
Since the purpose of a flowchart is to mark the logical order of events, decisions being made, and the results of those decisions, most people find it best to represent this in the form of a flowchart. And they find it much easier to do this if they take a few minutes to organize their thoughts.
And indeed it is. If your thoughts are not thought through enough, then the flowchart will not be good.
Therefore, before proceeding directly to the creation of a flowchart, it is recommended to make certain notes. The format in which they will be conducted is not so important. The main thing is to list each stage of the process, to determine each decision and its consequences.
Setting Items
- Go to the “Insert” tab, where you will find the “Shapes” element.
- After that, a list of shapes will appear, organized by groups. Next, you need to look through all of them until the “Flowchart” group is found.
- Select the required element.
- To add text, right-click on the element and select “Change Text” from the context menu.
Finally, on the Formatting ribbon, you need to choose a style and color scheme for the flowchart.
After selecting the desired element, you must add the next one for a specific item and continue until each stage is displayed.
Then the shape that displays each element of the flowchart must be labeled. Then the one who views it will understand what role each element of the flowchart plays in it and how it is related to others.
Each figure performs its standard function. If you use the elements of the diagram incorrectly, someone who views it may misunderstand you.
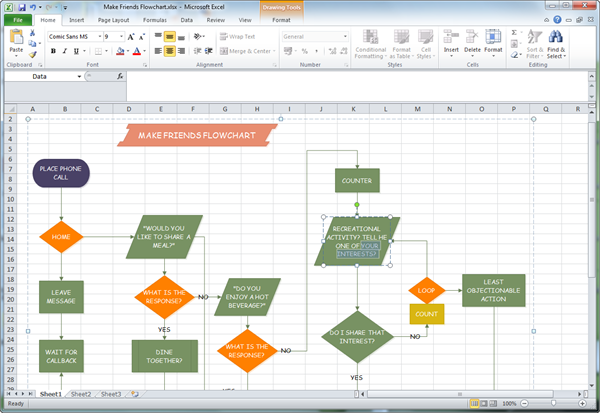
Here are some of the most common elements:
- The beginning or end of the flowchart.
- The process of work.
- A predefined process, such as recurring routines.
- Data source. It can be either a table, or some kind of document, or a website.
- Decisions taken. For example, it can be a control of the correctness of a pre-executed process. From each corner of the rhombus there can be lines that show the results of the decision made.
Ordering elements
Once the elements are placed in the correct places, you can follow these steps:
- To arrange elements in a column, you must select several elements by pressing the SHIFT key and then pressing each of them, and then select Align Center on the Format tab.
- If you need to make the same spaces between the elements vertically, then you need to select them, and then select the “Distribute vertically” item on the same tab.
- Next, you need to make sure that the sizes of all elements are the same in order to make the chart more visually appealing.
Link line setup
On the “Insert” tab there is an item “Shapes” where you need to select an arrow. It can be either straight or angled. The first is used for elements in direct sequence. If you need to return to a certain step after completing all the actions, then a curved line is used.
What’s next?
In general, Excel offers a huge number of shapes for charting. Sometimes you can ignore the standards and turn on the creativity. This will only benefit.