


Contents
- What is “AutoCorrect”
- Placement Locations
- Content search
- Sample replacement
- Enable and disable autocorrect
- Date autocorrect and possible problems
- Autocorrect with math symbols
- Editing the autocorrect dictionary
- Setting the main autocorrect options
- Working with exceptions
- Excel Version Difference
- Video instruction
- Conclusion
While using a spreadsheet, many users, working with huge amounts of information, make various errors in calculations or make typos. In addition, some people do not know how to correctly add special characters and use other characters that are not related to work instead. The program has a special feature called “AutoCorrect”, which allows you to automatically correct incorrect data entry.
What is “AutoCorrect”
The Excel spreadsheet processor stores in its own memory a wide variety of errors made by users when working with tabular information. If the user makes any mistake, the program will automatically correct it to the correct values. All this is achieved thanks to the AutoCorrect tool. The auto-replacement feature corrects the following types of errors:
- errors made due to the included Caps Lock;
- start entering a new sentence with a small letter;
- two capital letters in a row in one word;
- other common mistakes and typos made by users.
Placement Locations
Note that auto-replace and the Find and Replace tool are two completely different options. In the first tool, the spreadsheet independently analyzes the typed text and implements the replacement, and in the second, all manipulations are performed by the user working in the spreadsheet.
The entire list of replaced phrases is located in the Excel settings. To view this table of values, follow these simple steps:
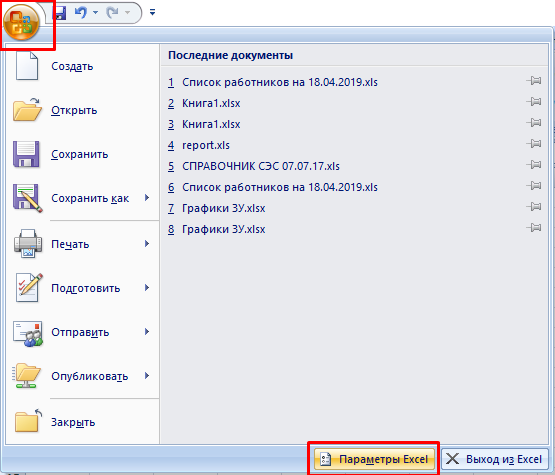
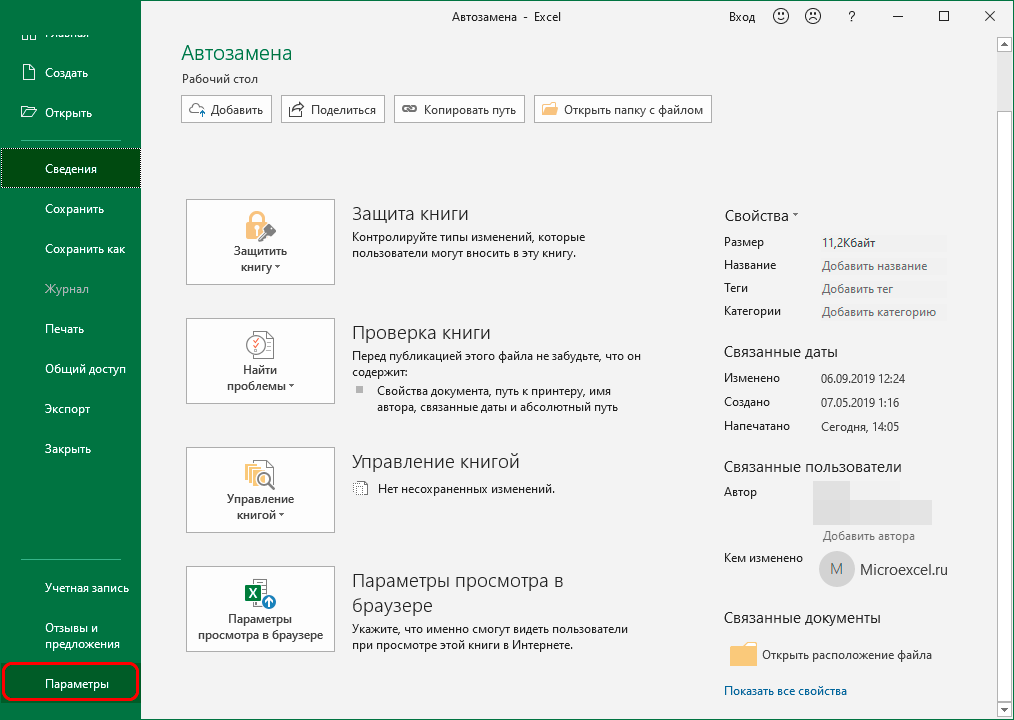
- We click on the big button located in the upper left part of the interface, and then click on the “Settings” element.
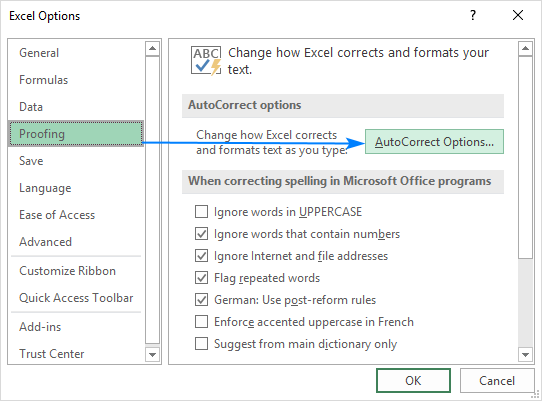
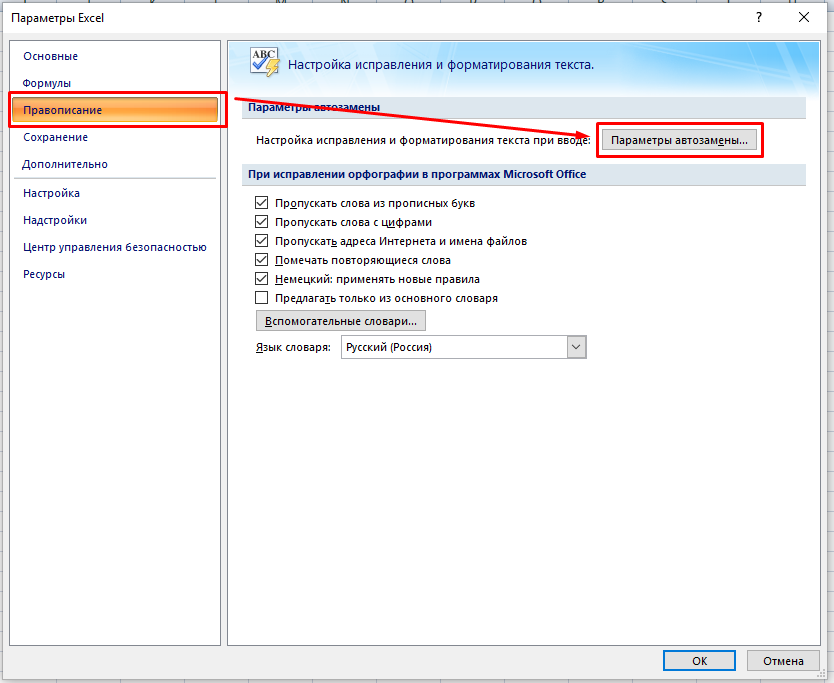
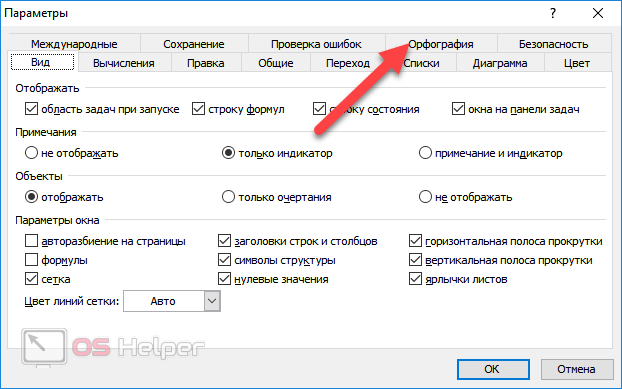
- In the window that appears, click on the line “Spelling” and move to the settings menu for automatic replacement.
- In the new window that appears on the screen, you can view the function parameters. There is also a table of examples of replacing characters or words.
Note that the location of this function is identical in all versions, only in some cases access to the parameters begins with clicking on the “File” element.
Content search
Let’s take a closer look at how to search for content in a document. Walkthrough:
- Go to the “Edit” section, and then click on the “Find” button. You can get to this window by pressing the key combination “Ctrl + F”.
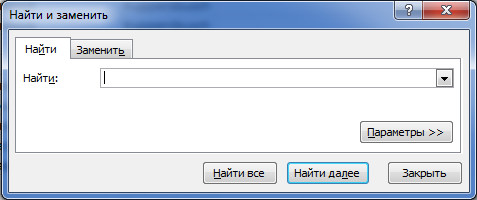
- In the line “Find” you must enter the value that you want to find in the document. After entering the data, click “Find Next”. In the window, there are various additional search filters located in the “Options” section.
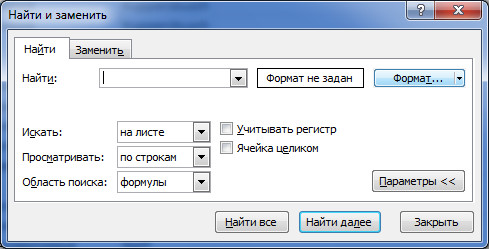
It should be understood that if you click the “Find Next” button, the program will display the closest entered phrase and show it in the document. Using the “Find All” function allows you to display all the search values that are in the document.
Sample replacement
It often happens that the user needs not only to find a phrase in the document, but also to replace it with other data. Step by step guide to perform this function:
- Go to the search box as described above.
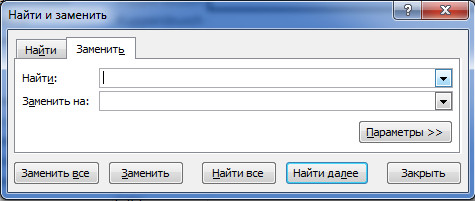
- Now we move to the section called “Replace”.
- There is a new line “Replace with”. In the line “Find” we drive in the phrase for the search, and in the line “Replace with”, we drive in the value with which we want to replace the found fragment. By moving to the “Options” section, you can apply a variety of search filters to speed up the work with information.
Enable and disable autocorrect
By default, the automatic replacement feature in the spreadsheet is enabled. There are cases when it needs to be turned off so that when entering information, the program does not perceive some characters as erroneous. Step-by-step guide to disable automatic replacement:
- Go to the “File” section.
- In the left list of elements, select “Settings”.
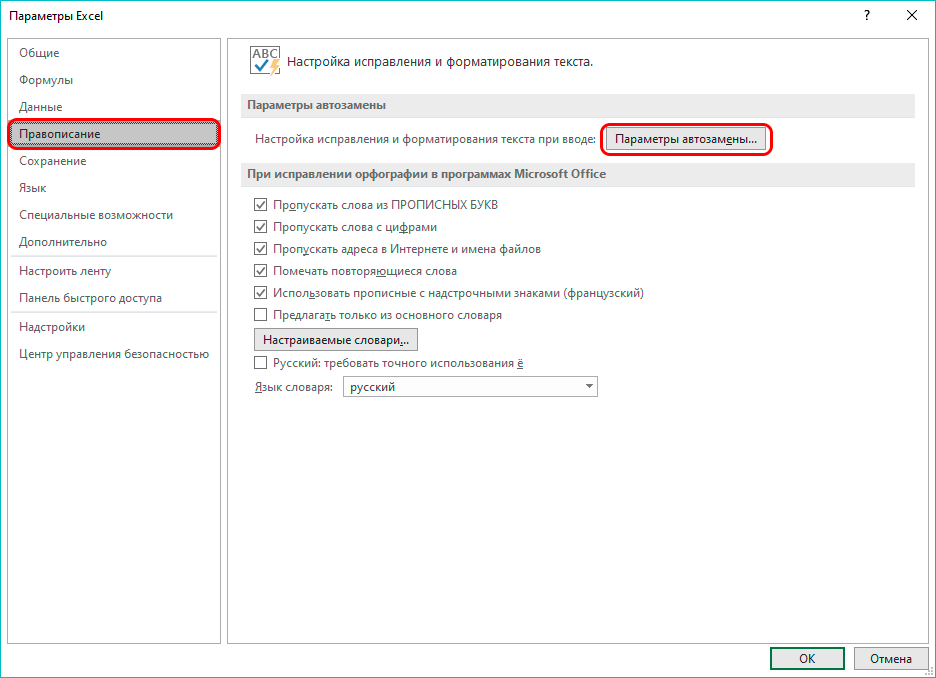
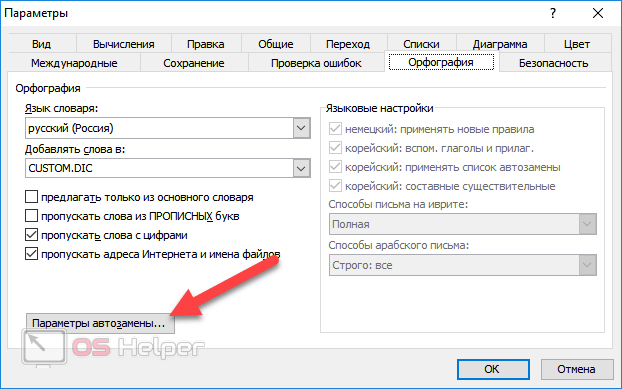
- In the options window that appears, select the “Spelling” section. Next, click on AutoCorrect Options.
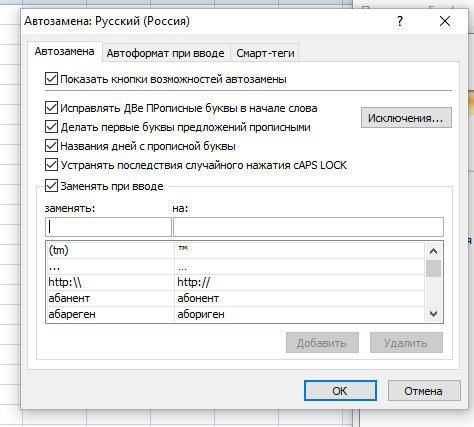
- A new window appears with parameter settings. Here you need to uncheck the box next to the inscription “Replace as you type”, and then click “OK”.

- The spreadsheet will take the user to the previous window, in which you must click “OK” again.

Attention! To re-enable the function, you need to return the checkmark next to the inscription “Replace as you type” and click “OK”.
Date autocorrect and possible problems
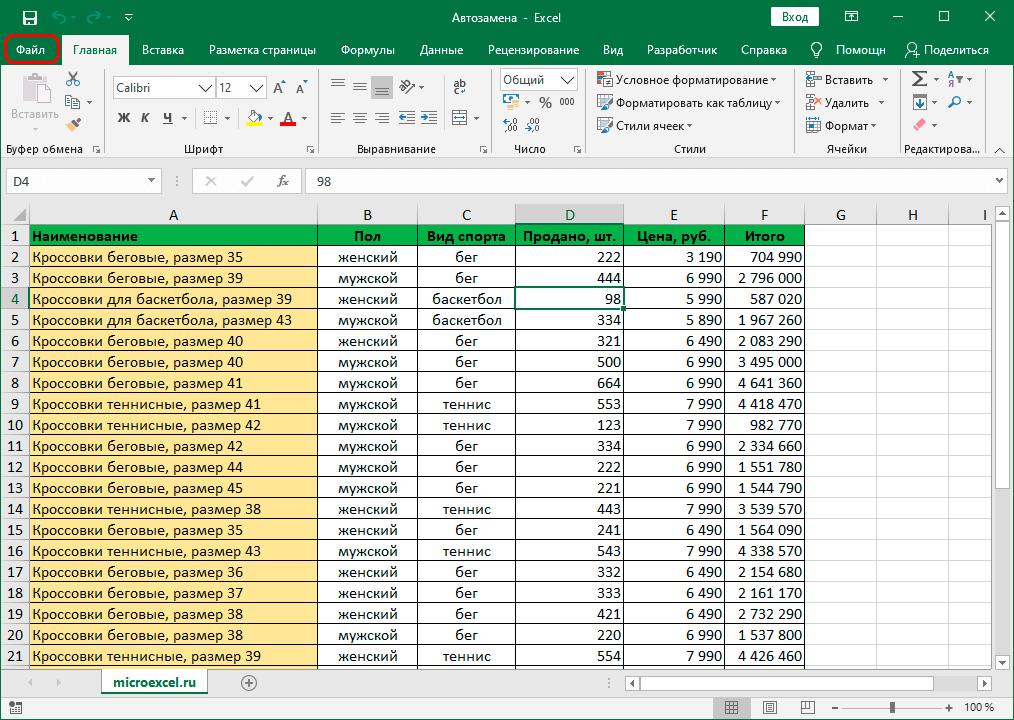
There are times when the user drives in numerical information with dots, and the spreadsheet processor independently changes it to a date. To save the original information in the cell without any changes, you must perform the following simple steps:
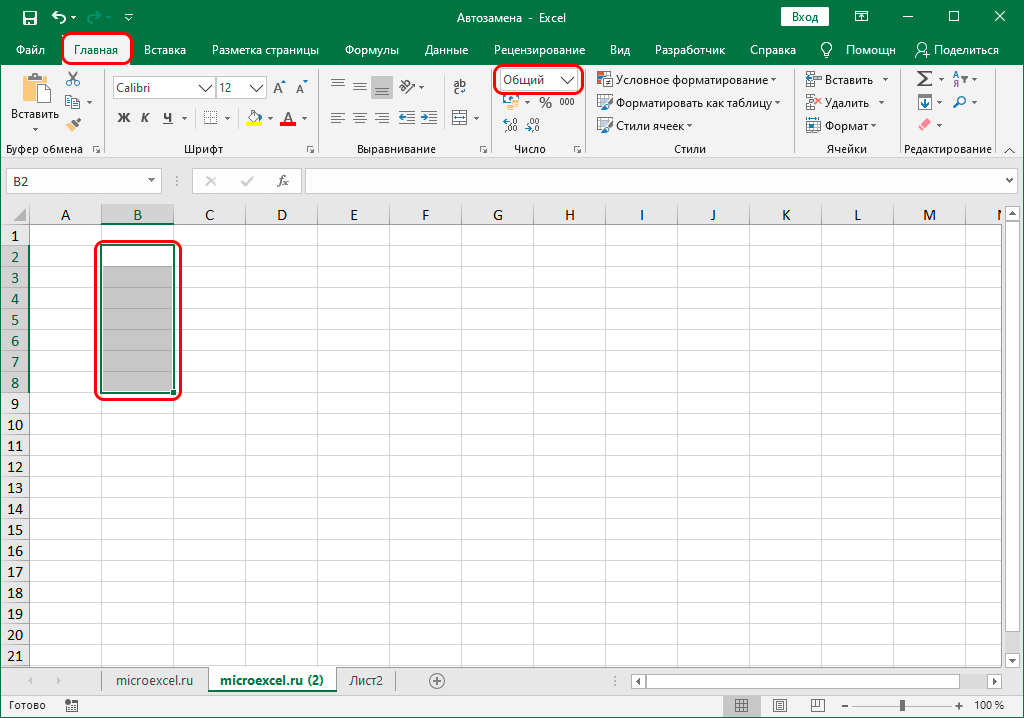
- We make a selection of a range of cells in which we plan to enter numerical information with dots. Go to the “Home” section, and then move to the “Number” tab. Click on the current cell format variation.
- A small list with various formats has been revealed. Click “Text”.
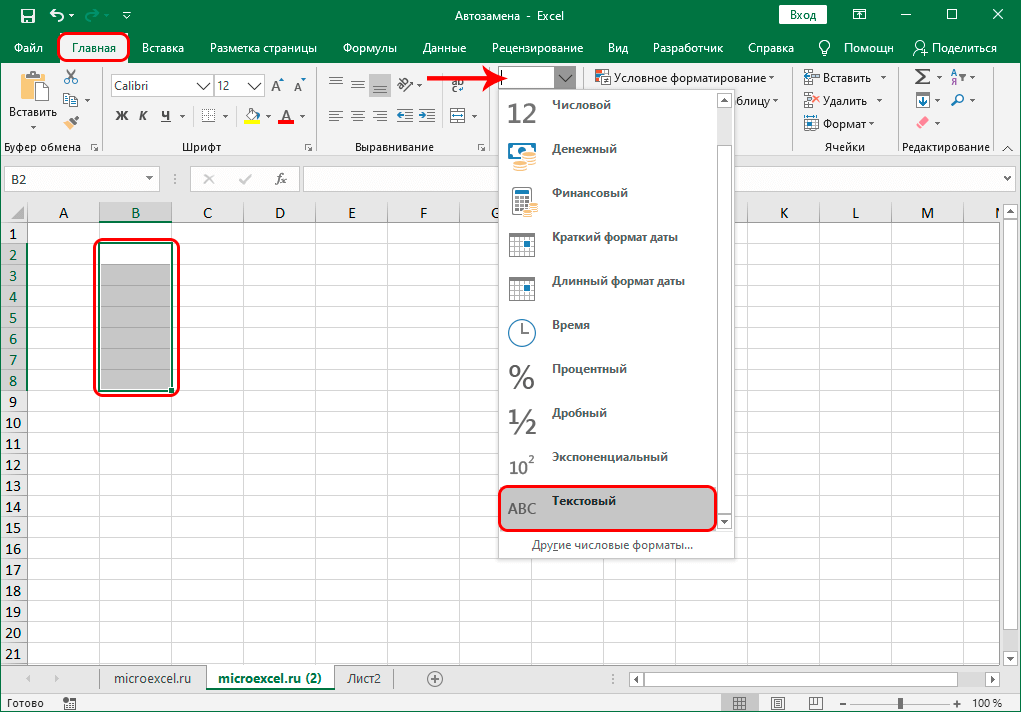
- After the manipulations, you can enter data into the cells using dots.
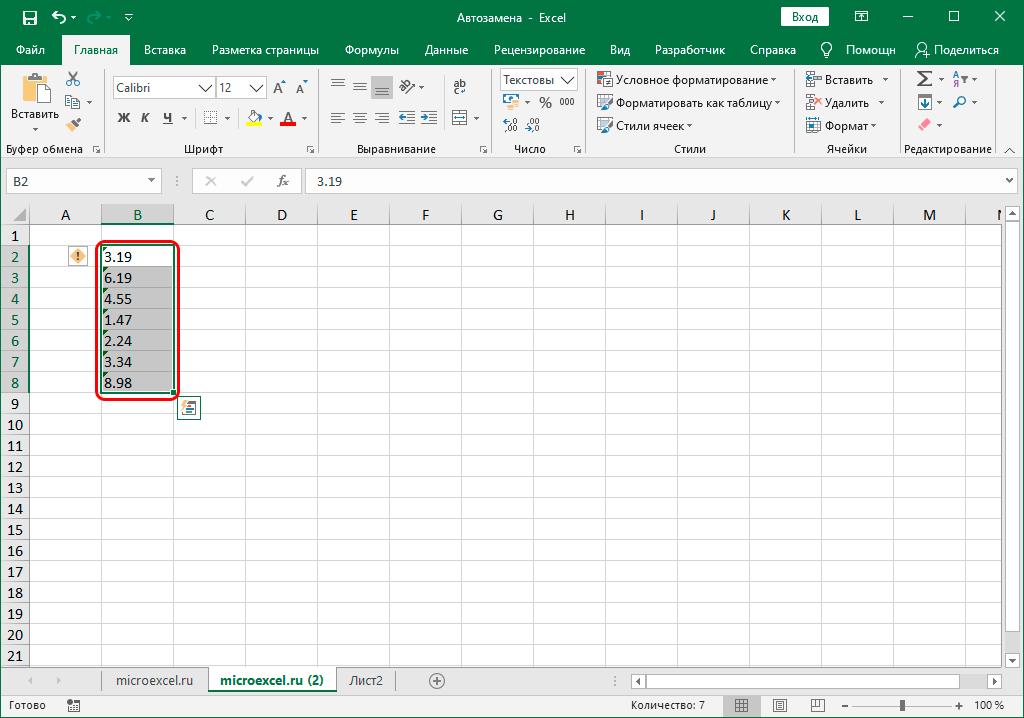
It is important to understand that numeric information in cells with text format will not be processed by the program as numbers.
Autocorrect with math symbols
Now let’s look at how the process of automatic replacement with mathematical symbols is performed. First you need to go to the “AutoCorrect” window, and then to the “AutoCorrect with Mathematical Symbols” section. This feature is handy and useful as many math symbols are not on the keyboard. For example, in order to display an image of an angle in a cell, you just need to enter the angle command.
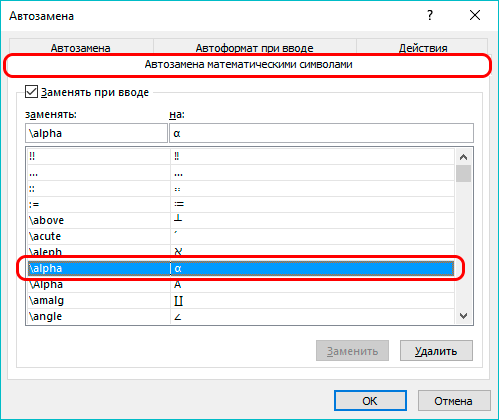
The existing mathematical list can be supplemented with own values. To do this, enter your command in the first field, and the character that will be displayed when writing this command in the second field. Finally, click the “Add” button, and then “OK”.
Editing the autocorrect dictionary
The main task of automatic replacement is to correct typos and errors in the information entered by the user. A special dictionary is integrated into the spreadsheet processor, which contains lists of words and symbols for automatic replacement. You can add your own unique values to this dictionary, which will greatly simplify the work with the spreadsheet processor. Walkthrough:
- We move to the window with the parameters of automatic replacement, using the technique described above.
- In the “Replace” line, you must enter a character or word, which in the future the spreadsheet processor will take as an error. In the line “On” you need to enter the value that will be used as a replacement for the mistake made. After entering all the necessary information, click “Add”.
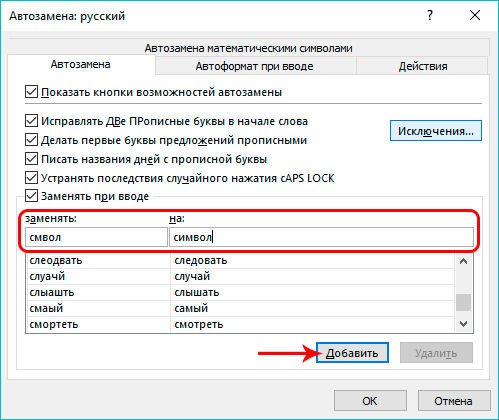
- Similarly, you can add your own values from the dictionary, so that later you do not waste time correcting them.
To remove unnecessary values from the list of automatic replacements, you just need to select an unnecessary combination, and then click “Delete”. By selecting a value, you can not only delete it, but also edit it.
Setting the main autocorrect options
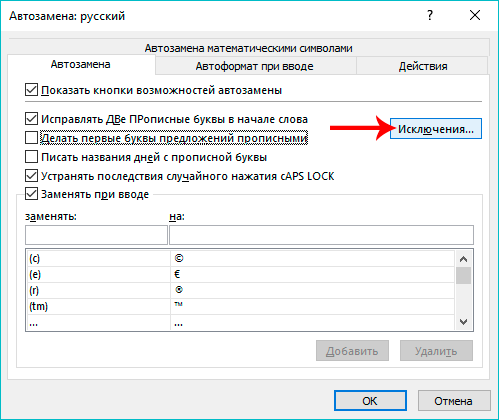
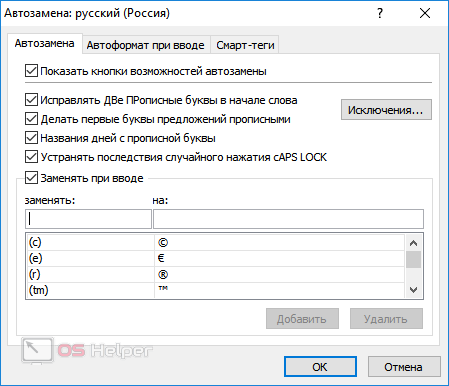
The main characteristics include all the parameters located in the “AutoCorrect” section. By default, the spreadsheet includes the types of corrections shown in the image:
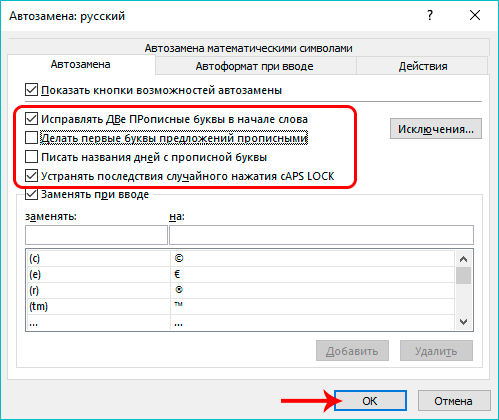
To turn off any parameter, you just need to uncheck the box next to it, and then, to save the changes entered, click “OK”.
Working with exceptions
The spreadsheet has a special exception dictionary that allows you to make sure that automatic replacement is not applied to the values included in this dictionary. Step-by-step guide to working with the dictionary:
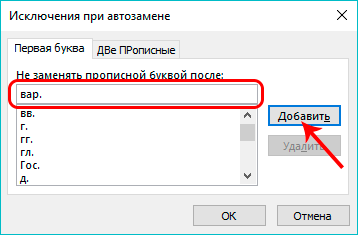
- In the “AutoCorrect” box, click on “Exceptions”.
- There are two sections here. The first section is “The First Letter”. This section describes all values after which the “period” is not perceived by the program as the end of a sentence. In other words, after entering a period, the next word will begin with a small letter. To add your own values, you need to enter a new word in the top line, and then click “Add”. If you select any indicator from the list, you can either adjust it or delete it.
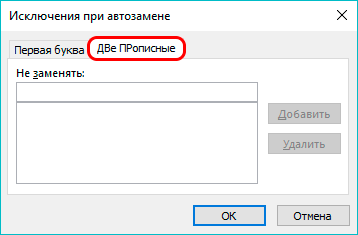
- The second section is “Two Capitals”. Here, as in the previous tab, you can add your own values, as well as edit and delete them.
Excel Version Difference
All of the guides above are for use with 2007, 2010, 2013, and 2019 spreadsheet processors. In the 2003 editor, the procedure for setting up automatic replacement is done in a different way, and the key elements are located in completely different locations. Walkthrough:
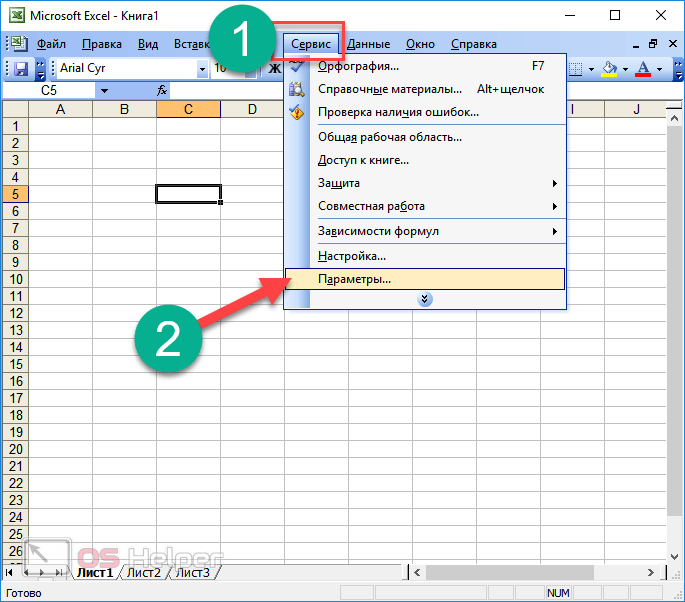
- Click on the “Service” section.
- Click on the “Settings” element.
- Moves to the Spelling tab.
- There are three options for setting up automatic replacement.

- To make changes to auto-replacement, click on the “AutoCorrect Options” element.
- A familiar window appears. There is no setting of mathematical symbols, since absolutely all parameters are located in one place. We make all the necessary transformations and click the “OK” button.
Video instruction
If all the above instructions are not enough, then you can watch the following video:
It tells about all the additional nuances to the manual. After watching the video, you will learn a lot of additional information that will allow you to solve all the problems when working with automatic replacement in a spreadsheet.
Conclusion
The automatic replacement function allows you to significantly speed up the process of working with tabular information. The tool is most effective when working with a huge amount of information. It is very important to be able to properly use and configure this useful feature.