


When working in office programs, you may need to transfer data. Most often we are talking about copying tables from Excel to Word. However, sometimes you have to do the reverse. Consider the methods by which you can transfer a table from Word to Excel.
First method: simple copy and paste
This method is fast and does not require much effort.
“Copy” function in the list that appears
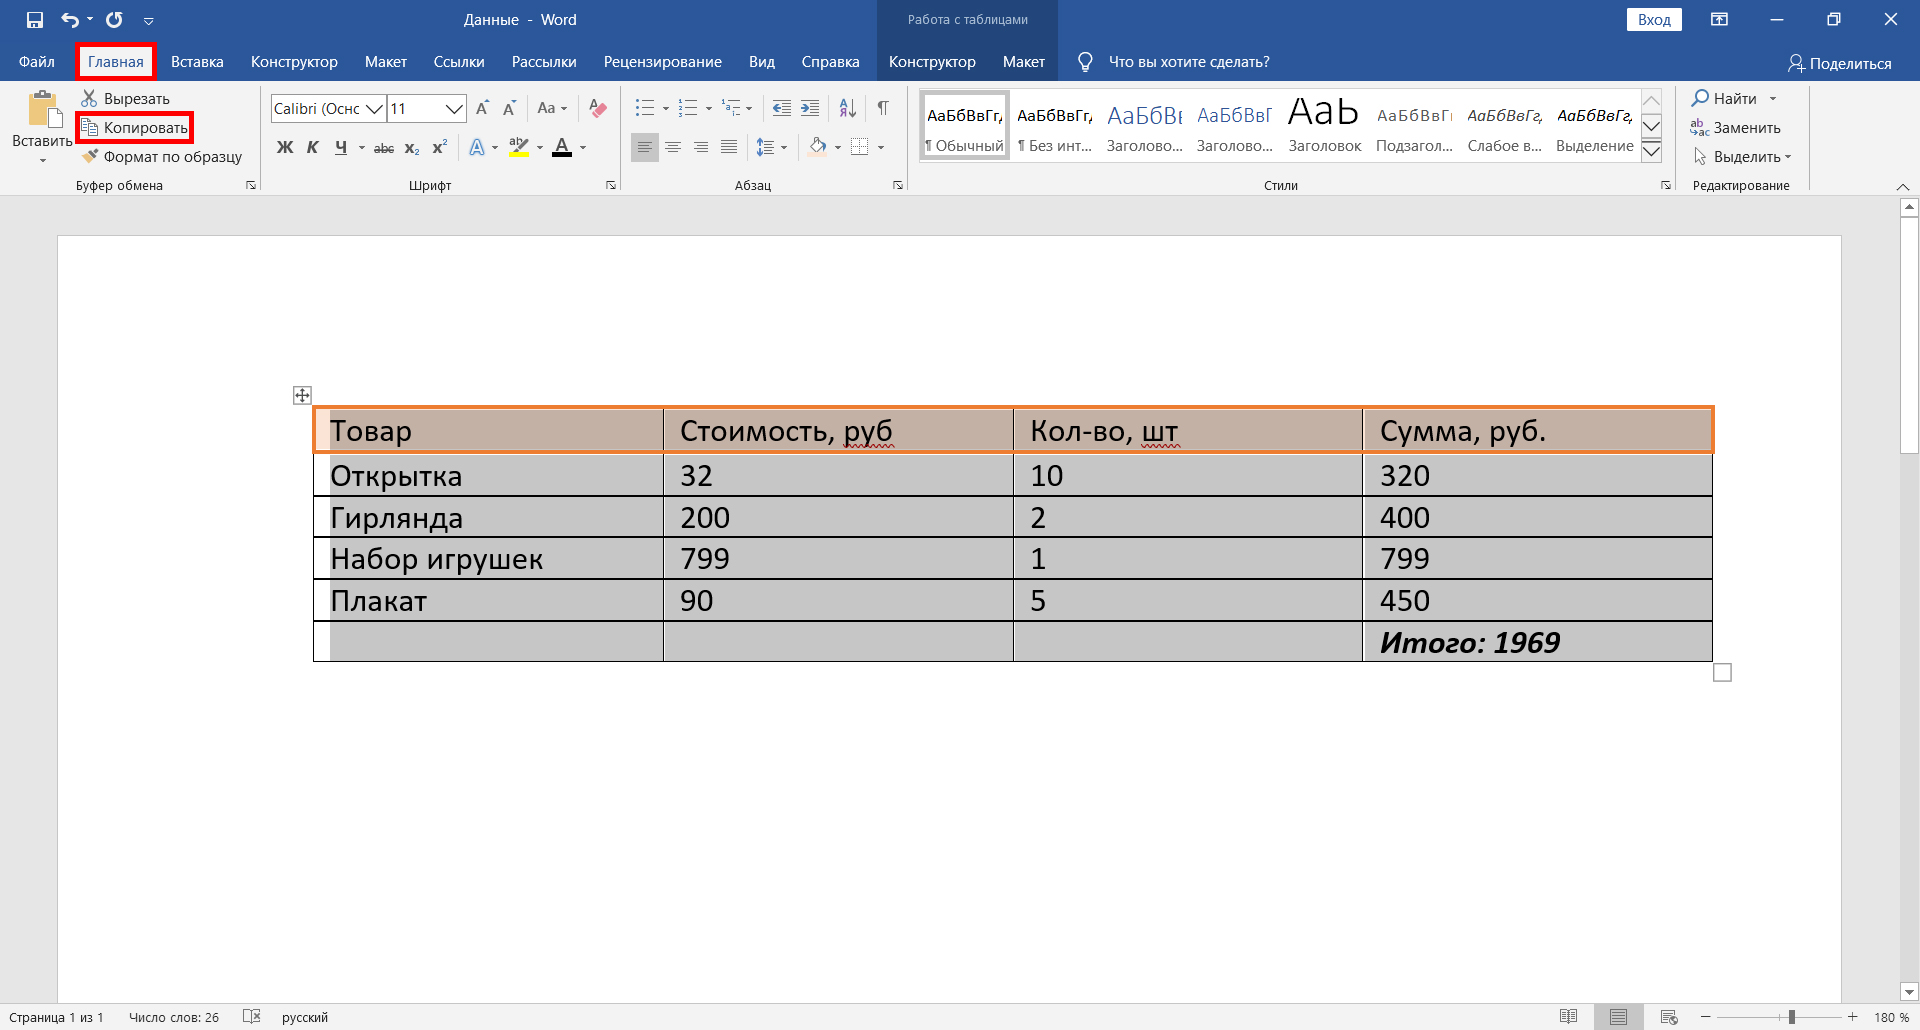
In Word, you need to select the table that needs to be moved. This can be done by clicking the right mouse button. After this manipulation, you need to click on the selected area and select the “Copy” item from the list.

“Copy” function on the “Home” tab
Also on the “Home” tab there is a button in the form of two documents. It’s called Copy. First, you also need to select the table, and then click on it.
Universal keyboard shortcuts for copying
It is not uncommon for different programs to use the same keyboard shortcut to copy data. Select the desired fragment and hold down the combination “CTRL + C”.
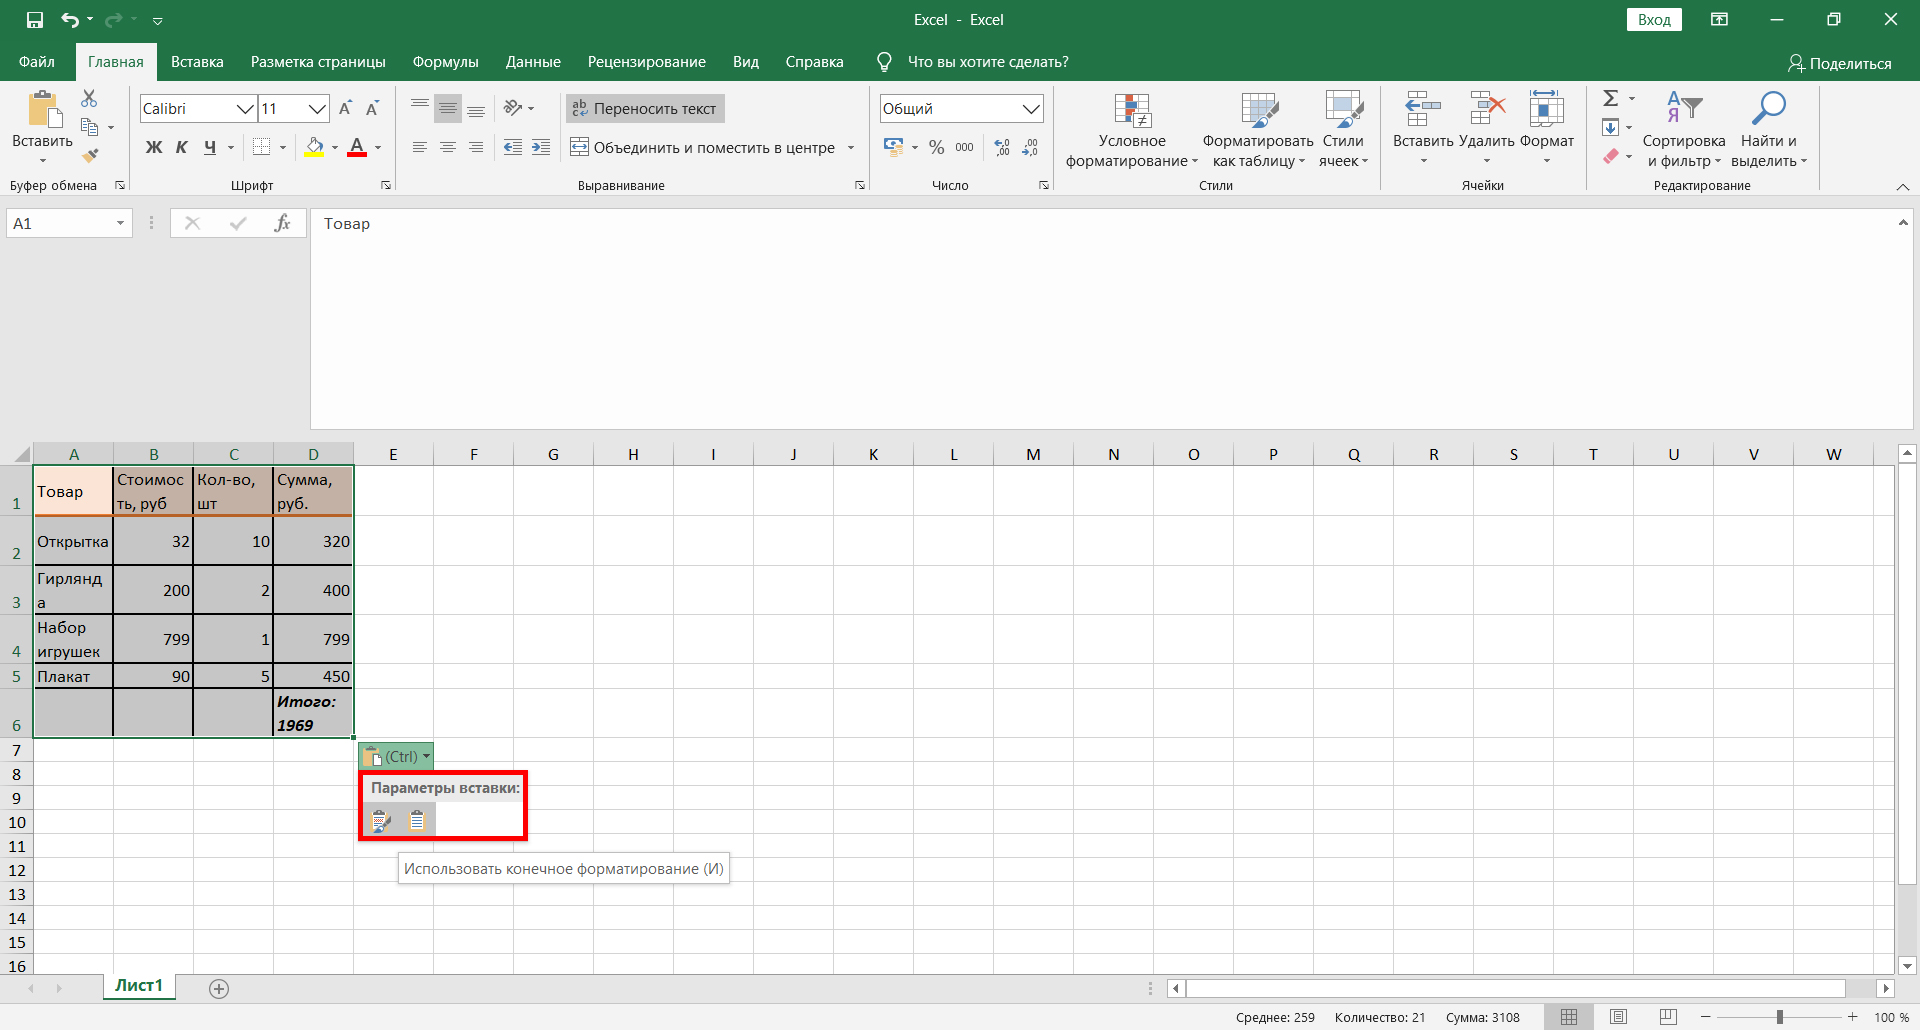
After all the steps, the table will be copied to the clipboard. You need to insert it directly into the file itself. Open the desired Excel document, select the cell that will be located at the top left. After that, right-click on it. A menu will then appear from which you can select the paste options. There are two options:
- use original formatting;
- using final formatting.
Paste feature on the Home tab
When pasting data, you should act in the same way as copying. Go to the “Home” tab and find the “Insert” button. Click on it.
Keyboard shortcut for pasting
To insert a table into a file, you can use a combination of hot keys. Just press CTRL+V. Ready.
Important! Data often does not fit in the cells after migration, so you may need to move the borders.
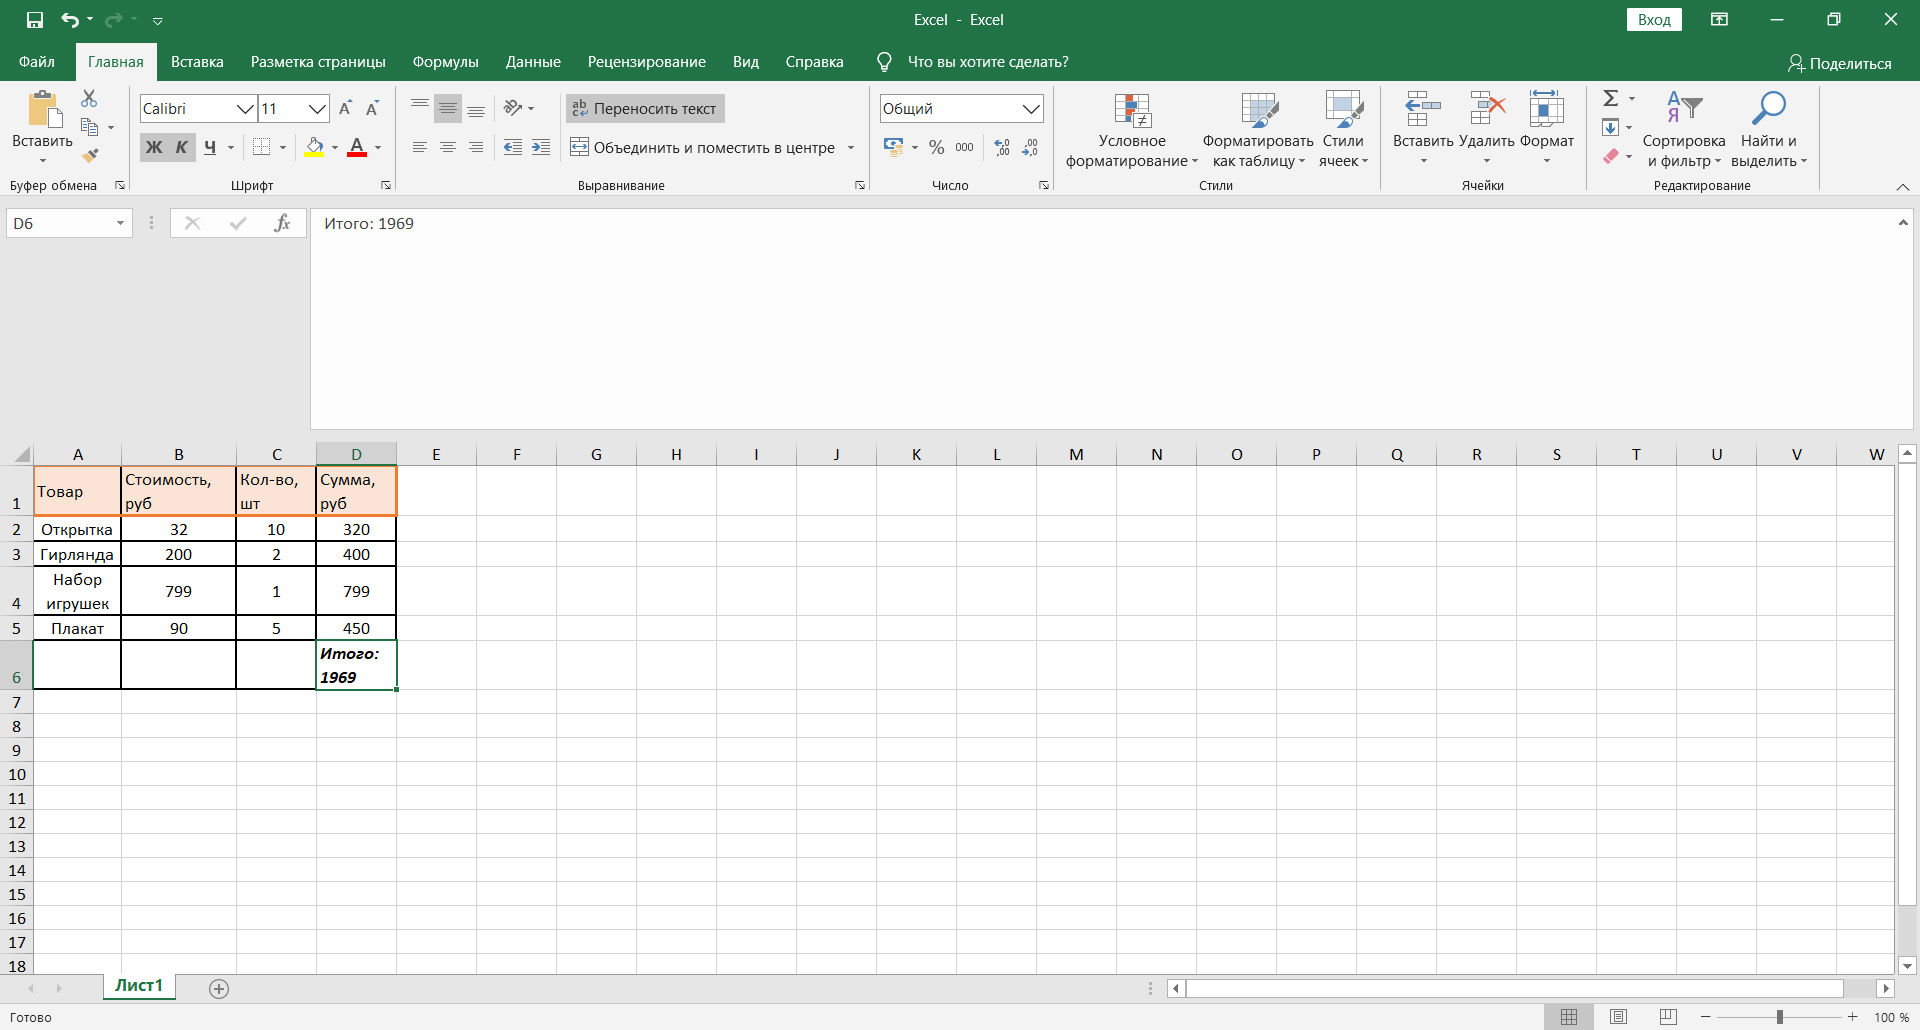
After all the manipulations, we can say that the table was successfully transferred.
Second Method: Importing a Table into an Excel Document
This method is used by a limited number of people. However, it can also be used to transfer a table from a Word document to Excel.
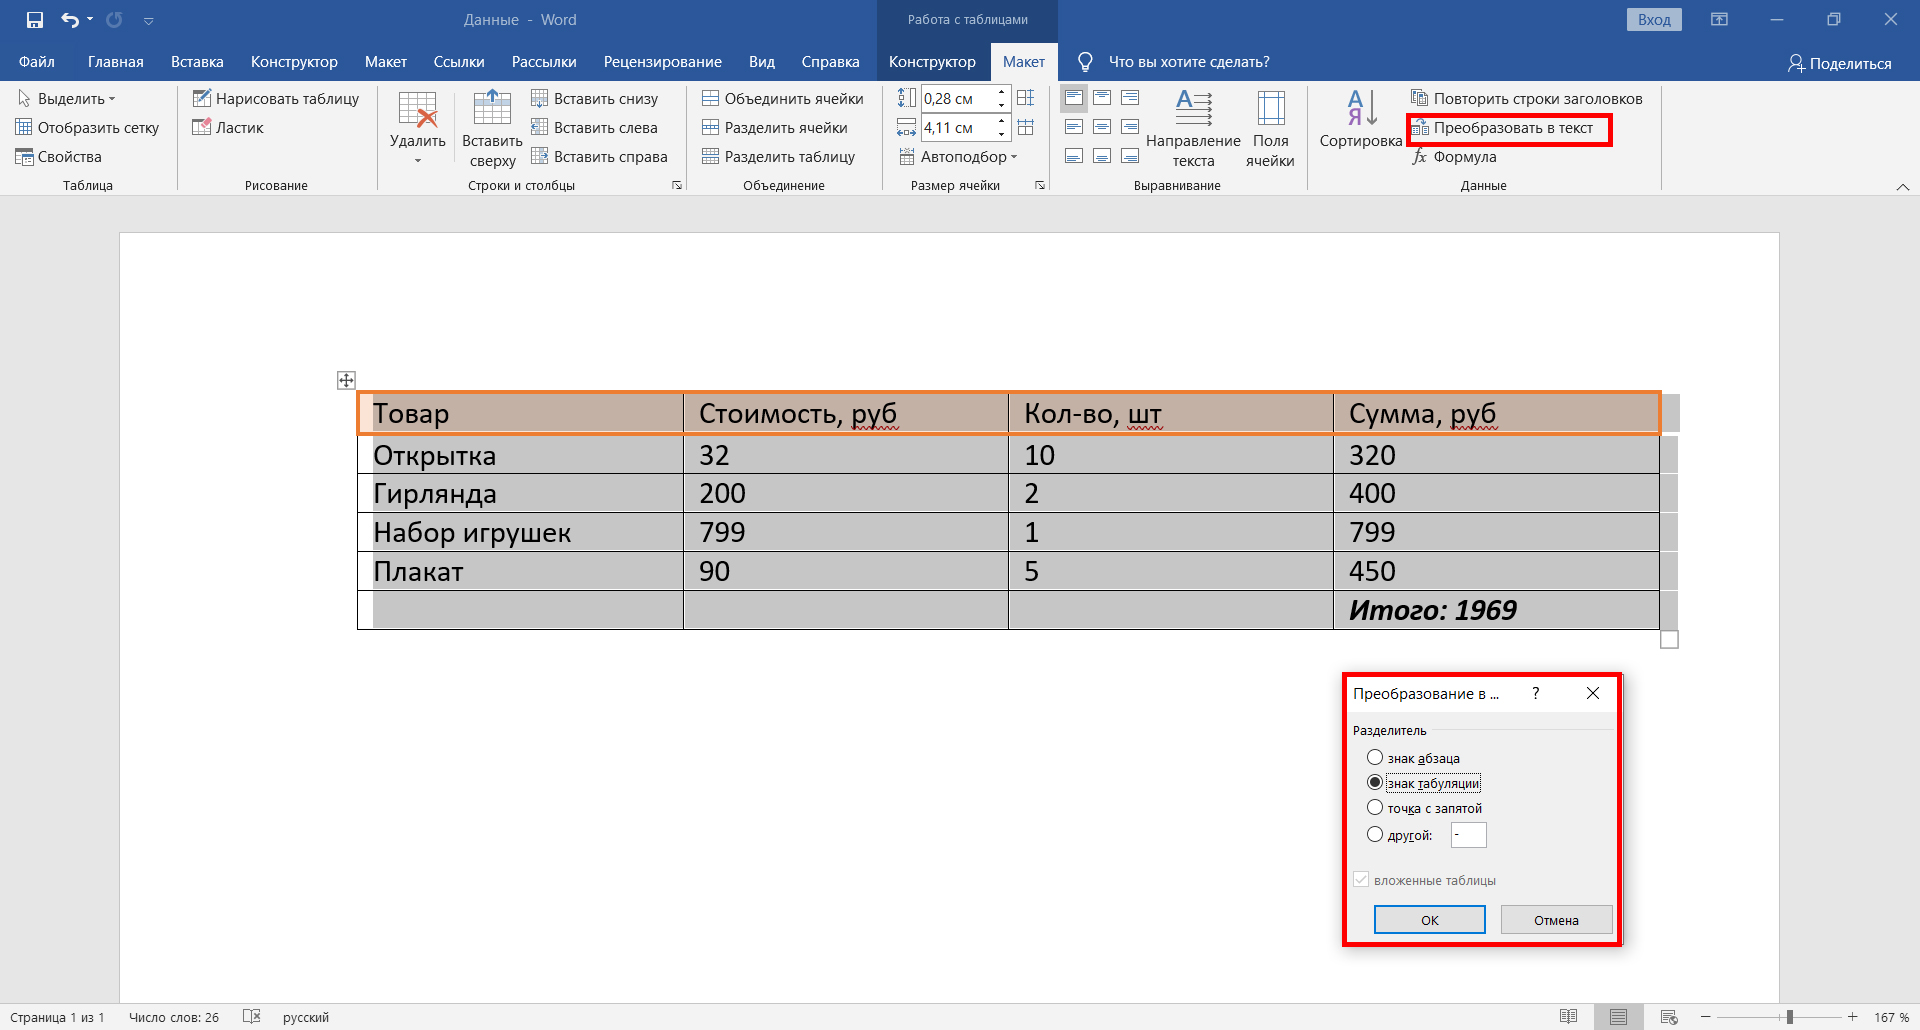
Converting a table to plain text
First you need to select the table. Then you should find the “Layout” tab and select the “Data” option. Then select “Convert to Text” from the drop-down menu. A small window will appear in front of you, click on the “Tab sign” parameter. Confirm the action by clicking on the “OK” button. After that, you will see that the table has been converted to plain text.
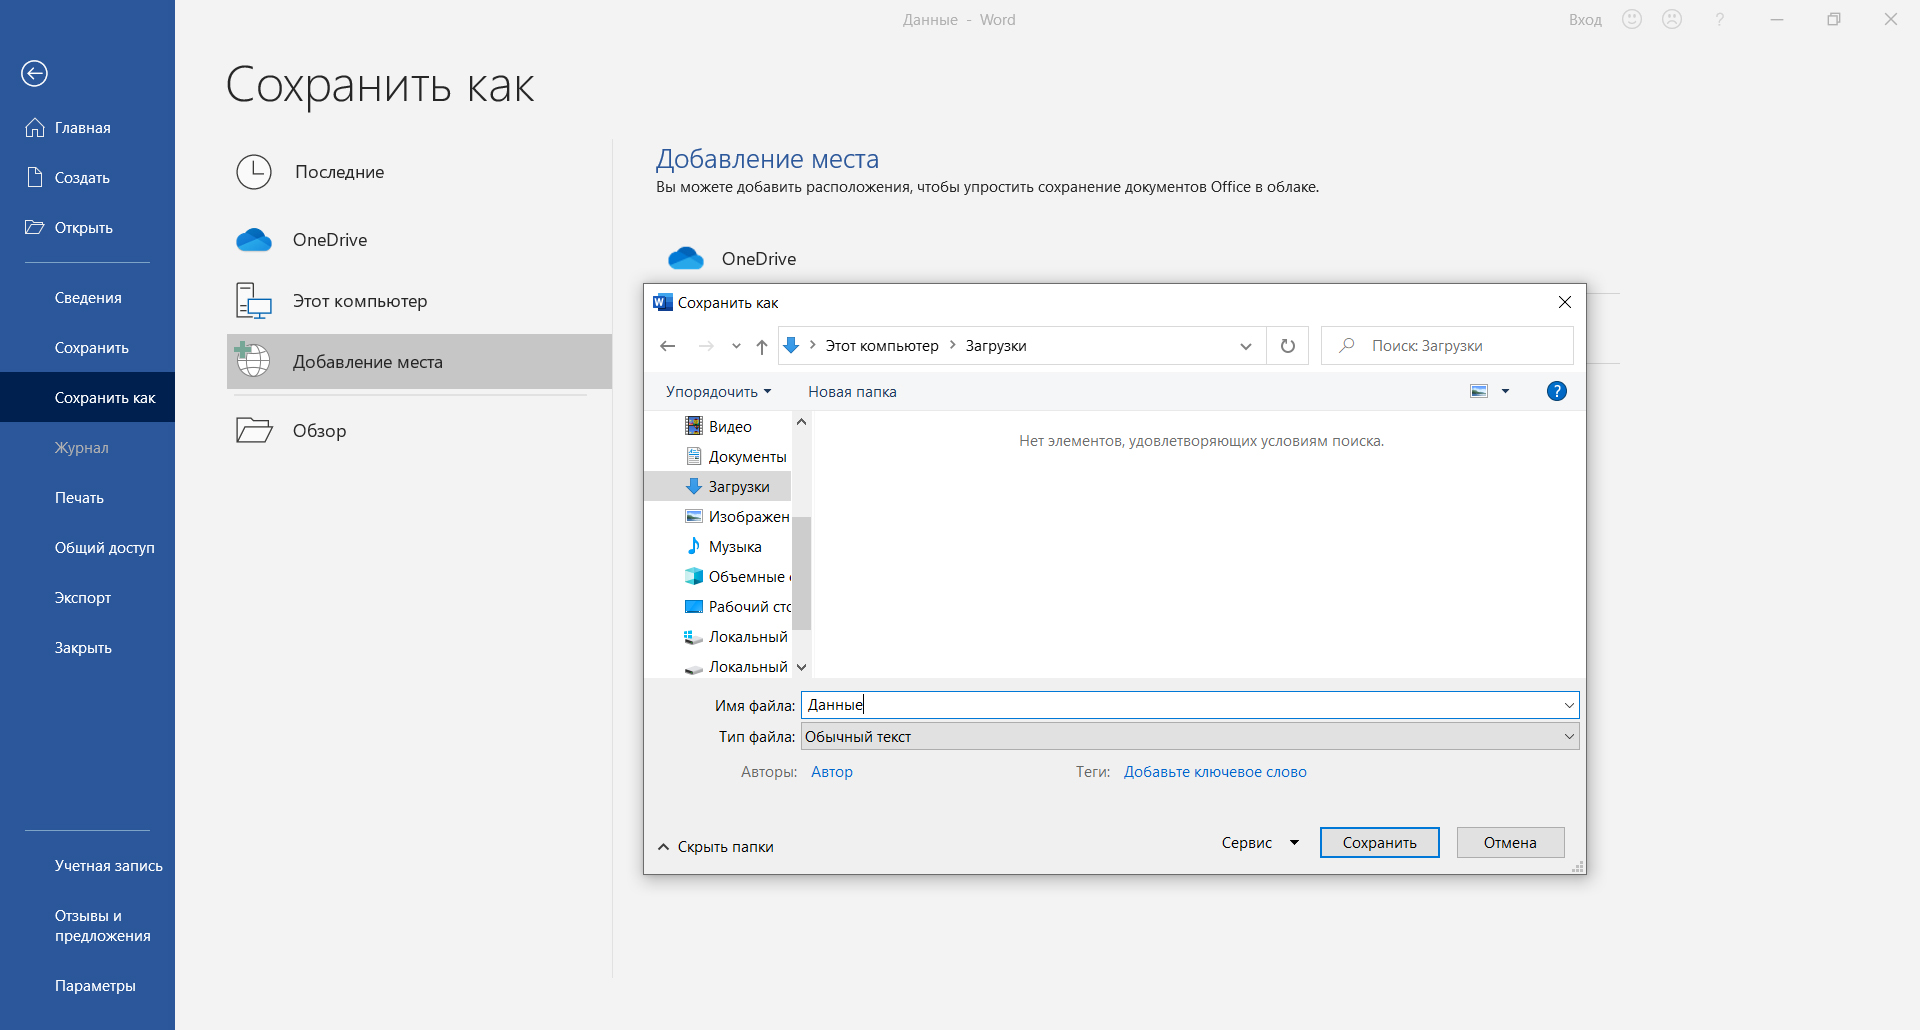
Saving a table in text format
You need to find the “File” tab on the top panel. A new window will appear in front of you, find the “Save As” option on the left and then select “Browse”. It should be noted that earlier versions of the program do not have this function. When the save window appears, you will need to give the file a name and specify the location where it will be located. Then you need to select “Plain text” as the file type.
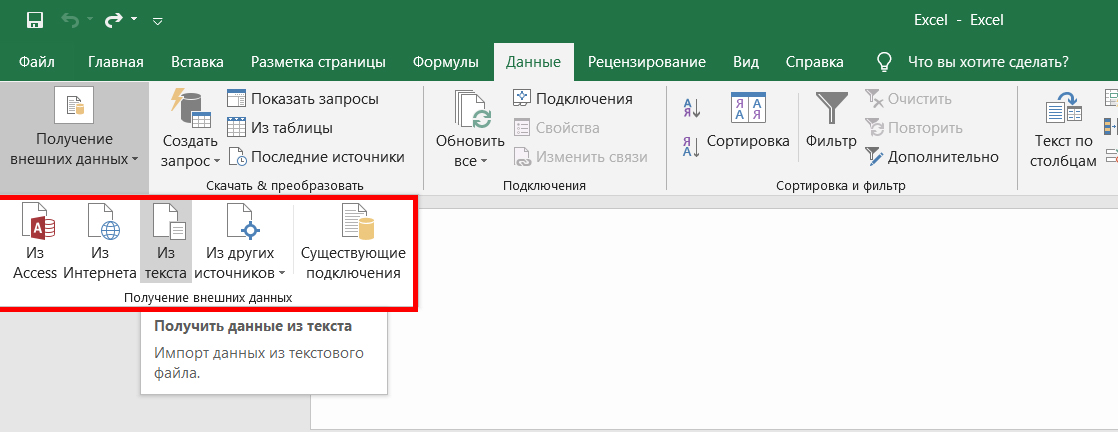
Inserting a table into an Excel document
In the Excel document, go to the “Data” tab. There you need to find the option “Get external data”. Several options will appear in front of you, you should select “From text”. Navigate to the location of the spreadsheet document, click on it, and select Import.
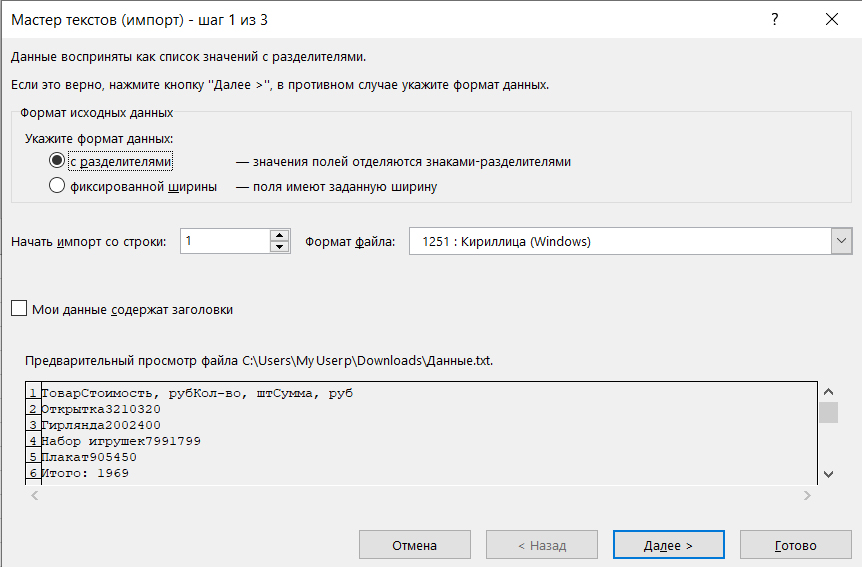
Encoding selection and other options
The window that appears will have several options. Under the inscription “Source data format” the parameter “with delimiters” should be indicated. After that, it will be necessary to specify the encoding that was used when saving the table in text format. Usually you have to work with “1251: Cyrillic (Windows)”. There is a small chance that a different encoding was used. It will need to be found using the selection method (option “File format”). If the correct encoding is specified, then the text at the bottom of the window will be readable. Then you need to click on the “Next” button.
Selecting the separator character and column data format
In the new window, you should specify a tab character as the delimiter character. After this step, click “Next”. Then you need to choose the column format. For example, the default is “General”. Click on the “Finish” button.
Selecting Paste Options and Finishing the Operation
You will see a window where you can select additional paste options. So, the data can be placed:
- to the current sheet;
- to a new sheet.
Ready. Now you can work with the table, its design, etc. Of course, users often prefer the first method because it is easier and faster, but the second method is also working and effective.