Contents
At almost every Power Query training, when we get to how to update created queries and people see how new data replaces old data when updating, one of the listeners asks me: “is it possible to make sure that when updating, the old data is also somewhere were saved and the entire update history was visible?
The idea is not new and the standard answer to it will be “no” – Power Query is configured by default to replace old data with new ones (which is required in the vast majority of cases). However, if you really want to, you can get around this limitation. And the method, as you will see later, is very simple.
Consider the following example.
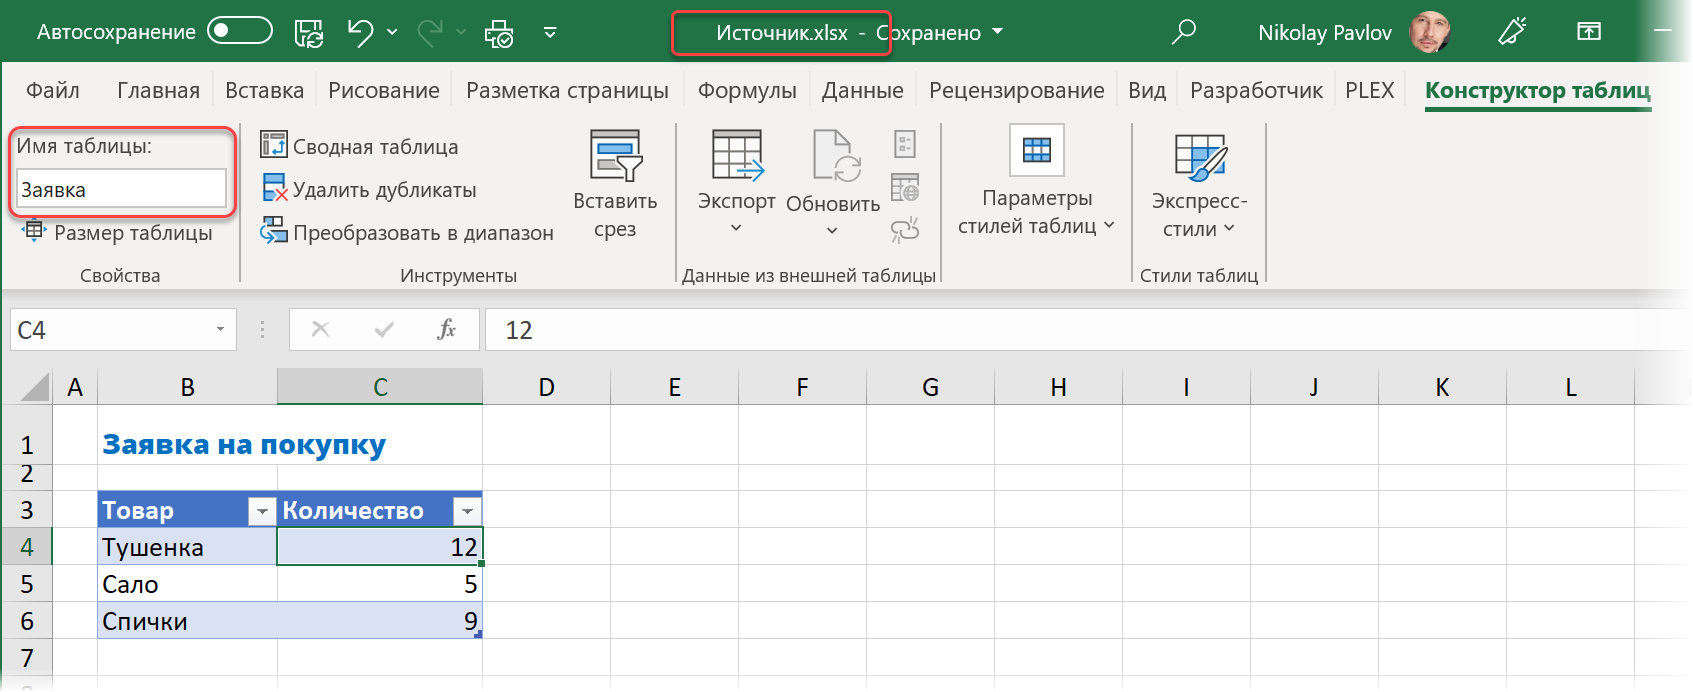
Let’s assume that we have a file from the client as input data (let’s call it, let’s say, Source) with a list of products that he wants to buy in the form of a “smart” dynamic table named Application:
In another file (let’s call it by analogy Receiver) we create a simple query to import a table with products from the Source via Data – Get Data – From File – From Excel Workbook (Data — Get data — From file — From Excel workbook) and upload the resulting table to the sheet:
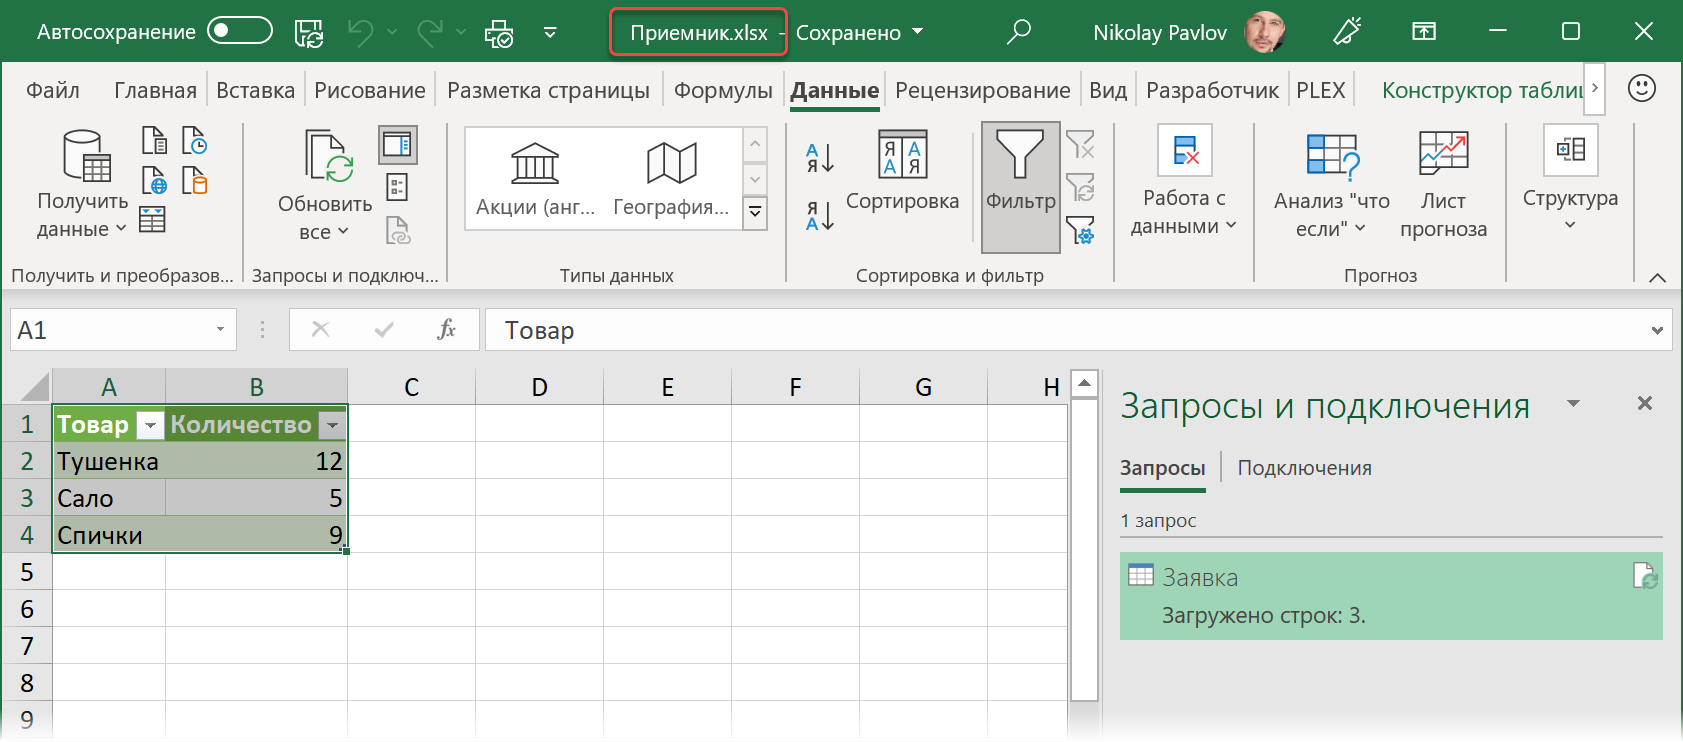
If in the future the client decides to make changes to the order in his file Source, then after updating our request (by right-clicking or via Data – Refresh All) we will see the new data in the file Receiver — all standard.
Now let’s make sure that when updating, the old data is not replaced by new ones, but the new ones are appended to the old ones – and with the addition of a date-time, so that it can be seen when these specific changes were made.
Step 1. Adding a date-time to the original query
Let’s open a request Applicationimporting our data from Source, and add a column with the date-time of the update to it. To do this, you can use the button Custom column tab Adding a column (Add column — Custom column), and then enter the function DateTime.LocalNow – analogue of the function The TDATA (NOW) в Microsoft Excel:
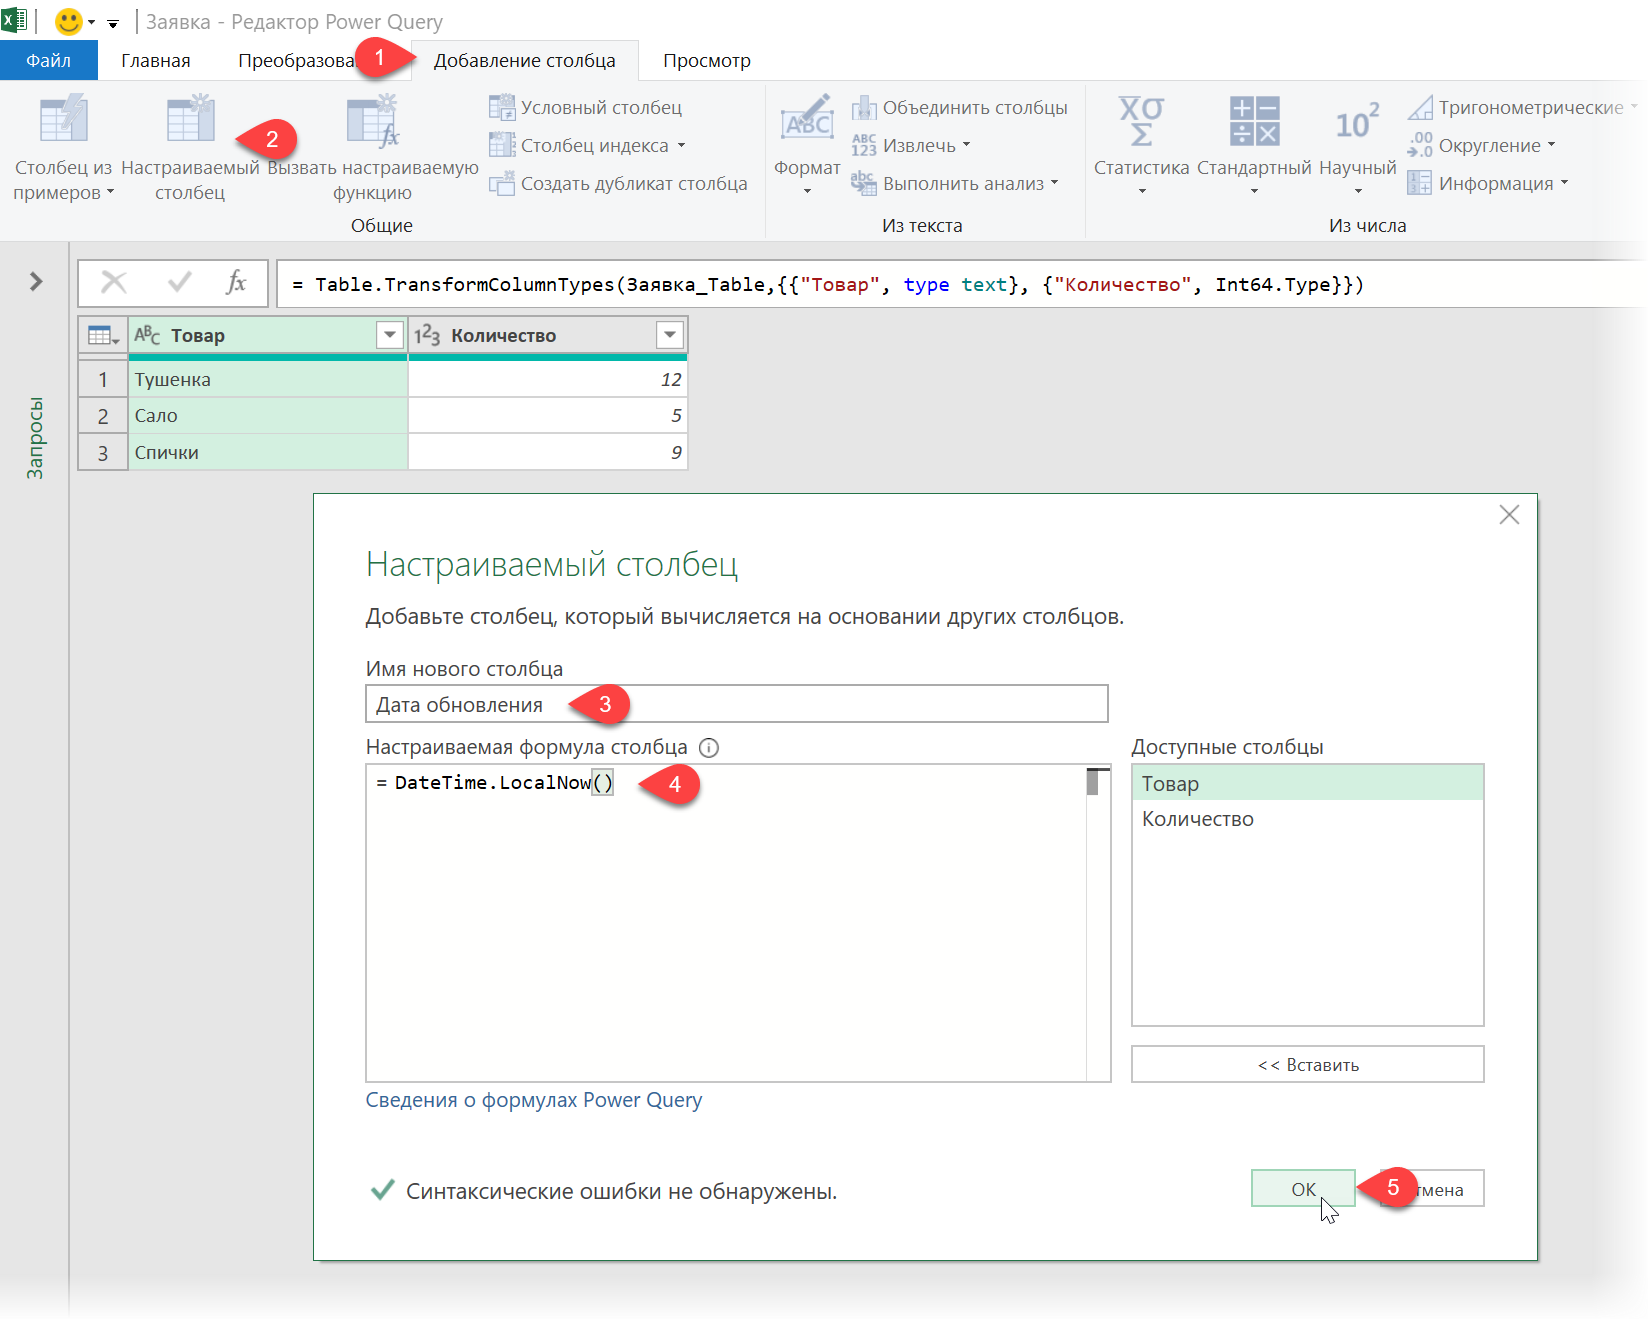
After clicking on OK you should end up with a pretty column like this (don’t forget to set the date-time format for it with the icon in the column header):

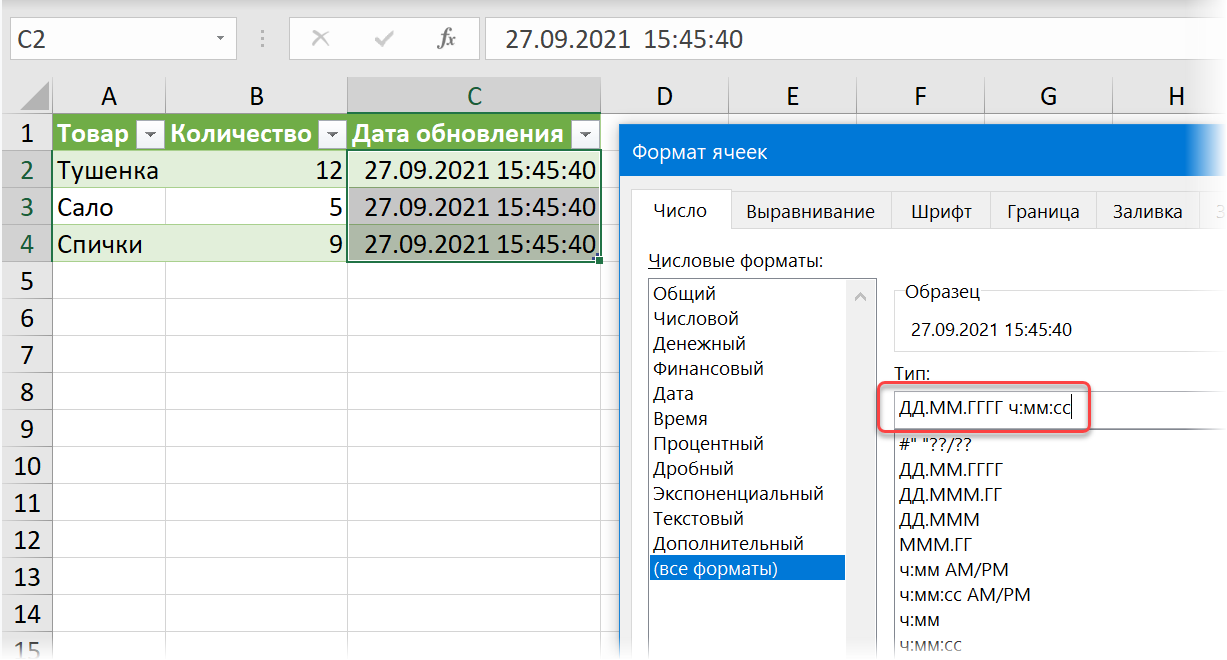
If you want, then for the plate uploaded to the sheet for this column, you can set the date-time format with seconds for greater accuracy (you will have to add a colon and “ss” to the standard format):
Step 2: Query for old data
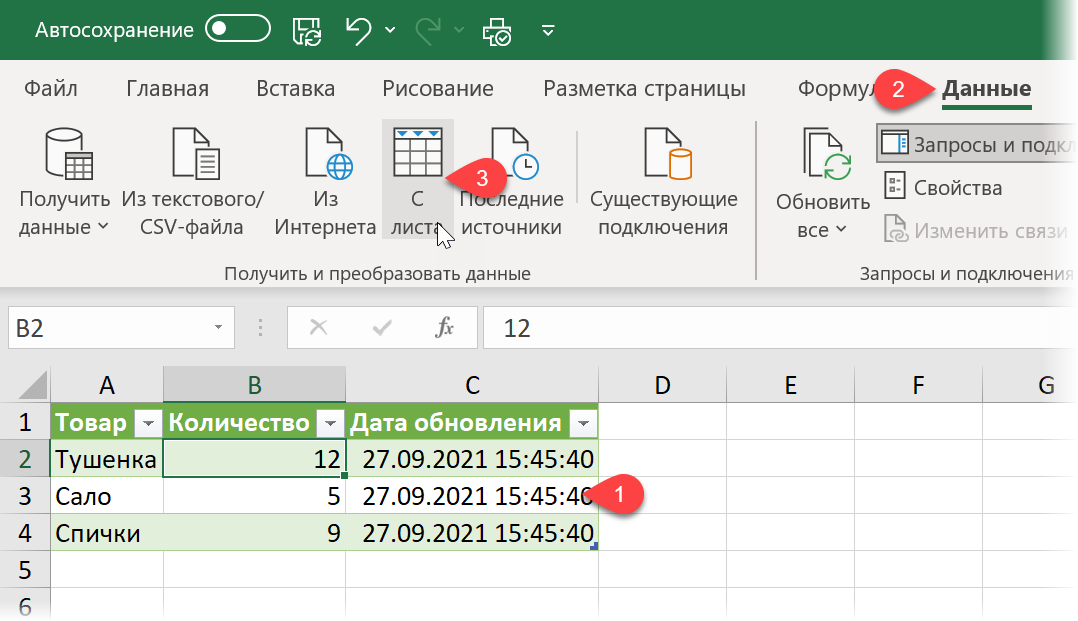
Now let’s create another query that will act as a buffer that saves the old data before updating. Selecting any cell of the resulting table in the file Receiver, select on the tab Data Command From Table/Range (Data — From table/range) or With leaves (From sheet):
We do nothing with the table loaded in Power Query, we call the query, for example, old data and press Home — Close and load — Close and load to… — Create connection only (Home — Close&Load — Close&Load to… — Only create connection).
Step 3. Joining old and new data
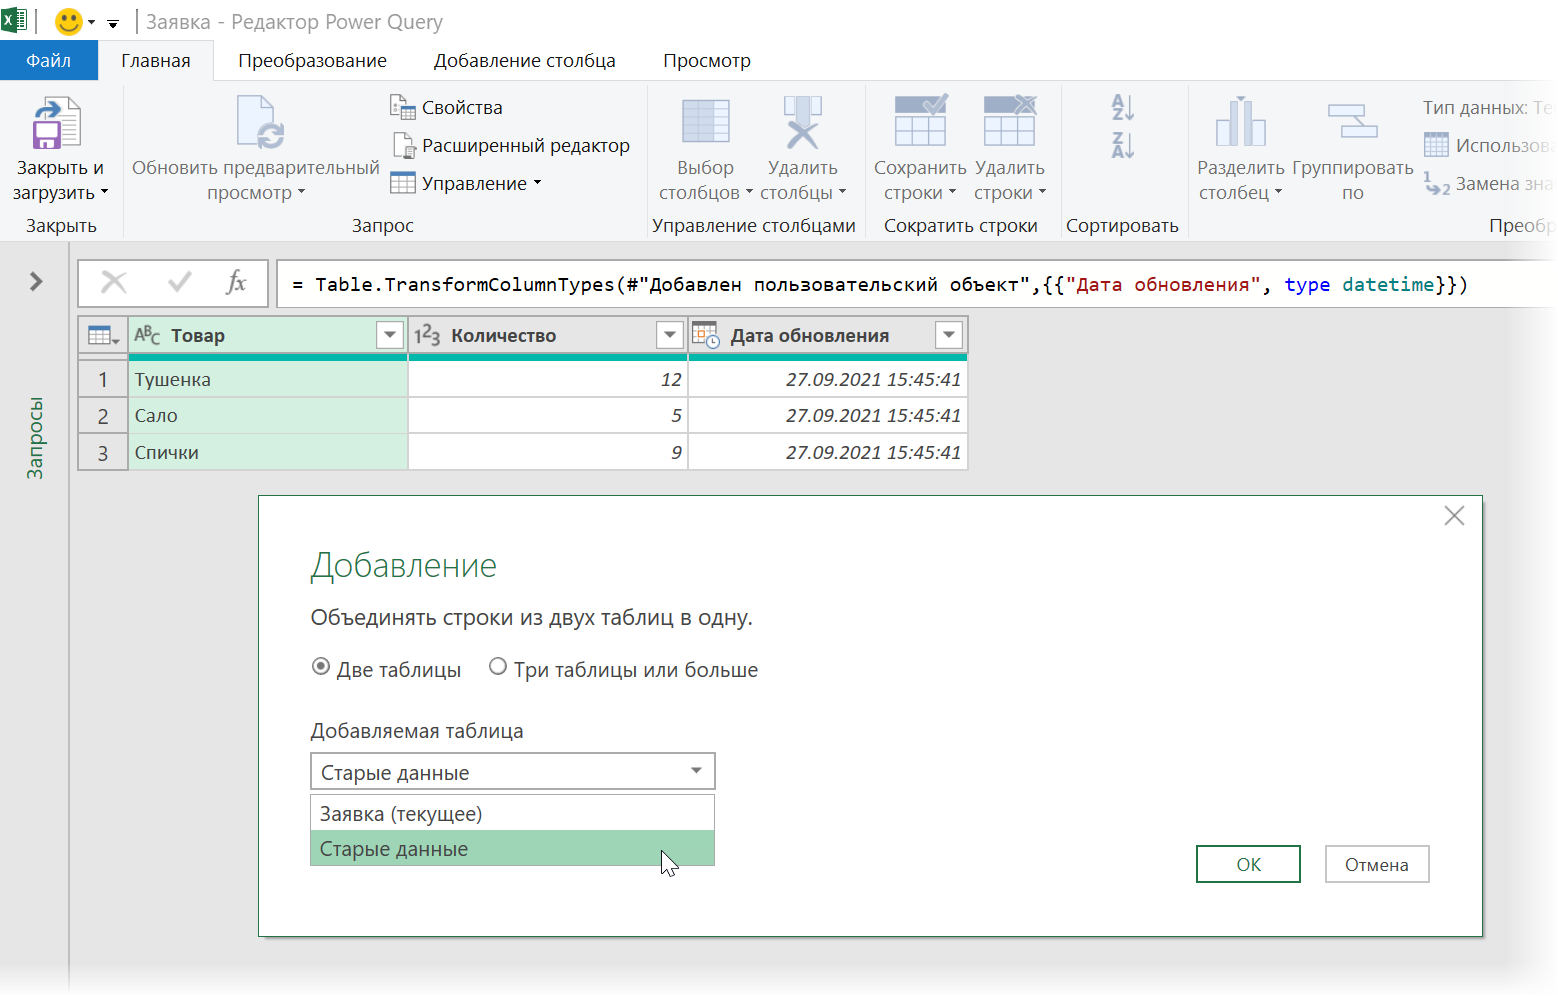
Now back to our original query Application and add to it from below the old data from the previous buffer request with the command Home — Add Requests (Home — Append Queries):
That’s all!
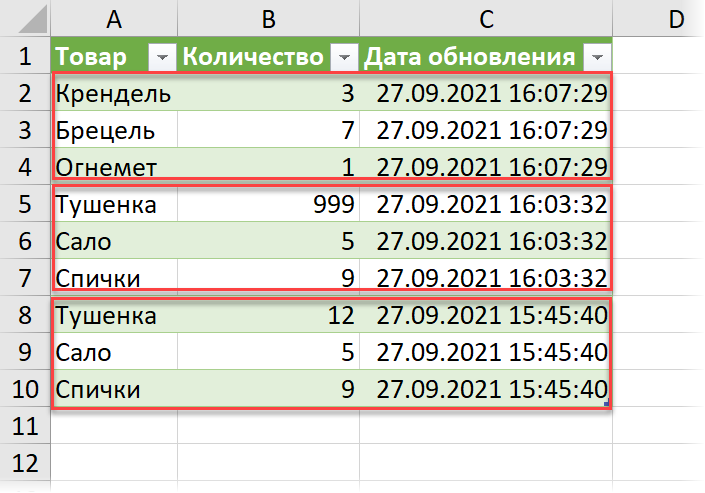
It remains to return to Excel through Home — Close and download (Home — Close&Load) and try a couple of times to update our entire structure with the button Update All tab Data (Data — Refresh All). With each update, the new data will not replace the old data, but will push it below, keeping the entire update history:
A similar trick can be used when importing from any external sources (Internet sites, databases, external files, etc.) to keep the old values for history if you need it.
- Pivot table across multiple data ranges
- Assembling tables from different files using Power Query
- Collecting data from all sheets of the book into one table


