


In this tutorial, we will look at three very useful Microsoft Excel tools: printing headers, working with headers and footers, and inserting page breaks. All these tools are sure to come in handy when preparing an Excel document for printing or exporting to PDF.
Print Headings in Excel
If your table has headings, especially when the table is large enough, it is very important that these headings appear on every page when printed. Reading a printed Excel workbook will be very inconvenient if the headings are only on the first page. Team print headers allows you to select specific rows or columns and print them on each sheet.
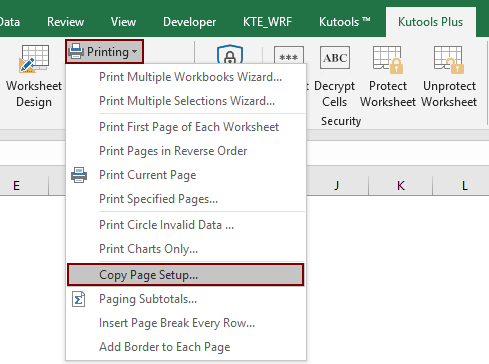
- Click the Page layout and select the command print headers.
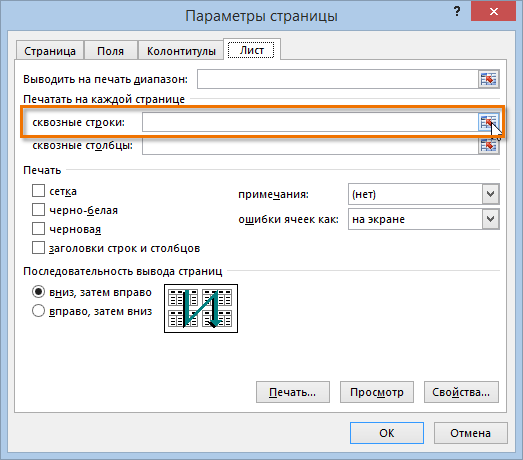
- In the dialog box that appears Page settings You can select the rows or columns to be printed on each sheet. In our example, we will select the first row.
- Нажмите кнопку Collapse Dialog, which is located to the right of the field through lines.

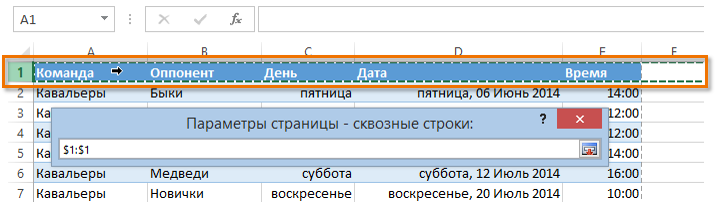
- The cursor will turn into a small black arrow and the dialog box Page settings curl up. Highlight the line you want to print on each sheet. In our example, we have selected row 1.
- Row 1 will appear in the field through lines… Click the button Collapse Dialog again.
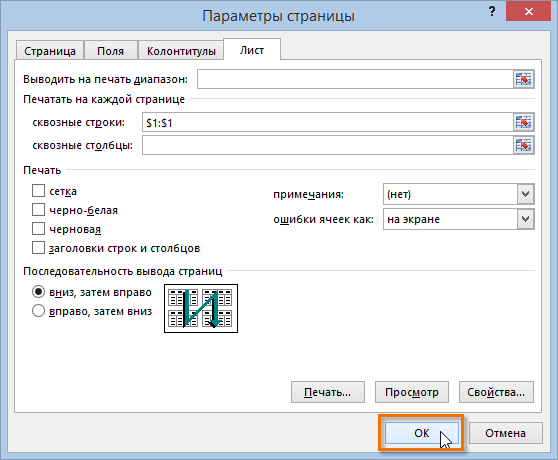
- In the popup dialog box Page settings click OK. Line 1 will be added on every printed sheet.

Insert page breaks in Excel
If you want to print certain sections of the workbook on separate sheets, you must insert page breaks. There are two types of page breaks in Excel: vertical and horizontal. Vertical breaks are divided by columns, and horizontal breaks by rows. In our example, we will insert a horizontal page break.
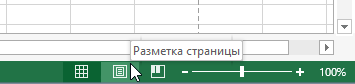
- Switch to page view of the book. To do this, find and select the command in the lower right corner of the book Page.
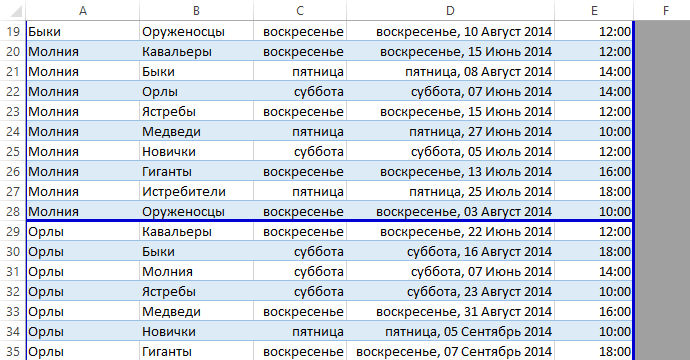
- Next, select the line above which you want to insert a break. For example, if you want to insert a break between lines 28 and 29, select line 29.
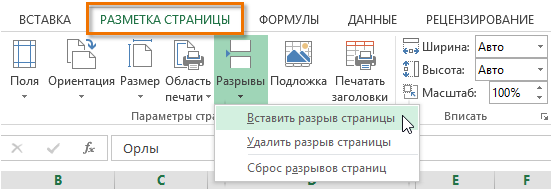
- Click the Page layout and from the command drop down menu Breaks click Insert page break.
- A page break will appear, marked with a dark blue line.

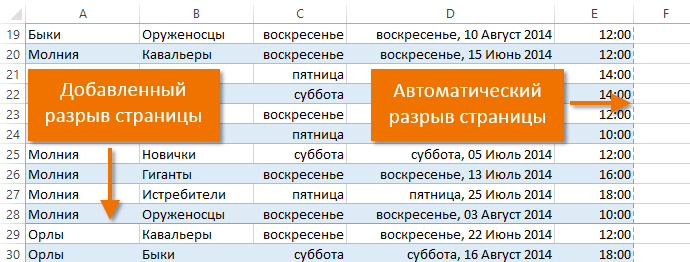
When viewing a book in normal mode, inserted breaks are represented by a solid gray line, while automatic breaks are indicated by a dotted line.
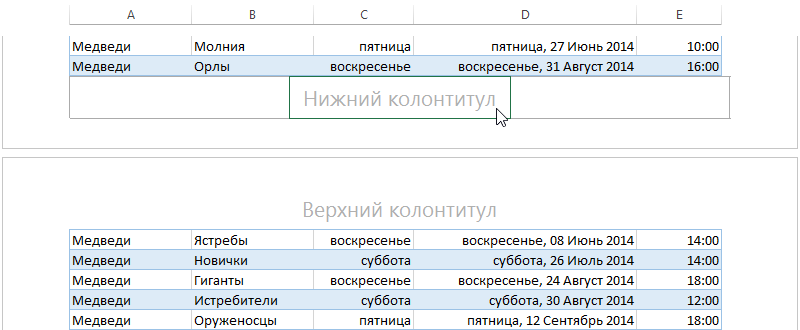
You can make your book more interesting and professional by inserting headers and footers into it. The header is located at the top of the page, and the footer is at the bottom of the page. Headers and footers contain information such as page number, date, book title, or section titles.
- Switch to mode Page layoutby clicking the command at the bottom of the Excel window. The sheet opens in page layout view.
- Select the header or footer you want to change. In our example, we will change the footer.
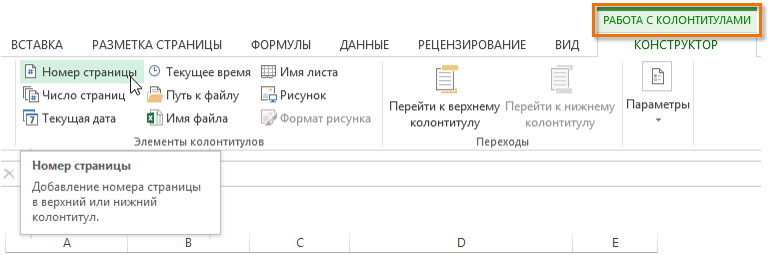
- A tab will appear on the Ribbon Constructor. From there, you can access Excel commands that allow you to automatically insert header and footer elements such as page numbers, date, or workbook title. In our example, we will add page numbers.
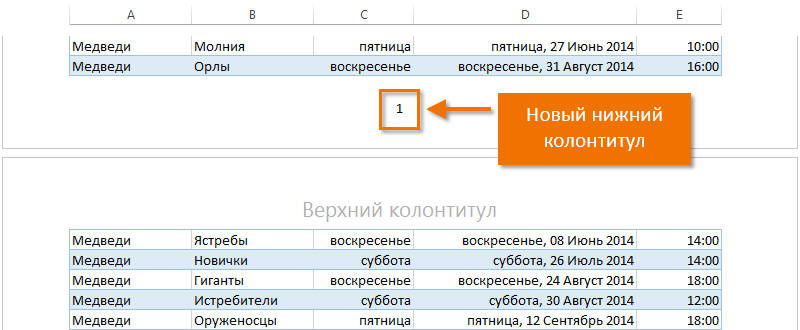
- The numbers will be added to the footer.
Excel uses the same header and footer tools as Microsoft Word. See the Word 2013 headers and footers and page numbers guide for more information.