


Contents
Often, users of a spreadsheet editor face such a task as creating a special form for entering the necessary information. Forms are a form that helps to facilitate the procedure for filling out a spreadsheet document. The editor has an integrated tool that allows you to fill the worksheet in this way. In addition, the user of the program, using a macro, can create his own version of the form, adapted to various tasks. In the article, we will consider in detail the various methods that allow you to create a form in a spreadsheet document.
Using the fill tools in the spreadsheet editor
The filling form is a special element with fields whose names correspond to the names of the columns of the plate being filled. It is necessary to drive in information into the fields, which will immediately be inserted as a new line in the selected area. This special shape can be used as a stand-alone integrated spreadsheet tool or can be found on the worksheet itself as a range. Let’s analyze each variation in more detail.
First method: integrated element for entering information
Let’s first figure out how to use an integrated form to add information to an editor’s spreadsheet document. Detailed instructions look like this:
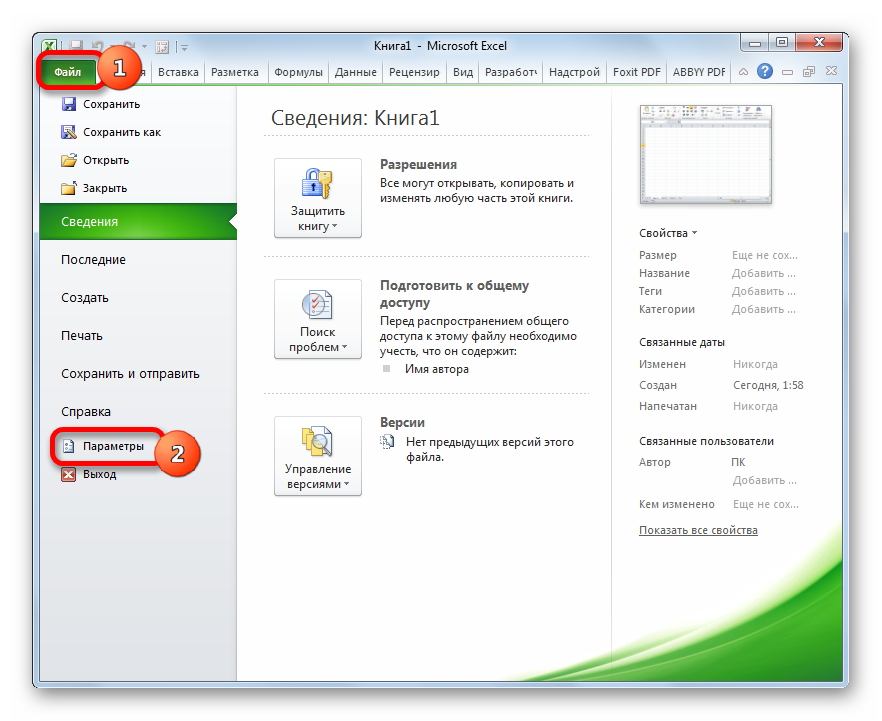
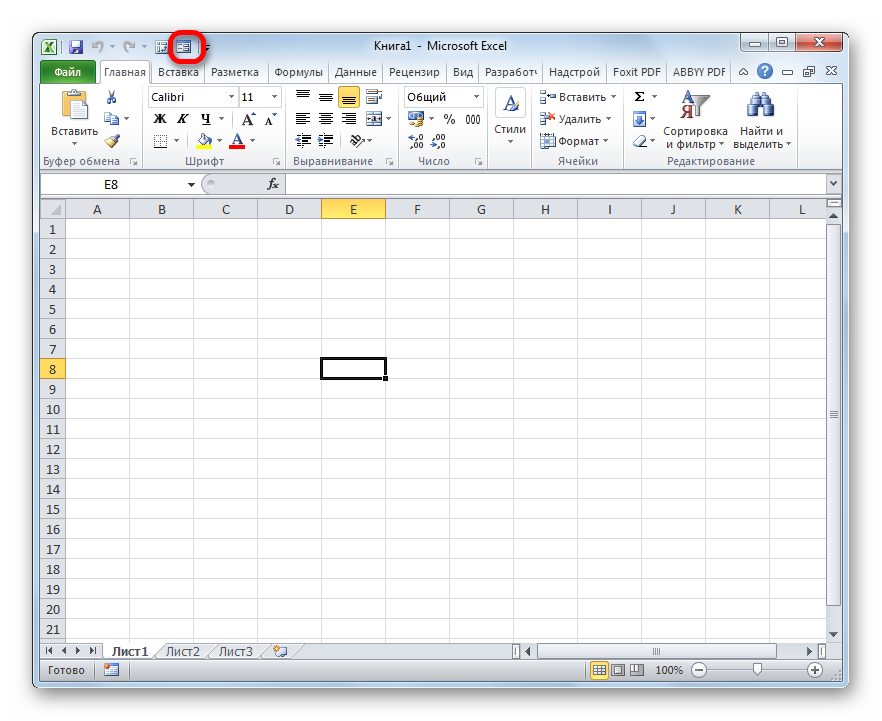
- Note that initially, the icon that includes this form is hidden. We need to perform the activation procedure for the tool. We move to the “File” submenu, located in the upper left part of the spreadsheet editor interface. We find here an element that has the name “Parameters”, and click on it with the left mouse button.
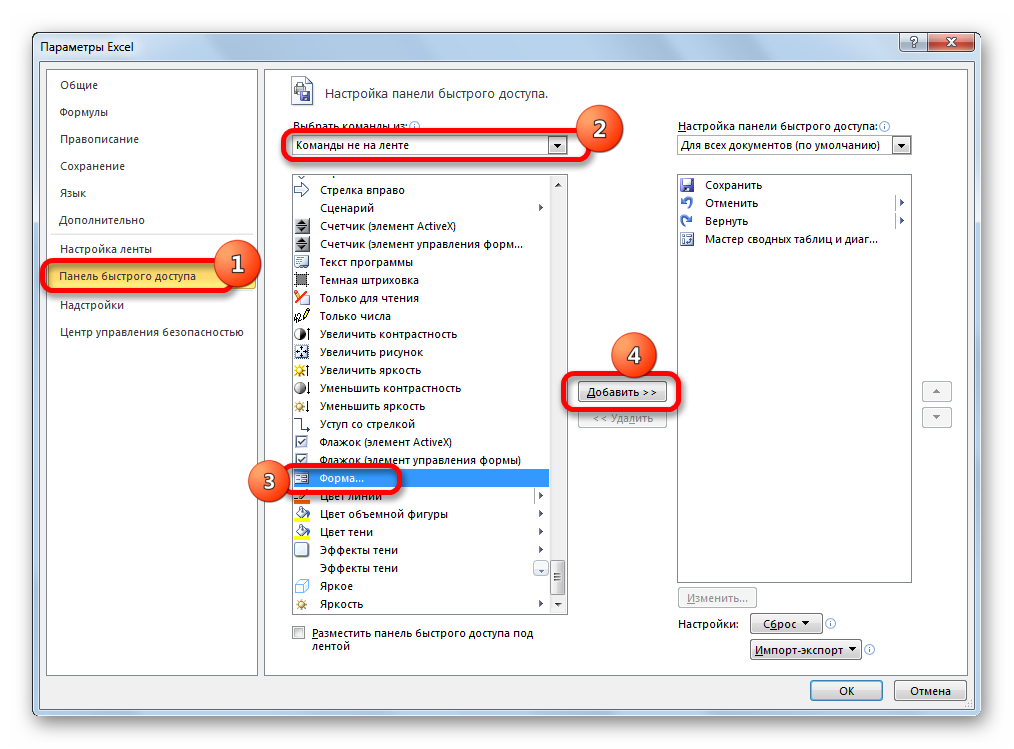
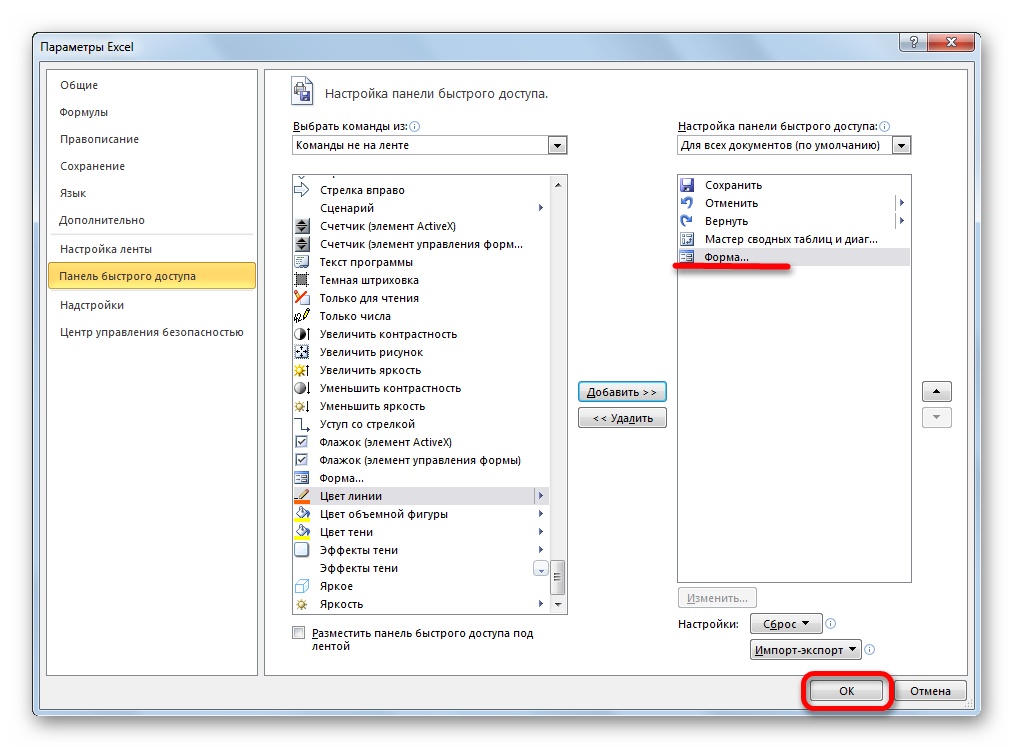
- A window called “Excel Options” appeared on the display. We move to the subsection “Quick Access Panel”. There are a wide variety of settings here. On the left side are special tools that can be activated in the toolbar, and on the right side are already included tools. Expand the list next to the inscription “Select commands from:” and select the element “Commands on the ribbon” with the left mouse button. In the list of commands displayed in alphabetical order, we are looking for the item “Form …” and select it. Click “Add”.
- We click on the “OK” button.
- We have activated this tool on a special ribbon.
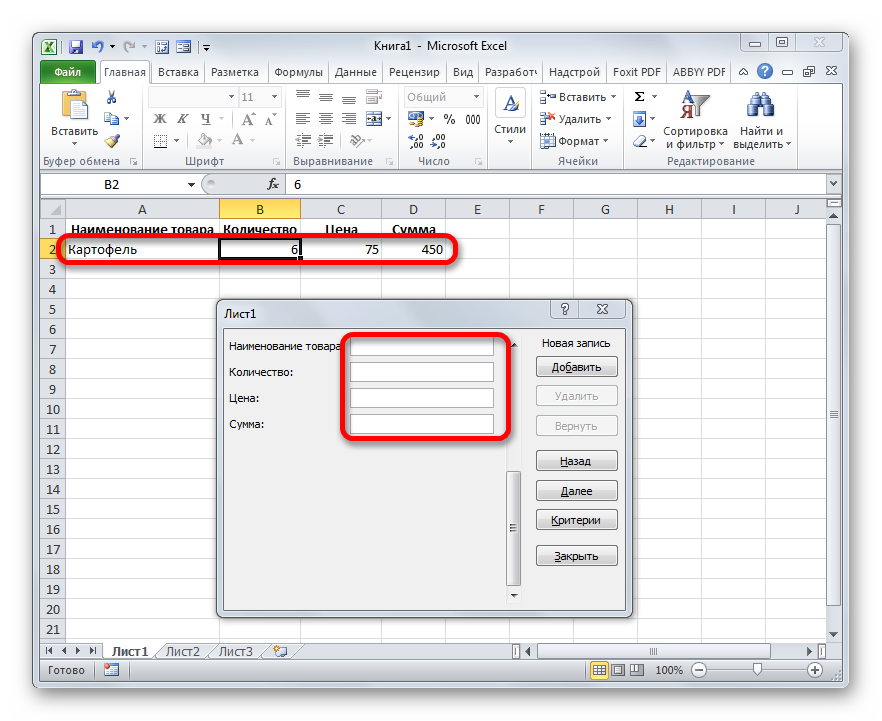
- Now we need to start designing the header of the plate, and then enter some indicators into it. Our table will consist of 4 columns. We drive in the names.
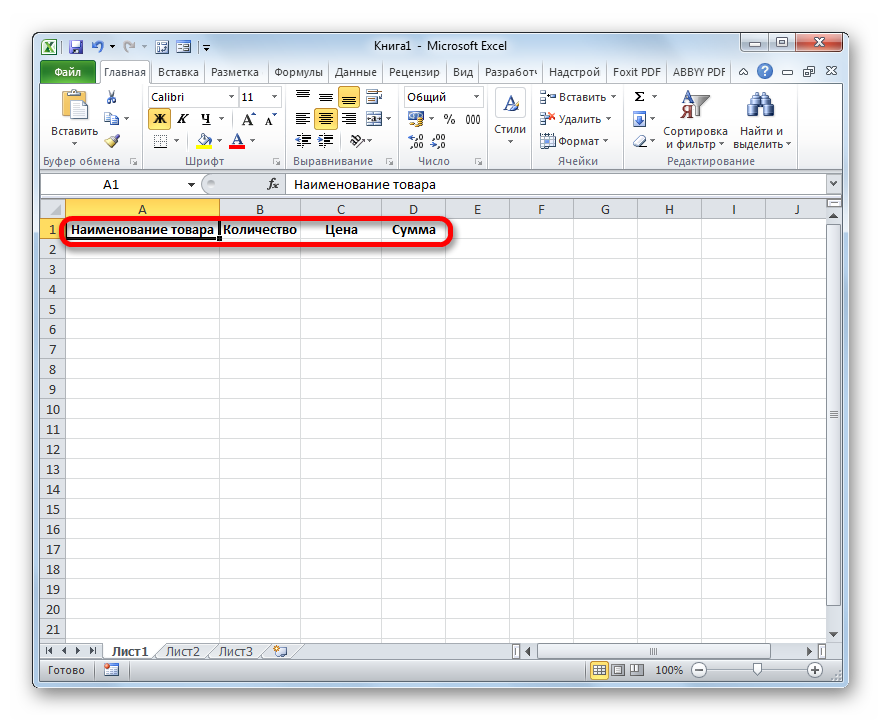
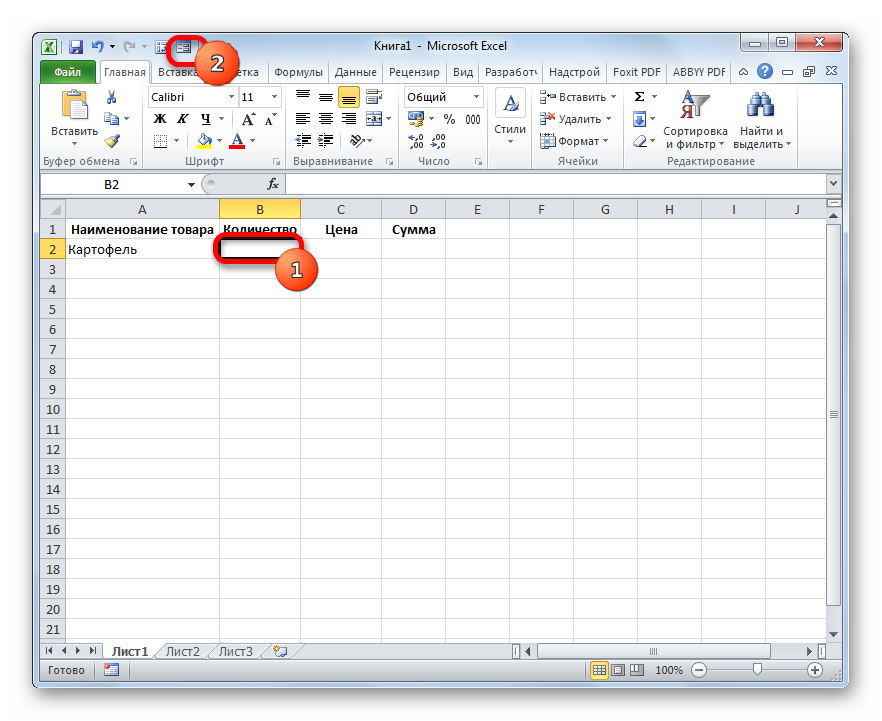
- We also drive in some value into the very 1st line of our plate.

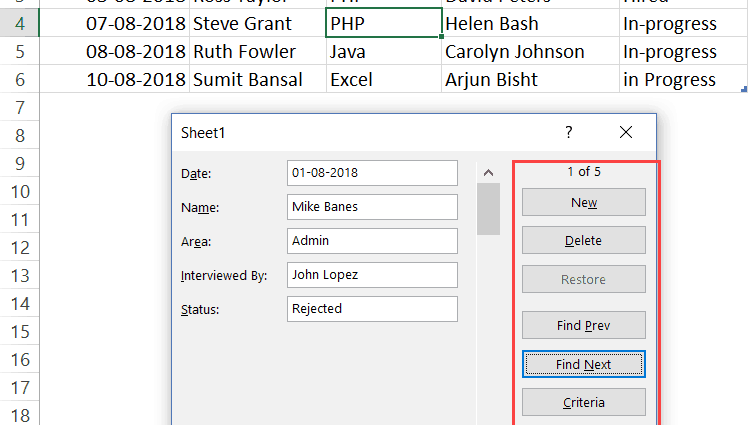
- We select any field of the prepared plate and click on the “Form …” element located on the tool ribbon.
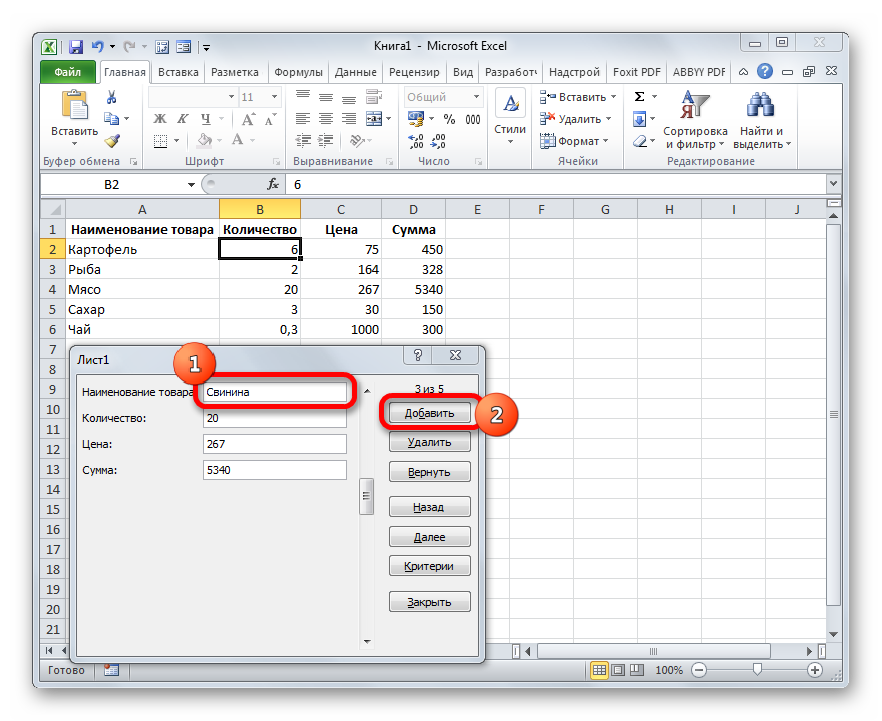
- The tool settings window opens. Here are the lines corresponding to the names of the columns of the plate.
It is worth noting that the first line is already filled with data, since we previously entered them on the worksheet ourselves.
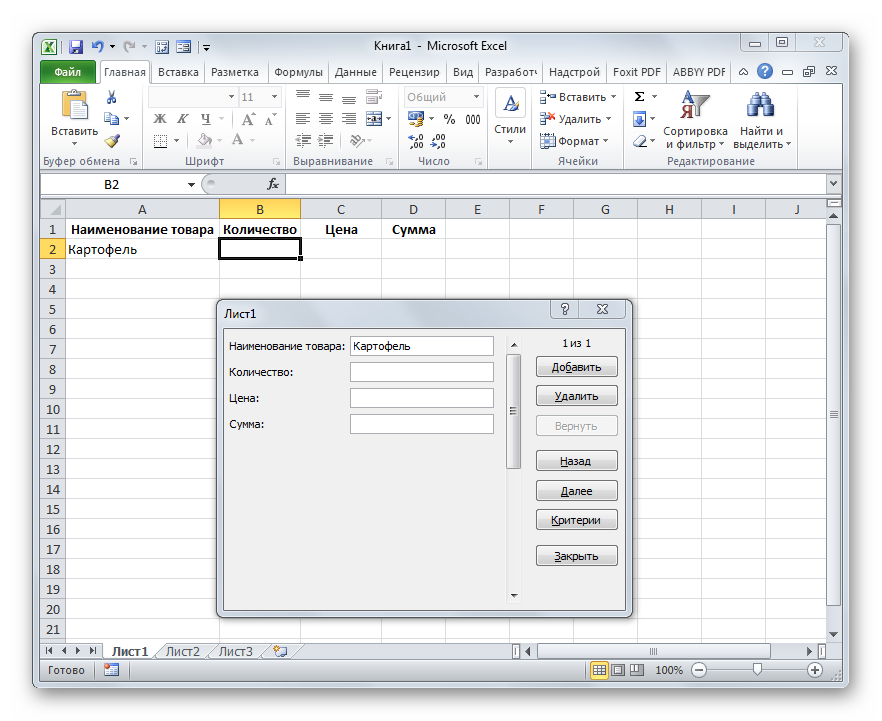
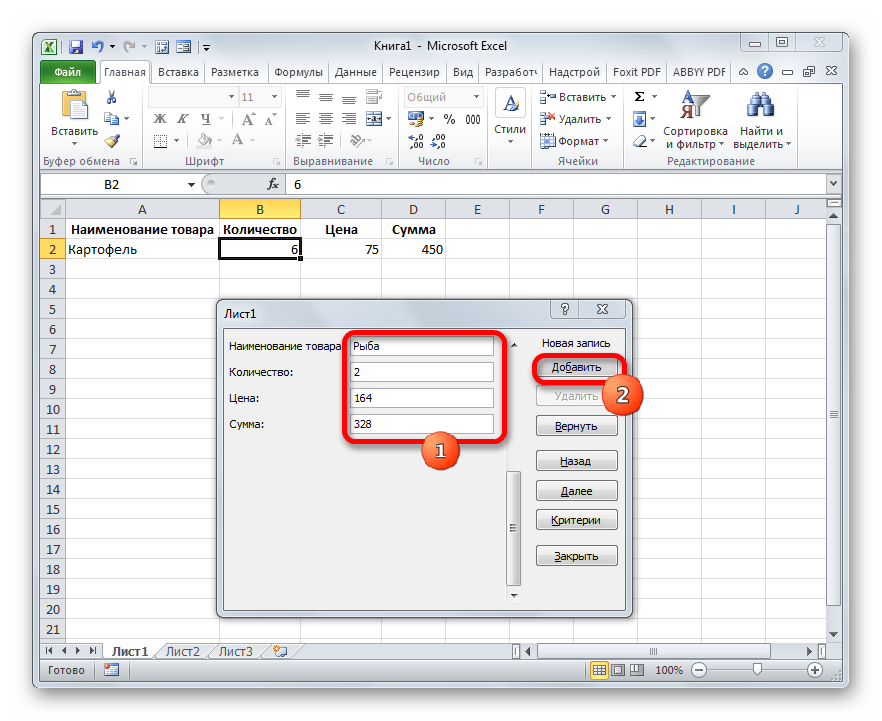
- We drive in the indicators that we consider necessary in the remaining lines. Click on the “Add” button.

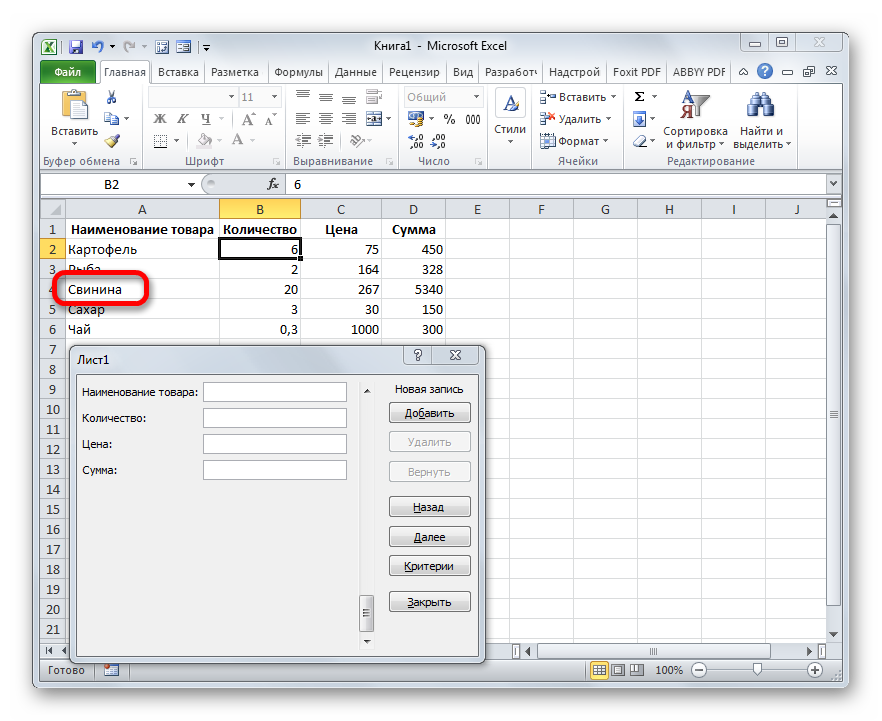
- The entered indicators were automatically transferred to the 1st line of the table, and in the form itself, a transition was made to another block of fields corresponding to the 2nd line of the table.
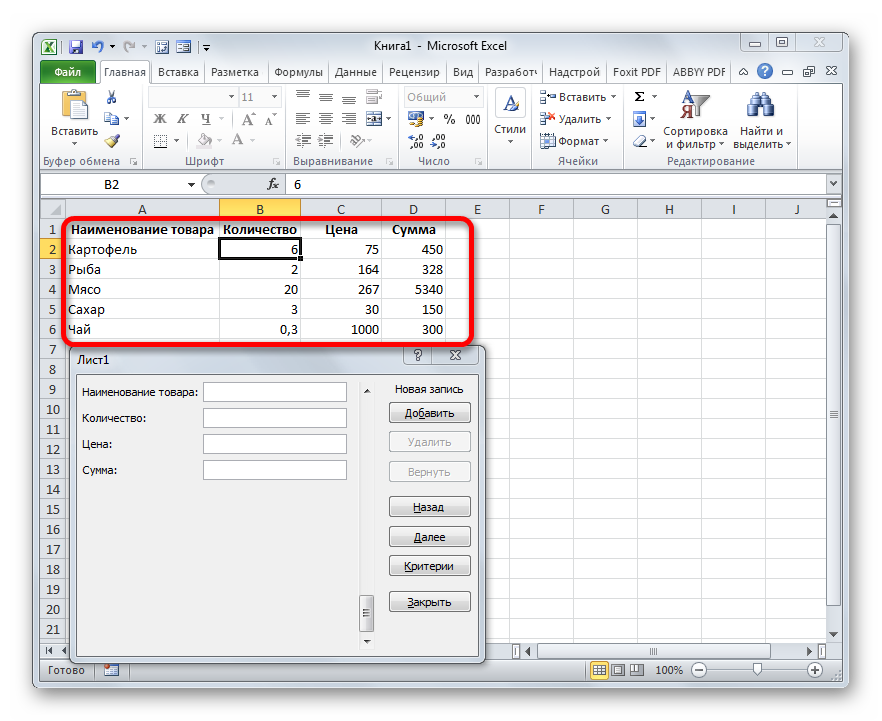
- We fill the tool window with the indicators that we want to see in the 2nd line of the plate. We click “Add”.
- The entered indicators were automatically transferred to the 2nd line of the plate, and in the form itself, a transition was made to another block of fields corresponding to the 3rd line of the plate.

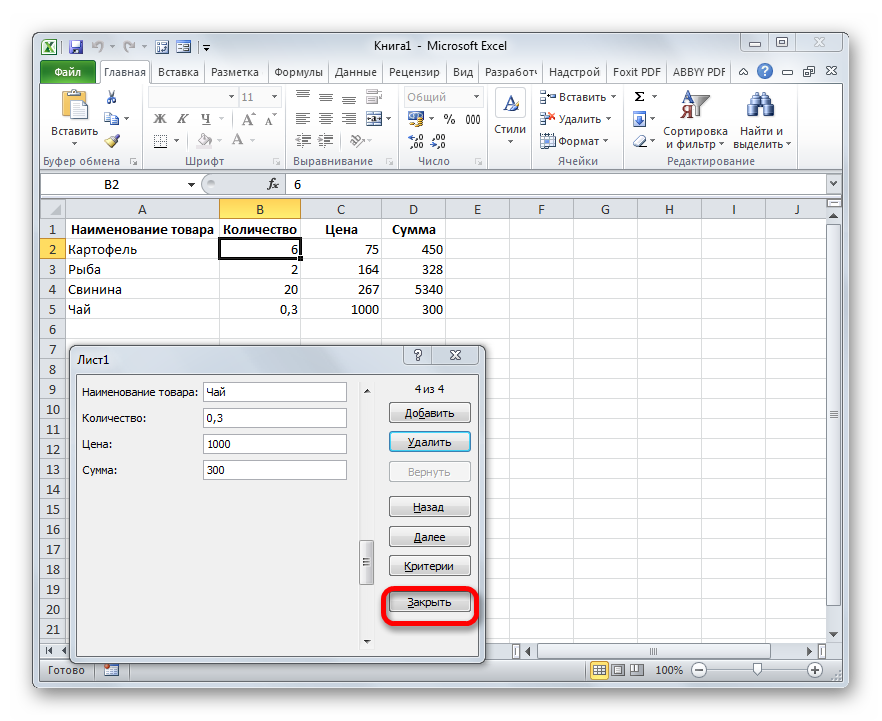
- By a similar method, we fill in the plate with all the necessary indicators.
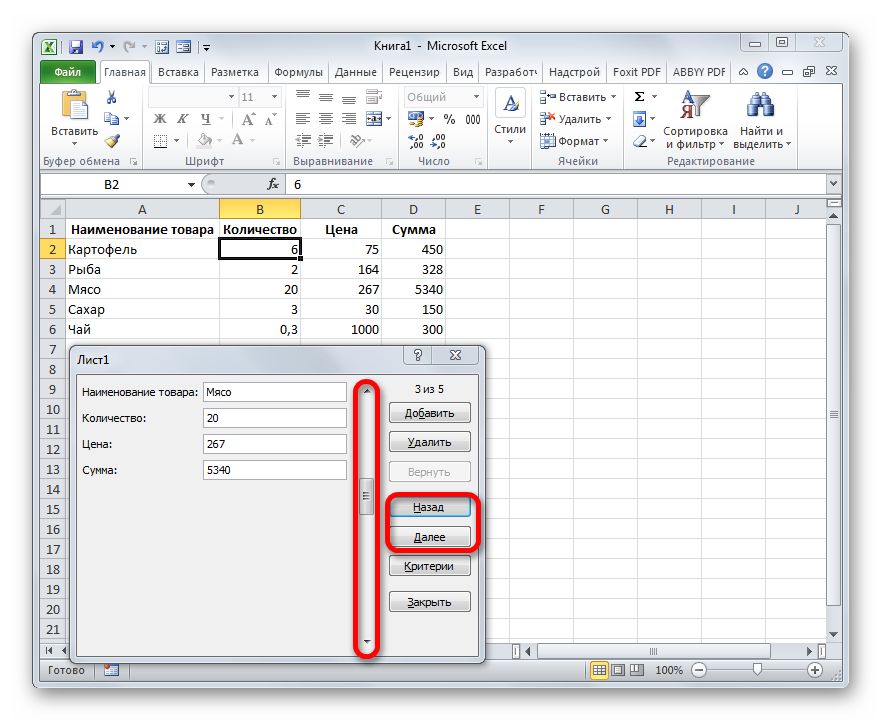
- Using the “Next” and “Back” buttons, you can navigate through previously entered indicators. The alternative is the scroll bar.
- If desired, you can edit any indicators in the table by adjusting them in the form itself. To save your changes, click on “Add”.
- We notice that all the edited values were displayed in the plate itself.
- Using the “Delete” button, you can implement the removal of a specific line.
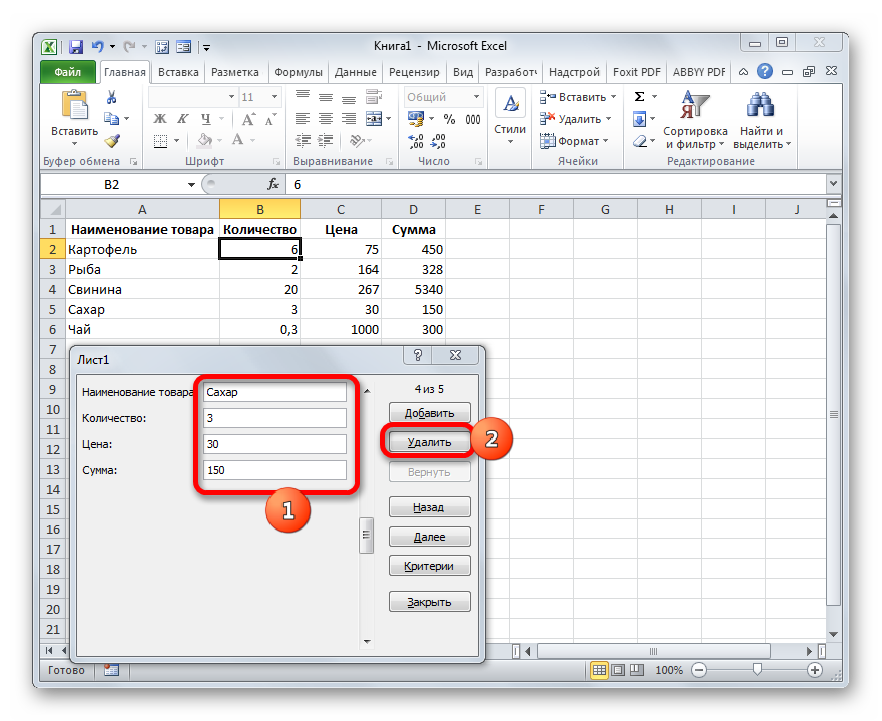
- After clicking, a special warning window will appear, which indicates that the selected line will be deleted. You must click “OK”.
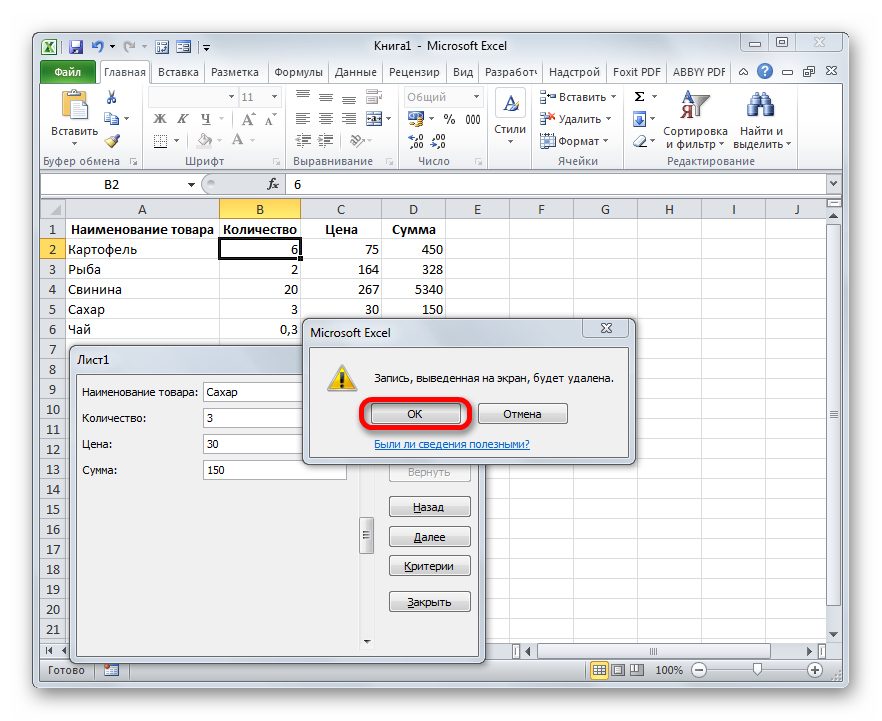
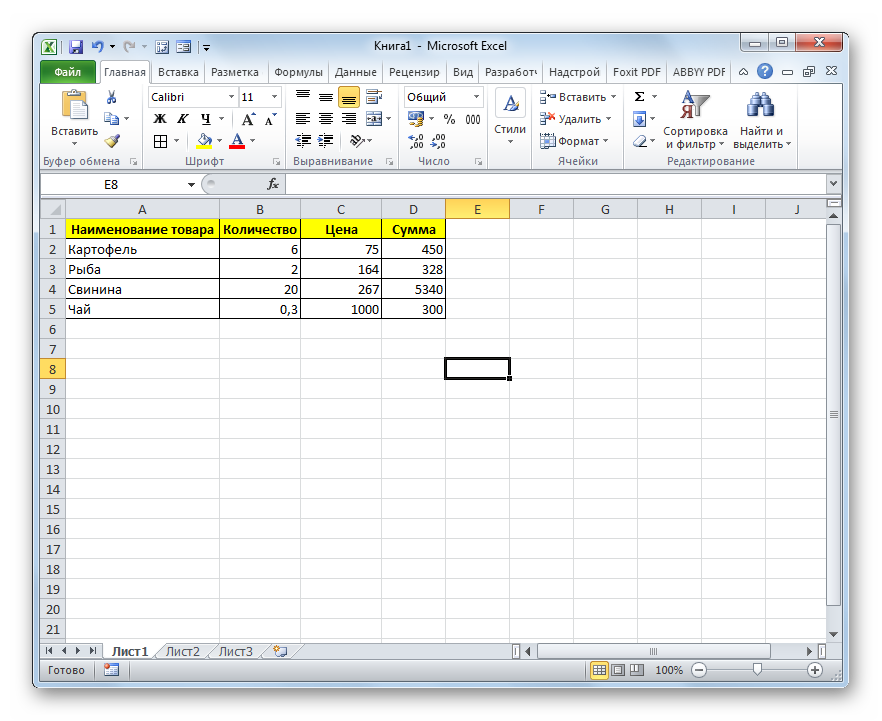
- The line has been removed from the table. After all the procedures carried out, click on the “Close” element.
- Additionally, you can format it so that the plate acquires a beautiful appearance.
The second method: filling in the forms with information from the tablet
For example, we have a plate that contains information on payments.
Purpose: to fill in the form with these data so that it can be conveniently and correctly printed. Detailed instructions look like this:
- On a separate worksheet of the document, we create an empty form.
It is worth noting that the appearance of the form itself can be created independently or you can download ready-made forms from various sources.
- Before you take the information from the plate, you need to change it a little. We need to add an empty column to the left of the original table. Here a mark will be placed next to the line that we plan to add to the form itself.
- Now we need to implement the binding of the plate and the form. To do this, we need the VLOOKUP operator. We use this formula: =VLOOKUP(“x”,Data!A2:G16).

- If you put a mark next to several lines, then the VLOOKUP operator will take only the 1st indicator found. To solve this problem, you need to right-click on the icon of the sheet with the source plate and click on the “Source text” element. In the window that appears, enter the following code:
Private Sub Worksheet_Change (ByVal Target As Range)
Dim r As Long
Dim str As String
If Target.Count > 1 Then Exit Sub
If Target.Column = 1 Then
str = Target.Value
Application.EnableEvents = False
r = Cells(Rows.Count, 2).End(xlUp).Row
Range(«A2:A» & r).ClearContents
Target.Value = str
End If
Application.EnableEvents = True
End Sub
- This macro does not allow you to enter more than one label in the first column.
Conclusion and conclusions about the creation of the form.
We found out that there are several types of creating a form in a spreadsheet editor. You can use special forms located on the tool tape, or you can use the VLOOKUP operator to transfer information from the plate to the form. Additionally, special macros are used.