


When you add pictures to Microsoft Office documents, you may need to crop them to remove unwanted areas or highlight a certain part of the picture. Today we will figure out how pictures are cropped in Office 2010.
Note: We will show the solution using Microsoft Word as an example, but you can crop pictures in Excel and PowerPoint in the same way.
To insert a picture into an Office document, click the command Picture (Pictures) tab Insertion (Insert).
Tab Picture Tools/Format (Picture Tools/Format) should become active. If not, click on the picture.
New in Microsoft Office 2010 is the ability to see which part of the photo you are keeping and which will be cropped. On the tab Size (Format) click Crop Top (Crop).
Drag the mouse inside the picture of any of the four corners of the frame to crop one of the sides. Note that you still see the area of the drawing that will be cut off. It is tinted with a translucent grey.
Drag the corners of the frame with the key pressed Ctrlto crop symmetrically on all four sides.
To crop symmetrically at the top and bottom, or the right and left edges of the pattern, hold down dragging Ctrl for the middle of the frame.
You can further align the crop area by clicking and dragging the picture below the area.
To accept the current settings and crop the picture, click Esc or click anywhere outside the picture.
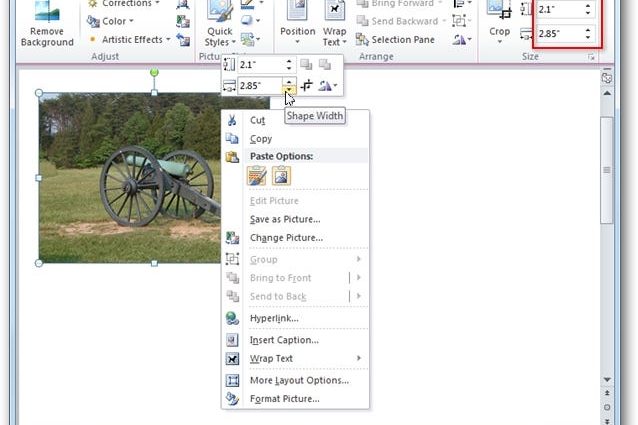
You can manually crop the image to the required size. To do this, right-click on the picture and enter the desired dimensions in the fields Width (Width) and Height (Height). The same can be done in the section Size (Size) tab Size (Format).
Cut to shape
Select an image and click the command Crop Top (Trimming) in the section Size (Size) tab Size (Format). From the options that appear, select Crop to Shape (Crop to Shape) and select one of the suggested shapes.
Your picture will be cropped to the shape of the selected shape.
Tools Fit (Insert) and Fill (Fill)
If you need to crop the photo and fill the desired area, use the tool Fill (Fill). When you select this tool, some of the edges of the picture will be hidden, but the aspect ratio will remain.
If you want the picture to fit completely in the shape selected for it, use the tool Fit (Enter). The size of the picture will change, but the proportions will be preserved.
Conclusion
Users who migrate to Office 2010 from previous versions of Microsoft Office will certainly enjoy the improved tools for cropping pictures, especially the ability to see how much of the picture will remain and what will be cropped.