


Contents
Adding new columns to a table is an important skill that every Excel spreadsheet user should have. Without this skill, it is impossible to work effectively with tabular data. In this article, we will look at many useful ways to create additional columns on the worksheet of a document.
Adding a new column
There are several options for adding a new column to a worksheet. Each of the methods below is very easy to perform, so even a beginner can handle them. Let’s consider each method in more detail.
Method 1. Inserting a column through the coordinate bar
This method is the easiest and most convenient to use. It implements the addition of a new column or an additional row to the tabular data. The walkthrough looks like this:
- We find the coordinate panel of the horizontal type and click on the name of the column from which we want to add a new column. After carrying out this procedure, the entire column will be highlighted on the worksheet.
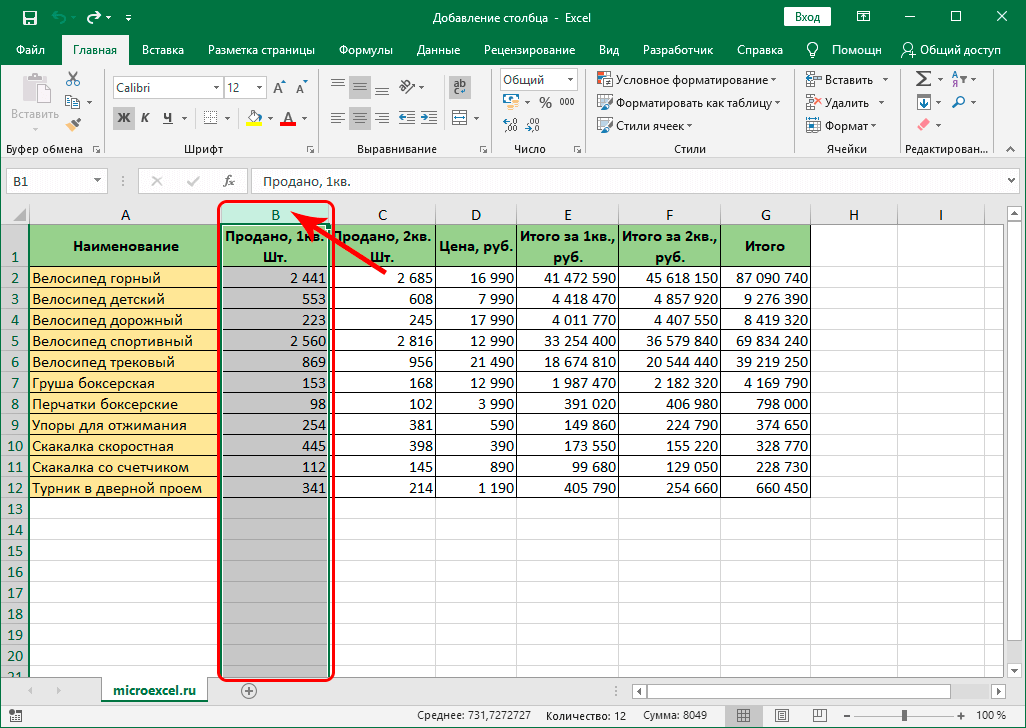
- We click RMB on any area of the selected fragment. A small context menu was displayed on the screen. We find an element called “Insert” and click on it with the left mouse button.
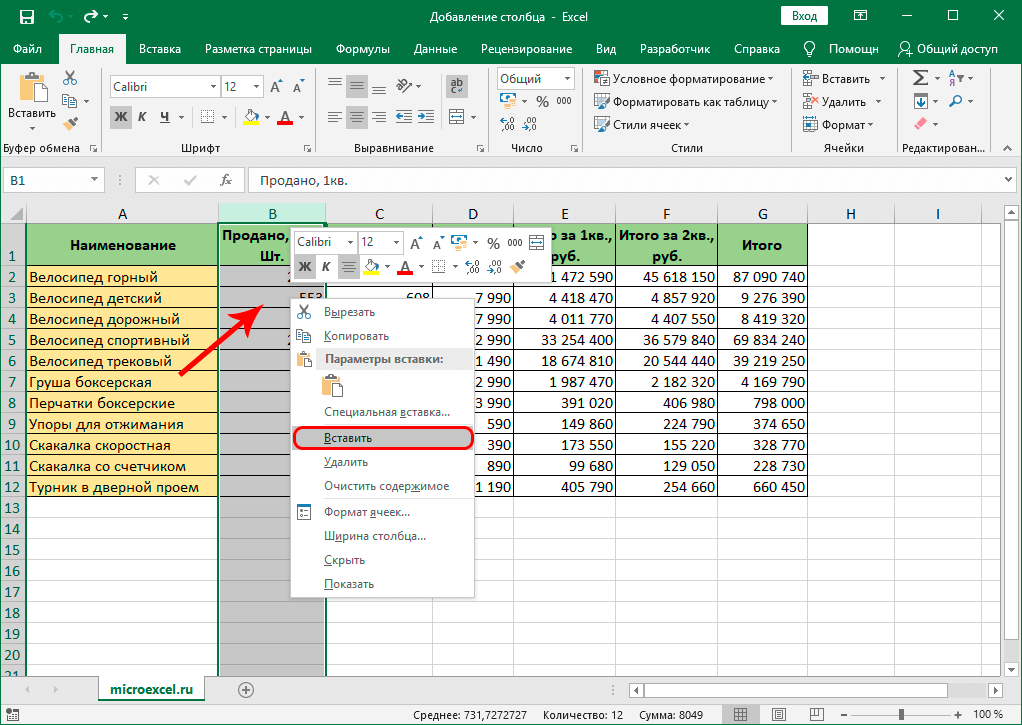
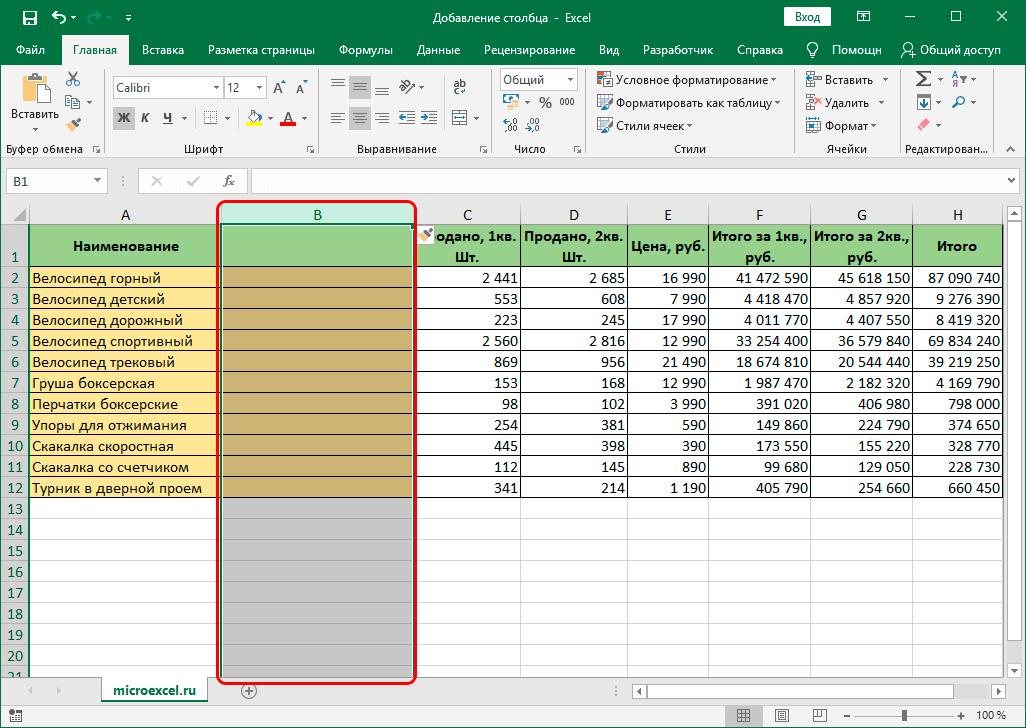
- Ready! We implemented the addition of a new empty column to the left of the column that was originally selected.
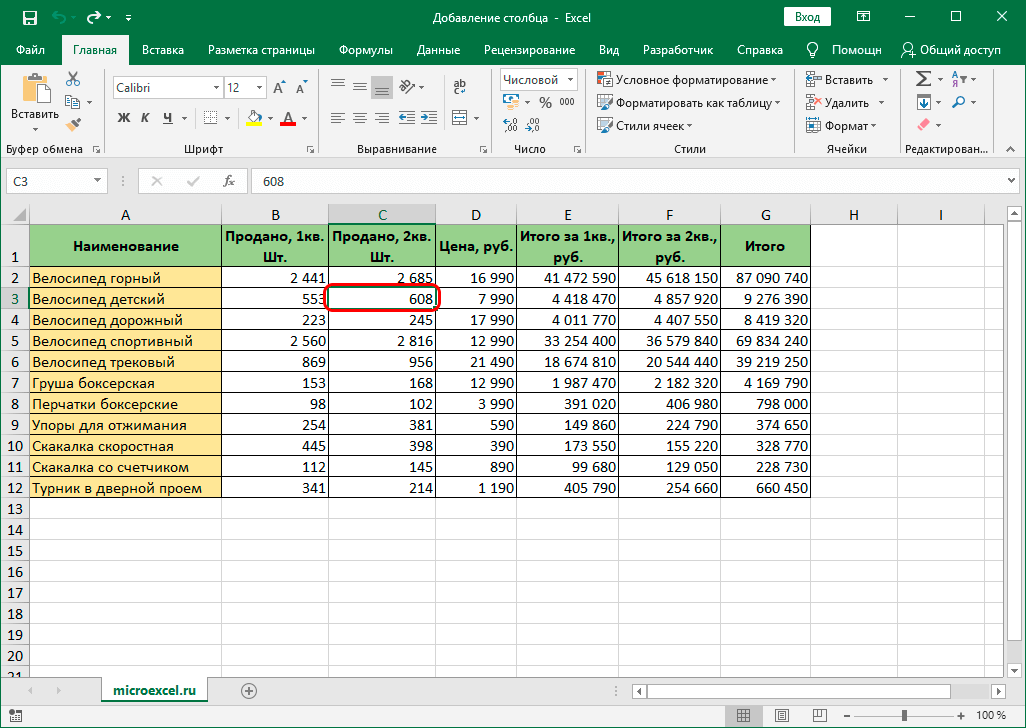
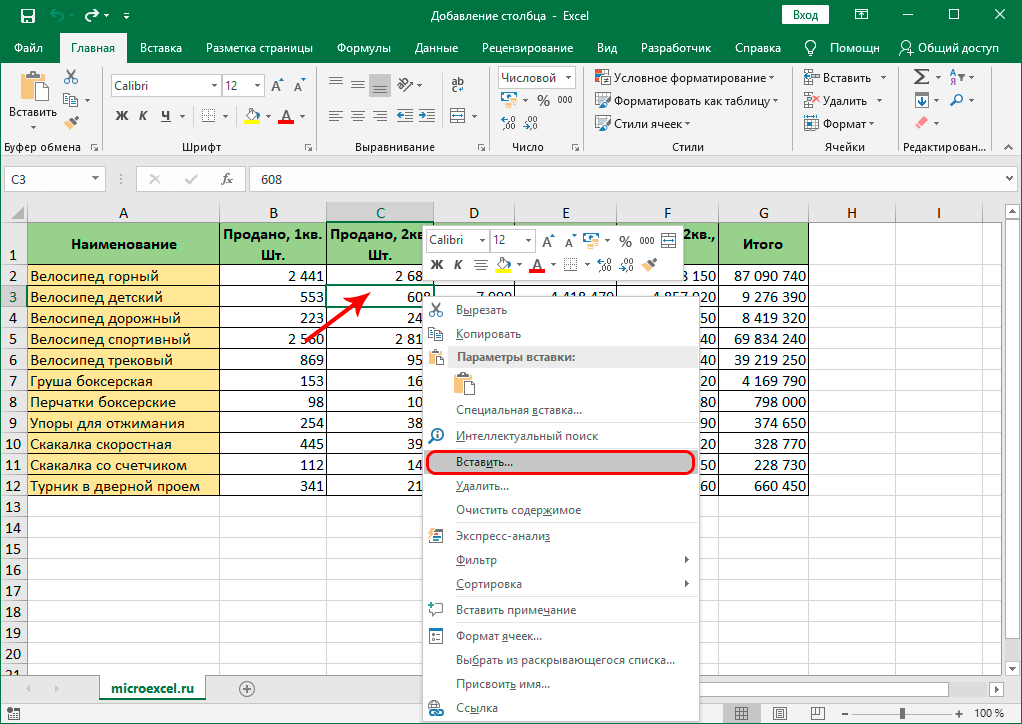
Method 2: Adding a Column Using the Cell’s Context Menu
This method, like the previous one, involves using the context menu, but not the entire column is selected here, but only one cell. The walkthrough looks like this:
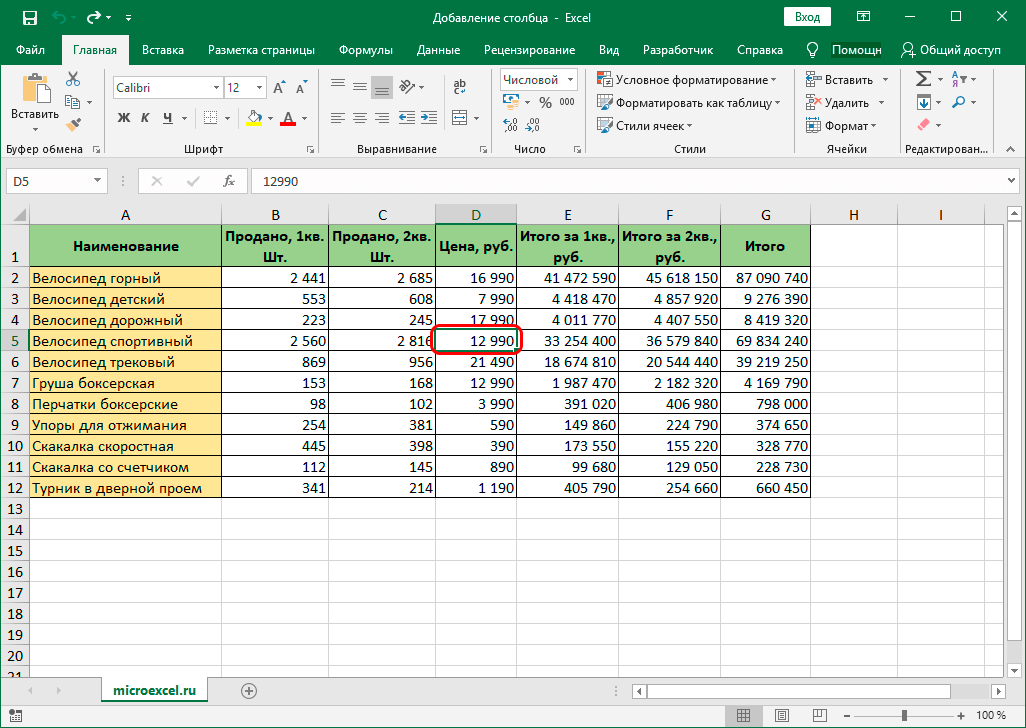
- Select the cell to the left of which we plan to create an additional column. The selection is made using the left mouse button or the arrows on the keyboard.
- Right click on the selected cell. The familiar context menu was displayed on the screen. We find the element “Insert …” and click on it with the left mouse button.
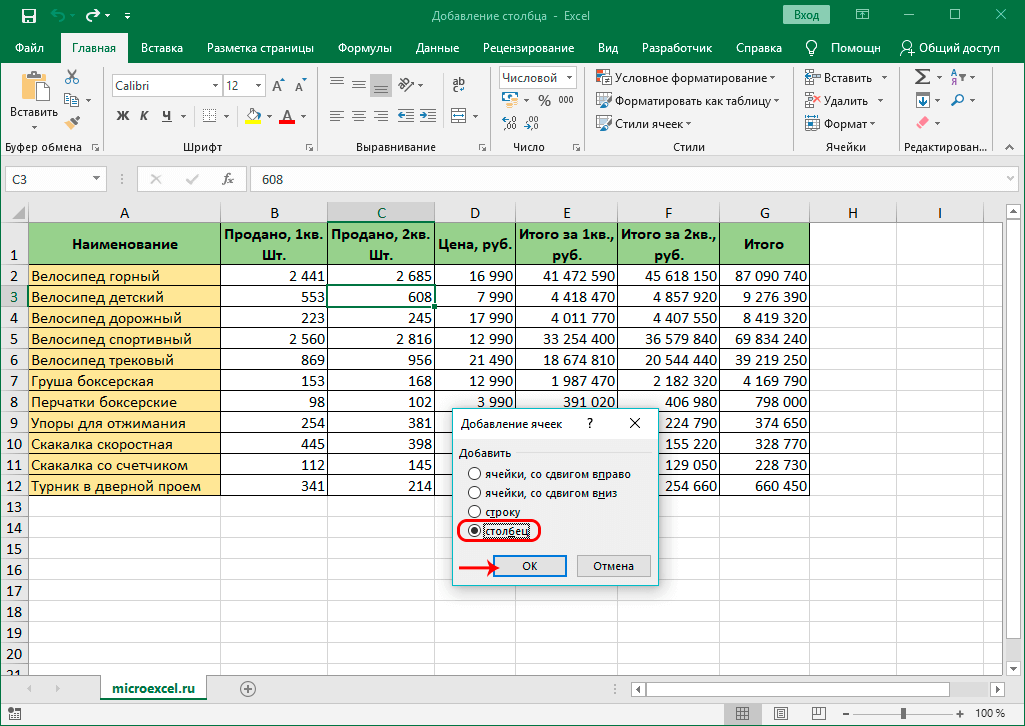
- A small window appeared on the display, in which you must specify which element will be added to the plate. There are three types of element: cell, row and column. We put a mark near the inscription “Column”. After carrying out all the manipulations, click the “OK” button, located at the bottom of the window.
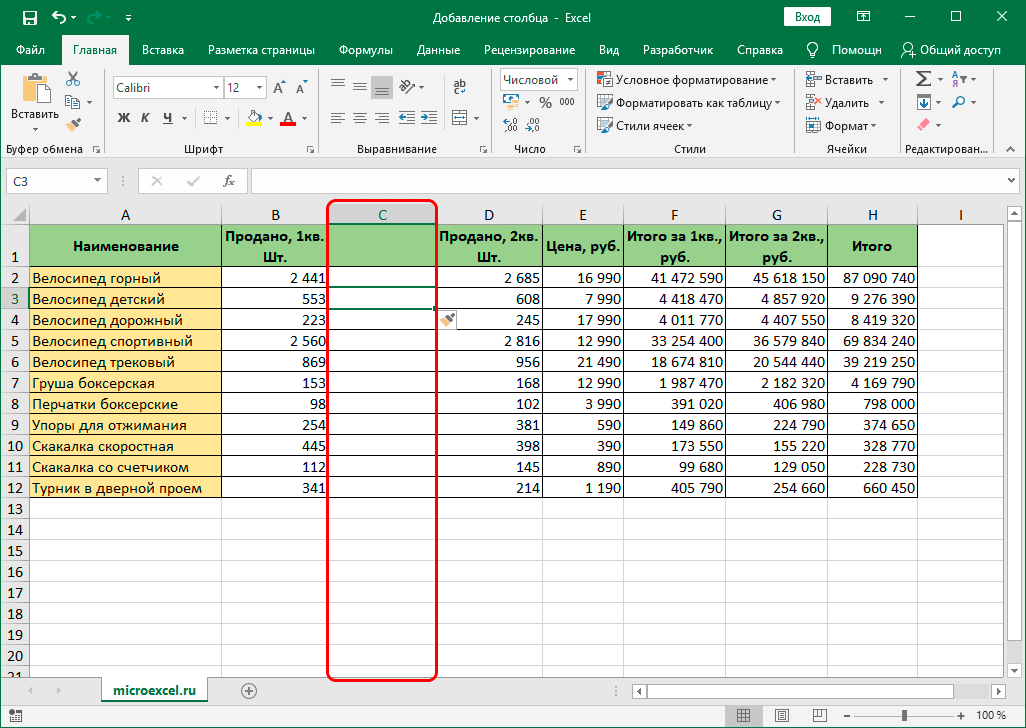
- Ready! We implemented the addition of a new empty column to the left of the column that was originally selected.
Method 3: Paste using the tools on the ribbon
On the ribbon, located at the top of the Excel spreadsheet interface, there is a special element that allows you to insert a new column into the table. The step-by-step tutorial looks like this:
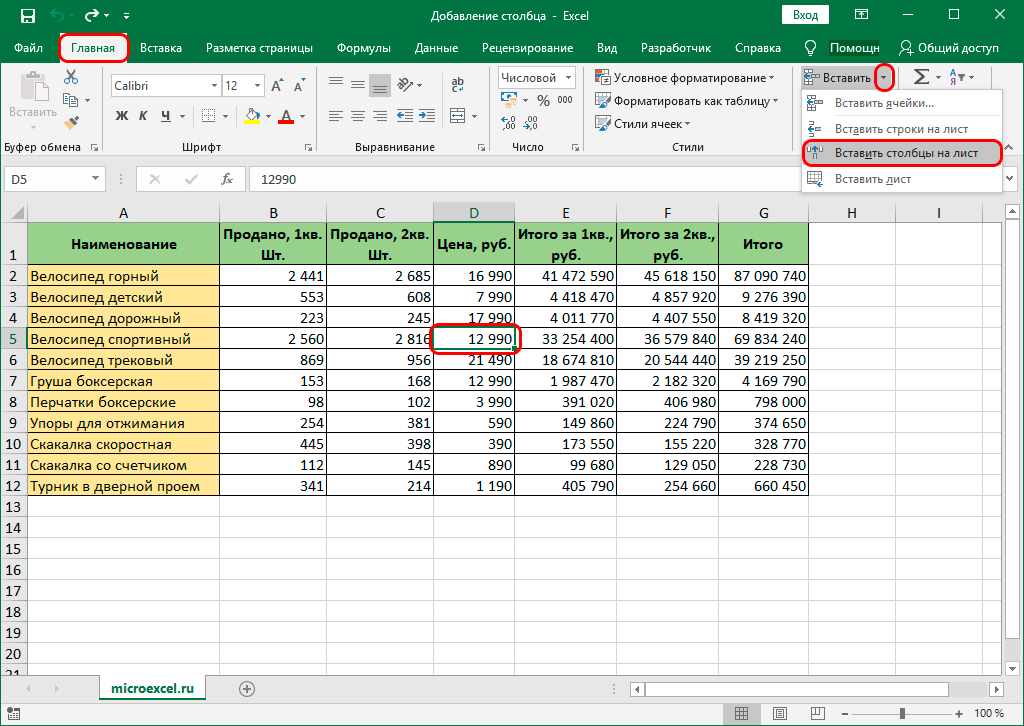
- Select the cell to the left of which we plan to create an additional column. The selection is made using the left mouse button or the arrows on the keyboard.
- We move to the “Home” section, which is located at the top of the spreadsheet interface. Expand the list of the “Insert” element. In the list that opens, find the button “Insert columns on the sheet” and click on it.
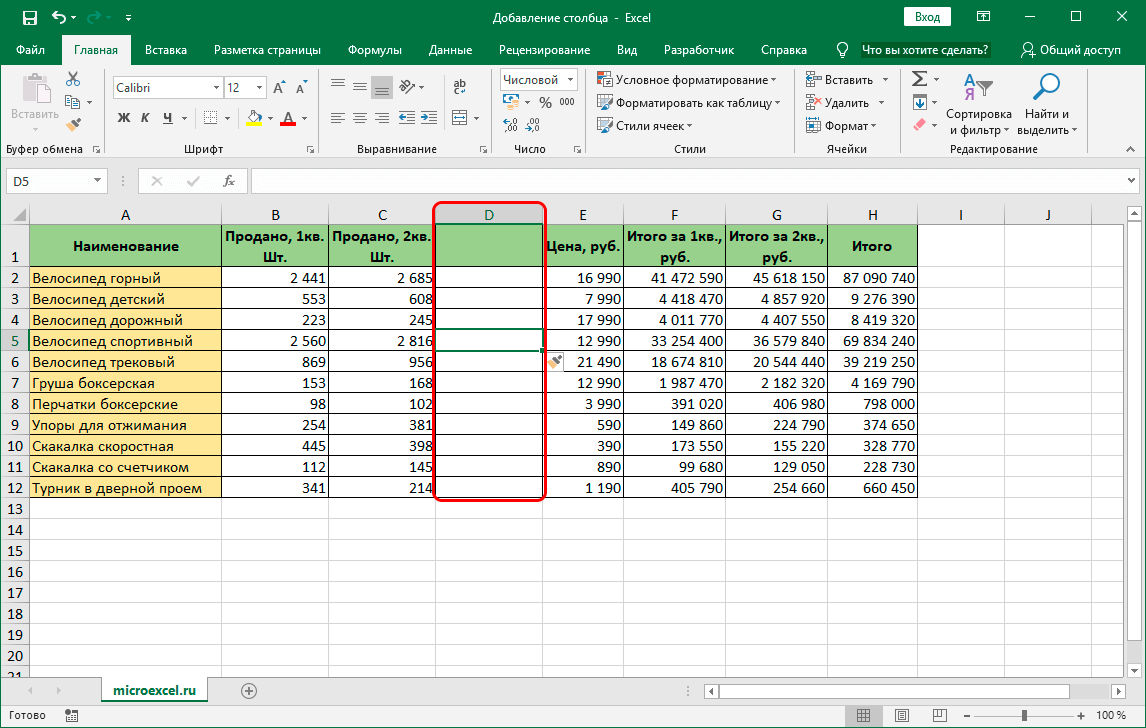
- Ready! We implemented adding a new empty column to the left of the column that was originally selected
Method 4. Hotkeys for inserting a new column
Using hotkeys is another method that is very popular among experienced Excel spreadsheet users. There are two variations of this method. The walkthrough for the first method is as follows:
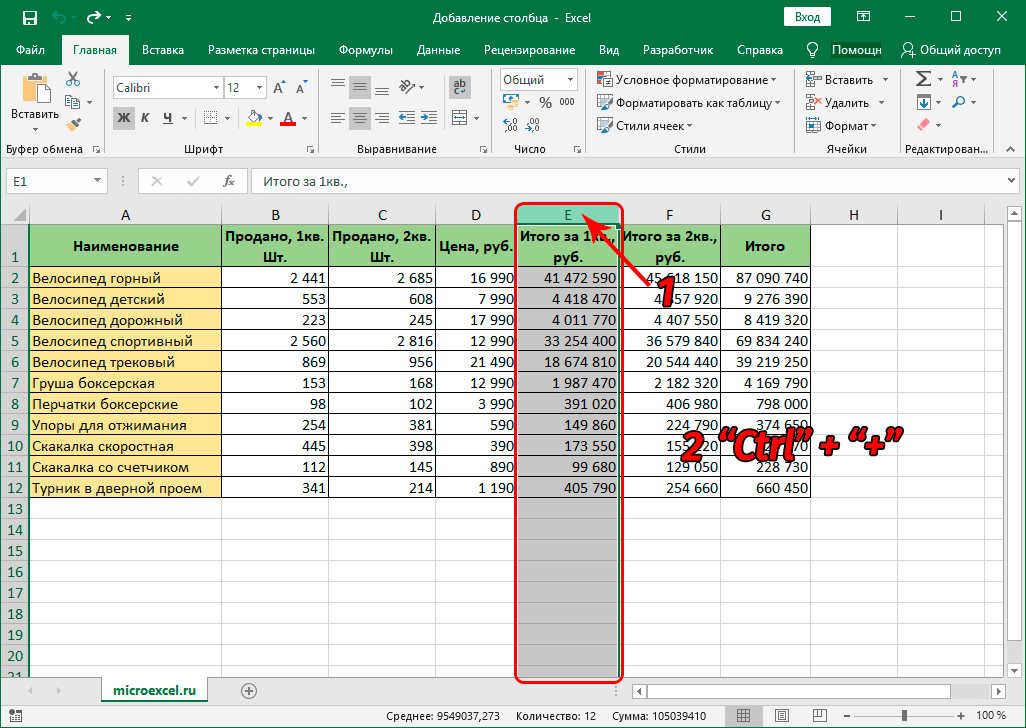
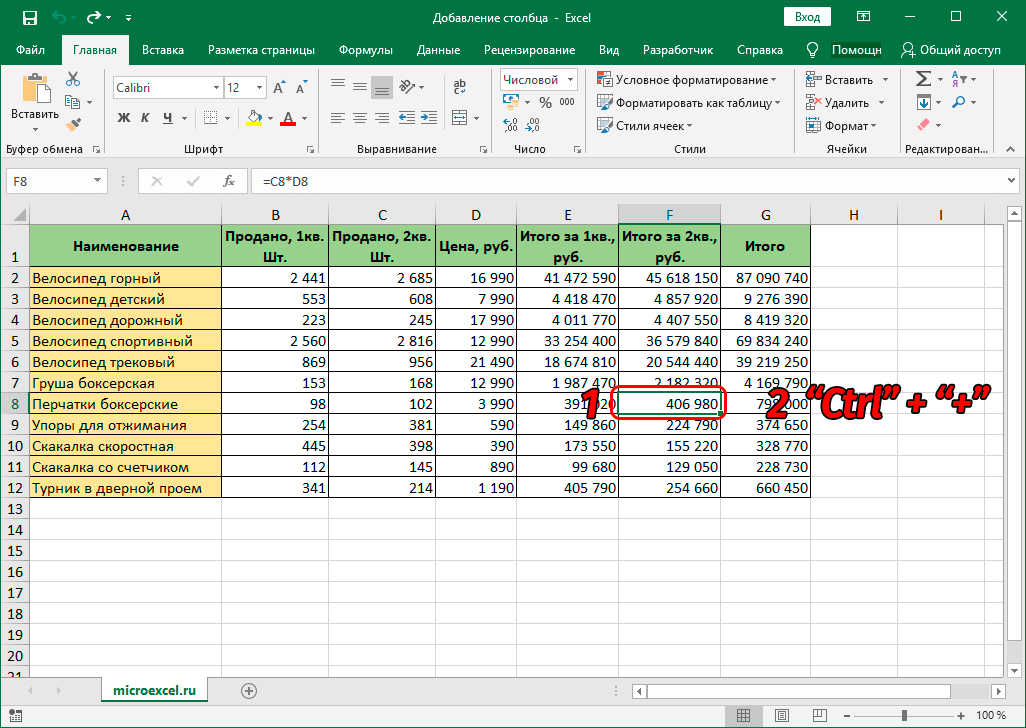
- Click on the name of the column in the coordinates panel.
Remember! An additional column is always added to the left of the selected column.
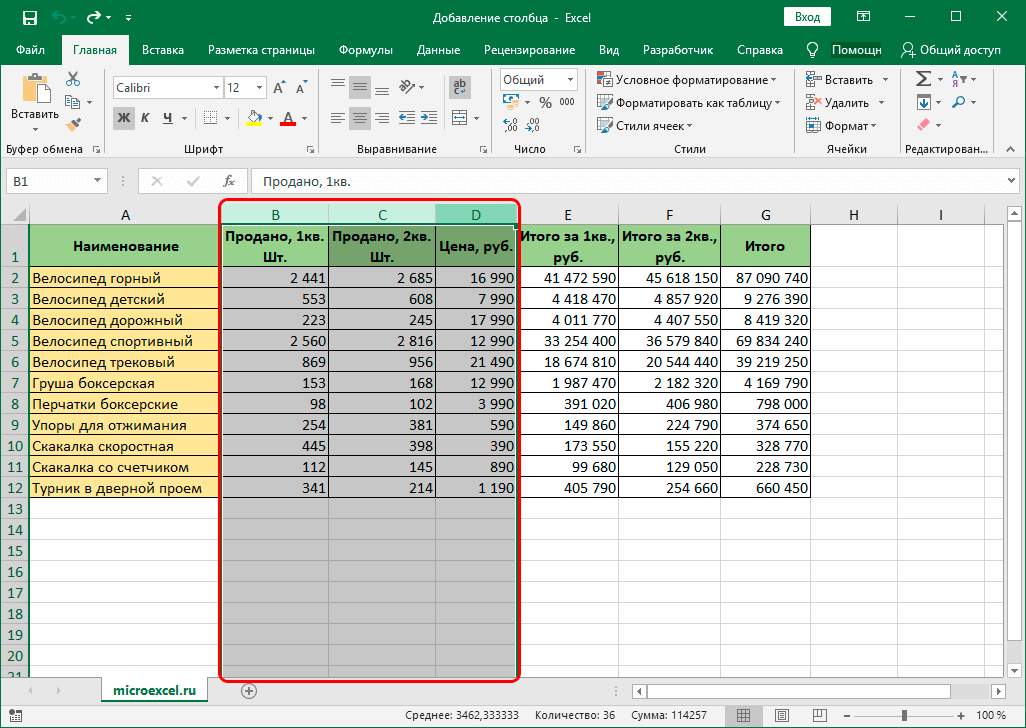
- Press the key combination on the keyboard “Ctrl” + “+”. After carrying out all the manipulations, a new column will appear to the left of the selected column.
The walkthrough of the second method is as follows:
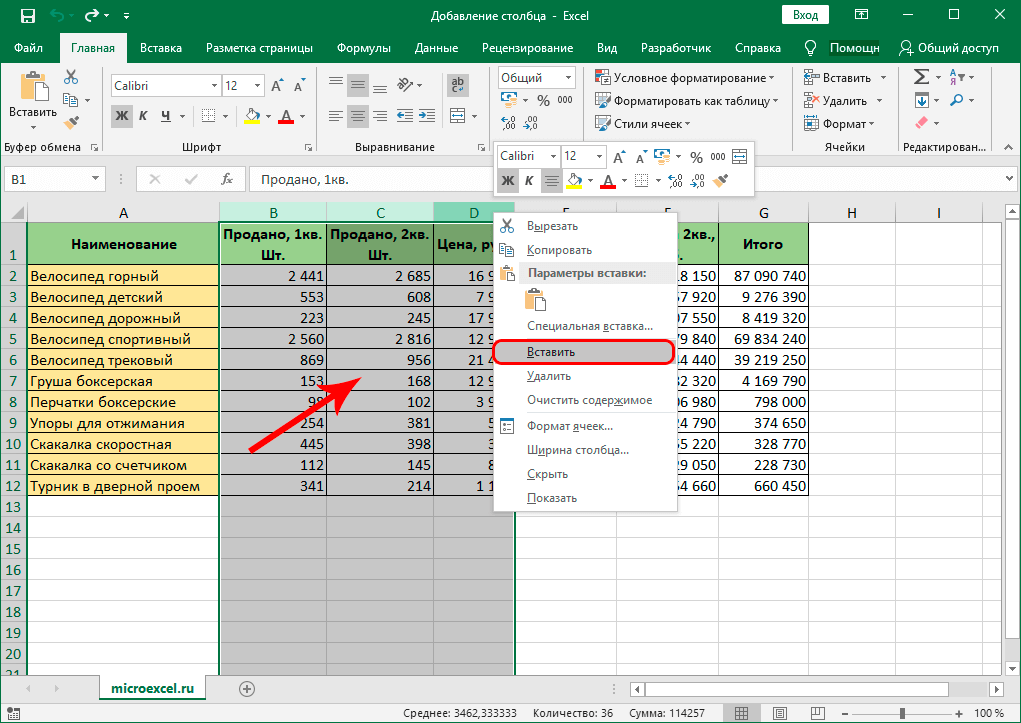
- Click on the cell with the left mouse button.
- Press the key combination on the keyboard “Ctrl” + “+”.
- The familiar window called “Add Cells” was displayed on the screen. We put a fad near the inscription “Column”. After carrying out all the manipulations, click the “OK” button, located at the bottom of the window.
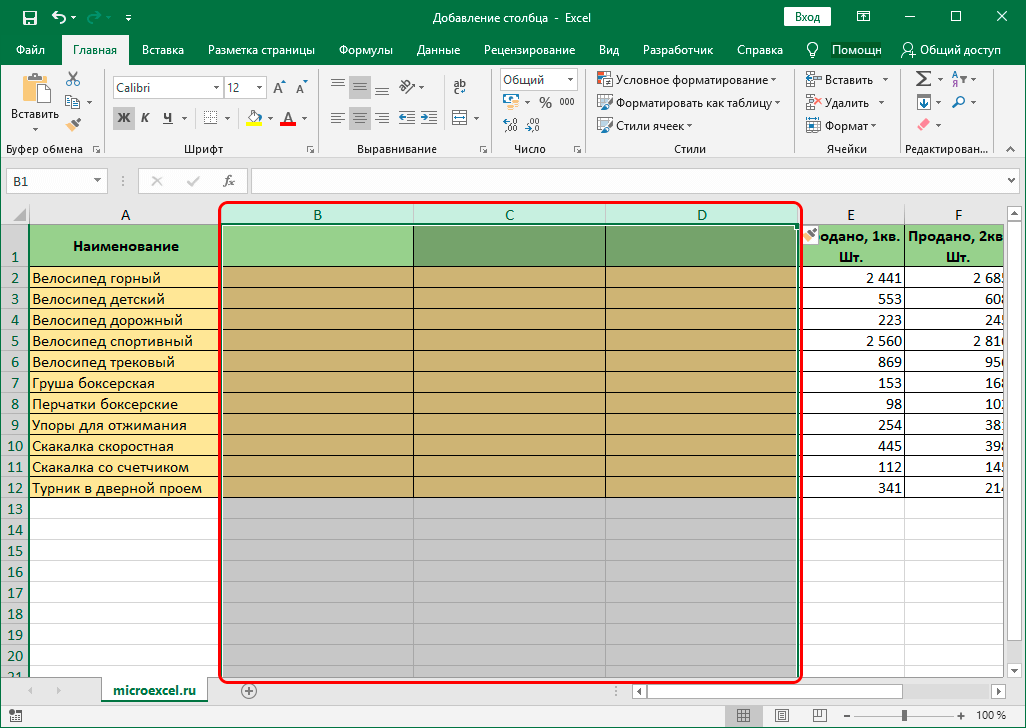
- Ready! After carrying out all the actions to the left of the selected column, a new column will appear.

Inserting two or more columns
There are situations when the spreadsheet user needs to insert several additional columns at once. The functionality of the program makes it easy to do this. The walkthrough looks like this:
- Initially, we select cells horizontally. You need to select as many cells as there are additional columns you plan to add.
Pay attention! And it doesn’t matter where the selection is made. You can select cells both in the table itself and on the coordinate panel.
- Using the guides described above, we perform the procedure for adding additional columns. In our particular example, we opened the context menu with the right mouse button and selected the “Insert” element.
- Ready! We implemented the addition of new empty additional columns to the left of those columns that were originally selected.
Insert a column at the end of a table
All the methods above are only suitable for those situations when it is necessary to add one or more additional columns to the middle or the beginning of a plate located on the worksheet of the document. Of course, using these methods, you can add new columns to the end of the table, but then you will have to spend a lot of time editing it.
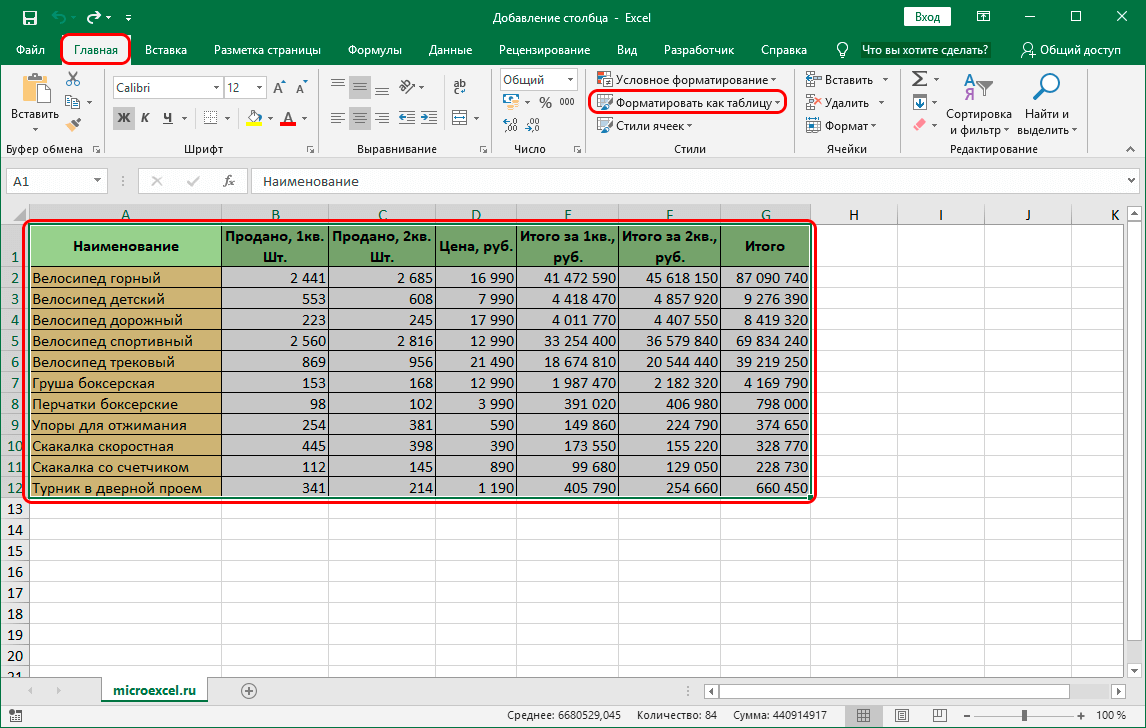
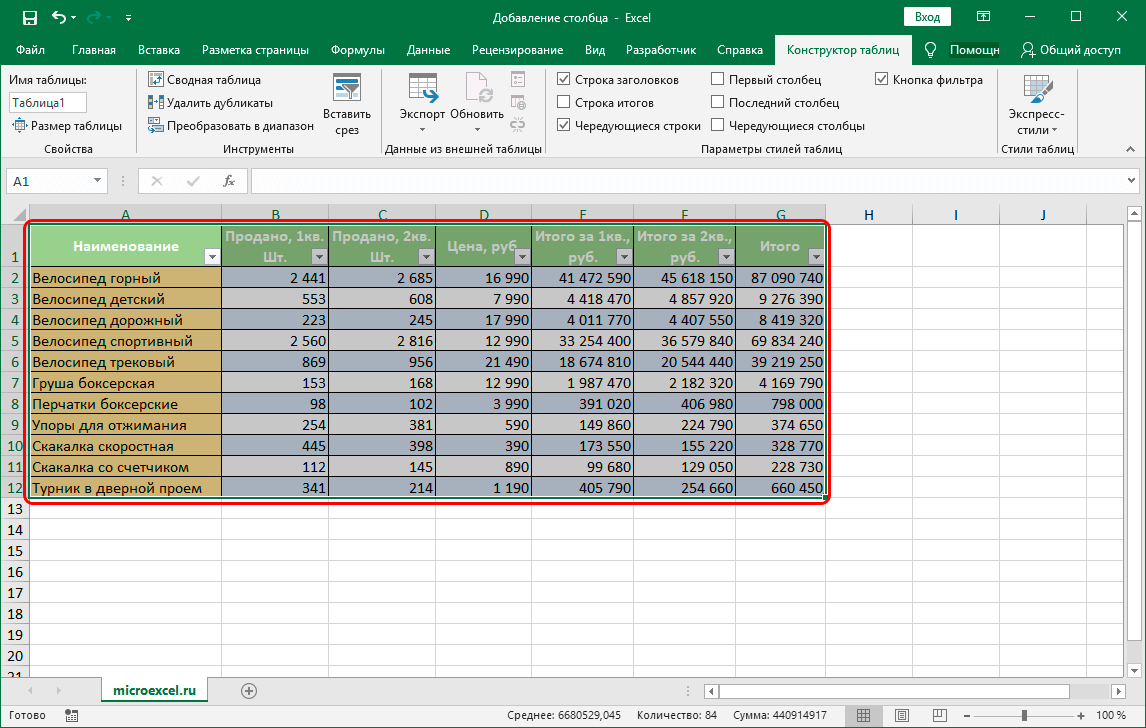
To implement the insertion of new columns into the table without additional formatting, there is one useful method. It lies in the fact that the standard plate turns into a “smart” one. The walkthrough looks like this:
- We select absolutely all the cells of our table. There are many ways to highlight all data. We will use the key combination on the keyboard “CTRL + A”.
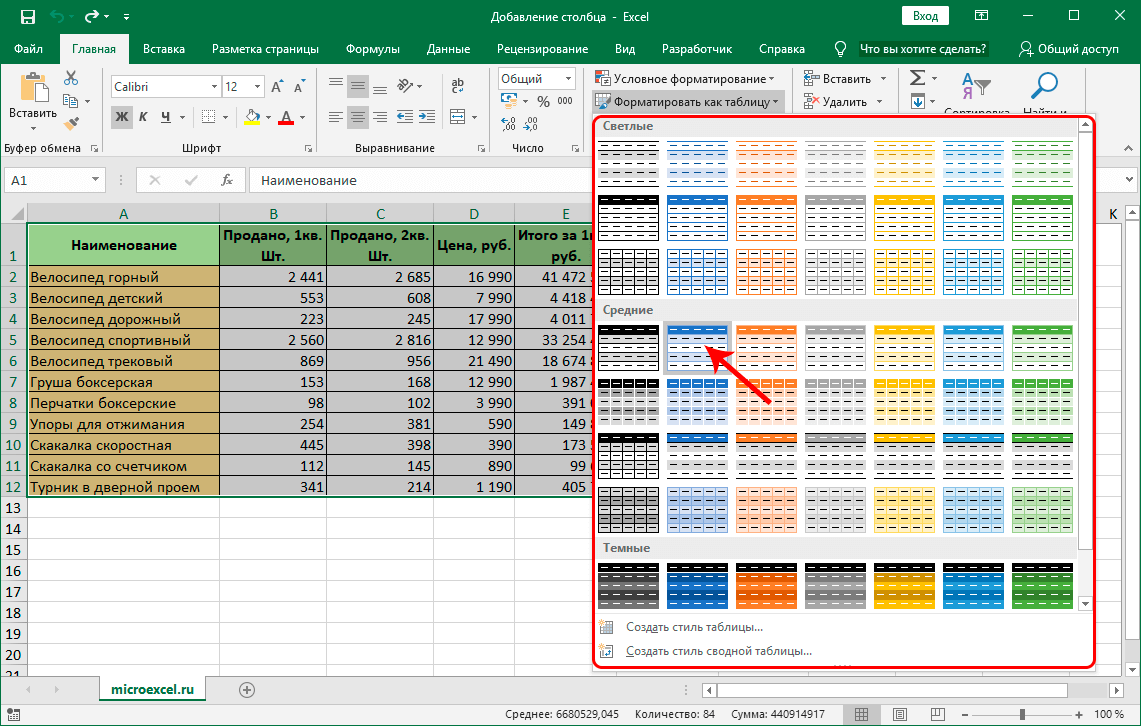
- We move to the “Home” section, which is located at the top of the interface. We find the block of commands “Styles” and click on the element “Format as table”.
- A list with styles has been opened. We select the appropriate style for the “smart table” by pressing the left mouse button.
- A small window called “Format Table” was displayed on the screen. Here you need to specify the boundaries of the selected area. With the correct initial selection, there is no need to change anything here. If you notice incorrect data, you can edit it. Put a checkmark next to the element “Table with headers”. After carrying out all the manipulations, click on the “OK” button.
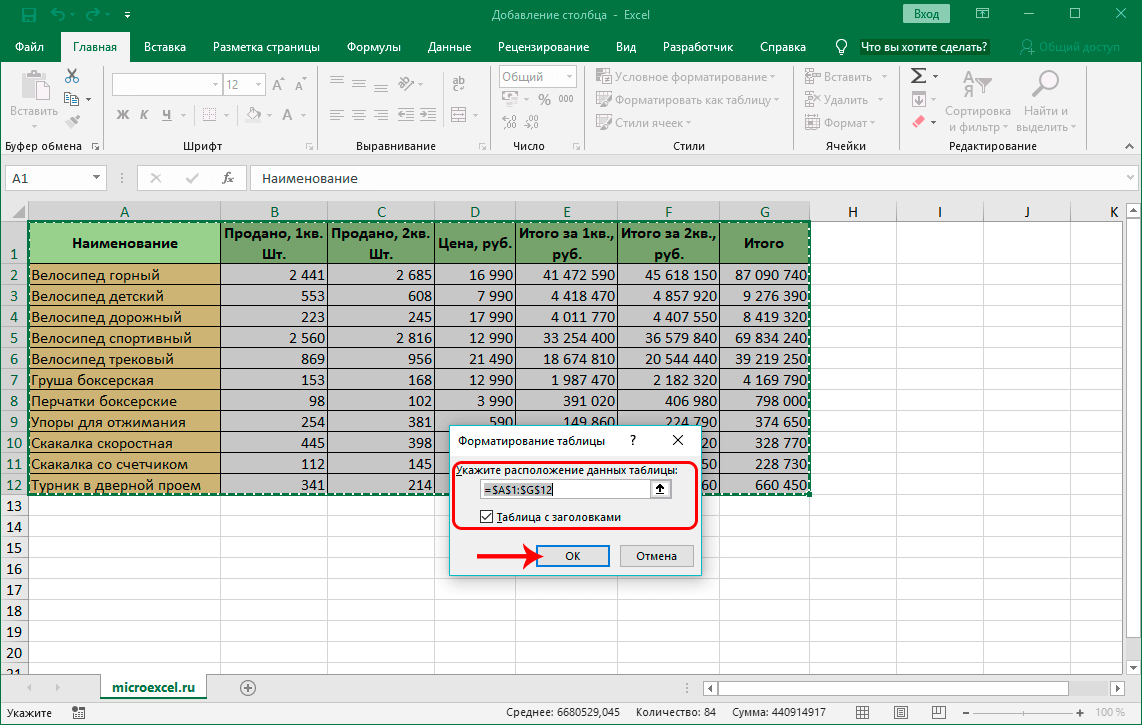
- As a result of our manipulations, the original plate turned into a “smart” one.
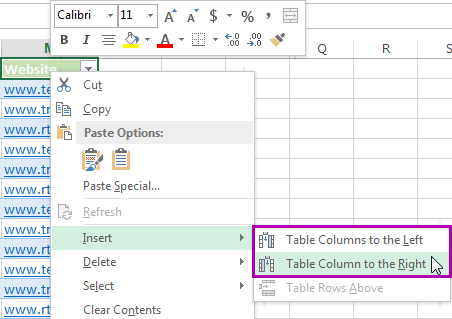
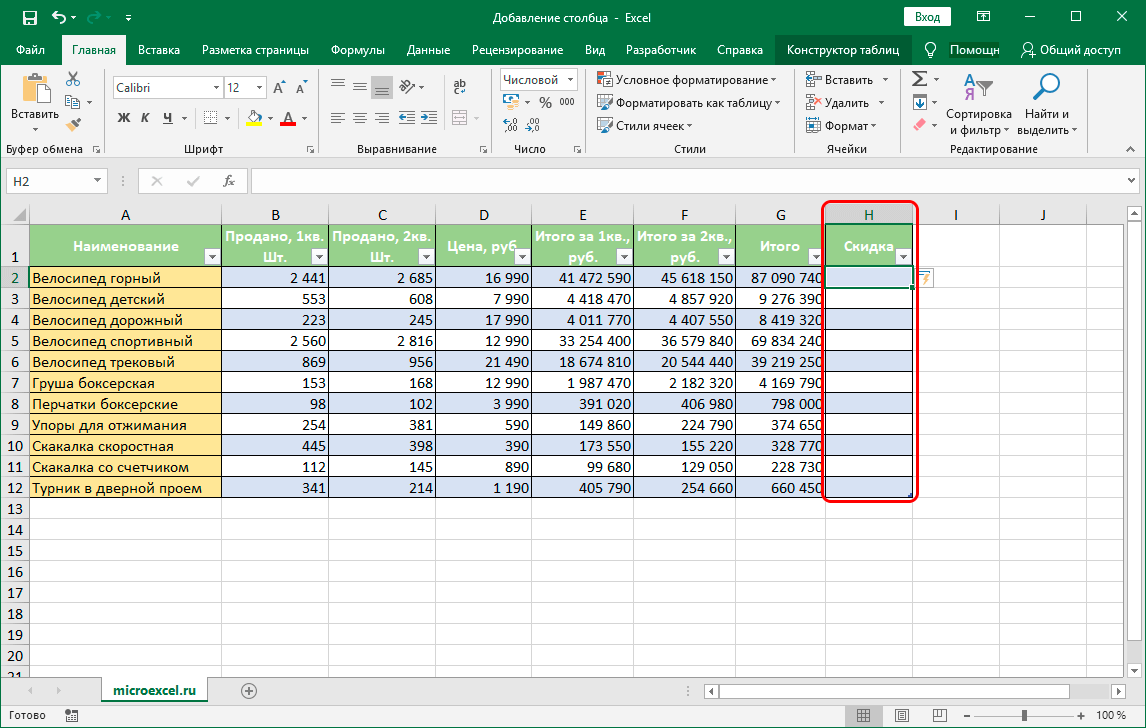
- We just have to add a new column to the end of the table. We simply fill in the necessary information with any cell located to the right of the “smart” table. The column filled with data will automatically become an element of the “smart table”. All formatting will be preserved.
How to insert a column between columns in Excel?
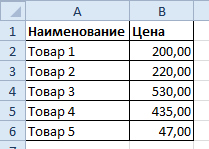
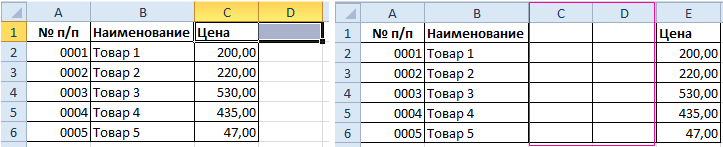
Now let’s talk in more detail about how to insert a column between other columns in an Excel spreadsheet. Let’s take a look at a specific example. For example, we have some price list with missing item numbering. We need to add an additional column between the columns in order to fill in the price list item numbers. There are two methods to implement this procedure.
The walkthrough for the first method is as follows:
- Move the mouse pointer to cell A1 and select it.
- We move to the “Home” section, which is located at the top of the spreadsheet interface. We find a block of commands called “Cells” and select the “Insert” element.
- A small list has opened, in which you need to select the “Insert columns on sheet” item.

- Ready! We have implemented the addition of a new empty additional column between the columns.
The walkthrough of the second method is as follows:
- Right click on column A.
- A small context menu was displayed on the screen, in which you need to select an item called “Insert”.
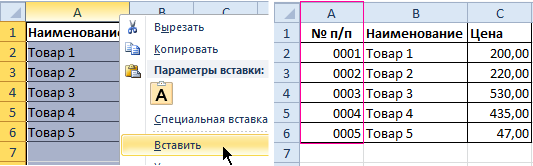
- Ready! We have implemented the addition of a new empty additional column between the columns.
After using one of the two methods described above, we can start filling the created column with the numbers of the price list items.
Insert multiple columns between columns at once
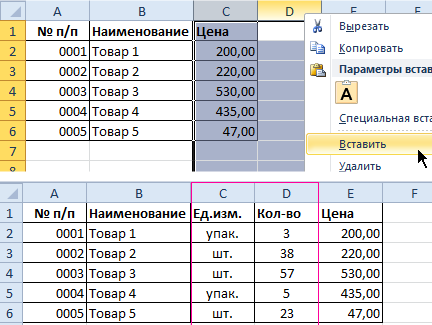
Continuing with the price example above, let’s find out how to add multiple columns between columns at the same time. The price list lacks 2 columns: quantities and units of measurement (pieces, kilograms, liters, packages, and so on). The walkthrough looks like this:
- To implement the addition of two additional columns, we need to perform the procedure for selecting a range of 2 cells. We highlight C1:D
- We move to the “Home” section, which is located at the top of the spreadsheet interface. We find a block of commands called “Cells” and select the “Insert” element. A small list has opened, in which you need to select the “Insert columns on sheet” item.
- Ready! We have implemented adding two columns between two columns.
There is an alternative way to perform this procedure. The walkthrough looks like this:
- We select two column headings C and D.
- Click the right mouse button. The familiar context menu opens. We find an element called “Insert” and click on it with LMB.
- Ready! We have implemented adding two columns between two columns.
Sometimes it happens that the user, while working with tabular information, accidentally adds an unnecessary column. Let’s figure out how to perform the removal procedure. The walkthrough looks like this:
- Select the range of cells whose columns we plan to delete.
- We move to the “Home” section, find the “Delete” block and click on the element called “Delete columns from the sheet.” Alternatively, right-click to open the context menu and select the “Delete” item.
- Ready! We have implemented the removal of unnecessary columns from tabular data.
It’s important to remember! Additional columns are always added to the left of the selected columns. The number of new columns depends on the number of columns originally allocated. The order of the inserted columns depends on the selection order (through one and so on).
Conclusion
The Excel spreadsheet has a huge number of ways that allow you to add additional columns to any place on the table. Converting the source data into a “smart table” allows you to insert additional columns without wasting time on formatting, since the appearance of the new columns will take on the finished table formatting. A wide variety of methods for adding columns allows each user to choose the most convenient one for themselves.