


Contents
So, you have finally matured and made the decision to practice yoga. Very well! Today we will tell you how to do it correctly at home.
Hatha is the most popular type of yoga. You can go to any fitness center, and it will definitely be there along with aerobics, boxing or Pilates. The most important thing is to get to a good teacher who will teach you how to properly perform asanas (body positions) and pranayama (breathing exercises), introduce you to yoga gently and effectively. But if you do not have the opportunity to practice hatha yoga in a club, you can practice at home. To do this, you need to know simple, but very important rules. They will help to avoid mistakes that beginners often face.
10 Steps to Effective Hatha Yoga Practice for Beginners
- You need to do it on an empty stomach. It should take an hour and a half before class if you ate something light, for example, a salad of greens and vegetables. After a denser meal, it will take a little longer. Three or four hours.
- Choose clothes that are comfortable and preferably made of cotton. Go barefoot. You will need socks and a blanket during shavasana – this is the relaxation pose at the end of all hatha yoga exercises. In shavasana, it will be important to keep warm in order to relax as much as possible.
- You can practice yoga at any time of the day. Morning sessions are therapeutically effective and energize for the whole day. But deep relaxation and mental effect are easier to get from evening workouts. Here choose for yourself. The main thing is to allocate a free hour and a half, when no one will disturb you with calls and messages.
- How often do you need to exercise? Better every day. But if this is not possible, at least twice a week. And here our video tutorials with hatha yoga complexes for beginners at home will just help you (see this material).
- The room must be ventilated. You can practice with the music you like. But of course it doesn’t have to be punk or rock. It is better to choose the sounds of nature: the murmur of a stream, the sound of the surf, the peals of spring thunder. This will allow you to best immerse yourself in a special meditative state. To put it simply: disconnect from the daily hustle and bustle and get the maximum effect from hatha yoga exercises.
- At first, choose the simplest asanas. Do not chase advanced users from yoga magazines. Wait, if you wish, and you will soon be able to tie into a knot and balance on your hands. This is not the main thing! Your task is to start with basic asanas, easy, but no less effective. Here, learn how to perform them correctly – then add more complex ones.
- No tension and discomfort during exercise! No need to specifically stretch, arch the spine, twist the neck strongly. In no case! All movements should be smooth and soft. Feel the pain – loosen the effort or get out of the asana. As soon as the body gets used to it and becomes more flexible, the asana itself will give up without a fight.
- Watch your breath during home hatha yoga classes. Breathing should be deep and slow. No delays, quick inhalations and exhalations. There are special exercises when needed, but we will cover them a bit later in the next issues. Just remember that the breath must be conscious.
- After class, you do not need to immediately jump up and run about. A set of exercises should always end with shavasana (aka “corpse pose” or “dead man” – as you like). Knowing how to relax in yoga is just as important as doing asanas correctly. So, we don’t run anywhere, lie down on the mat and don’t move for 7 minutes. This is a necessary minimum for high-quality relaxation. During shavasana, the effect of the exercises done is fixed, your body gets a deep rest and recovery.
- A positive attitude is very important. Do not drag yourself to the mat, as if to hard labor. Easier, more positive! It is a pleasure to do yoga. Feel how your body responds, how it becomes more flexible and beautiful. Yes, you will need special discipline, because you will do hatha yoga exercises at home on your own. The more valuable they are – advanced yogis will only shake your hand!
Health Benefits of Hatha Yoga
An important point. If you have a serious illness, then you first need to see a doctor. After all, yoga was originally designed for healthy people. If the doctor gives you the go-ahead, you can safely do hatha yoga at home. Otherwise, it is she who helps to develop endurance, restore flexibility and relief to the body, increase immunity and even attractiveness. Yes Yes! It has been proven that yoga eliminates wrinkles, prolongs the youth of the whole body and solves problems with excess weight.
As you already understood, people come to hatha yoga with different goals. And they are all good. For example, it is vital for someone to learn how to cope with stress and extinguish negative emotions in themselves (our lessons will help get rid of these problems as well – watch the video in this material). But one thing unites everyone: people go to yoga for health.
The following hatha yoga exercises will help you solve specific problems at home, for example, with the spine or joints. But we will warn you right away: this classification is conditional. Each asana in yoga has such a wide effect that it can cure many ailments at once.
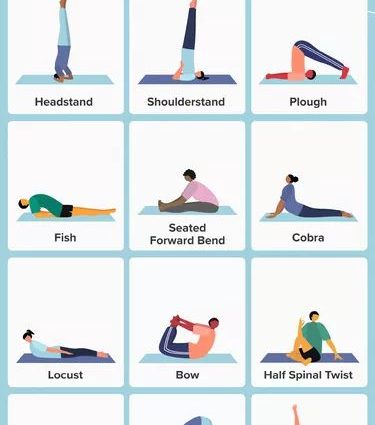
And remember! For beginners, at first it is enough to do as it turns out. You don’t go out of your way to achieve everything at once (like in the pictures or in our video tutorials). So, first, how does it work. Then gradually bring the asana to perfection. Let’s start!
Basic Hatha Yoga Exercises
Postures to increase the flexibility of the joints and spine
Paschimottanasana
Stretched tilt sitting with locks behind the back
Effect: It has a powerful therapeutic effect, being one of the most versatile and healing yoga asanas. Its development helps to get rid of fat deposits in the abdomen and thighs, stretch the entire back surface of the body, eliminate stoop and curvature of the spine. It has a beneficial effect on the digestive organs and heart function. Increases the mobility of the shoulder and wrist joints, opens the chest.
Technique performance:
1. Sit on the floor with your legs extended in front of you. Keep them together. Pull the socks towards you, the heels away from you.
2. Interlace your fingers and turn your thumbs back, pull your shoulder blades together, move your arms back and open your chest.
3. Lean forward, press the stomach to the hips, face to the shins. Stretch your hands up and to the back of your head, crown forward.
Important! Stretch from the lower abdomen along the hips forward. Keep your feet upright, pointing your toes up and turning the outer surface of the feet outward. Lock back, opening the chest and stretching the shoulders, then up and to the back of the head.
Contraindications: displacement of the vertebral discs, sciatica, arthritis, asthma. Hand and shoulder injuries.
Standing tilt with eversion of the shoulder joint
Effect: stretches the entire back surface of the body, strengthens the legs, works out the hip joints. Improves the mobility of the shoulder joints, hands, opens the thoracic region. Stimulates the liver, kidneys and spleen.
Technique performance:
1. Starting position: standing, legs together.
2. Lean forward and press your stomach against your thighs.
3. Interlace your fingers in a lock, turn your hands, pointing your thumbs back.
4. Stretch your arms diagonally and up, spreading your chest, then point to your head and down. Relax your head, neck and arms. Press your face into your legs.
5. Straighten your legs.
Important! Hold the pelvis above the heels, to do this, shift the weight of the body forward a little, on the front of the feet. If your belly is far from your hips and your back is round, bend your knees.
Contraindications: injuries of the lower back, hands, shoulders. Violations of cerebral blood supply, sciatica, pregnancy.
Parivritta-ardha-padma-pacchimottanasana
Effect: Improves mobility of the hip, knee and ankle joints. Increases the elasticity of the tissues of the lateral surface of the body. Works out the intercostal muscles and improves the mobility of the joints of the thoracic spine. Stimulates the pelvic organs, abdominal cavity and organs of the respiratory system.
Technique performance:
1. Starting position – sitting. The back is straight, the legs are extended forward and gathered together. Bending your left leg at the knee, pull it towards you. Passing the left hand under the left knee, grab the foot with the left hand in the region of its inner rib below the thumb. Opening the hip joint, place the foot on the floor with the toe and lower the knee. The foot should stand so that its sole touches the inner surface of the right thigh, and the heel almost touches the pelvis.
2. Stretching the spine from the center of the body to the top of the head, turn the body to the left and tilt so that the right shoulder is near the right knee and the right shoulder blade touches the inner surface of the thigh.
3. Slightly bending the right leg at the knee, move the right elbow to the side and grab the right leg in the area of the Achilles tendon.
4. Expanding the chest and stretching the left side of the body, grab the right foot with the left hand and turn the head up, directing the gaze to the left elbow.
Then do the exercise symmetrically on the other side.
Important! You can not pull the foot towards you with your hand without opening the hip joint. This can lead to knee injury. Make sure that after tilting and turning, the torso fits snugly against the leg, and the pelvis on both sides fits snugly on the floor. Pull the foot of the extended leg forward with the toe towards you so that the outer edge of the foot does not turn inward.
Poses for stretching and strengthening the muscles and ligaments of the spine
Sarpasana (option)
Effect: due to the fact that this version of the deflection is carried out without relying on the hands, there is practically no risk of injury during classes at home. Asana strengthens the muscles of the back, promotes stretching of the spine, and tones the kidneys.
Technique performance:
1. Lie on your stomach, bring your legs together, pull your socks.
2. Resting your hands on the floor, stretch your ribs forward, with the rib arch as if “clinging” to the supporting surface.
3. Open your chest, pull your elbows back, bringing your shoulder blades together and leaving your palms open.
4. Raise your chest as high as possible.
5. Tighten your buttocks.
Important! Do not raise your head too high, the neck should continue the line of the back. Try to “open” the thoracic spine as much as possible. Don’t pick up your elbows. The insteps and calves should be firmly pressed to the floor.
Urdhva-mukha — pashchimottanasana
Effect: asana stretches the entire back surface of the body. Actively includes the muscles of the back of the neck, which in ordinary life is extremely rare. It also liberates the sacro-lumbar region.
Technique performance:
1. While lying on your back, bend your legs and lift them up (feet about shoulder-width apart).
2. Grab your hands from above the feet by the heels.
3. Press your hips to your stomach, straighten your knees.
4. Reach your feet and elbows to the floor behind your head. Pull your toes towards you, push your heels forward.
5. Raise your head, press your chin to your chest.
Important! Legs are straight. Don’t put your head on the floor. Stretch your legs between your pelvis and heels, reaching with your toes toward the floor behind your head, and with your pelvis and lower back in the opposite direction.
Utkatsana
Chair pose (option)
Effect: Performing this asana helps to strengthen the muscles of the back, hips, and shoulders. Trains endurance, allows you to “center” the body.
Technique performance:
1. In a standing position, place your feet shoulder-width apart.
2. Raise your arms through the sides up, palms facing each other.
3. Squat so that the heels do not come off the floor, the coccyx is above the line of the heels, and the torso remains as even as possible.
4. Tuck the pelvis and tighten the stomach, removing the lumbar deflection.
5. Straighten the chest, press the shoulder blades to the back.
Important! Tuck the tailbone so that the lumbar region is flat, without deflection. The entire line of the body is elongated along the vertical axis. In the initial stages of practice, do not be zealous with the depth of the squat. In the future, when the muscles are sufficiently strong, utkatasana can be performed in a more complicated version: the hips are parallel to the floor, the knees do not go beyond the toes, it is permissible to tilt the body forward, maintaining a flat back position – without lumbar deflection. The line of the arms continues the lateral lines of the body.
Contraindications: with caution in injuries of the knee joints.
Postures to improve posture and strengthen legs
Ardha-chandrasana
Effect: improves posture, strengthens the hips, knees and ankles. Strengthens the abdominal muscles, buttocks. Well stretches the lateral lines of the body.
Technique performance:
1. From a standing position, legs together.
2. Pull up the lower abdomen and stretch up.
3. Put your hands on your belt and lean to the side, continuing to reach for the top of your head.
4. Tilt to the other side.
Important! Distribute the weight evenly on both feet. Keep your pelvis in the starting position and do not collapse in the lumbar and thoracic spine. Straighten your chest and shoulders, slightly bringing your shoulder blades together. Do not strain your neck, shoulders, arms. Stretch from the tailbone to the crown.
Urdhva-uttanasana
Effect: allows you to get rid of the stiffness of the feet and ankles, strengthens the legs and hips. It helps to increase the mobility of the shoulder joints, eliminate problems in the upper back, opens the chest.
Technique performance:
1. In a standing position, place your feet together.
2. Raise your hands up, interlace your fingers into the lock, turn the lock outward and stretch your arms up back.
3. Lift your heels off the floor and rise up on your toes.
4. Pull your chin forward and down, stretching the back of your neck over the top of your head.
Important! Do not sink into the lumbar region. Pull the pelvis back slightly, stretching the lower back through the chest up. Open your chest by pulling your shoulders up and back behind your hands.
Healing asanas
The beneficial effect of these hatha yoga exercises is so great that we have separated them into a separate group. Practice for health!
Sarvangasana
Shoulder stand
Effect: one of the most important asanas in hatha yoga. It benefits the entire body. It improves blood supply to the brain, eyes and skin of the face, relieves headaches, runny nose and other colds, improves digestion and excretion processes, rejuvenates the genitals, and gives rest to the heart muscle. Stimulates the work of the thyroid and parathyroid glands.
Technique performance:
1. Lie on your back. Stretch your arms along your head, palms up.
2. Raise your legs up, move them behind your head, lifting your back off the floor.
3. Straighten your legs and back, stretching from your shoulders with your whole body to the ceiling. Keep your feet together, toes pointing out.
4. Stretch your arms along the body, towards the soles of the feet.
Important! Stretch the whole body in one line from the shoulders to the toes. Keep the chin pressed to the chest, the back of the neck is extended. Relax your buttocks and stomach.
Contraindications: neck injury, high blood pressure.
Ardha-chandrasana
Half moon pose (option)
Effect: asana allows you to develop coordination, strengthen the muscles of the hands, stretch the side lines of the torso. Refers to postures that are not difficult to perform, but have a powerful energy effect.
Technique performance:
1. From a prone position, turn on your side, place your palm with the base under the shoulder joint.
2. Move your legs closer so that your feet and supporting arm are in line.
3. Push up, arching your upper body.
4. The free arm is extended forward over the back of the head.
5. Look at the floor.
Important! Make sure that the shoulder girdle and pelvis are in the same plane. Control the elbow joint of the supporting arm – there should be no overextension. The fingers of the supporting palm are directed forward. Strive to bend the torso so that its upper line is stretched as much as possible. The coccyx and abdomen are tucked up.
From the author
The most difficult thing in hatha yoga is spreading the mat. I’m serious. Yes, in the first classes, your body may remind you of the lumberjack from The Wizard of Oz: joints creak, something clicks, everything hurts and nothing bends. But these are great bells and whistles. So the body is working. Finally!
Yoga is so perfect and beneficial that it is suitable for almost everyone: no matter what your weight, age, how flexible and hardy you are. On the contrary, beginners are lucky. It is for beginners that yoga opens up in the most unexpected and best way. For example, after the very first lessons at home, the feeling of flying did not go away for me (not to be confused with the practice itself: ten sweats can come off during exercises). The first year I soared for sure. Then other, no less interesting processes followed. But everyone will have their own story. The main thing, indeed, at some point, just spread the rug.
We thank Sidersky Yoga Studio and personally Elena Siderskaya for help in preparing the material.