


Contents
Almost every fishing lover has a fishing rod case. This, although simple, but a convenient assistant to any angler. With it, you can transport fishing rods to any distance without fear of damage. In addition, it is very convenient to place all the fishing rods in a separate case and transport or carry them in this way, what to do with each fishing rod separately. In addition to the fishing rod, other fishing accessories can be placed in the case, which is very practical.
Purpose of tubes and covers
Modern rod blanks are distinguished by the presence of a flexible tip, which, although it bends, is afraid of mechanical forces that are not aimed at bending.
In addition, if you transport fishing rods in bulk, then sooner or later they will lose their attractive appearance. The presence of scuffs and scratches really reduces the durability of products, and interest in them is lost. As a rule, in such cases, you always want to buy a new fishing rod. Unfortunately, desires do not always coincide with opportunities.
If you do not protect the fishing rods from atmospheric influences, then over time the adhesive joints may be broken, which will lead to the weakening of such places and, as a result, the fishing rod may fail at the most inopportune moment. As a rule, in the arsenal of any angler there are several fishing rods of various lengths and different strengths. If at least one of them is spoiled, then the fishing process will not be so exciting and interesting, and sometimes productive.
Purchased or homemade?
A very interesting question that many fishermen ask themselves. Naturally, it is easier to buy a factory-made product, but you will have to pay a tidy sum for it. With certain skills and desire, the cover can be made by yourself, at home. In addition to being interesting, it is also economical. This is especially true if you don’t want fishing to be “golden” in terms of costs. The fact is that you have to pay for everything, and for real fishing you need a lot of different accessories. Making a case or a tube for fishing accessories with your own hands, you will always be able to make the product that is intended and that is more suitable for specific fishing conditions. In addition, for many anglers, fishing is a hobby in which they put a piece of their soul.
Let’s compare all the pros and cons of a purchased and homemade case
The advantages of purchased products include:
- Big choice.
- Optimal quality.
- Ease of use.
The disadvantages include:
- High prices.
- You can’t always find what you’re looking for.
The advantages of homemade products include:
- Possibility of making a case of the desired size.
- The ability to manufacture from unnecessary components, which saves money.
- The ability to form the required number of pockets and compartments.
- Make handles and fix them in a convenient place.
If you analyze everything, then home-made has more advantages, especially since the process is not at all complicated. Making fishing accessories at home is an opportunity to demonstrate your fantasies and your skills. As life shows, products made in a handicraft way are no worse than factory copies.
We make a tube for a fishing rod with our own hands
Do-it-yourself hard case for a fishing rod
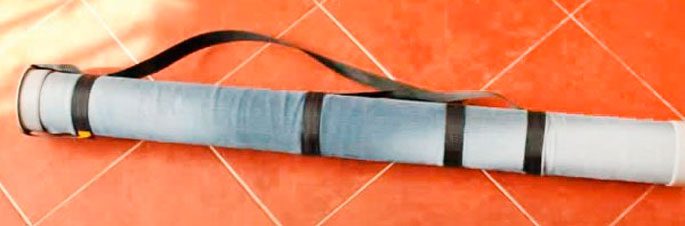
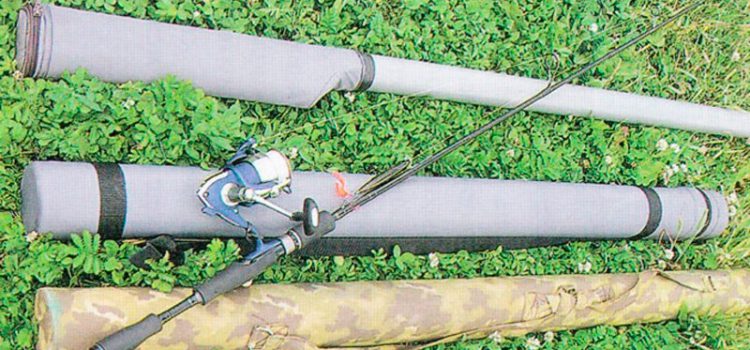
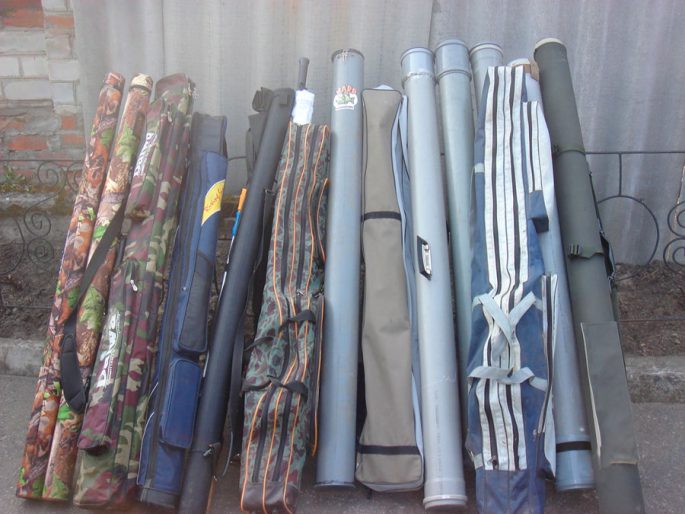
The tube is actually a hard case that has both advantages and disadvantages. In some situations, a hard case is preferred over a soft case. As a rule, rods suffer during transportation, as well as at the time of loading rods. Since the tips of the rods are quite fragile, their protection is mandatory, otherwise fishing may not take place. In addition, there are times when you have to make your way through the thickets and here, without a cover, there is nothing to do at all. If you use a tube, it will reliably protect the rods from any mechanical influences, since it has a rigid structure.
Therefore, a hard case can solve many of the problems associated with moving fishing equipment. As a rule, tubes are made of plastic, followed by sheathing on the outside with a dense, wear-resistant material.
Inside there is a soft lining and fasteners designed for various fishing accessories. Cases made in the shape of a tube are called tubes.
The simplest in design hard case for storing fishing rods can be made from the most unexpected materials. In almost every house you can find the remains of sewer pipes, since almost everyone repaired their home, and especially the sewer. This refers to a sewer pipe with a diameter of 100 mm or more. In addition, in every house you can find an old briefcase, which can also be useful for making a hard case. In this case, other options are possible, you just have to carefully delve into the household trash.
Necessary materials

- Sewer pipe made of plastic, up to 1,5 meters long and at least 100 mm thick.
- A pen from an old school bag or other end-of-life item.
- Plastic lid from a mayonnaise jar, although the lid can be made from plastic yourself.
- Epoxy glue, although plastic is best glued with special glue.
- Tools for working with glue.
- Hacksaw for metal.
Manufacturing technology
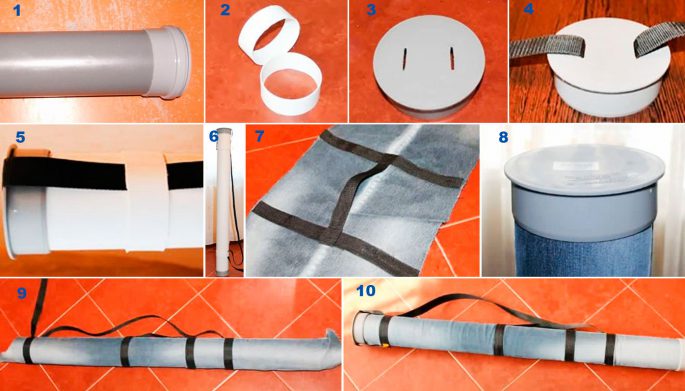
- The required length is cut from the plastic pipe, taking into account the length of the fishing rods. To do this, use a hacksaw for metal. When cutting the workpiece, it is necessary to control the evenness of the surface. If the work is poorly done, then the surface should be leveled.
- Epoxy glue is being prepared for work: – Epoxy resin is poured into a separate container, after which, a hardener is added here in the required proportion. – Increasing the dose of hardener accelerates the bonding process, but strength decreases.
- Surfaces are prepared for the gluing stage: – Places are cleaned with sandpaper. – After that, the places are degreased.
- Epoxy glue is applied to the cut of the pipe, after which a mayonnaise cap is placed on this place. Bonding points are tightly pressed. After 24 hours, the product can be used. Glue can be used for about an hour and a half. Therefore, they can glue some more details, but for this they need to be prepared in advance.
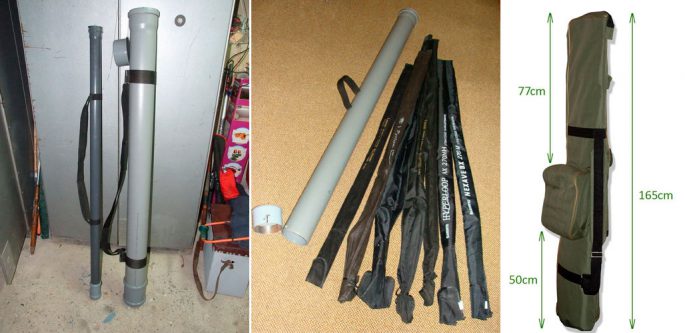
Do-it-yourself homemade tube for rods
Here is the tube making process and completed
- A handle is cut off from the school (old) briefcase and glued to the finished tube. The handle is comfortable and soft, besides, its length can be adjusted.
- The final stage boils down to the fact that the tube is ennobled. You can glue some decorative overlays from the same elements that are unnecessary in the household to it. In this case, the presence of imagination is useful.
Making a tube cap
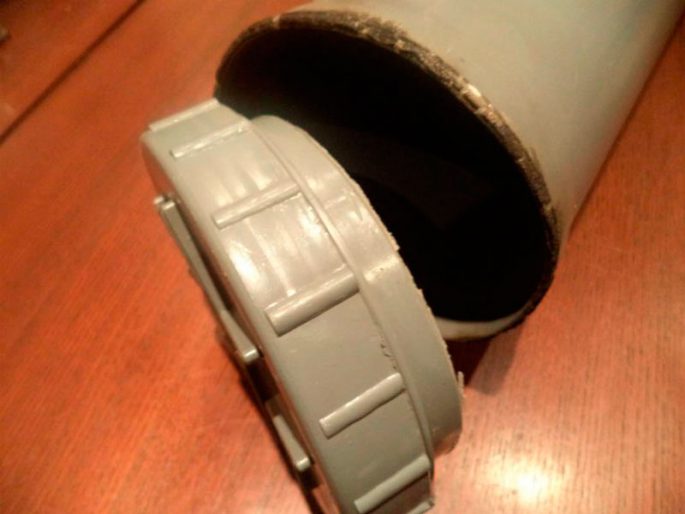
The tube is almost ready, but it does not have a lid, therefore, safe storage of fishing rods will not work.
Cover manufacturing technology:
- For this, a piece of sheet plastic is taken, from which a circle is cut, the size of which is slightly larger than the diameter of the pipe.
- A strip is cut from the same plastic, about 3 cm wide and equal to the circumference of the circle.
- The parts of the cover are glued together using the same glue and fixed with adhesive tape.
- A piece of foam rubber corresponding to the diameter of the pipe should be glued inside the lid.
After that, we can assume that the tube is ready for work. At the same time, you need to wait until the cover elements are securely glued together. It can turn out faster if you use special glue for plastic in your work: it is not always convenient to dilute epoxy, and it hardens quickly.
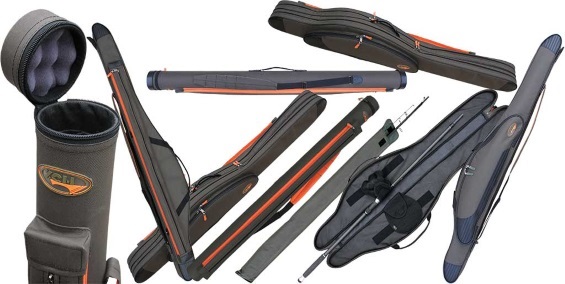
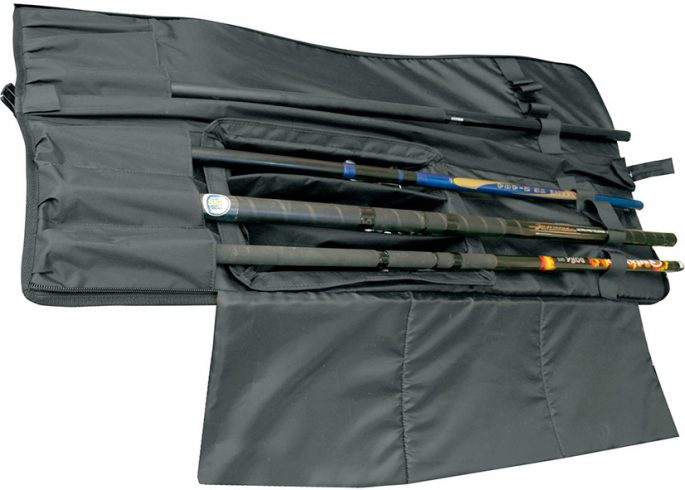
DIY soft case for fishing rods
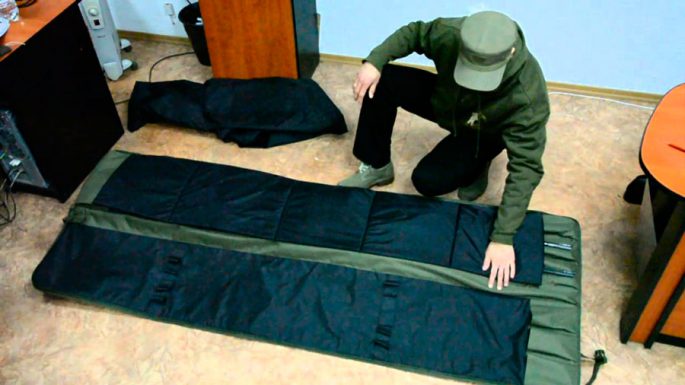
Soft cases for storing rods, as a rule, are made of materials that do not allow moisture to pass through. They differ in that they have a large number of large and small pockets designed to store various fishing accessories. Soft cases are distinguished by the fact that they are multi-seated and several rods are placed in them at once. They are very convenient in cases where fishing is carried out on cultivated reservoirs.
How to make a tube for spinning, feeder, rods and fishing with your own hands author Alexander Ideyny
At the same time, you can purchase a case for transportation and storage:
- Ordinary fishing rods.
- Spinning.
- Bottom gear.
- Feeder gear.
If you have to go fishing for a short distance, then it will be enough to purchase an ordinary soft case without spending extra money on an expensive hard case. The main thing is to get a case that would fit fishing rods with reels and other accessories. It’s good when all the rods are completed and upon arrival at the pond, it is enough to pull them out of the case and they are ready for use. The fact is that if there is no high-quality cover, then fishermen transport fishing rods and reels separately. Therefore, they spend a lot of time installing reels on their rods, and this is not entirely conducive to fishing.
A soft case is not so difficult to sew at home from improvised materials.
Fishing cover from army pants. How to make a cover for fishing rods
To sew a soft cover, you need to stock up:
- Patience and free time.
- A non-wetting fabric, such as a tarpaulin, measuring 2×1,5 meters.
- Belt tape.
- Zip fasteners – 4 pieces 70 cm long and 4 pieces 25 cm long.
- A good sewing machine, and if there is none, then it is permissible to sew with your hands.
- Step by step sewing instructions.
Sewing process

- A piece of fabric is laid out on a table or on the floor, after which half a meter of material is cut off from it.
- This strip should be cut in half again. The result will be 2 pieces of fabric, 75×150 cm in size.
- You don’t need to throw away the cuttings. Of these, you can make patch pockets, measuring 35×35 cm.
- Pockets are formed like this:
- The folded side edges are simply stitched.
- To obtain the desired volume, a z-like insert is placed on each sidewall.
- For reliable fastening, the fold is sewn from the bottom.
- The bottom is tucked up by 3 cm, after which the side parts are sewn on, without fixing the ends.
- After that, the pockets are attached to the base: first the lower part, then the side and finally the upper part.
- Then the belt is sewn on:
- First, a piece of the desired length is cut off from it to form handles.
- After that, they find a place on the case where the handles should be attached and mark this place with chalk.
- Handles are sewn on several times, for reliability.
- The places for fixing the handles should be at the top level of the pockets.
- At this stage, the lock is sewn in.
- Sidewalls are sewn. Attachment points are sewn together several times for reliability.
- We can assume that the work on the manufacture of a cover for fishing rods is completed.
Additional recommendations
The cover can not only decorate, but make it quite noticeable against the backdrop of nature. Sometimes this is very important, because in the confusion you can simply step on him if he is invisible. In this case, it all depends on the level of your own imagination. What can be done:
- Embroider personalized initials. This will allow him to be identified in any case.
- Decorate the case with any application related to nature.
- Attach key rings to the clasps.
- Place boxes in pockets to store small items.
There is another option – this is the manufacture of a cover from an old bag. This is one of the easiest and fastest options to have a rod case.
What you need for this:
- Find an old sports bag, up to one and a half meters long and remove the excess width by cutting off all the excess with scissors.
- After that, the cut point is connected and securely sewn a couple of times.
- Then you should sew the handles of the desired size.
- The pockets that were present on the bag can be left, as they will come in handy.
- In some places, you can impose and sew on pieces of fabric for strength.
- A zipper is sewn in with several lines for reliability.
- The bag-case is ready for use: fast enough and economically enough.
Regardless of which case or tube is homemade or purchased, the main thing is that it performs its protective functions, is convenient to use and is practical. Of course, purchased products do not always meet all the requirements: they are either too small or too large. This applies not only to covers, but also to other fishing accessories. Therefore, some anglers practice independent production, which allows solving many problems.
Do-it-yourself fishing rod case