


Contents
Electric underfloor heating is a popular solution for heating residential premises. They are used both in private houses and in apartments, because they are allowed to be connected to existing wiring systems in apartment buildings. The warranty period for underfloor heating from many manufacturers is very long – 10, 15 years or more. For example, the manufacturer Teplolux gives a lifetime warranty on some of its products.
Electric underfloor heating will be a great addition to the main heating system in the house. However, it can also be used as the main source of heat, for this it is necessary to arrange heating for at least 80% of the surface. The advantage of a warm floor is that the air in the room warms up evenly due to the fact that the heating comes from below, and the heating elements are distributed over the floor area.
Most mechanical or electronic thermostats are suitable for controlling the heating element. For example, automatic programmable thermostats from the Teplolux company allow you to set the time to turn on and off the heating, and the model that works via wi-fi, control it from a distance.
Which is better to choose an electric underfloor heating under the tile
Electric warm floors are divided into two large groups: cable and infrared. For cable floors, the heating element is a cable, and for infrared floors, composite rods or a film with conductive carbon strips applied to it. Cable floors are supplied either as the cable itself or as a heating mat. The heating mat is a cable attached with a certain pitch to the base. The basis, as a rule, is a fiberglass mesh or foil. Before buying, you need to check with the manufacturer or seller with which coating this or that product is combined. For tiles, both versions of cable floors are used (except for foil ones, since their installation does not imply strong adhesion of plates, glue and base), as well as rod ones. Infrared film is used with tiles quite rarely.
Heating cable. This is ideal if the renovation of the premises starts from scratch, or a major overhaul is planned. To mount such a warm floor, you need to perform a screed and lay the cable in a layer of mortar 3-5 cm thick. The advantage of the cable is that the total heating power can be adjusted by the laying step. For example, for a bathroom with high humidity, you can lay the cable more tightly and thereby increase heating, and for a small room without a balcony, on the contrary, take a step wider and reduce power. The recommended power for living rooms in the presence of the main heat source is from 120 W / m2. For bathrooms or cold rooms – 150-180 W / m2. We recommend considering two-core cables due to the relative ease of installation compared to single-core cables.
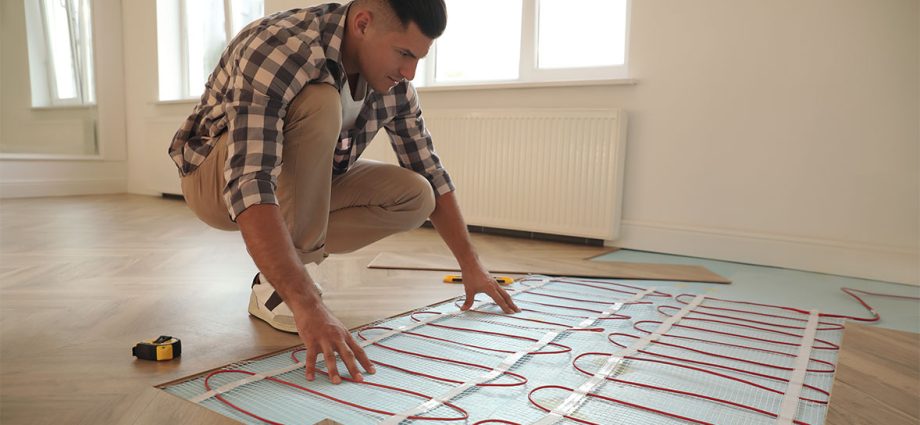
Heating mats laid in a thin layer (5-8 mm) of tile adhesive. Thus, the installation of the mat is easier than the installation of the cable, and most importantly, it almost does not increase the height of the floor covering. If you want to lay the mat at an angle or fit the shape of the area, it can be cut without affecting the cable. The optimal power of the mat is 150-180 watts per 1 m2: this will ensure uniform and rapid heating of the room.
Rod floor. The heating elements are rods made of composite materials (the most common are carbon-based rods) attached to the mat with a certain pitch. Manufacturers of such floors claim that they are very economical, as they stop using electricity when the rods are heated to a certain temperature. Mount the core floor both in the screed and in the tile adhesive.
How to install electric underfloor heating under tiles
We will analyze the process of laying an electric underfloor heating using the example of Teplolux products. This is a sought-after manufacturer, its underfloor heating kits have been awarded many prestigious awards.
First you need to decide whether you are using a cable or a mat. It depends on whether you have to perform a floor screed. In the case of the cable, the “pie” should look like this:
- primed smooth concrete base;
- a layer of thermal insulation made of polyethylene foam;
- heating sections – cable;
- cement-sand mixture screed 3-5 cm;
- tile or porcelain tile flooring.
If you lay the mat, then instead of the screed there will be a layer of tile adhesive 5-8 mm thick.
What tools are needed in the work:
- Resistance tester.
- Perforator.
- Square.
- Screwdriver.
Tanks for construction mixtures.
Draw a room plan
It is necessary, if possible, to have an accurate idea of uXNUMXbuXNUMXbwhere stationary furniture without legs will be located, such as built-in wardrobes, kitchen sets or, for example, a washing machine. Laying underfloor heating under such furniture is not recommended.
Remember the subtleties of styling. For example, the temperature sensor should be 50 cm away from the wall, and the cable should not be closer than 10 cm from walls with radiators and 5 cm away from walls without heaters.
Preparatory stage: a place for a box and wires
A strobe (20 × 20 mm) is to be made in the wall for the wiring of the thermostat and the device box itself. As a rule, it is installed at a height of 80 cm from the floor. If you are laying a warm floor under the tiles in the bathroom, then you should not bring the thermostat into the room – fix it outside. To make room for the thermostat box, take a drill bit. Bare wires should not be laid in the groove, they should be placed in a corrugated tube. The thermostat is powered by 220-230 volts.
Floor preparation
Clean the concrete base of the floor, roll out the rolls of thermal insulation – it is necessary for the efficient operation of the warm floor. Experts recommend using polyethylene foam as thermal insulation. A mounting tape is distributed over the thermal insulation. At Teplolux, for example, it comes with a cable.
Heating cable laying
The cable has a “snake”. The step must be calculated by yourself, manufacturers, as a rule, describe in detail in the instructions how to do this. The smaller the pitch, the higher the power per square meter. It must also be remembered that there are limit values - they must be obtained from the manufacturer. Many manufacturers recommend not to step less than 5 cm. The distance between the turns is calculated using the following formula:
100 * (heated area / length of one section) = installation spacing in centimeters.
The section length is specified in the documentation.
Before laying the section, you need to check its resistance, it must match what is indicated in the complete papers from the manufacturer. The turns of the cable during measurements should not intersect, kinks and excessive tension should be avoided.
The mounting tape has special tabs that clamp the cable. The installation wire is connected to the heating section using a coupling, the connection and grounding diagrams must be viewed in the manufacturer’s documents.
If you decide to install a heating mat, you should also measure the resistance, but you are relieved of the need to calculate the pitch, fix the tape yourself and lay the cable.
Temperature sensor
The temperature sensor should be half a meter away from the wall on which the thermostat is placed. The sensor is placed in the mounting tube (it performs a protective function) and closed with a plug. The tube must be fixed between the threads of the heating cable at an equal distance from them using mounting tape.
Temperature controller
After the place under the thermostat box is ready, and the wires are connected, do not forget to de-energize the wiring. The thermostat has several outputs in which you need to connect the wires. Refer to the instructions for your device to connect everything correctly. The rear cover of the thermostat is placed in the junction box and fastened with screws, and the front panel is put on top. After that, you can check the health of the system and connections.
Electrical work should be entrusted to a specialist if you are not qualified to perform it.
Screed laying
This step is relevant for laying the heating cable, for heating mats its presence is optional. The screed is made using a cement-sand mixture, its thickness is 3-5 cm. The drying time varies depending on the properties of the particular mortar, temperature and humidity, but usually it is at least a week.
Laying decorative coating
Laying tiles or porcelain stoneware on underfloor heating is not much different from conventional installation. Care must be taken not to damage the wiring with a spatula. This is especially true in the presence of a mat embedded in the adhesive layer.