


Contents
In Sanskrit, the butterfly pose is known as Baddha Konasana, which means “bound angle.” As you can see, there is not a word about the butterfly here: “buddha” is “connected”, and “kona” is “corner”. But the position of the legs in this asana just resembles a beautiful representative of the fauna. As we practice the pose, we seem to flap our wings (our legs), opening and relaxing our hip joints more and more. And this is very useful! Especially for those who sit a lot (for example, work at a computer), who move little and go in for sports.
The butterfly pose is therefore very popular, it is included in almost every class. Pranayama (breathing exercises) and meditation are also practiced in this position. But it becomes available to those who have been practicing yoga for a long time. And today we will figure out how to master Baddha Konasana for beginners, learn all the subtleties of performing the asana, its beneficial properties and contraindications.
The benefits of exercise
Despite its apparent simplicity, the effectiveness of the butterfly pose for health is enormous:
- improves blood circulation in the pelvic organs and lower back, abdomen
- improves the condition of the kidneys, urinary organs
- opens and develops the hip joints
Those who do the butterfly pose every day are not threatened with diseases such as sciatica, varicose veins.
Recommendation for women
It is believed that Baddha Konasana is especially beneficial for women. A sedentary lifestyle, menstrual pain, ovarian dysfunction are direct indications for performing this asana.
It is recommended to all pregnant women! I’ll explain why. The butterfly pose improves the opening of the hip joints, in the pelvic region, blood begins to circulate better. All this – with daily practice – leads to easier childbirth. The asana also strengthens the bladder and uterus.
Exercise harm
There are no serious contraindications to the butterfly pose. But one must be very careful for those who have had knee or groin injuries. In this case, the exercise should be performed with folded blankets under the thighs.
Pay attention! Before starting to practice the butterfly pose, we still recommend that you consult a doctor for those who have chronic or acute pain in the hip joints, knee and spine injuries.
How to do the butterfly pose
ATTENTION! The description of the exercise is given for a healthy person. It is better to start the lesson with an instructor who will help you master the correct and safe performance of the asana. If you do it yourself, carefully watch our video tutorial! Wrong practice can be useless and even dangerous to the body.
Step by step execution technique
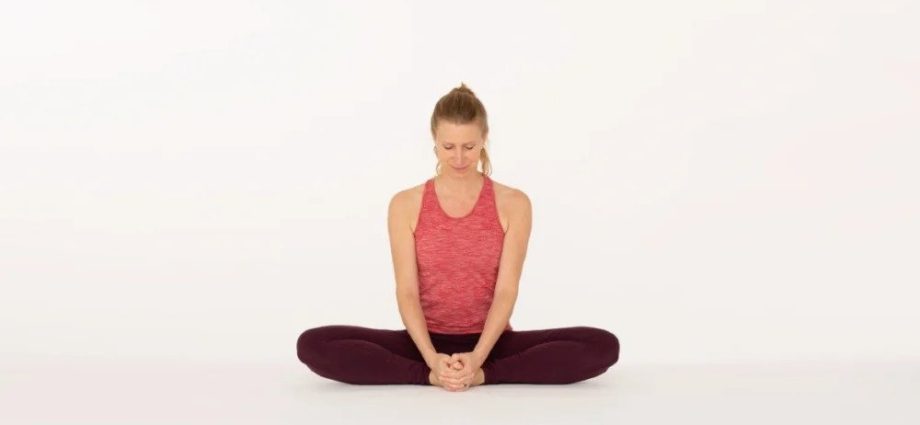
Step 1
We sit on a folded blanket. Place your feet together and pull them close to your groin.
Step 2
We take the palms of the feet and bring the heels as close as possible to the perineum.
Step 3
If possible, lower your hips to the floor and touch the floor with your knees.
Step 4
Shoulders back and down. Chin slightly on itself. We remain in this position with slow and deep breathing.
lead time
Start with 30 seconds or one minute, gradually increasing your stay in this asana to 3-5 minutes.
Pose Adjustment:
- Back is straight
- Chest expanded
- The body is extended from the coccyx to the crown
- Shoulders relaxed and down, neck straight
- The feet are turned with the soles outward, forming an open “book”
- Heels pulled up to the crotch
How to make it easier: 8 recommendations for beginners
At first, the “butterfly” may not open. Most likely this will happen if you have not practiced yoga before and have just begun to master this asana. It takes time and perseverance for your knees to sink to the floor and the “butterfly” to turn out. In the meantime, take your time, do not endure the pain in this asana and follow our recommendations.
- It is best to sit on a folded blanket.
- Before assuming this pose, sway a little to find the most comfortable position.
- If you find it difficult to keep your back straight, sit against a wall and lean against it.
- Lap. If they do not fall well (or there were injuries in the groin area), place rollers or folded blankets (towels) under the thighs. This will help relax the muscles and gradually open the pelvis.
- If you can’t grab your feet with your hands, grab your ankles. Do what works.
- In no case do not try to force your knees apart. While the muscles are tense, there will be no effect (on the contrary, such tactics can lead not only to pain, but also to injury). Relax them with deep, even breathing. With each exhalation, let go of the tension until you feel comfortable in this position.
- “wings” will also help to relax the muscles – that is, with the knees. Firmly hold the palms of the feet as close to the groin as possible and “wave” at a fairly fast pace. Run time: 1-2 minutes.
- We go deeper. After the swings, we gently lean on the right thigh, lowering the right hand on its inner surface. Push the left knee down with the left hand. We repeat the same on the second leg. Make sure that there are no jerks – all movements are smooth, meditative. We return to the center, align the back, reach up with the crown of the head and help with our hands to gently lower both knees to the floor – as much as possible. We breathe evenly and calmly. Let’s get out of this situation.
How to strengthen
So, your knees are already freely falling to the floor, it is easy and comfortable for you in this position. This means that it is time to deepen the asana. How to do it:
- With your palms, unfold the soles of the feet, while their inner edges are in contact with each other. You should end up with an open book.
- Keeping your back straight, as you exhale, tilt your body forward as far as possible.
ATTENTION! The buttocks lie on the floor, the torso is pulled forward.
- We try to touch the floor with the forehead, and then with the nose and chin. If possible, we remain in this position with slow and even breathing for 30 to 60 seconds (several breaths).
- We come out of the pose carefully. We inhale and as we exhale we raise the body, rounding the back. The chin is pressed to the chest. Raise your head last. We release the feet and connect the knees, helping with our hands. Stretch your legs forward and rest.
A set of exercises with a butterfly pose
When you have warmed up the joints and muscles in the butterfly pose (it will be very good if you also do the frog pose – see its description in our yoga asanas section), do not rush to get up from the mat. Now you can do a small set of exercises and thereby deepen your practice. So, what can you do after completing the butterfly pose:
- backbends
- twists (we put our hands on our shoulders and start turning the body 90 degrees)
- meditation or pranayama (breathing exercises in yoga)
Watch our video tutorial in which we explain how to do backbends and twists of the spine after butterfly pose.
Good practice and stay healthy!
We thank for the help in organizing the filming the yoga and qigong studio “BREATHE”: dishistudio.com