


Contents
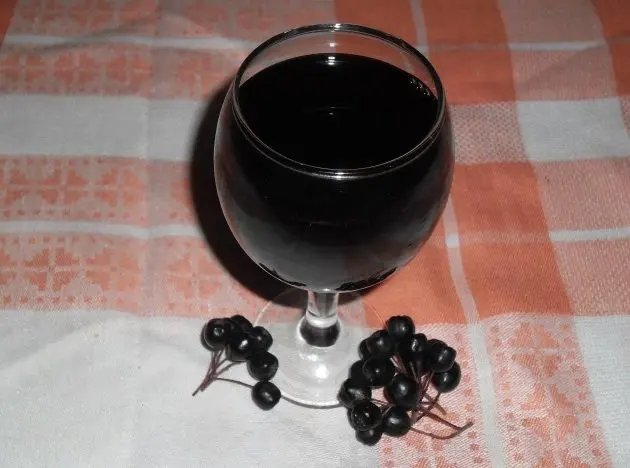
Many summer residents consider chokeberry to be a useless plant, the berries of which are unsuitable for winemaking. It’s time to debunk this myth. We will consider the best recipe for homemade chokeberry wine, repeatedly tested in practice. The cooking process is not difficult, but in addition to fruits, water and sugar, patience is still required.
First, the berries must be carefully sorted out, removing unripe, spoiled, rotten and moldy. The taste of the future aronia wine largely depends on the thoroughness of sorting the raw materials. Not a single bad berry should get into the drink.
Used containers should be sterilized with boiling water and dried, especially if they come into contact with other products, such as milk. Otherwise, there is a risk of infection and spoilage of the wine.
Ingredients:
- ripe chokeberry – 5 kg;
- sugar – 1 kg;
- unwashed raisins – 50 grams (optional);
- water – 1 liter.
blackberry wine recipe
1. Preparation of rowan
Knead 5-6 kg of chokeberry with clean hands. Each individual berry must be crushed.
It is impossible to wash the mountain ash, because there are wild yeasts on the peel, thanks to which the juice will ferment. All dirt will then settle to the bottom and be removed by filtration.
2. Mixing ingredients
Pour the crushed mountain ash into a non-metallic container of 10 liters (plastic, glass or enameled).
Add 500 grams of sugar to the blackberry. I do not recommend making wine from chokeberry without sugar, since the natural sugar content of the berries is low (up to 9%), as a result, the wine will turn out weak (maximum 5,4 degrees) and will be poorly stored.
To be sure of fermentation, I advise you to add a handful of unwashed raisins to the container with wine, on the surface of which there are also wild wine yeasts. The quality of the drink will not suffer from this. After adding sugar, mix the wort thoroughly until a homogeneous mass is obtained.
Tie the container with gauze to protect it from insects, and put it in a warm place (18-25 ° C) for a week. 3-4 times a day during the entire period, mix the juice and pulp (peel and pulp particles that have floated to the surface) so that mold does not appear on the surface.
3. Squeeze juice
After 3-7 days, the rowan berries will swell and rise to the top. If you immerse your hand in liquid, a characteristic foam will appear. This indicates that it is time to squeeze the juice.
You need to collect the pulp with your hands and squeeze out the juice. You can use a press, but not a juicer, which will clog quickly. The squeezed pulp cannot be thrown away, it will still be needed.
Filter all the juice obtained (remaining in the container and squeezed out of the pulp) through a regular kitchen colander or gauze. You can ignore the small particles that got into the liquid during filtration, we will remove them later. Pour the purified juice into a fermentation tank, filling no more than 40% of the volume, so that there is room for a new portion of juice, foam and carbon dioxide, which will be released during fermentation.
4. Work with pulp
Add 0,5 kg of sugar and 1 liter of warm water (25-30°C) to the squeezed pulp. Mix well so that the liquid rises above the pulp. Cover with a lid, leave for 5 days in a dark place at room temperature.
The pulp again needs to be mixed every day, drowning the berries that have floated to the surface, otherwise mold will appear.
5. Installation of a water seal
Install a water seal of any design on a jar of juice obtained earlier (you can put on a medical glove with a small hole in one of the fingers), then put it in a dark room with a temperature of 18-27 ° C for fermentation.


6. Getting a new portion of juice
After a week of settling, carefully strain the pulp through a colander. It is not necessary to press specially, since only high-quality juice is needed, and not dregs. The reused pulp and peel can be thrown away, they have given up all the useful substances and will no longer be needed.
7. Mixing juice
Remove the water seal from the jar with the first portion of juice, remove the foam accumulated on the surface with a spoon, then add the juice obtained at the previous stage. After that, install the water seal back on the fermentation tank.
8. Fermentation
The process lasts 25-50 days. The end of fermentation is indicated by the absence of bubbles from the water seal during the day (the glove has deflated and no longer inflates), sediment appeared at the bottom, the wine became lighter. After that, you will get a young wine from chokeberry with a sharp taste, which needs maturation to improve the organoleptic properties. It’s time to drain the wine through a straw into another container, without touching the sediment.
At this stage, the drink can be sweetened to taste or fixed with vodka (alcohol 40-45%) in an amount of 2-15% of the volume of wine. Fixing promotes storage, but the taste and aroma become tougher.
9. Maturation
Fill the containers to the top with wine, close tightly (if sugar was added for sweetening, it is better to keep the first 7-10 days under the shutter) and transfer to a refrigerator or cellar with a temperature of 8-16 ° C. Leave to ripen for 3-6 months. When sediment appears, filter once every 30-45 days.

Ready chokeberry wine can be bottled and hermetically sealed. If stored in a cellar or refrigerator, the shelf life is 3-5 years. Fortress – 10-12% (without artificial fixation).
PS The recipe was changed on 31.10.2016/XNUMX/XNUMX. Comments prior to this date are irrelevant.