


Contents
It would seem that every grower knows about daylilies. These unpretentious, and at the same time beautiful plants can be found almost everywhere – in the school flower bed, in household plots, near shops and office buildings. Such popularity is due to the fact that planting and caring for daylilies in the open field is so simple and easy that even a beginner can perform a number of activities.
Description of the plant
Daylilies belong to the Asphodelov family, the subfamily of Daylilies and have another name – Krasnodnev.
The name of the genus Hemerocallis, to which this plant belongs, is determined by one feature – each flower of the Red Day blooms its petals in the morning and closes in the evening. Forever and ever. However, the number of flowers and the duration of flowering of the plant allow you to continuously enjoy bright, inimitable daylilies for a month.
A brief description of the daylily comes down to the following data:
- Refers to herbaceous, rhizomatous plants.
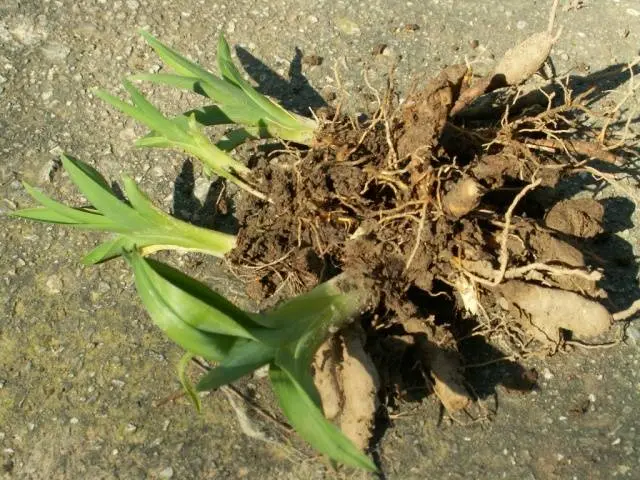
- The roots are fleshy, powerful, cord-like. Thickened in places, sometimes forming stolons.
- The leaves are broadly linear, entire, large, arched or straight.
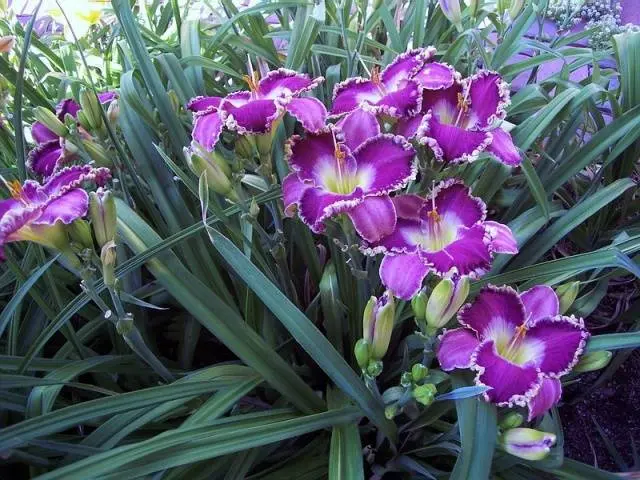
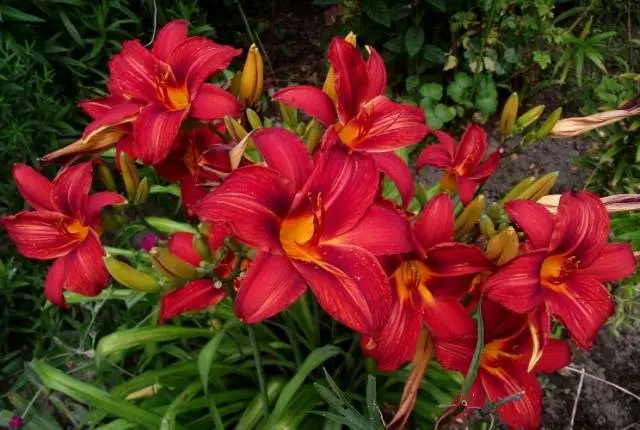
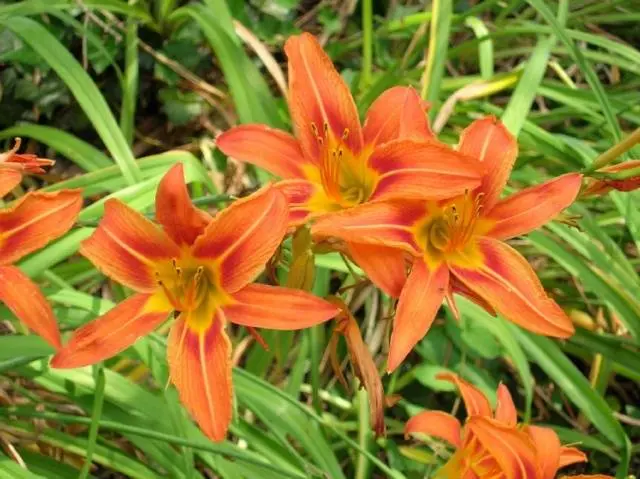
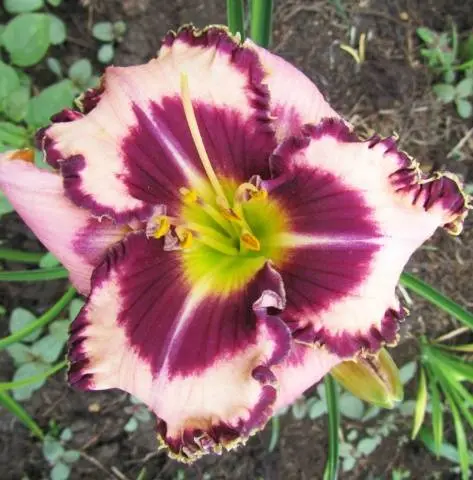
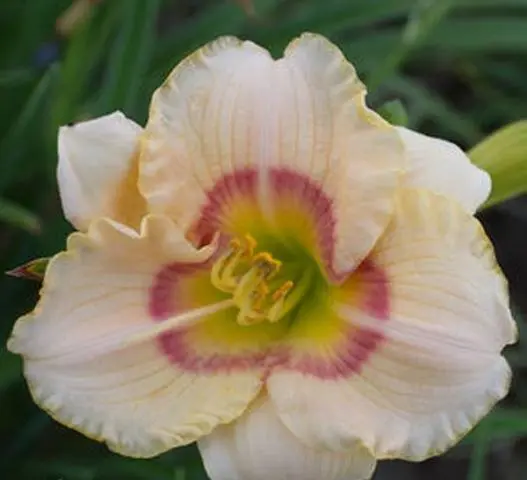
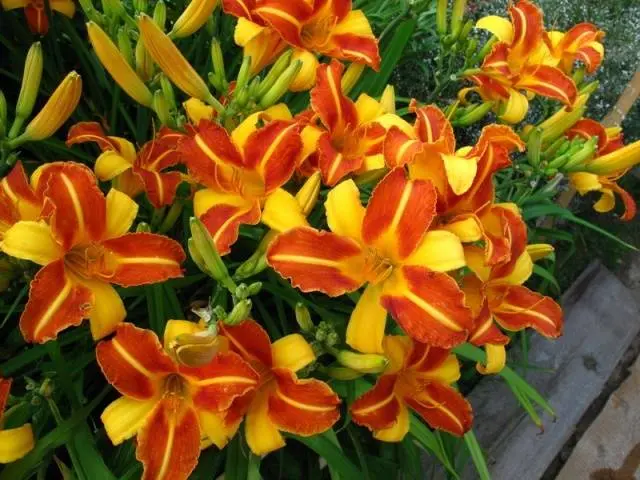
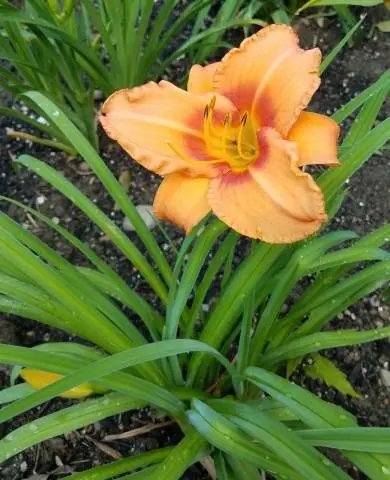
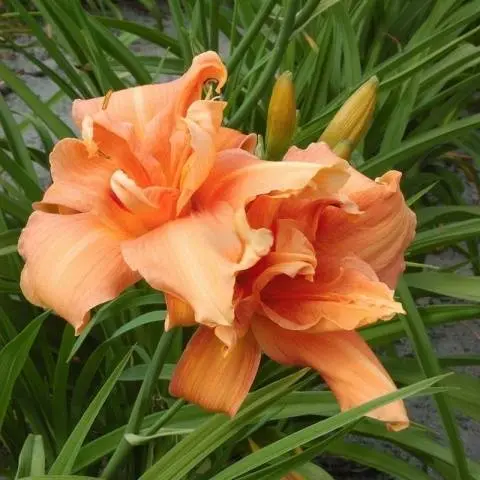
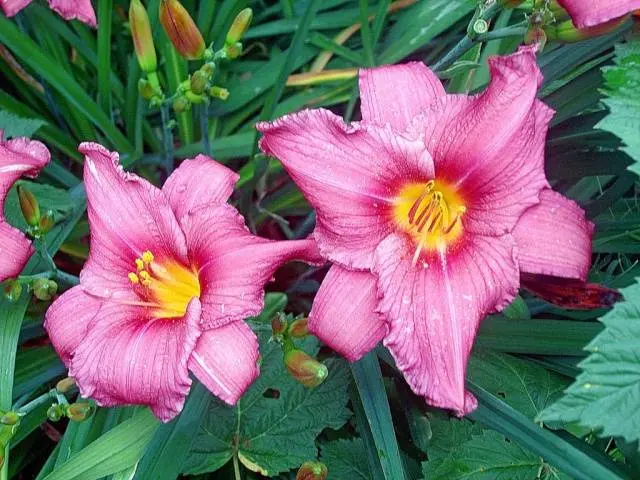
- Flowers are very large. The standard range of colors is yellow, red, orange. In varietal flowers, the range of colors is much wider – pink, burgundy, lilac, dark brown, purple. The flowers are six-parted, funnel-shaped, with a small tube. Daylily inflorescences consist of 2-10 flowers. On one peduncle, 1-3 flowers bloom at the same time. The duration of flowering of each flower is one day. In some varieties of plants, flowers bloom in the afternoon or late afternoon. The average duration of flowering plants is 25-30 days.

- Peduncles high, up to 1 m, slightly leafy, towering above the leaves. According to the height of the peduncles, daylilies are conditionally divided into undersized (up to 30 cm), medium (from 30 to 60 cm), semi-high (peduncles height from 60 to 90 cm) and tall – the height of the peduncles is more than 90 cm.
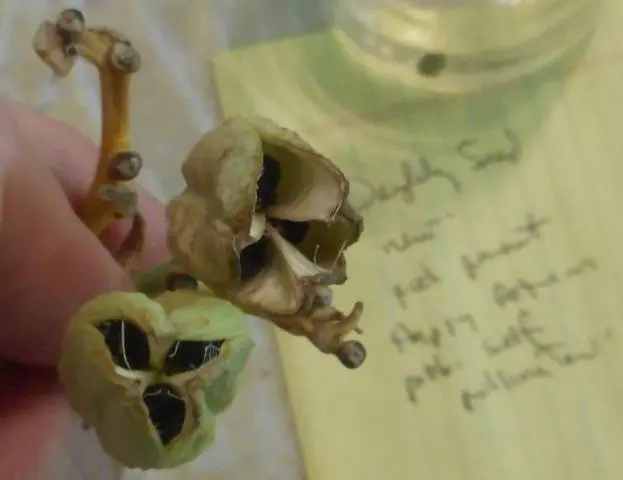
- The fruit is a triangular seed capsule containing a small amount of black, shiny seeds.
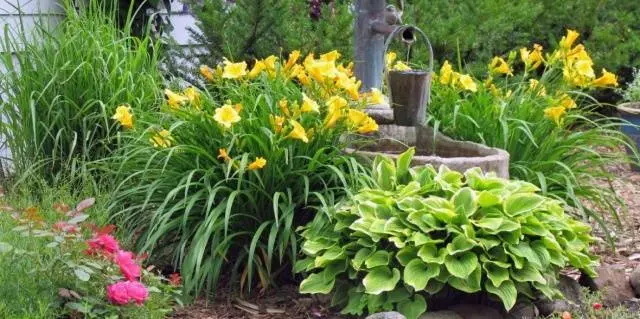
Daylilies can be grown for ornamental purposes either alone or in combination with other plants. Tetraploid varieties look very luxurious in flower beds and flower beds. Daylily bushes grow quickly, the flowers are much larger than those of traditional plants, and they are distinguished by a variety of colors.
Growing conditions
In planting and care, daylilies are not capricious and do not require close attention. They grow equally well in shade and partial shade. However, in a lit, sunny place, plants bloom more luxuriantly and brightly. In the shade, the coloring becomes faded, daylilies bloom later and close the petals earlier.
It is worth noting that some varieties of plants, the color shades of which are closer to dark tones (burgundy, dark lilac, dark brown), are best grown in partial shade; in the sun, their main varietal feature – individual colors – loses its uniqueness. In partial shade, daylily colors become more saturated and bright.
In some hybrid plant varieties, flowers open fully only under bright sunlight. Therefore, when planting a daylily, pay special attention to the recommendations for planting your chosen variety. In total, daylilies should be exposed to at least 6-7 hours of sunlight per day.
The beginning of the growing season in the daylily is early. The first green leaves appear almost immediately, as soon as the thermometer reaches a positive mark at night.
Experienced flower growers plant daylilies in open ground in spring or autumn. But, like all plants, krasnodnevy easily tolerate spring planting, get sick less, gain color earlier. The recommended distance between plants is 40-60 cm.
Daylily flower growers are not in vain considered a long-lived plant – some specimens can grow in one place without a transplant for up to 12-15 years. Therefore, before planting, carefully choose a suitable place so as not to disturb the flowers with an unscheduled transplant.
Before planting a daylily in open ground in spring, check out some of the requirements that are the key to active growth and abundant flowering:
- Daylilies love sunny, well-lit places. The exception is varieties with dark shades of flowers – they fade from too bright sunlight. Therefore, it is advisable to plant them in those places where the plants will be in the shade at noon.
- Loose, light and fertile soil should retain moisture well. However, flowers do not like prolonged stagnation of water.
- The composition of the soil should be neutral or slightly acidic.
- It is undesirable to grow daylilies near trees and shrubs. It is difficult for plants to compete with these crops for moisture and nutrients. Flowering will be scarce and rare, the flowers become smaller over time, and varietal characteristics are lost.
The soil for growing daylilies in open ground is prepared in advance. Too heavy soil needs to be lightened – add a little sand and compost, dilute acidic soil with lime, chalk or wood ash, apply complex mineral fertilizer to poor soil. Dig up the area with a shovel bayonet. Don’t forget to pick out the roots of the weeds. Leave the beds alone for a few days.
Daylily is a plastic, soft plant. It quickly adapts to any changes and growing conditions. However, without observing the rules of agricultural technology and the recommendations of experienced flower growers, it will be difficult to achieve long and lush flowering. Only proper daylily planting and competent care will help you grow these beautiful and unique plants.

Types and varieties of flowers
For the first time, a hybrid variety of daylily was bred in 1893 by the biologist J. Eld. In 1975, the flower catalog already included more than 15 hybrid plant varieties. Ten years later, their number almost tripled – about 000. It is not known exactly how many varieties of daylily exist at the moment.
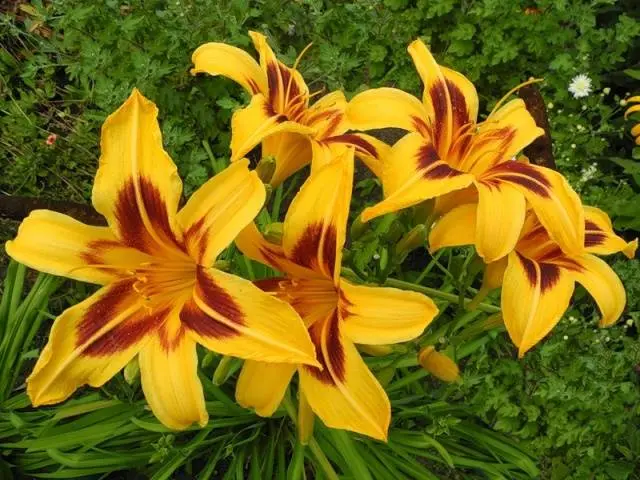
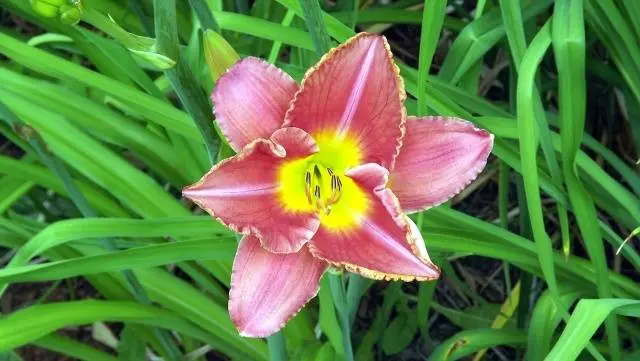
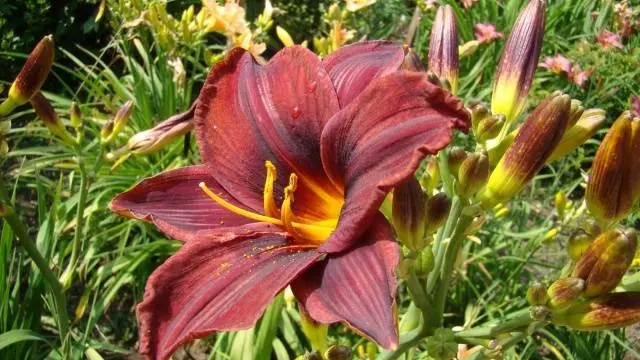
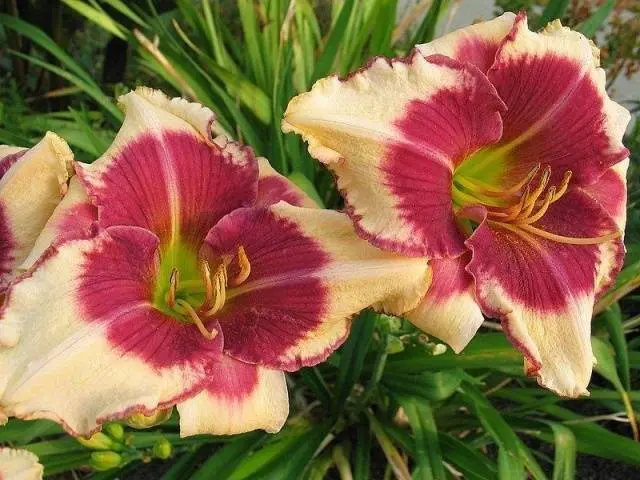
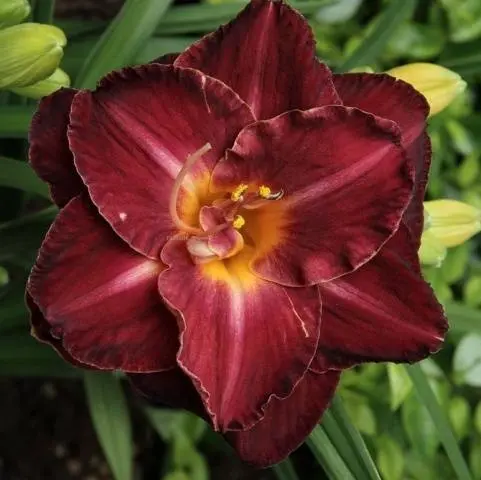
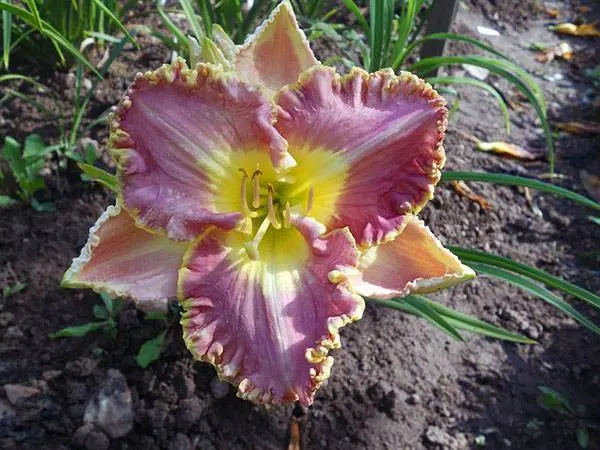
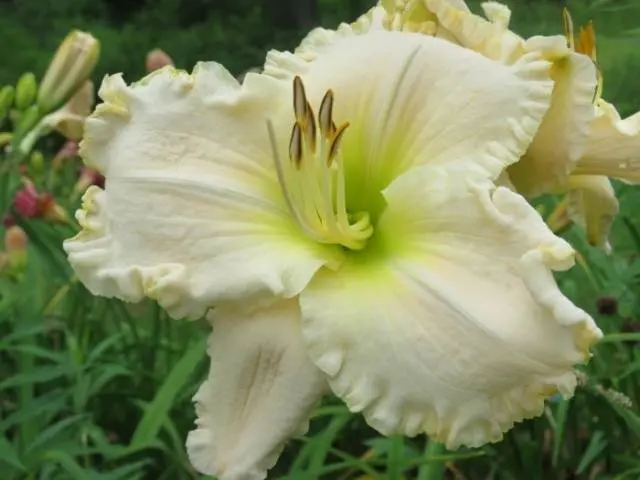
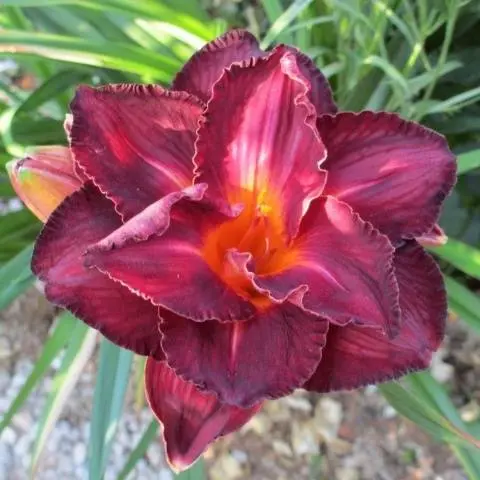
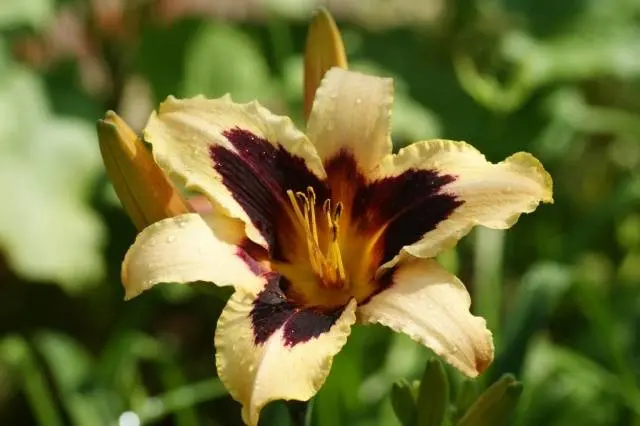
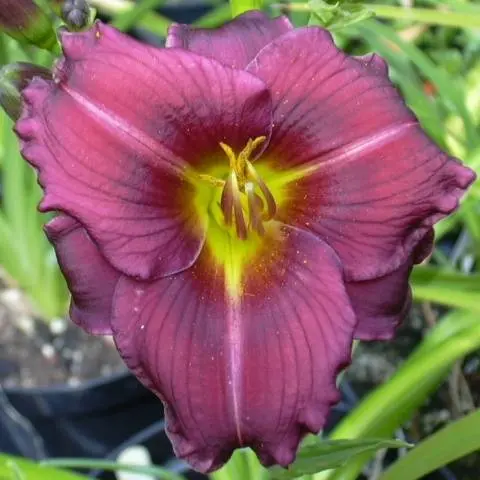
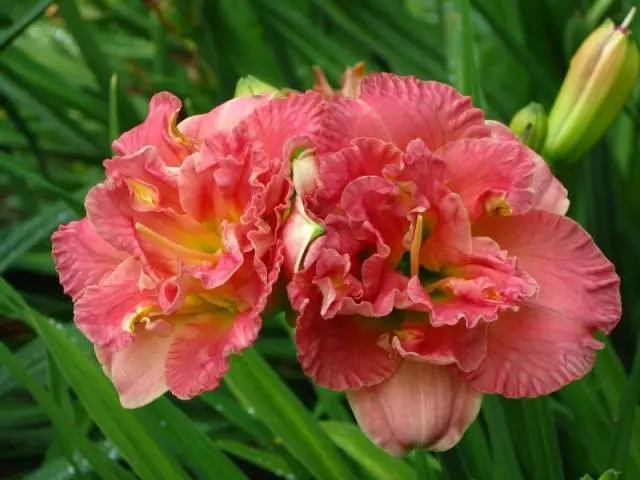
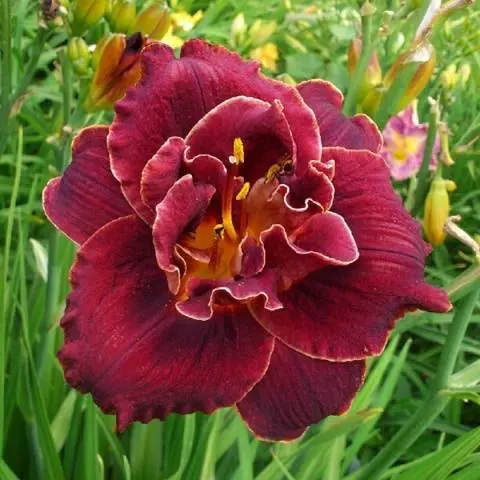
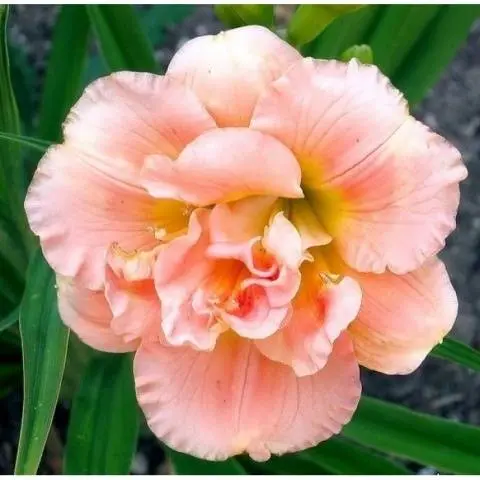
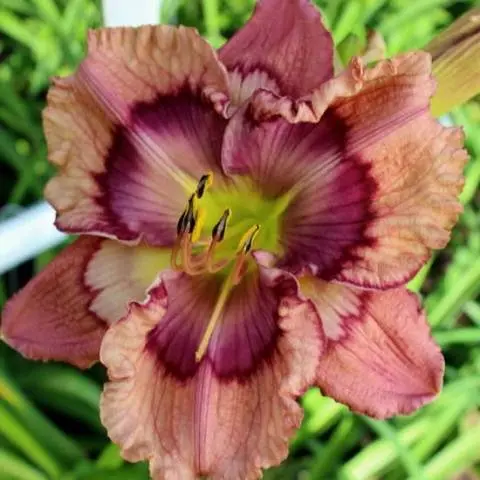
It is impossible to tell about all varieties of these inimitable flowers. We invite you to appreciate the beauty and uniqueness of some varieties in the photo below.
- Ai On America
- Apre Mua
- Бестселлер
- Blizzard Bay
- Burgundy Lion
- Wild Horses
- Pone Of Profesi
- Lacey Doyle
- Knight Ambers
- Ash Flame
- Siloam Baby Talk
- Siloam Double Classic
- Frans Hals
In addition to the variety of colors, modern daylily varieties have the so-called ruffles or denticles along the edge of the petals, some specimens are distinguished by a peculiar pattern on the petals. There are even terry varieties of plants.
Methods of reproduction
There are three ways to propagate daylilies:
- seeds
- air layers
- division of the bush.
And each method is so easy to perform that it will not be difficult for you to grow these delightful plants in your garden.
Before planting daylilies in the spring, it is worth knowing that not all plant varieties propagate by seeds. In many specimens, even under the condition of ripening, the seeds do not retain varietal characteristics or are not at all able to germinate and produce full-fledged offspring. Therefore, flower growers rarely grow daylilies from seeds.
Air layers
A simple and affordable method of daylily propagation is by air layering. 2-3 weeks after flowering, small rosettes begin to appear on the peduncles of some plant varieties. They are great for propagating flowers and retain all the varietal characteristics of the mother plant.
Daylily can be propagated as follows:
- Do not cut the flower stalks, let the rosettes develop well.
- As soon as the layers grow well, cut them off along with the peduncle. Each rosette should be on a segment of the peduncle 8 cm long, 4 cm above and 4 cm below.
- Rosettes are placed in water with root for 1,5-2 weeks.
- After the appearance of well-developed roots, the layers are planted in pots or in open ground.
In the event that it is too late to plant a daylily on a flower bed, rooted sockets will have to be planted in pots. In winter, provide flowers with care on a par with other indoor plants, and plant them in a flower garden in spring.

Seeds
Not all daylily varieties propagate by seeds. Seeds of hybrids will not transfer the varietal characteristics of the original plant. And in some varieties, the seeds do not germinate at all. Therefore, this method of reproduction does not guarantee that you will grow exactly the flower from which the seeds were collected.
If you still decide to try to grow a daylily from seeds, you have to follow the following planting algorithm:
- Soak plant seeds for a day or two in water. Remember to change the water once a day;
- Sow the swollen seed material in a container. Be sure to have holes and drainage at the bottom of the container. The soil for growing daylilies should be loose and nutritious. The distance between seeds is 2-3 cm, the embedment depth is 0,5-1 cm. When planting a daylily immediately on a flower bed, the minimum distance between seeds will be 5 cm, row spacing – 20 cm.
- When growing plants in room conditions, as soon as you notice 4-5 full-fledged leaves in seedlings, pick them up in separate containers, or, if the weather permits, plant them immediately in a flower garden.
Such plants bloom only for 2-3 years. Caring for daylilies after planting is practically the same as caring for other garden flowers.
Boarding rules and dates
Propagation of plants by dividing the bush is the most popular and affordable for every grower. However, the condition of your flower garden depends on how well the daylily is planted and cared for in the open field – either the plants will actively grow and give you pleasure during flowering, or they will be forced to fight for a place in the sun.
Recommended landing dates
There is no definite answer to the question of when to transplant daylilies: in spring or autumn. Landing time depends on several factors. The first is the age of the flowers: whether you are planting a young plant, or whether you have decided to plant and rejuvenate an old plant.
Young, recently purchased daylilies can be planted outdoors at any time – in spring, summer, and early autumn. If in the spring there are no problems with planting, then in the summer it is advisable to plant young curtains in cool weather.
In autumn, flowers can be planted in September. The main thing is that the plant has enough time for successful rooting and preparation for winter.
You still need to divide or transplant daylilies in the spring. Until autumn, the plants will take root, grow well and get stronger. They will have enough strength to endure severe frosts without loss.
The second factor affecting the planting time of daylilies is climatic conditions. If in the southern regions with a mild climate it is possible to plant plants without fear in mid-September, then in Siberia and the Urals it is better to transplant daylilies in the spring.
How to plant krasnodnev
Immediately before planting, daylilies need to be inspected and prepared. Young, acquired plants should be carefully examined and diseased and affected areas removed.
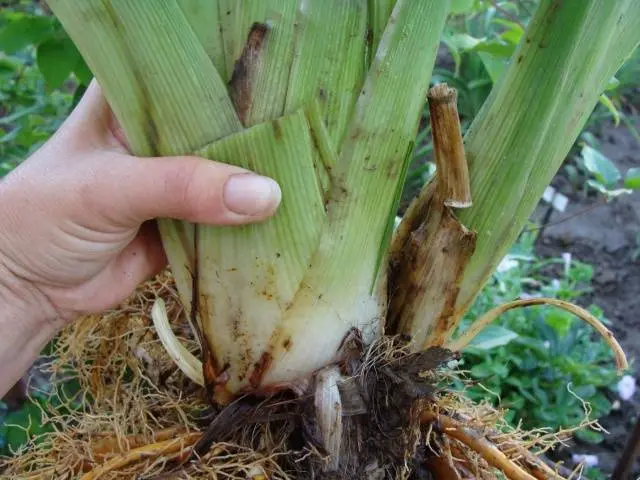
Old plant bushes need to be watered abundantly per day. Carefully dig up daylilies with a pitchfork, trying to cause as little damage to the root system as possible. Divide the bush into several small pieces.
It is advisable to separate the delenki from the edges, since the central part of the bush takes root worse. The peripheral parts of the plant have more powerful roots, will be accepted faster and will hurt less.
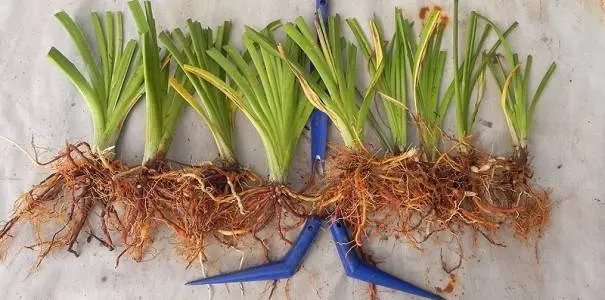
Examine the separated daylily bushes and remove the dead roots, trim the healthy ones a little. This stimulates the formation and growth of new roots. Daylily leaves are cut to a height of 20-25 cm so that the plant puts all its strength into rooting.
You can soak the daylily roots in a light pink solution of potassium permanganate for disinfection or in water with the addition of root growth stimulants. The minimum soaking time is 3 hours.
After this procedure, the delenki are pulled out of the solution and allowed to dry a little. The daylilies are now ready for planting outdoors.
Plant daylilies in the ground in spring or summer, preferably in cool weather. Proper planting of a daylily involves the following activities:
- The planting hole is dug in such a way that the entire root system of the plant fits in it, and there is some free space left on the sides. The optimal dimensions of the pit: depth – at least 30 cm, diameter – from 40 cm, depending on the size of the division.
- A small mound is poured in the center of the planting pit and the daylily root system is placed on it. All roots must be carefully straightened. The roots should be directed to the side and at a slight angle down.
- The level of penetration is clearly marked on the divisions – at the base of the rosettes there is a light green, almost white stripe. Position the daylily in height at the same level and cover the roots with soil.
- It is impossible to deepen the root neck of the plant by more than 2-3 cm. There should not be bare roots.
- Pour plenty of warm water over the daylilies, being careful not to get on the leaves.
After planting the daylily in spring, the soil in the flower garden can be mulched to retain moisture.
Works in the flower garden
Despite the unpretentiousness, after planting in the spring, daylilies need care. Watering, fertilizing, pruning – this is a list of the necessary work that you should regularly carry out in the flower garden so that the plants always delight you with their violent flowering.
Regular and plentiful watering is the main component of competent daylily care in spring and during summer. The biological feature of the root system of plants allows them to withstand a long dry period. But the brightness, the number of buds and the size of the flowers are greatly reduced. Remember that daylilies are moisture-loving plants.
With severe moisture deficiencies, daylilies drop their buds, the foliage loses its bright color. Therefore, it is desirable that the soil in the flower garden is always wet. If summer does not indulge in rains, you need to water the plants as often as possible.
During the first year after transplanting or planting, daylilies do not need additional feeding. Plants have enough of those nutrients that are contained in the soil. But starting from the second year, the flowers need to be fertilized regularly. Daylilies are fertilized in spring and summer.
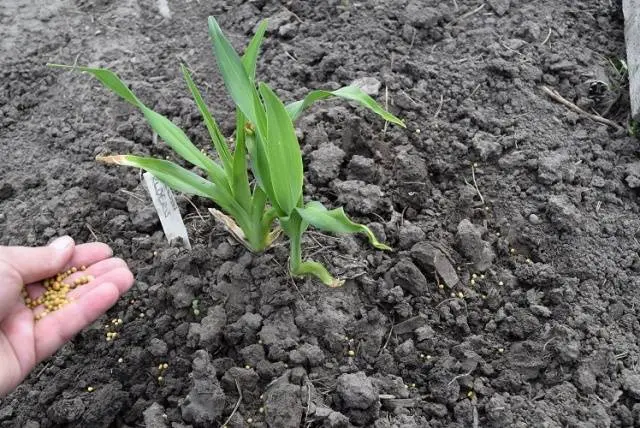
The first top dressing – complex mineral fertilizer – apply in early spring in liquid or dry form. The second feeding of plants with complex fertilizer is carried out before the start of budding. The third – 3-4 weeks after the end of flowering with fertilizers based on potassium and phosphorus. They will help plants recover from violent flowering and prepare for winter.
Pruning daylily bushes is carried out in several stages:
- In the spring, cut off old leaves along the edges of the bushes, this will help the plants rejuvenate.
- After lush flowering, it is necessary to cut off all flower stalks.
- In autumn, when preparing the daylily for winter, you need to cut off the old, pale foliage. Young leaves that have grown relatively recently can be left.
As you can see, caring for daylilies after planting in open ground is not at all difficult. All activities are very familiar to every grower and are not at all burdensome.
Possible problems in growing
Even the most unpretentious plants can sometimes be attacked by insect pests or the harmful effects of harmful spores and bacteria. Daylilies were no exception.
They do not cause much trouble to flower growers. But it is imperative to know what and who can threaten plants. When growing a daylily, you may encounter the following problems:
pest, disease | Primary signs | Methods of struggle |
TRIPS | Flowers become ugly and shapeless, leaves are also affected. | Cut and remove the affected parts of plants, treat with insecticides. |
Viruses | Spots or strokes appear on the foliage, in general the plant looks sick. | It is very difficult to cure. Most often, affected plants are dug up and burned. |
daylily mosquito | Insect larvae appear in the buds. | Affected buds are cut off and removed from the site. |
Root rot | The basal neck of the plant softens, acquires a dark color, emits a putrid odor. Leaves begin to turn yellow and die. | The affected plants are dug up, cleaned of the affected parts, washed in a dark pink solution of potassium permanganate. Daylilies cannot be planted in the same place – prepare another site for them. Before planting, disinfect and dry the roots of the plant well in the shade. |
Rust | Absence of buds or very poor flowering, slow growth, small, yellow-orange pustules on the leaves. | All affected leaves and those that are close to the sick must be urgently cut off. The plant is treated several times with fungicides until complete recovery. Drugs must be changed with each treatment. |
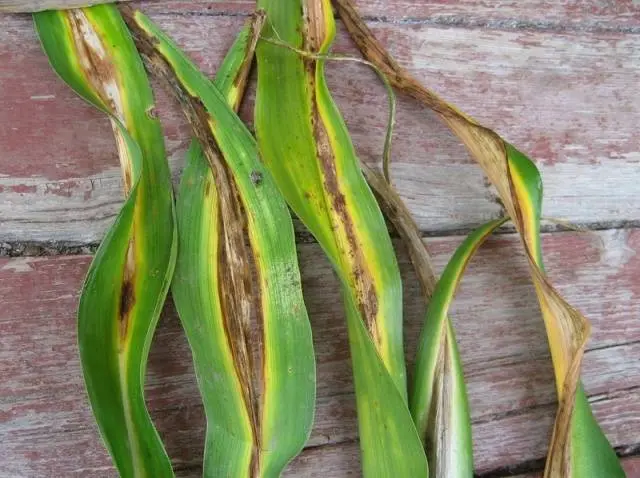
Foliage striping | Light yellow strokes along the entire length of the leaves, most often located closer to the center of the leaf. The appearance of a large number of small red-brown spots, which soon increase in size. | The affected parts of the plant must be cut off, the bushes should be treated with foundationazole at a concentration of 0,2%. |
Sometimes when growing a daylily, other problems can arise that are not related to pests or diseases. Most often, flower growers face the following complications:
- No buds. Reasons: deep planting, lack of lighting, excess nitrogen in the soil.
- Weak, brittle peduncles. Reasons: excess moisture and nitrogen.
- Dark and reddish spots on the petals. Reasons: Traces from the rain or sunburn.
- Buds do not fully open. The phenomenon is temporary, the adoption of urgent measures is not required, since flowering is restored over time.
An expert will share the secrets of growing and propagating daylilies in the open field

Conclusion
Planting a daylily in the open field and caring for it is not particularly difficult for both a professional and a beginner. The popularity of these truly beautiful plants is growing every year. A wide range of varieties, a rich color palette and amazing plant vitality are just a few of the reasons that influence the choice of flower growers in favor of a delightful daylily.