Contents
A petunia transplant is necessary during a pick, and then into separate pots for growing on a balcony or in open ground in flower beds. It is not necessary to strictly follow this sequence. Most gardeners only transplant once, transferring seedlings to larger pots. Then they can be placed on a balcony, in a flower pot, on a veranda or terrace.
How to transplant petunia seedlings into a pot
If they plan to grow flowers in the open ground in a flower bed, they do exactly two transplants of petunia seedlings:
- The first (dive) from common seedling boxes to individual containers, for example, peat cups.
- The second – from individual pots to the flower bed.
Terms, features of transplantation and care rules at each stage are described in the following sections.
When to repot a petunia
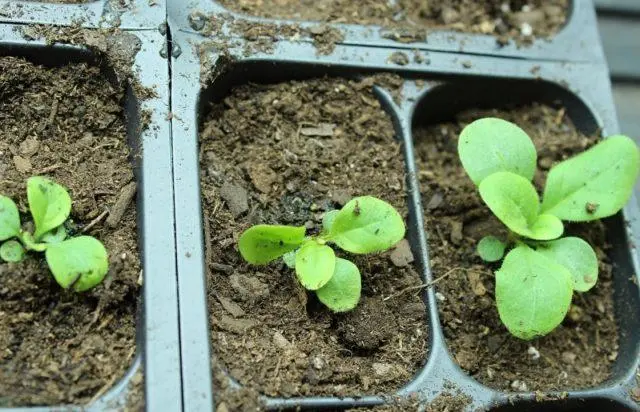
Picking seedlings is planned at the stage of appearance of 2-3 true leaves. They are formed 3-4 weeks after planting the seeds or 2-2,5 weeks after the appearance of mass seedlings. Seedlings grow together, so picking is done in one day.
As for transplanting into the ground or into a pot for outdoor cultivation, most often it is performed after the May holidays, in the second decade of the month. Specific dates depend on the weather and climatic features of the region:
- in the middle lane, Moscow region, transfer is carried out in mid-May;
- in the Urals, in Siberia, work begins in the second half of the month;
- in the southern regions, it is possible to plan a petunia transplant as early as the end of April. This is acceptable if the temperature does not drop below +14 °C at night.
Choosing a pot and soil
To properly transplant a petunia at home, you need to choose a suitable pot and make up the soil. Containers for picking can be of small volume, from 200-300 to 500 ml. Peat pots are best suited, since the seedlings do not need to be removed from the ground during the second transplant. It is enough to plant directly in a pot, the material of which decomposes in the soil and serves as a natural fertilizer. If they are not available, you can also use plastic cups or special cassettes.
Seedlings can be grown in cassettes
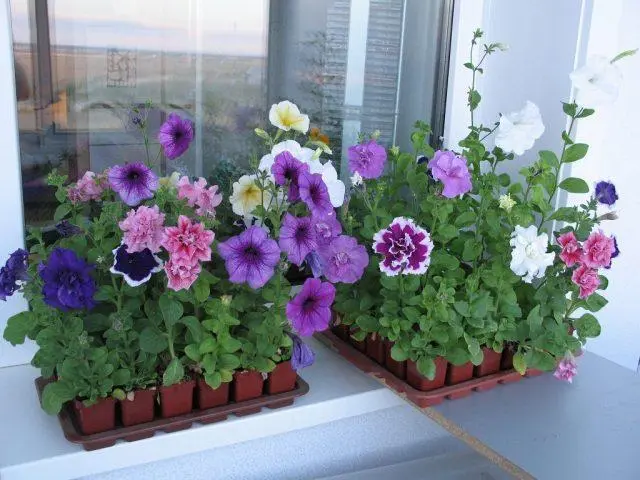
For growing in a flowerpot on a veranda, balcony, window sill, pots made of any material are suitable – ceramics, plastic, plastic. The main condition is that they must have drainage holes at the bottom to drain water. The volume depends on the type of plant:
- ampelous or cascading varieties require spacious 5-liter containers;
- 1 liter is enough for simple petunias;
- terry varieties need three-liter pots.
As for the soil for transplanting, it can be purchased at the store (a universal mixture for seedlings is suitable). Or prepare it yourself in the fall, mixing black peat with humus and sand in equal amounts. Or take sod land, compost and sand in a ratio of 2: 1: 1.
Previously, the soil for transplanting petunias is recommended to be disinfected. To do this, use a solution of potassium permanganate (1 g per 1 liter) or keep the mixture in the freezer for several days. If there is no time, you can put in the oven for 20 minutes (temperature 120 degrees).
Petunia transplant in a pot
Transplanting petunia into separate pots is quite simple. Regardless of which pick is performed (first or second), the technology is approximately the same:
- A few hours before transplanting, the plants are thoroughly watered so that a dense earthen lump forms around the roots.
- Fill a new container with soil mixture to 2/3 of the volume. It should not be completely filled, because during watering in the future the soil will sag a little, and then it will be possible to gradually add new soil.
- A small hole is marked in the center, the depth of which depends on the size of the seedling. For the first transplant of petunias, 2-3 cm is enough, for the second – 4-5 cm.
- Seedlings are removed from the old container for transplanting into a new one. This should be done especially carefully during the first picking of the petunia, since the root system is still very weak. Plants are removed with a spoon, tweezers or stick, separated from each other, if necessary, unraveling root layers.
- Then they are transplanted into new containers and gently compact the soil. Immediately after transplantation, it can be treated with a fungicide, for example, “Fundazol” to prevent the black leg.
- Water each petunia seedling well again, being careful not to hit the leaves. In order for the seedlings to take root better in a new place, you can prepare a solution of Epin, Kornevin, Energen or another growth stimulant.
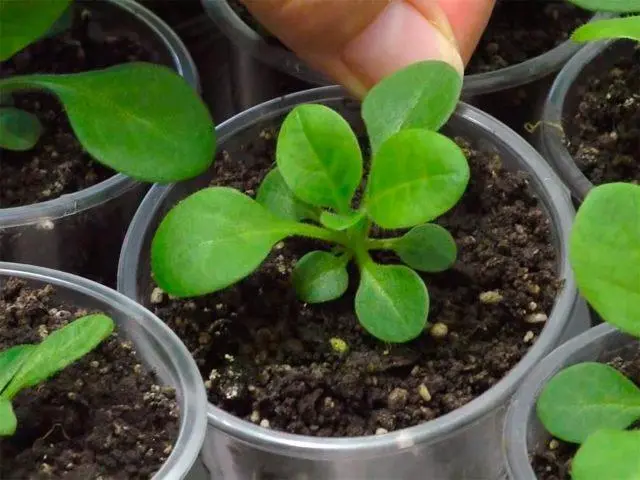
During picking, seedlings are transplanted into plastic cups.
Aftercare
After transplantation, the strengthened seedlings of petunias are placed in a cool and slightly shaded place for two days. The temperature should be below room temperature – optimally within 16-20 degrees. It is under such conditions that the roots take root quite quickly, and the seedlings do not stretch out, but develop quite normally. Further (on the third day after transplantation), they are placed on a well-lit windowsill and grown already at room temperature of 18-22 degrees.
Seedling care is quite simple. Water it twice a week, constantly maintaining a moderate level of soil moisture. The soil is periodically loosened gently or a new layer is added (the second option is preferable). Also, after transplantation and two weeks later, it is recommended to feed with complex fertilizer, for example, Kemira Lux. 10-15 days before transplanting into the ground, the seedlings are hardened by taking the containers to the balcony or veranda.
Transplanting petunias in open ground
Petunias are transplanted into flower beds only in the second half of May, when the threat of return frosts is minimized. First you need to choose a suitable place – it must be well lit and dry (lowlands are excluded). The basic rules for transplantation and care are described below.
Site Preparation
Petunias grow well on fertile and loose soils with a slightly acidic or neutral reaction. The site should be prepared in advance – two months before transplanting, the soil is dug up and compost or humus is added in a bucket per square meter. If the soil contains a lot of clay, sand or sawdust up to 3-5 kg is embedded in it for the same area.
How to transplant a petunia into the ground
The algorithm for transplanting strengthened petunia seedlings into the ground, to a flower bed:
- First you need to level the surface and mark several holes with an interval of at least 20 cm. For large plants, leave a distance of 25-30 cm.
- A small layer of stones fall asleep at the bottom.
- A few hours before transplanting, seedlings are watered.
- Then they carefully roll over from the pots, keeping the earthen clod.
- Planted in the center of the hole, tamp the soil a little.
- Then lightly water and mulch after a few days.
Plants are transferred to open ground or pots for outdoor cultivation in the second half of May.
Outdoor care
Petunia is unpretentious. To ensure normal flowering and avoid diseases, you must follow the basic rules of care:
- Water the plants at least once a week, and in the heat – twice.
- Feed a week after transplanting, and then every 10-15 days until mid-August. Complex mineral fertilizers are used in alternation with organic matter, for example, mullein infusion 1:10.
- The soil is periodically loosened, if necessary, weeds are removed. You need to work carefully, especially after transplanting a petunia, since the root system of the plant is in the surface layer of the soil.
- Periodically, flowers are inspected and treated for fungal diseases and pests. Fungicides and insecticides are used.
For lush flowering, fertilizer should be given every two weeks.
Possible mistakes
Transplanting petunia seedlings into cups, and then into pots, flowerpots or in open ground is not so difficult. But sometimes plants develop poorly, stretch out, which will have a bad effect on their flowering in the future. To avoid such phenomena, you need to familiarize yourself with the mistakes that beginner flower growers often make:
- If the seedlings lag behind in development, the main reason is related to the wrong temperature regime. It is a mistake to think that after transplantation it needs to be grown in warmth – on the contrary, the temperature should be below room temperature (16-20 degrees and not higher).
- The first days after transplantation, the petunia should be shaded, for example, using a white linen.
- If the stems are too thin and the seedlings have begun to stretch, the reason is due to a lack of light or too high a temperature.
- If the leaves turn yellow, dry and fall off, it is necessary to increase watering, and also regularly give the plants complex fertilizers.
Conclusion
Petunia transplantation at home should be carried out 1-2 times. Seedlings need a mandatory pick after the appearance of 2-3 leaves. Seedlings can be immediately transferred to separate pots or small cups. They are moved to open ground no earlier than mid-May. Next, you need to regularly water and feed.