Contents
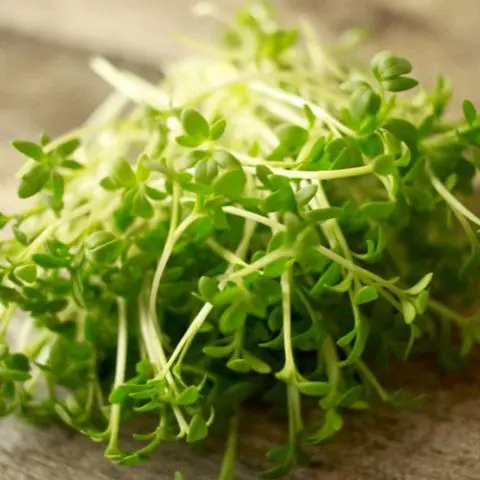
Growing watercress on a windowsill is an easy and affordable way to get delicious greens on your own any time of the year. Watercress is an unpretentious but very useful plant that can be grown at home on a windowsill.
Features of growing watercress at home on the windowsill
The choice of this type of lettuce for home gardening is due to the ease of its agricultural technology and the benefits of this variety of cabbage plants. Watercress has a tart taste and low calorie content (33 kcal per 100 g).
Greens are rich in vitamins, folic and ascorbic acid. It has a beneficial effect on the functioning of the thyroid gland, gastrointestinal tract, and is recommended for bronchitis, anemia and cough. The substances contained in watercress stimulate the elimination of toxins, calm the nervous system and help with insomnia.

Greens contain many vitamins, essential oils and trace elements
Watercress is very useful for smokers, as it helps to reduce cravings for nicotine. It is also able to prevent severe asthma attacks, so its regular use is recommended for people suffering from these diseases.
The advantages of watercress, in addition to ease of care, include frost resistance and shade tolerance.
The first thing to do when deciding to grow watercress at home on a windowsill is to buy seeds. Choose, as a rule, from the following 3 types:
- planting season;
- whole-leaved;
- curly.
A sowing variety up to 21 cm high is an early ripening crop with large leaves and the sharpest taste.
Watercress “Zabava” has a slightly spicy taste
Whole-leaf watercress is more desirable for growing on a windowsill, as it has a mild, savory flavor. It has finely cut leaves and grows up to 15-17 cm.
Green watercress “Ducat” can be added to salads and meat dishes
Curly watercress with the smallest leaf plates reaches 17 cm. Taste qualities – spicy, slightly reminiscent of horseradish.

Green watercress “Azhur” can decorate ready-made dishes
Seeds can be collected independently or purchased at a specialized store.
When buying seed material, it is worth checking not only the expiration date, but also the integrity of the packaging.
Before planting watercress on the windowsill, stock up on the following equipment:
- capacity 9-10 cm deep (plastic container, flower pot, bowl, deep plate, special tray);
- cling film;
- substrate (cotton wool, foam rubber, small wood chips) or soil (a mixture of peat and sand, rotted compost);
- shallow mug or glass;
- tea spoon.
Having prepared the tools, you can get to work.
How to grow watercress on a windowsill
The process of growing watercress from seeds on the windowsill does not require serious financial investments, extra efforts or special time costs.
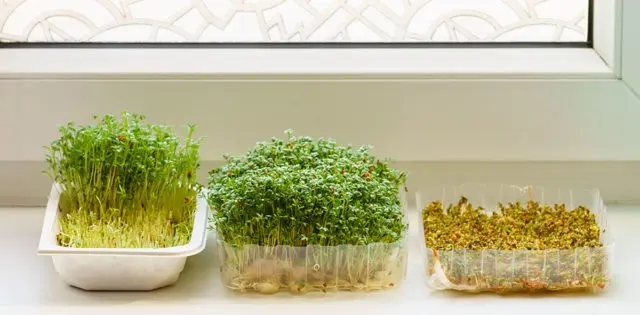
At home, watercress is grown in 2 ways: in the ground or in the substrate.
Soil preparation and planting capacity
The container used for planting on the windowsill must be equipped with drainage holes. It is more advisable to sow the lettuce in small containers that can be reused for planting every 16-20 days (depending on the maturity of the variety).
The selected container is pre-washed and rinsed in a weak solution of potassium permanganate. Such disinfection will reduce the risk of the spread of pathogenic bacteria.

Even an eggshell can act as a container for planting
The soil can be bought at any specialized store or you can prepare the mixture yourself by mixing soil, humus and river sand in equal proportions.
Preparation of planting material
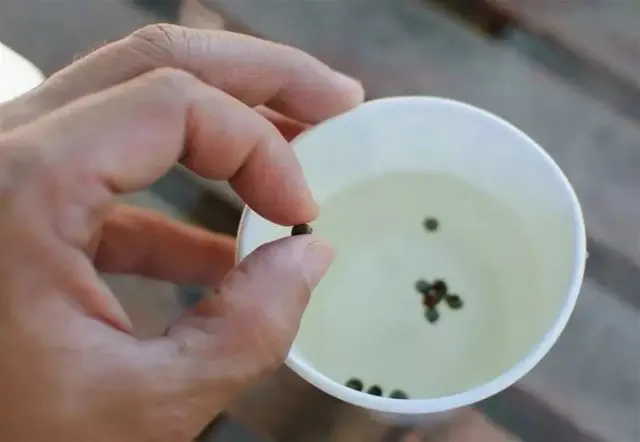
Preliminary preparation requires not only containers and soil, but also planting material. Store-bought watercress seeds are poured into a glass or cup and poured with warm water. This is necessary so that each seed forms a shell. After holding for 3-5 seconds, the material is caught with a teaspoon and carefully distributed on top of the soil or substrate.

Pre-soaking seeds allows you to identify defects
Self-collected seeds should be pre-soaked in a solution of manganese. Floating specimens are unsuitable for sowing, but those that have settled are washed well in running water and used when planting.
Rules for planting watercress on the windowsill
The bottom of the tank is drained using fine expanded clay or a special mesh, then soil 6-7 cm thick is covered and shallow grooves are laid at a distance of 10-12 cm.
The next step is seeding. This procedure is carried out with a teaspoon or simply poured into a container with water with seeds soaked in it so that they lie along the grooves in a relatively even layer.
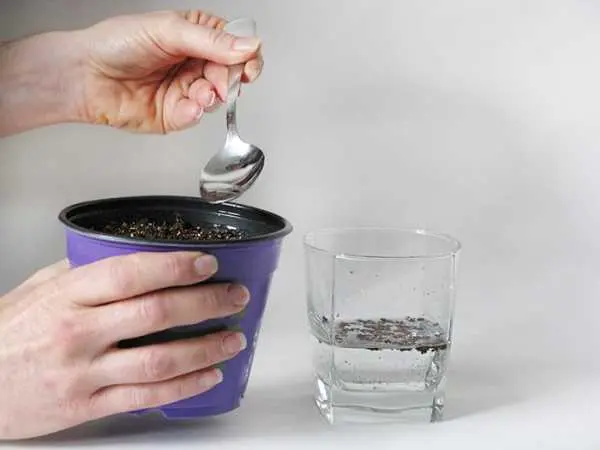
It is more convenient to “sow” watercress with a spoon
After that, everything is sprinkled with a thin layer of soil. The latter is not a prerequisite.
Next, the container is covered with cling film and left for 1-2 days on the windowsill.
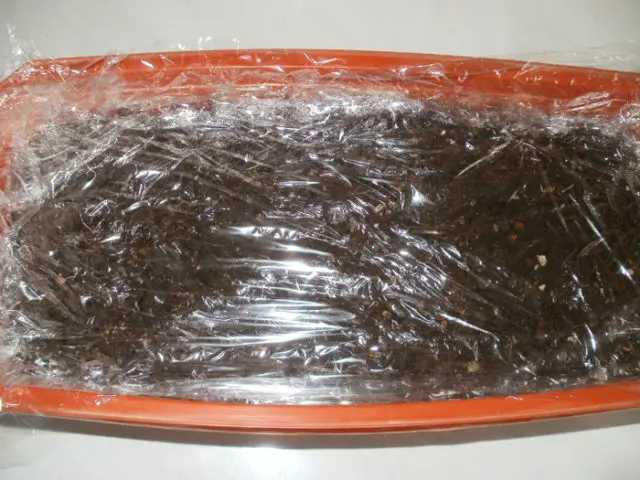
Shelter with cling film allows you to maintain a comfortable temperature
The procedure for sowing into the substrate is practically the same. However, if sawdust or shavings act as a substrate, then they are preliminarily scalded with boiling water to avoid mold development.
After a day of landing check. By this time, the first tender sprouts can already be observed. On the second day, the cling film is removed.
Care
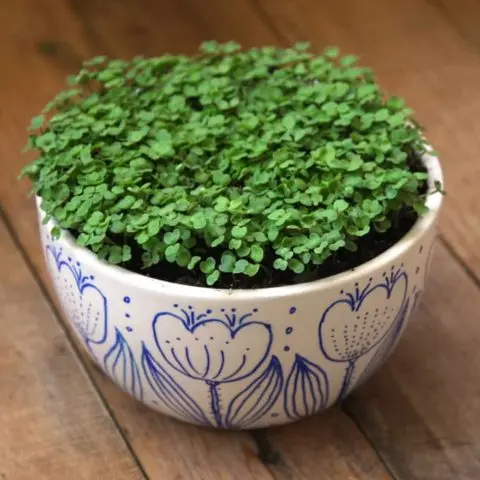
Caring for watercress growing on a windowsill is extremely simple and includes arranging regular watering, top dressing and visual observation. You can get an excellent result only by creating optimal conditions for growing this variety of lettuce.
Optimal Growing Conditions
For beginners to grow watercress on a windowsill in winter, it is important to create a microclimate that is comfortable for the culture, which takes into account indicators of temperature, humidity and degree of illumination.
Watercress is classified as a cold-resistant crop, as it germinates already at +5 °C. The optimal mode for the first shoots is 12-18 ° C. After 6-7 days, the temperature indicators are brought to 20-21 ° C, and they no longer increase, since at a temperature of 25 ° C the taste of the salad deteriorates (it begins to be very bitter).
Watercress grown on a windowsill needs natural light from a window. If possible, it is better to place containers with sprouts in the southern parts of the house or apartment.
Watercress does not require additional artificial lighting
The culture loves moisture and requires constant moisture. Spraying from a spray bottle is enough to maintain the desired level of humidity on the windowsill.
Watering
Watercress is very hygrophilous. Even a short-term drought can lead to the death of the entire crop. Starting from the moment the first shoots appear and until the collection period, the plant on the windowsill is regularly sprayed with settled water at room temperature.
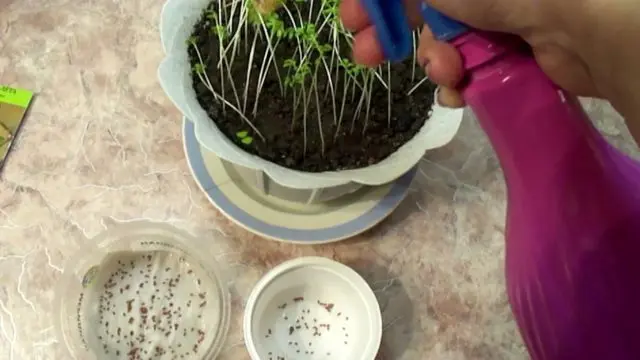
For spraying use only settled water
Additional fertilizing
8 days after the appearance of the first shoots of watercress, you can feed. To do this, make a solution of nitroammophoska at the rate of 5 ml per 10 liters of water. Water the salad regularly with this solution. However, if the plant shows good and fast growth, then it should not be fertilized once again.
Top dressing is carried out no earlier than a week after the first shoots.
Useful Tips
It is necessary to harvest the crop at the exact time set for the variety. The sprouts that have reached a height of 10-13 cm are considered the most delicious. Harvesting watercress is carried out in the morning or evening hours, when the plant is in a state of turgor.
Overgrown watercress loses its flavor. Sprouts acquire unnecessary rigidity and an unpleasant bitter taste. Unsuitable for consumption and seedlings that have started arrows. They not only lose in terms of taste, but also become poorer in chemical composition, becoming less useful.
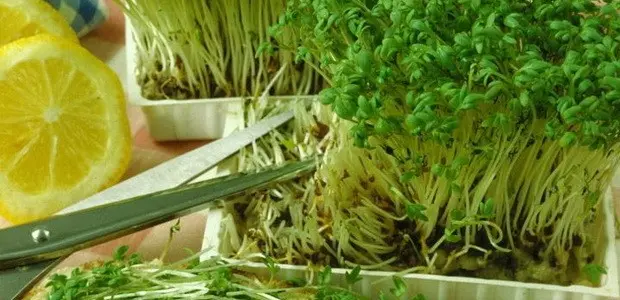
You can cut the lettuce as soon as the seedlings reach 12-13 cm in height
To get the maximum yield and excellent tasting properties, you can use a number of useful tips:
- Too dense plantings of watercress on the windowsill must be thinned out no later than a week after sowing. If you leave more free space between shoots, you will get larger lettuce leaves.
- In order for watercress to “not lay down” towards the natural light from the window, the container located on the windowsill must be rotated regularly (daily by 40-45 °).
- Setting a low temperature in the first week of growth (12-16 ° C) promotes the growth of a healthy root system, strengthening the stems without subsequent uncontrolled stretching.
Conclusion
Growing watercress on a windowsill is a simple process of cultivating herbs at home at any time of the year. Despite a number of features, even people who have never previously engaged in “home gardening” can actually implement this procedure.