


Contents
If you changed plumbing during the renovation process, do not rush to throw away the old bathtub. Those who have a summer cottage probably have to cook their own food, and a cast-iron bath stove will be very useful. Properly designed equipment will not only allow you to eat deliciously, but also serve as a kind of decoration for the site.
Advantages of cast iron
The antique bathrooms our fathers and grandfathers used were massive. Unfortunately, over the years, the coating becomes unusable, it would be more rational to redesign the bathroom for something no less useful. There are plenty of opportunities for this. A stove or barbecue is far from an exception. Masterful owners of suburban areas manage to build with their own hands from a cast-iron bath:
- decorative pond;
- a couple of garden benches;
- creative flower bed or garden bed;
- miniature greenhouse;
- swimming pool for children;
- bath brazier.

There are several main advantages of cast iron:
- Resistant to high temperatures. Even a stove made of bricks begins to crumble over the years and needs to be repaired.
- Increased strength. In this regard, cast iron will give odds even to steel.
- High thermal conductivity. It heats up quickly and begins to heat the room (the same bath, for example) earlier than other materials.
- Resistant to open flame. You don’t have to worry about compliance with fire safety rules.
However, it is worth mentioning the shortcomings. Cast iron, firstly, is brittle, and secondly, it lends itself to rust. It should not be subjected to mechanical stress, and to combat corrosion, the surface is treated with specific compounds.
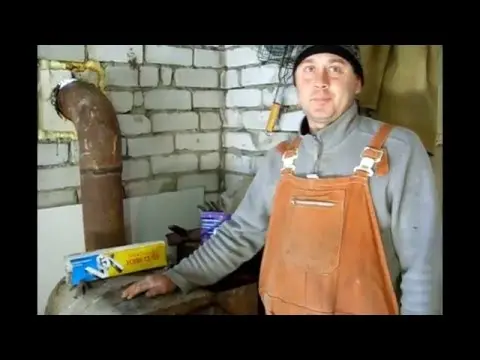
Video “How to make a cast-iron bath oven”
From this video you will learn how to make a stove from a cast-iron bath with your own hands.
How to build
To create a furnace, you will need additional materials and a set of tools. Make sure you have on hand:
- grinder (grinder) with circles for working on metal and for grinding;
- electric drill with a set of drills;
- hammer and files;
- plumb and building level;
- Master OK;
- construction gun for applying sealant.
In addition to the cast-iron bath itself, it will also come in handy:
- steel four- or five-millimeter sheet;
- refractory bricks;
- grate for grate;
- Rabitz;
- cement, sand, water and clay;
- metal corners, bolts, nuts, washers;
- 12 cm chimney pipe;
- sealant.
It is desirable to work in the yard, since this type of activity cannot be called clean (the bathroom will have to be cut in half into two identical halves). The seriousness of the process is evidenced by the fact that the master is strongly recommended:
- dress up in protective overalls;
- put on goggles and gloves;
- use a respirator.
Base
Since a cast-iron stove weighs a lot, it needs a foundation to function properly. It is formed on the basis of a concrete mortar or laid out from refractory bricks.
The work on laying the foundation is carried out in several stages:
- A rectangular trench is dug half a meter deep.
- At the bottom, a sand and gravel cushion is constructed, and a film for waterproofing is laid on top.
- A formwork is being constructed that rises 25–30 cm above the ground.
- The voids are reinforced, then filled with concrete mix (1 part cement to 3 parts sand). Another way is to fill the entire volume with bricks, fastening them with cement mortar grade M-300 or higher. Bricks are placed on the ribs.
Camera Assembly
To create a barbecue oven, you need both halves of the bath: one for the fuel chamber, the other for cooking. If you plan to make a stove for a bath or a country fireplace, you can get by with one part.
The sequence of assembling a two-chamber oven for cooking:
- On the finished concrete foundation, they put that half of the bathtub in which there is no drain hole (they put it upside down, with a cut towards the facade). This will be the firebox.
- The top is covered with a metal sheet cut according to the bath pattern. If you make holes in the sheet, you get a hob.
- A hole must be cut in the sheet for the chimney pipe. The pipe is inserted, then welded to the sheet.
- On top of the sheet put the second part turned upside down (cooking and oven). In it, the drain hole is pre-blocked with a heat-resistant sealant. In addition, a hole for the chimney is cut, coinciding with the bottom hole.
- After installing the chimney, the remaining gaps are filled with heat-resistant sealant.
- Along the entire line of joining of both halves, holes are drilled in increments of 20 cm, through which the chambers are tightened with M10 or M12 bolts. Tighten the bolts without fanaticism, remember the fragility of cast iron.
- In the lower chamber, at a height of 15–20 cm, bolts are screwed in or corners are fixed, creating supports for the grate. This is an important detail that will not allow the burning fuel to crumble down when the grate is shifted, and when laying new logs, the grate will not move or tilt.

Thermal insulation
To reduce heat loss, the cooking-oven chamber is insulated. For this:
- A chain-link mesh is tightly applied to the upper half.
- Along the perimeter, the mesh is attached to the brickwork.
- The mesh frame is filled with prepared clay mortar (medium viscosity).
- When the clay dries, a final layer is applied on top.
At the time of solidification, the structure is covered with polyethylene, leaving access to air. When the clay is completely hardened, it is decorated with lime whitewash in several layers.
Finish
The lower cooking part can be lined with a brick wall. It should completely cover the back wall of the firebox and both sides. If desired, the front part of the furnace is also easily designed, leaving only openings for the doors. The top line of the masonry should coincide with the level of the cooking compartment, the bottom is made slightly wider than the top.
The top chamber needs a shutter. It is made of metal, the shape corresponds to the curve of the bath. The handle is insulated so as not to get burned.
The upper part of the pipe from precipitation is covered with a special tool.
Although brickwork looks beautiful, it can be additionally plastered and painted, tiled, or trimmed with natural stone.
Bath Cutting Tips

To do this, you need a grinder. A marker across the bathtub marks the cut line (inside and outside). It is more convenient to cut on the outside, although this does not really matter.
In the process, the tool must be periodically turned off so that it does not fail.
The bowl is fixed during cutting so that the cutting disc does not get stuck. Be careful, because a broken canvas can injure with its fragments. Do not hit the tub with force – remember that cast iron is fragile.
All work will take a maximum of an hour, it all depends on the skills of owning a grinder. The cutting process is carried out as follows:
- Remove the enamel layer along the applied line. This will reduce the risk of chipping at the edges.
- Cast iron is cut in small sections, about 10 cm each, so that the apparatus does not overheat.
- It is easier to work with a grinder at an angle. In this case, the enamel does not exfoliate, the incision comes out even.
- Upon completion, the sawn parts are placed on supports so that they do not fall or break.
It cannot be said that the creation of a country stove from an old cast-iron bath is an easy task. Requires experience with welding, skills in the construction of brickwork, serious equipment. But having spent time and money, the owners will receive an excellent design that will serve their owners for many years.