


In the previous lessons, we got acquainted with the basic sorting techniques and learned how to apply custom sorting to data in Excel. In this tutorial, we will go even further and learn how to perform multiple sorting, i.e. consisting of several levels.
When more precise sorting of data in Excel is needed, you can add many levels to it. This feature allows you to sort information by more than one column. For example, you can sort the list of sold cars by brand, if the brand is the same, by model, and if the models are the same, then by the names of the buyers. In fact, this list can go on and on, it all depends on the required sorting accuracy and the amount of source data.
Adding a sort level in Excel
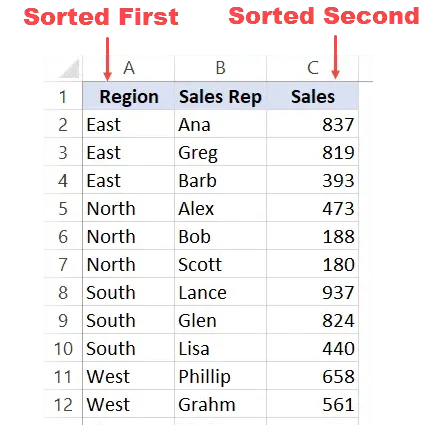
In the following example, we will sort the table by Audience number (column A) and Surnames (column C).
- Select any cell in the table that you want to sort. In our example, we will select cell A2.
- Click the Data, then press command Sorting.
- A dialog box will open Sorting. From the drop-down list, select the column by which you want to sort. In this example, we will sort by column Number of audiences (column A).
- Click the Add levelto add another sort column.
- From the drop-down list, select the second column by which you want to sort the table, then click OK. In our example, we will sort by Surnames (column C).
- The table will be sorted according to the selected order. In our example, classroom numbers are sorted in ascending order, and for each classroom, students are listed alphabetically by last name.
If you need to change the multilevel sort order in Excel, you can easily specify the column that is sorted first. To do this, highlight the required column and then press the up or down arrow to change the priority.