Contents
There is no fundamental difference between apple wine and cider, just wine, as a rule, is stronger and without fail requires the addition of a certain amount of sugar, without which this strength is unattainable. Otherwise, the same raw materials, the same production process, the same terms.
Therefore, we recommend that you first read the article on making homemade cider. In the same article, you will learn how to make homemade apple wines of various types, while the production process will be described in great detail, with extracts from winemaking manuals and the conclusions of experienced winemakers.

So, let’s first deal with the toolkit, that is, what we will need in the end. To make wine from apples, you need to acquire: ripe apples of different varieties, sugar, equipment for squeezing juice, two containers for fermentation and settling, a water seal and a number of different consumables. All this can be obtained, except for apples, in any hardware store, including a water seal, which we will make ourselves.
The choice of raw materials for wine and general points
In principle, almost all fruits and berries are suitable for making homemade wine, but only grapes and partly apples / pears are ideal in this case. The fact is that most fruits and berries contain too much acid and not enough sugar, so the wines from the pure juice of these fruits and berries turn out to be too sour, and also very slightly alcoholic. Apples, like grapes, have an optimal juice composition for making wines. This is another plus in favor of apple wine – it can be prepared directly from the juice, without the urgent need to correct and improve it.
Another very important point – below you will find recipes for all categories of apple wines, that is: light (alcohol 6,5-8,75%, sugar 1-1,5%) and strong table (alcohol 9,75-11,5 %, sugar 2%), strong (alcohol 16%, sugar 3-5%), dessert (alcohol 12,25%, sugar 15-20%) and liquor (alcohol 13%, sugar 40%). If you are a novice winemaker and are just beginning to learn this great science, we recommend that you first prepare strong, dessert and liqueur wines, as they do not require sophisticated equipment, are less prone to disease, and more easily tolerate rough, inept handling. This is not written as a reproach, everything comes with experience, but light and dry wines may not work the first time.
The process of making apple wine at home is identical to the process of making any other fruit and berry wine. We mean the main steps:
- Preparation of fruits and berries.
- Getting juice.
- Juice research.
- Flavoring, improving the juice and preparing the wort.
- Setting for fermentation.
- Infection of wort with yeast fungi.
- Violent fermentation.
- First filtration and transfer.
- Quiet fermentation and wort care.
- The second and subsequent transfusions of wine.
- Maturation and aging of the drink.
- Cleaning, clarification and preparation for bottling.
- Spill.
- Storage.
- Treatment of vices and diseases of wine.
When making wine from apples, we will only touch on some of these steps, since this type of wine is less demanding, which, again, plays into our hands. At the same time, the product will turn out incredibly tasty and will surely please your household.
Stage 1. Preparing apples and extracting juice from them
There is no ideal variety of apples for making wines – we will definitely need a combination of them. To get a harmonious, strong, aromatic wine, we need to choose the most successful combination of apples, different in taste: sweet, sweet and sour, sour, tart / bitter. If you are going to cook light table wines and ciders, then sweet and sour apples of autumn household varieties are ideal. Strong, dessert and liqueur apple wines are best prepared from sour and sweet and sour autumn apples, and preferably winter varieties (Antonovka is the best option). But it is best to mix different varieties. The most common and best blends are:
- 3 hours sweet, 3 hours, tart and 2 hours sour apples;
- 2 hours sweet, 2 hours tart and 1 hour sour;
- 1 hours sweet, 1 hours tart and 2 hour sour;
- 1 hour sweet, 3 hours tart;
- 2 hour sweet, 1 hours tart;
- for 2 parts of bitter apples, 1 part of sweet apples should be taken.
If you only have sweet apples with low acidity at hand, we recommend adding the juice of berries and fruits rich in acids and tannins to them. For this, blackthorn or mountain ash juice is ideal – 5 part of juice is taken for 10-1 parts of apples.
Preparing apples
After harvesting, apples of summer, ripened varieties can be immediately sent for juice extraction; autumn varieties should be sent to ripen within a few days; winter varieties must necessarily mature within 3-4 weeks in the basement. The harvested fruits must be washed, but without enthusiasm, so that natural yeast cultures remain on the skin. Be sure to remove all wormholes, rotten places, areas affected by diseases. So that the wine from apples does not give off bitterness, it is necessary to remove the core and seeds.
Getting juice
The processing of finished apples depends entirely on the equipment you have. First, the fruits need to be crushed, that is, to get a mushy mass (pulp or pulp). For this, a manual or mechanical grater and a meat grinder with the smallest nozzle are best suited, as they break the cells containing the juice. But for these purposes, you can use a household juicer. Then, from the resulting mass, you need to get juice, while the presence of pulp in it is only in our favor. For wringing, you can use gauze, which is a very laborious process, or a press (ideally). In any case, the minimum task is to get liquid applesauce.
Stage 2. Preparation of the wort and setting for fermentation
Fermentation of wort
This process is necessary to obtain pure juice, which, subsequently, will ferment. To do this, pour the resulting applesauce into a wide-mouth dish (large saucepan or can) and cover it with cheesecloth. Literally the next day, the initial wort should begin to ferment and decompose into two main fractions: the pulp will rise up, and the clarified juice below. In this state, the wort should stand for about three days, while stirring it several times a day so that the pulp (“cap”) does not turn sour, which will completely spoil the apple wine.
To feed yeast fungi at the stage of fermentation, a portion of sugar can be added to the juice. To do this, use the must composition table for apple wine.
To make 10 liters of must to obtain 8 liters of apple wine or cider
where, 1 – light table, 2 – strong table, 3 – strong wine, 4 – dessert, 5 – liqueur.
In any case, sugar should be added in portions, considering that every 2% sugar in the wort yields approximately 1% alcohol. It should also be noted that each 1 kg of sugar increases the volume of the must by 0,6 liters. For fermentation, about 1,5 kg of sugar per 7-7,5 liters of juice can be added to the primary must, and then the remaining amount. But you can do without this by adding sugar just before the main, quiet fermentation.
Setting for fermentation
After three days, remove the risen pulp with a colander or a saucepan, leaving 3-5 mm “caps” on the surface of the juice. Now you can add sugar and water (if you use certain varieties of apples presented in the table), guided by the table above. For the preparation of table wines, sugar must be added immediately, in one go. For the preparation of other wines, the addition of sugar can be divided into several stages, and everything must be calculated so that the sugar content of the must does not exceed 10-13% (you can use special devices, hydrometers). When this sugar content is reached, the next portion of sugar should be added after 5-7 days.
However, this approach is relevant only if special, wine-making yeast is used. Our apple wine will be fermented by wild yeast cultures, so the wine will turn out with a strength of no more than 13,5%. In this regard, sugar can be added immediately. But it is necessary to add it, since it is he who is the food for the yeast.
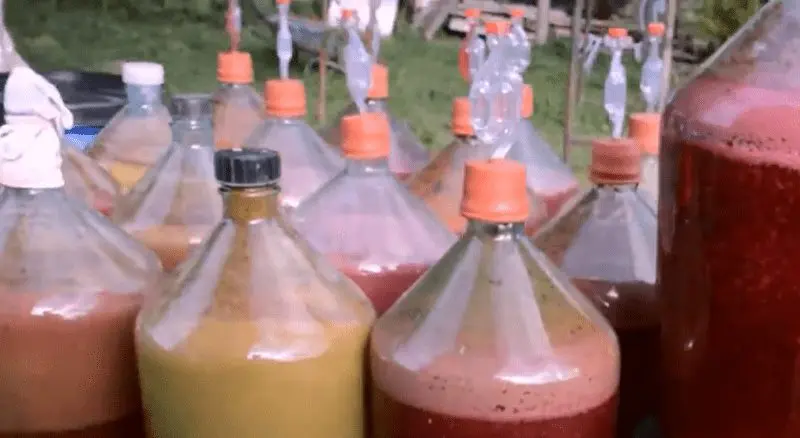
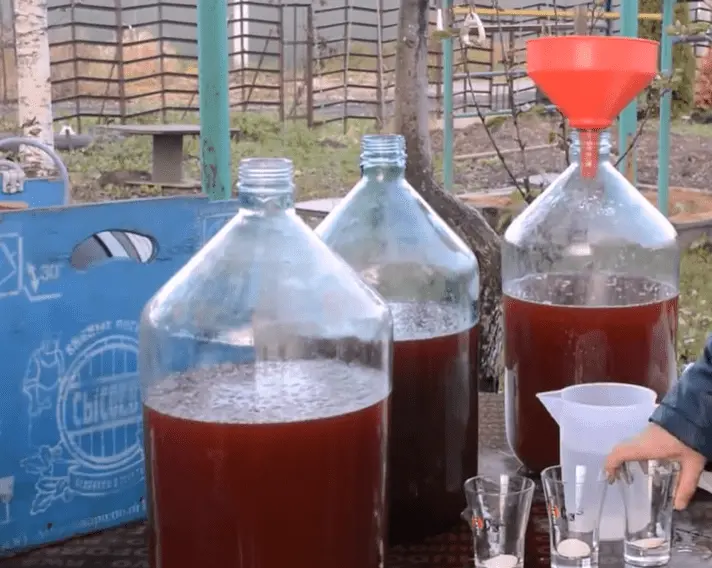
Next, the juice with sugar must be thoroughly mixed until the latter is completely dissolved and poured into a clean, dry glass container. Glass is perfect for this. If you use plastic tanks, make sure they are made from food-grade materials, otherwise the wine will have a chemical flavor and hardly anyone will drink it. You need to fill the container to 4/5 or 6/7 of the total volume, since foam will form on the surface of the must during the fermentation process. Now we need to ensure that carbon dioxide, which is formed as a result of the vital activity of bacteria, can rupture the container if it is tightly sealed, and prevent oxygen from entering the container – this is necessary so that our apple wine does not turn into ordinary apple cider vinegar, which we you, of course, do not cook.
 For these purposes, we will need a good water seal or sheet pile, we will make it ourselves. To do this, in the cork that will clog your fermentation tank, make a hole for a small-diameter tube (you can buy a dropper at the pharmacy and use the tube from it). Next, you need to thread the tube into the hole and drip it with wax, sealing wax, resin, or simply cover it with plasticine, which is necessary to seal the hole. The other end of the tube must be placed in a glass of water, lowering it by 2-3 cm. That’s it, the water seal is ready, now carbon dioxide will freely leave the vessel without letting oxygen into it. You can also buy a special tongue from a wine shop, but this is troublesome and not interesting.
Stage 3. Quiet fermentation of wine from apples
We send the container with our wort and hydrolock to a dark, warm place. The ideal temperature for fermentation is +20+22 degrees. Fermentation will slow down significantly if the room temperature drops below +16 degrees or rises above +25 degrees. At the same time, the fermentation temperature should be even, that is, we need to protect our container from drafts and other factors that can cause temperature fluctuations. Apple wine ferments for about 30-45 days. A sure sign of the end of fermentation is that bubbles have ceased to stand out in a glass of water from the water seal.

The fermented wine must still be insisted for several days in a container (but not more than 2 weeks, since the dead yeast that has precipitated will begin to rot) and removed from the sediment that has fallen as a result of fermentation.
Stage 4. Transfer and maturation of apple wine
In principle, the resulting homemade apple wine can be drunk, but its taste will definitely not please you – the drink must ripen. To do this, you need to prepare another container, while it needs to be washed and dried very well (you can use a hairdryer). Then the fermented wort must be drained from the sediment using a PVC tube. The container must be filled to the limit and tightly sealed. After, send it to a dark cool place for 60-120 days, which is quite enough to form an impeccable taste. In this case, you need to ensure that the fermentation process does not start again! The ideal temperature for ripening apple wine is +10+12 degrees, again, there should be no temperature fluctuations!
As a rule, home-made apple wines are perfectly clarified by themselves and become transparent, acquiring a golden yellow color of various shades (from golden yellow to brown). After maturation, the wine can be immediately bottled (again, up to the very neck, so that the wine does not oxidize) or tasted, inviting all your friends and relatives. By the way, light table wines can not be aged, but drunk immediately, ten days after filtration. Before bottling the wine, it can be once again removed from the sediment, if any.
As practice shows, homemade apple wine is in great demand, both among women and brutal men. There is even that category of people who prefer a glass of apple to grape. The resulting drink, by the way, can be distilled into delicious apple moonshine, but that’s a completely different story. If you find it difficult to wait as much as 3-6 months, you can always show this apple wine recipe to your friends and maybe they will thank you generously in the future. Good luck with your winemaking and let your drink become a real tasting masterpiece!
PS Recently I discovered the channel of an interesting person who, as they say, ate a dog in the production of apple wine. Be sure to watch both videos, especially the first, where in the second part there is a lot of necessary and useful theory:


