


Contents
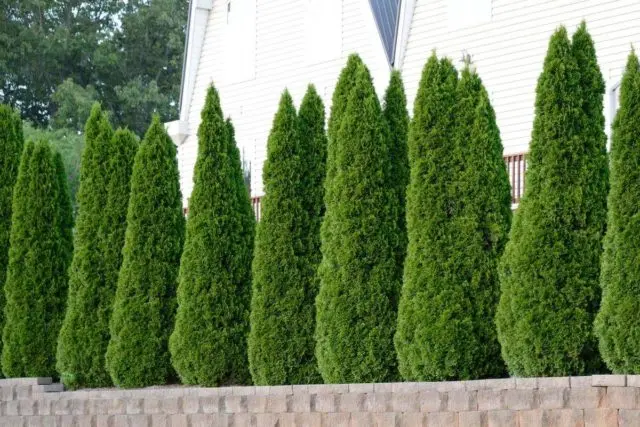
Growing thuja from seeds at home is a widespread method among gardeners. With it, you can simultaneously get a large number of plants for decorating a garden or summer cottage. Like any method, it has its drawbacks and advantages, more on this will be discussed later.
Is it possible to grow thuja from seeds at home
Reproduction of thuja seeds has several advantages. This method is suitable for all types and varieties of this crop. Unlike other methods, growing thuja from seeds allows you to simultaneously get many seedlings at home with high endurance and good health.
The method does not require special investments, the seeds can be collected with your own hands. However, do not forget that when thuja is propagated by seed, the varietal characteristics of the plant may not be preserved. Only vegetative methods of reproduction allow them to be completely preserved. As a result of growing conifers with seeds, a thuja can grow from a young seedling, which is completely different from the mother plant from which the cones were collected. As a rule, varietal characteristics begin to appear in the second year after sowing seeds. On average, growing thuja from seeds takes 3 to 5 years.
Procurement of planting material
Tui seeds can be bought at specialized garden stores or prepared independently. They begin to prepare material for planting thuja with seeds at home in the last days of summer or early autumn.
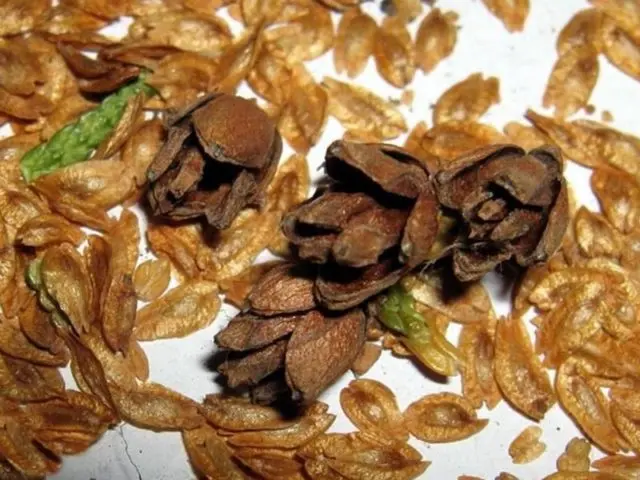
It is important to have time to collect cones with seeds before the fruit opens. If it is difficult to pick them from a tree, you can carefully separate the part of the shoot on which they are attached.
After the planting material has been collected, it should be laid out to dry on any flat surface in a dry, warm and well-ventilated place, protected from direct sunlight. The bright sun negatively affects the germination of seeds. During the drying of planting material in the room, it is necessary to maintain the temperature no higher than 6 – 7 degrees Celsius.
Over time, the cones will dry out, open up, and it will be easier to extract seeds from them. It is best to lay paper under the cones, since the seeds, after full ripening, begin to spill out of the cones on their own. Collecting them from a sheet of paper will be much easier. It is most convenient to collect ripe seeds by holding the cone over a piece of paper, lightly tapping it.
How to plant thuja seeds at home
In order for the plants to develop and grow well in the future, it is important to plant thuja seeds correctly.
There are a number of rules, following which, you can greatly facilitate the process of planting thuja from seeds and further care for it.
When to plant thuja seeds
At home, sowing thuja seeds is best done in the fall. In this case, personally collected, they will be still fresh, with a high percentage of germination. Wintering in the ground on the street, the seeds will undergo natural hardening, which will positively affect the germination of seedlings. When sowing seed in autumn, seedlings, as a rule, appear earlier than when planting thuja seeds in spring, and young plants are more adapted to the cold and require less care.
Selection of containers and soil preparation
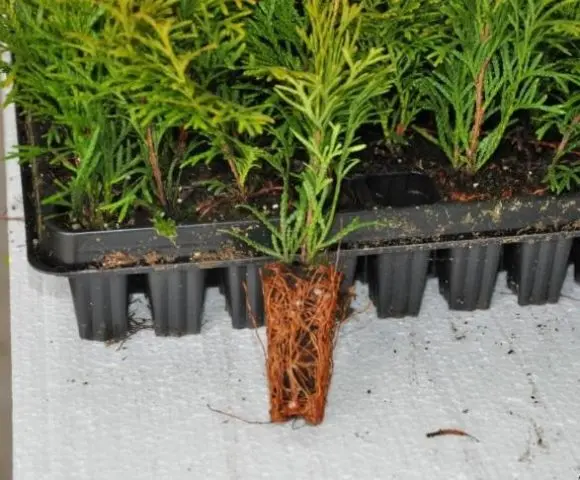
At home, thuja seeds can be planted in boxes or immediately in the garden. Growing in shallow boxes greatly simplifies the cultivation of seedlings, since, as necessary, they can be rearranged to any convenient place.
The best option for thuja seedlings is containers whose height does not exceed 10 – 12 cm. In too deep containers, the soil located in the lower layer may begin to turn sour, however, you should not choose containers that are too low: in them the roots of neighboring plants will intertwine with each other , thereby suppressing the development of each other. It will be impossible to dive them without damage in the future. Another more convenient option are containers with cells.
The soil for growing thuja must be very nutritious. A ready-made substrate for coniferous crops, sold in garden stores, is ideal. To prepare a nutritious soil mixture at home, it is recommended to mix:
- 2 parts sand;
- 1 part of sod land;
- 1 part peat.
Preparation of seeds for sowing
If thuja seeds are planned to be planted in the fall, during the winter they naturally stratify in the ground, they do not need to be additionally hardened. When planting thuja seeds in the spring, it is recommended to pre-stratify them. For this procedure at home, the seeds must be placed in a container with wet sand and left in the refrigerator for 3-4 months. The bottom shelf for vegetables is ideal.
Tui seeds can be hardened at home and using another method:
- place the seed in a linen bag;
- for the winter, bury the bag in the ground to a depth of at least 30 cm;
- sprinkle on top of fallen leaves.
Immediately before sowing, you will need to perform another procedure – seed germination. To do this, they are soaked in warm water overnight. By the next morning, the material will swell and be ready for planting.
How to plant thuja seeds at home
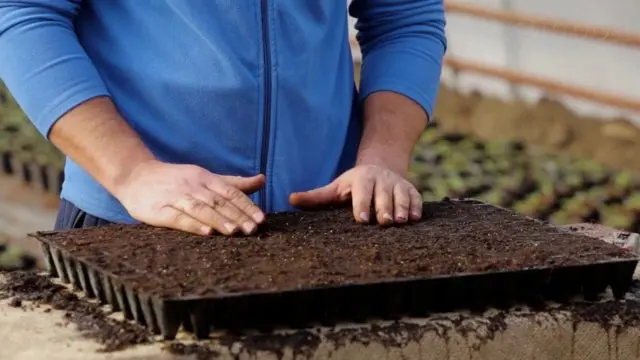
After stratification and germination of thuja seeds, you can start sowing them, for this you need:
- Place a drainage layer 2-3 cm thick on the bottom of the box, consisting of expanded clay or fine gravel.
- Pour a part of the nutrient soil substrate on top so that 2-3 cm to the edges of the box remain free. Level and lightly compact the soil.
- To disinfect the soil, it is recommended to shed it with a solution of potassium permanganate, which has a dark pink color.
- At a distance of about 5 cm from each other, form shallow furrows (up to 5 – 6 mm).
- Sow thuja seeds in the furrows, trying to evenly distribute them. Do not place seeds too close to each other.
- Sprinkle crops with a layer of nutrient soil mixture no more than 1 cm thick.
- Lightly compact the surface with a board or hands. Moisten with water from a spray bottle.
The first shoots will appear after about 20 – 25 days. After their appearance, the shelter from the film can be removed.
How to plant thuja seeds immediately in open ground
When planting thuja seeds immediately in open ground, it is important to consider that the comfortable soil temperature for their germination is about 10 – 15 degrees Celsius. If the temperature is lower, seedlings may not appear.
Sowing seeds in open ground is best done in autumn, then shoots will appear much earlier in spring, and young plants will be more viable and resistant to low temperatures.
Sowing seeds in open ground is carried out according to the same principle as sowing in boxes. You should not bury the seeds in the soil by more than 5 cm. It is most convenient to first grow thuja seedlings on one bed, and only then plant them in separate areas.
How to grow thuja from seed
In general, caring for thuja seedlings in the open field is not much different from caring for seedlings. Watering young thuja seedlings must be done carefully so as not to accidentally erode the soil. Experienced gardeners recommend watering plants using a fine spray bottle. If during watering the soil in some places is still washed out, you need to carefully sprinkle these places with a thin layer of soil.
Watering should be moderate, thuja seedlings are watered as the soil dries out. At the same time, it is undesirable to allow neither waterlogging nor drying out of the soil. Stagnation of moisture can be detrimental to seedlings.
In order for thuja seedlings to develop better, every two weeks it is necessary to fertilize with mineral complex fertilizers with a high content of nitrogen, potassium and phosphorus. To prevent fungal diseases, thuja seedlings should be treated with fungicides. Fundazol proved to be excellent.
When warm weather sets in, a box with thuja seedlings can be taken out into the street. Tender, still immature sprouts feel comfortable at temperatures from 17 to 23 degrees Celsius. The box should be placed in the shade or partial shade, so that direct sunlight does not fall on the seedlings. An excellent option would be a place shaded by the dense crown of a tall tree.
Being under the bright sun is contraindicated for young coniferous crops, direct sunlight can cause plant burns. That is why seedlings growing in open ground are recommended to be protected from the scorching sun at first with the help of covering materials.
During the first year, seedlings reach a height of 8-10 cm. Tui shoots growing in boxes spend the winter in them. In winter, boxes are best stored at a temperature of 14 to 18 degrees Celsius. Seedlings growing in open ground are mulched for the winter with peat, fallen leaves or straw.
The following summer, seedlings grown at home from boxes are planted in open ground for growing according to the 30×30 cm pattern. The bed should be located in partial shade. Transfer algorithm:
- In the soil per 1 sq. m add 1 bucket of humus, 40 g of nitroammophoska, 250 g of wood ash. Dig a shovel onto a bayonet.
- Transplant the seedlings so that the root neck remains flush with the soil. With a strong deepening, the thuja can boil out and die.
- Water and mulch with peat. Further planting care remains the same.
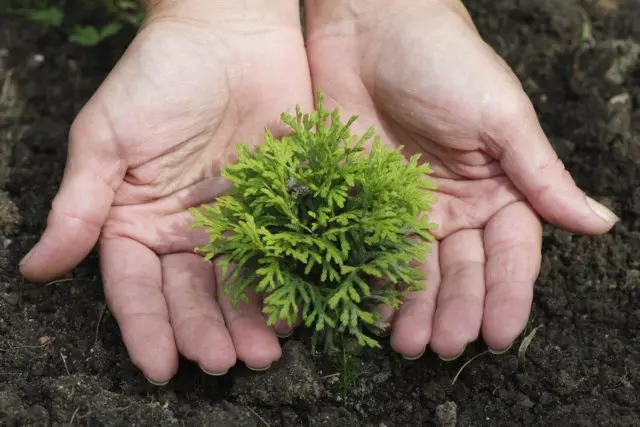
Transplanting seedlings to a permanent place
Tui seedlings can be transplanted to a permanent place in the third year after sowing the seeds, when the height of the bush reaches about 50 cm. This can be done both in autumn and in spring.
The landing site should be sunny and protected from the wind, in the shade the thuja needles will turn yellow and thin. The best option for thuja is sandy loamy soil mixed with soddy soil.
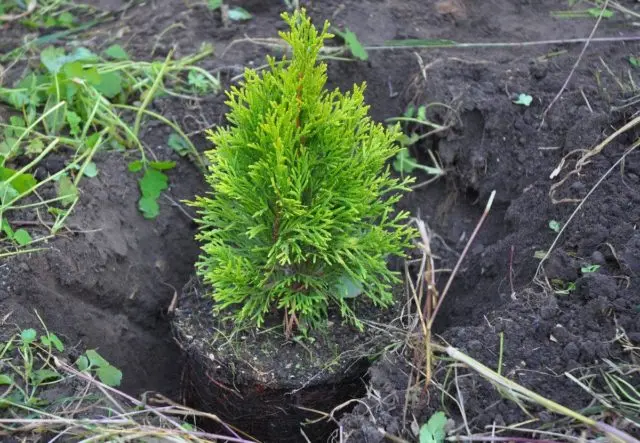
Algorithm for transplanting thuja seedlings to a permanent place:
- Place a layer of drainage at the bottom of the planting hole.
- Form a small mound out of the ground, place a thuja seedling on it.
- Cover with earth, not forgetting that the root neck should remain flush with the soil. Water, mulch with peat.
In addition, it is recommended to watch a video on how to grow thuja from seeds at home:

Conclusion
Growing thuja from seeds at home is a rather lengthy process, which takes an average of 3 to 5 years. However, the result is definitely worth the effort, as this hardy evergreen tree will delight the eye for years to come.