Contents
- What are the frames for hives
- How to determine frame sizes
- The distance between the frames in the hive
- General principles for making frames for bees
- The location of the wire on the frame
- Devices for the manufacture of frames for beehives
- Options for the correct location of the frames in the hive
- Production of innovative frames for bees
- Conclusion
Frames for hives come in different sizes, depending on the design and dimensions of the house. The beekeeping inventory consists of four rails knocked into a rectangle. A wire is stretched between opposite slats for fixing the honeycomb.
What are the frames for hives
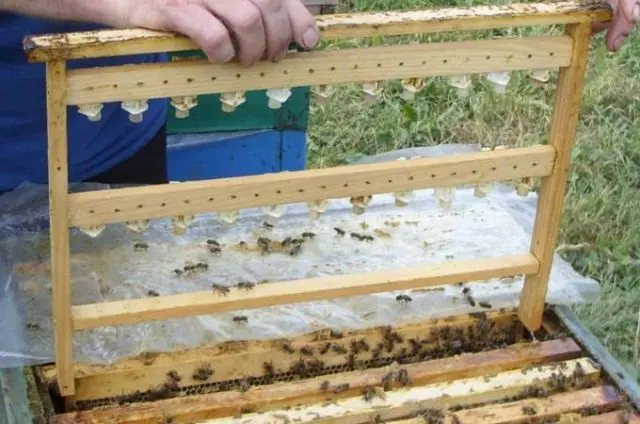
Frames for bees differ not only in size, but also in purpose. Inventory is used to perform various tasks.
Varieties of bee frames
According to the installation site, there are two main varieties:
- Nest models are installed at the bottom of the hive. Inventory is used to equip the brood zone. The design of nesting and honey frames in sunbeds is the same.
- Shop semi-frames are used during honey collection. The inventory is installed in the upper cases placed on the hives. If the design of the lounger provides for extensions, then half-frames can also be used here.
By purpose, there are the following types of apiary inventory:
- Cover honeycombs can be of different sizes. They do not differ in special design. Honeycomb frames enclose the nest on both sides to preserve heat. Hence the name came from.
- Framework the feeder has the same dimensions as the honeycomb frame and is installed in its place. Inventory is used to feed bees with syrup.
- Incubator consists of a honeycomb frame with brood or a sealed queen cell enclosed in a box. Inventory is used during the cultivation of queen cells.
- Nursery also called a grafting frame. The inventory consists of a simple honeycomb frame. The sides are equipped with moving slats. The nursery is in demand during the installation of cells with the queen.
- Zastavnaya the frame is often called a board. It is assembled from a frame sheathed with thin strips. Install a board in the hive to keep warm. Beekeepers still make inventory from polystyrene foam or sheathe the frame on both sides with plywood, and fill the interior with thermal insulation.
- Construction comb frames are used in the production of comb honey and wax. Inventory helps fight drones and ticks. In the spring, drones are bred on construction honeycomb frames for mating with the queen.
- Sectional models are used for the production of honeycomb. The inventory appeared in the 90s of the last century. Sections are made of plastic. Frames for comb honey are inserted into a semi-frame measuring 435-145 mm.
Common to all varieties of beekeeping equipment is a standard size corresponding to the dimensions of the hive used.
More information about beekeeping equipment can be found in the video:
On what frame are non-flying bees
Non-flying bees are considered to be young at the age of 14 to 20 days. Insects work inside the hive and occasionally fly out only to empty the intestines. When old bees are engaged in honey collection, non-flying young growth remains on honeycomb frames with brood.
How to determine frame sizes
The honeycomb frames are installed inside the hive, from which their size is determined. There are standards for all types of houses.
Core frame standards
If we talk about standards, then the dimensions of the frames for bee hives are as follows:
- 435×300 mm are used in Dadan hives;
- 435×230 mm are used in Ruta hives.
With a small difference in height, standard models will fit two-tiered and multi-tiered hives.
However, Dadanov’s hives are used with magazine extensions. Frame sizes are as follows:
- 435×300 mm put in nests;
- 435×145 mm are placed in extensions for honey.
The top rail of any model is slightly lengthened. On both sides, protrusions 10 mm long are formed for hanging in the hive. The width of the rails, corresponding to the thickness of the frame, is 25 mm.
Less common are hives that require the use of comb frames of other standards:
- put in the hive a frame 300×435 mm of the Ukrainian model, which is distinguished by a narrow body and increased height;
- 435×145 mm are placed in low but wide hives.
In the hives of Boas, non-standard sizes of honeycomb frames 280×110 mm are used.
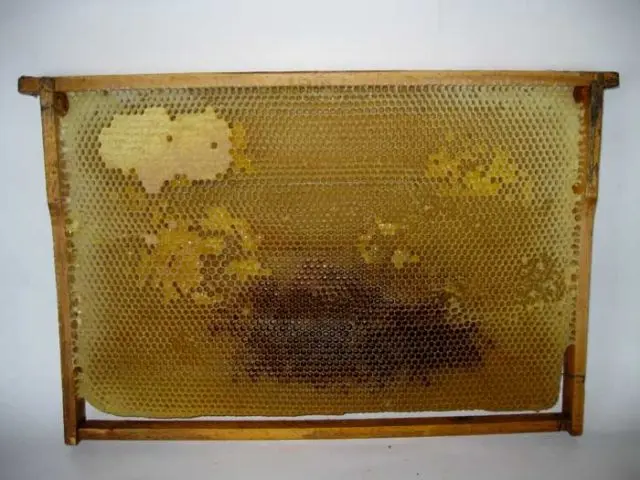
What factors influence the choice
The choice of frame size depends on the type of hive used. In turn, the choice of design depends on the purpose of the inventory.
The distance between the frames in the hive
Bees close up gaps less than 5 mm wide with propolis, and build up honeycombs in the space more than 9,5 mm wide. However, in the hive between the honeycombs and the wall, the so-called bee space is formed. Bees do not build it up with honeycombs and propolis.
The bee colony leaves for itself up to 12 mm of space between wax with brood, and up to 9 mm between honeycombs. Given the bee space, when installing the frames, beekeepers observe the following gaps:
- between the sidewall of the frame and the wall of the hive – up to 8 mm;
- between the upper rail of the frame and the ceiling or the lower element of the honeycomb frame of the higher body – up to 10 mm;
- between honeycomb frames in the nest – up to 12 mm, and in the absence of separators, the gap in the spring is reduced to 9 mm.
Compliance with the gaps creates optimal conditions for the development of the bee colony in the hive.
General principles for making frames for bees
The process of assembling frames for hives follows the same principle. Inventory for comb honey consists of 4 rails knocked down into a rectangle of standard size. The top rail is always longer than the bottom rail. The protrusions form hangers for installing the structure in the hive. The support frame inside the house are ledges on the side walls.
The most common material is wood. Modern inventory began to be produced from plastic. However, many beekeepers prefer natural material.
Drawings and dimensions of frames for beehives
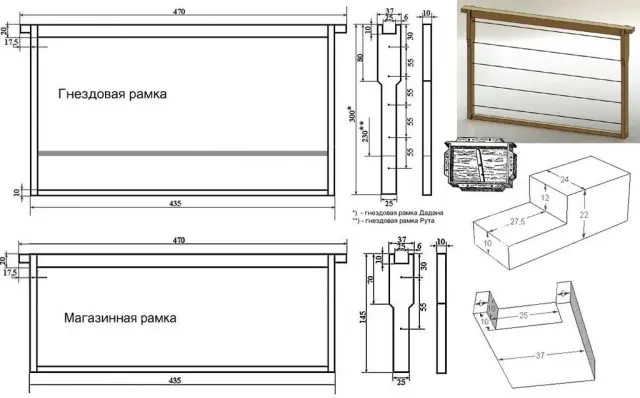
Initially, before manufacturing, the beekeeper needs to determine the size. When assembling a store and nest frame for a hive with your own hands, you do not need to look for different drawings. One scheme is enough, since the designs are identical. Only the dimensions differ in the drawing.
Tools and materials
From the materials you will need dry slats, cloves, self-tapping screws, wire for stretching the strings. From the tool it is ideal to have a woodworking machine. Planks can be sawn and sanded by hand, but this will be longer and more difficult.
How to make a frame for a beehive with your own hands
Modern innovative frames are made of plastic, but not many beekeepers like artificial material. Beekeepers traditionally prefer wood. The inventory manufacturing process consists of two main steps: preparing the planks and assembling the structure.
The planks are cut to the required dimensions according to the drawing, polished on a machine or manually with sandpaper. The assembly is carried out with self-tapping screws for the strength of the connection. You can use carnations, but then the joints must be additionally glued with PVA, otherwise the design will turn out to be weak.
If you make frames for bees with your own hands from coniferous wood, it is advisable to treat them with drying oil or molten paraffin. The coating will protect the honeycomb from resin released from the wood. When the frame is assembled, pull the wire.
The video tells more about the manufacture of inventory:
The location of the wire on the frame

The wire is pulled over the frame in rows. There are two schemes for its tension: longitudinal and transverse.
How to choose frame wire
The wire is pulled like a string. This state can be achieved only with high-quality material. Special beekeeping wire made of carbon steel, sold in coils.
Shops may offer ferrous wire and stainless steel. The first option is cheaper, but susceptible to corrosion. Stainless steel is the ideal. Some beekeepers use tungsten wire for stretching. The result is good, as tungsten is resistant to corrosion. Non-ferrous metal wires or fishing line for stretching will not work. They are soft and tend to stretch, which will cause the strings to sag.
Which winding is better: longitudinal or transverse
It is impossible to choose the ideal winding scheme, since each has its pros and cons. When the transverse tension of the strings is carried out, the number of rows increases. The tension force on the slats is distributed more evenly, due to which they bend less. During longitudinal stretching, from 2 to 4 rows are pulled onto the frame, depending on its size. The tension force is distributed over a smaller area of the slats, and they bend more.
However, building foundation on a transverse stretch is more difficult. Due to the smaller number of rows of strings in the longitudinal scheme, the process of soldering honeycombs is simplified.
To select the optimal winding scheme, the strength of the strips and the size of the frame are taken into account. The last parameter is important. For a large frame, the number of stretches increases.
When choosing one of the schemes, one must take into account that during operation, even the most stretched string weakens. It is advisable not to wind the ends of the string on a stretched track. They are tied to studs hammered into opposite strips. Hats protrude about 5 mm above the surface of the rail. The total length of the nail is 15 mm. It is desirable to take 1,5 mm in thickness. A thick nail will split the plank.
During winding, the ends of the stretched wire are wound around nails. When the strings sag during operation, the tension is carried out by driving a nail. Sometimes beekeepers immediately use this method to stretch the wire onto new frames if there is no stretching machine.
What length of wire is required for a rectangular frame
The length of the wire is calculated using the formula for the perimeter of the frame. For example, the length is 25 cm, and the width is 20 cm. According to the formula for calculating the perimeter, they solve the simplest problem: 2x (25 + 20) u90d 25. Designs measuring 20×90 cm will require XNUMX cm of wire. To be sure, you can make a small margin.
How to string strings on bee frames
The wire stretching process consists of 5 steps:
- Depending on the selected winding scheme, holes are drilled on the side rails or the top and bottom strips. A template or a hole punch will help simplify the task.
- Hammer on opposite slats with one tension nail.
- The wire is pulled through the holes with a snake.
- First, one end of the wire is wound around the nail.
- For the free end of the string, tension is carried out and only then its end is wound on the second tension nail.
The tension force is determined by the sound of the string. The wire pulled with your finger should make the sound of a guitar. If it is deaf or absent, the strings are pulled.
Devices for the manufacture of frames for beehives
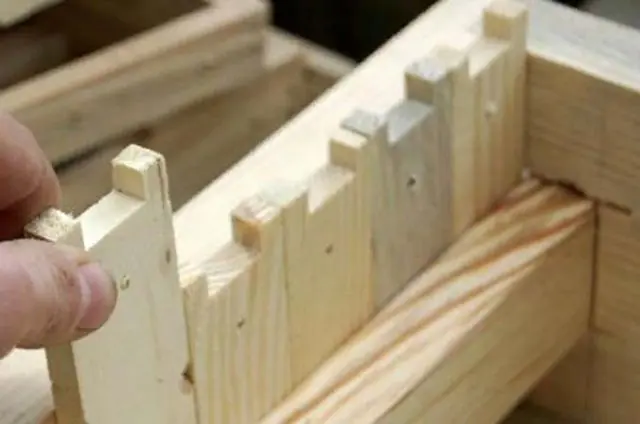
When it is required to establish the production of frames for hives or the farm has a large apiary, it is optimal to acquire a special machine – a jig. The device is a rectangular box without a bottom and a lid. Along the perimeter, the inner size of the template is equal to the size of the frame. The higher the walls of the conductor, the more inventory will be made on the hive at a time.
Beekeepers usually make a wooden template from planks. Holes are cut out in opposite walls, bars are inserted. They will be the emphasis for the assembled side rails of the frames. A gap is left between the bars and the walls of the conductor. Its size is equal to the thickness of the bar plus 1 mm for the free entry of the workpiece.
It is important to provide for a margin of clearance when calculating the size of the conductor. Usually 10 frames are inserted into the template. Side bar width 37 mm. In order for the required number of frames to fit into the template in width, 10 is multiplied by 37, plus 3 mm of clearance margin. It turns out the width of the machine is 373 mm. The length of the template corresponds to the width of the frames. For the Ruta and Dadan hives, the parameter is 435 mm. The top and bottom frame bar stays outside the template during assembly.
The assembly of inventory for hives begins with the insertion of side planks with lugs into the gap between the bars and the walls of the conductor. First take only the upper or lower slats. The blanks are placed in the eyelets of the side slats, fastened with nails or self-tapping screws. The machine is turned over and the same steps are repeated on the other side. When all the structures for the hives are assembled, they are removed from the template, but first the fixing bars are pulled out.
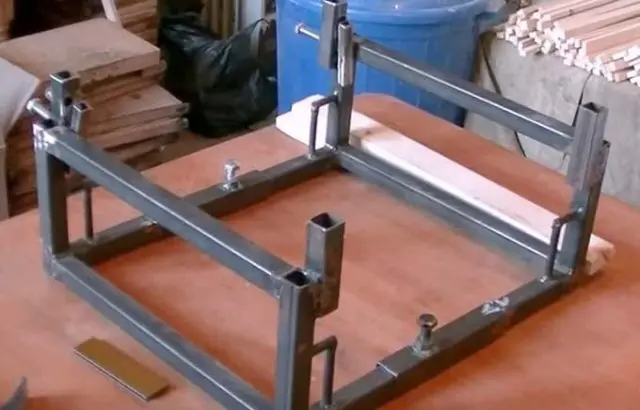
A metal machine for frames for beehives is welded from a square pipe. The design is almost identical, only bolts are used to clamp the workpieces. In addition, there is no need to cut eyelets in the side rails and bars. At the end of the assembly of the upper part of the frame, the bolt is released, the mechanism is shifted down and clamped again. The lower bar is inserted with force, like a spacer. The elements are connected with a pneumatic construction stapler.
Options for the correct location of the frames in the hive
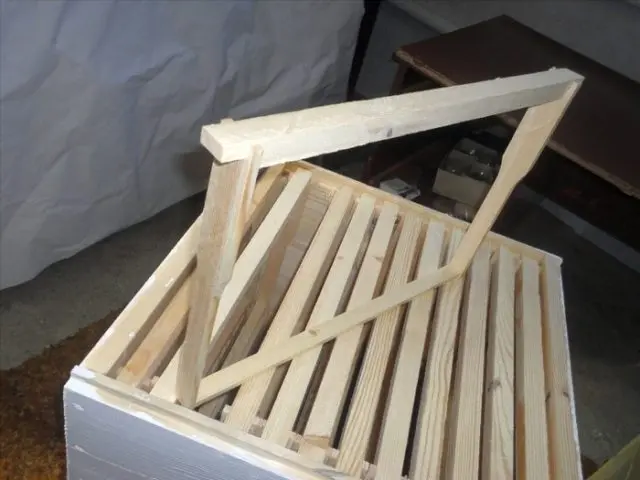
The number of honeycomb frames in a hive depends on its size. In addition, they take into account how many sections the house consists of. In the center, nesting frames for brood are always placed. In single-tiered horizontal hives, they are installed side by side. Inside multi-tiered vertical hives, nesting honeycomb frames are placed one above the other. The side frames and all those in the upper stores of the hive are used for honey.
Inside the hive, honeycomb frames are arranged from north to south. The side strips are turned towards the notch. This scheme is called cold skid. The house is turned to the north with an entrance. There is a method of warm drift, when honeycomb frames inside the hive are parallel to the entrance.
A warm skid has many advantages:
- during wintering in each hive, the death of bees decreases to 28%;
- the queen conducts uniform sowing of cells, the brood increases;
- inside the hive, the threat of a draft is eliminated;
- bees build honeycombs faster.
Production of innovative frames for bees
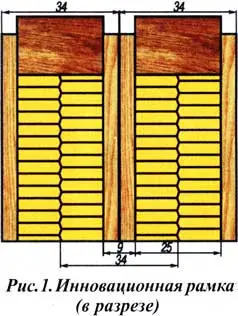
Modern innovative frames are not yet very popular. Beekeepers are wary of plastic. The technology was developed after high-tech experiments. For a long time it was believed that the optimal passage for a bee between combs is 12 mm. However, using laser measurements, it was found that under natural conditions the gap does not exceed 9 mm. Used for many years in beehives, wooden comb frames distort natural standards.
The innovative model was released with narrowed side bars with a width of 34 mm. When they are installed in the hive, a natural gap of 9 mm is maintained. The advantage of the innovative model immediately became apparent from the normalization of the temperature regime inside the hive, the improvement of natural ventilation.
Conclusion
Hive frames are considered the second most important bee equipment. The calmness and development of the bee colony, the amount of honey collected depends on their quality.


