Contents
How many finishing materials are there that are beautiful, not afraid of water, frost, heat, temperature changes, resistant to mechanical stress, not fading, easy to care for. It seems not so much. One of them is porcelain stoneware. This combination of qualities contributes to the high popularity of the material – it is used in exterior and interior decoration. A complex external fastening system does not make it possible to do it yourself, but laying porcelain stoneware on the floor or walls inside the premises is a task of medium complexity and can be done by hand, without the involvement of specialists.
Types of porcelain stoneware
Polished porcelain stoneware is the most widely used in our country, matte and semi-polished are also found. But this is not all types of this material. There are several other interesting variations that few people know about yet. We will deal with all types and their main characteristics.
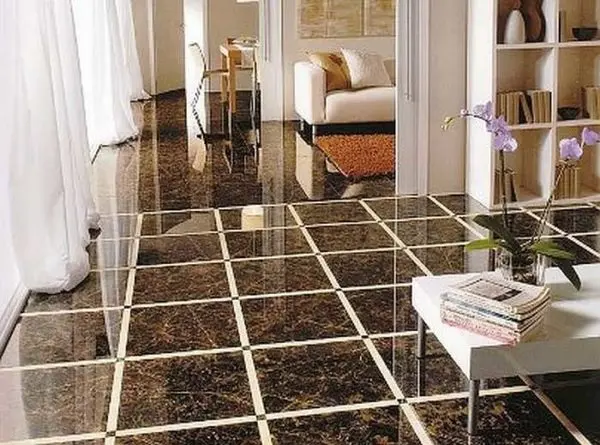
- Polished and semi-polished (differs in the degree of polishing and gloss). This type has the most spectacular appearance. And, although it is more expensive than other types, it is used quite often. But it should be borne in mind that during operation, the polishing becomes dimmer and over time the surface becomes matte. There is another disadvantage of polished porcelain stoneware – polishing opens previously closed pores. As a result, the spilled liquid is absorbed, leaving traces. Therefore, many manufacturers cover porcelain stoneware tiles with varnish. If such a coating is not available, it must be applied after installation. Another unpleasant moment: if liquid gets on such a surface, the floor becomes very slippery.
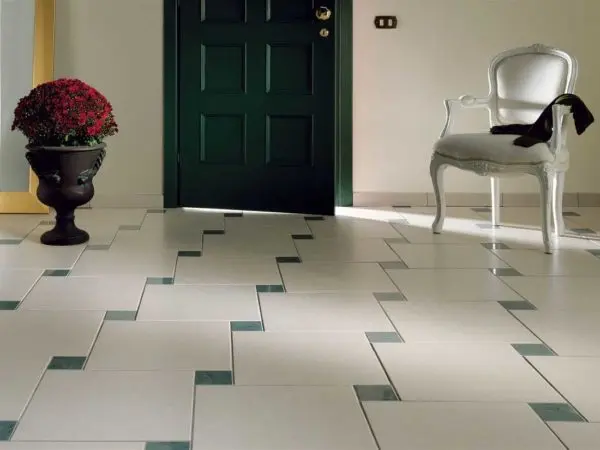
Polished porcelain stoneware laid seamlessly, creating a monolithic feel - Glazed. Outwardly, it is similar to ceramic tiles, but it is characterized by increased strength. Glaze was applied to porcelain stoneware tiles, then fired in a kiln. If this material is used in places with a heavy load, a thin decorative layer will rub off, the finish will lose its appearance.
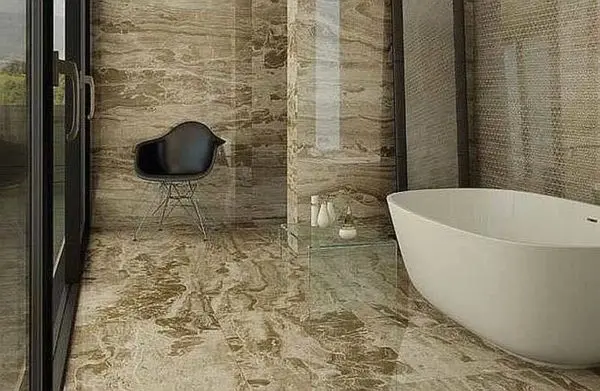
- Matte. These are molded boards without further processing. The surface of matt porcelain stoneware is not as spectacular as polished, but this type of finish is non-slip even when wet and can be used in kitchens and bathrooms.
Matte can be used in wet areas - Technical. The cheapest material from this group. It is somewhat reminiscent of natural granite, not very decorative, but very durable. It can serve more than ten years even in places with high mechanical stress. You can use it on the floor in technical rooms, on verandas, terraces, lay out paths on the site.
- Satin (satin). This porcelain tile has a very decorative and unusual look. The surface resembles satin, has a soft sheen, but does not withstand significant loads, and therefore is more used for wall decoration.
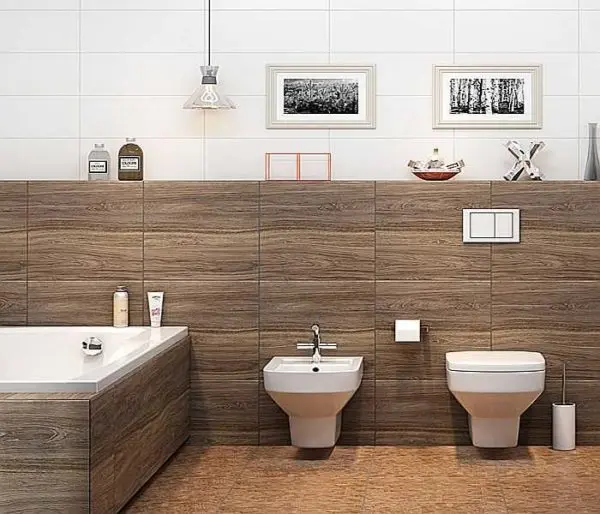
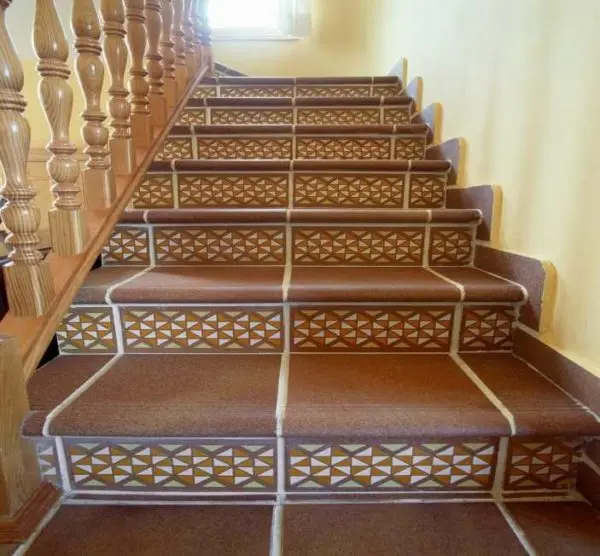
The surface of satin porcelain stoneware is very unusual - Structured. This species has a relief surface of various types. There are simply interesting reliefs, but there are those that imitate leather, natural stone, and wood. More popular from this group is wood-effect porcelain stoneware (ceramic parquet).
As you can see, there is plenty to choose from – for different requirements, for different tasks, interiors and premises. Each of the species comes in dozens of colors and shades, the size range is very wide. The minimum size of a porcelain stoneware tile is 5*5 cm, the maximum size is 120*360 cm (this is a facade). The most popular sizes for interior decoration are 30 * 30 cm, 45 * 45 cm and 60 * 60 cm. The thickness can also be different – from 3 mm to 30 mm. By the way, it is worth saying that correctly laid porcelain stoneware (on a flat surface without voids) 3 mm thick can withstand the same loads as 3 cm.
The amount of porcelain stoneware is calculated simply: by area, but at least a margin of 10% is required. This is insurance against measurement errors and trimming, which is inevitable.
What to look for when choosing
When choosing porcelain stoneware, it is necessary to pay attention not only to the appearance, but also to the quality. Before making a purchase, first inspect several samples, preferably from different packs. By external signs, you can say with a high degree of certainty how high-quality the material is in front of you.
- Measure the dimensions of the tiles. They may differ by a few millimeters from those declared. If you are not going to combine them with porcelain stoneware of a different size, this may not be scary, but you need to know about it. Worse, if the tiles from different packs are of different sizes – laying porcelain stoneware will turn into a difficult task. It is better to refuse such material.
- Look at the end of the porcelain tile. If it is not a structured and non-satin variety, the side surface should look the same as the front.
In addition to the appearance, pay attention to the geometry - Examine the back. Diamonds or squares should be formed here. The optimal cell size is 1,5-2 cm, the protrusion height is 2-3 mm. If the squares are larger than 3 cm or more, and the protrusions are high, you have poor quality porcelain stoneware.
- When buying, check the geometric of several tiles taken from different boxes. Measure several tiles. Ideally, there should be no difference in size. Also check if the edges are even, if the surface is not convex / concave, if there is a “propeller”.
If all tests are passed successfully, porcelain stoneware can be taken. But there are a few more points. Make sure all packs are the same size and thickness. Take out the tiles and compare the shades. Often there are quite noticeable differences, which are then striking when laying porcelain stoneware.
Preparation of the base for laying porcelain stoneware
Like most finishing materials, this one is laid on a flat, clean, primed surface. The best base is concrete or cement-sand screed. The height difference per 1 square meter should not be more than 1 cm. If the difference is more significant, a leveling screed with a thickness of at least 3 cm is poured.
If the differences are within the acceptable range, the surface is first cleaned of the old coating, if any. Cracks, potholes and chips are closed. Then a primer (deep penetration) is applied for better adhesion (adhesion).
What to put on
Since porcelain stoneware has a very low hygroscopicity, putting it on a regular cement-sand mortar is a waste of time and money. Water is not absorbed into the surface of this material, and the tile practically does not hold. It is with such an adhesive composition that the finish “bounces”. There is almost no adhesion with the solution.
For heavy facing materials, a special adhesive is made with a large number of polymer additives. This composition has many times greater adhesive ability, so that even with very low hygroscopicity, porcelain stoneware holds well. It is not worth using a cement-sand mortar for laying. In this case, it is likely that during operation the tiles will separate from the floor or walls. You will have to take it out, gouge out the solution, prime and plant the porcelain stoneware already on a special glue.
Stacking ceramic granite with your own hands
The tile must be inspected prior to installation. Many manufacturers at the factory cover the front side with a protective layer – technical paraffin. It prevents scratches during shipping. Before laying the paraffin must be removed. It is easily cleaned with a spatula. Then the surface is washed with soapy water (with any detergent), after which the porcelain tiles are dried. It is forbidden to wet it before laying.
A little about the conditions under which the work should be carried out. The minimum temperature at which porcelain stoneware can be laid is + 5 ° C, the optimum is + 18-20 ° C. If it is placed on a heated floor, the heating must be turned off no later than 36 hours before the start of work, and it can be turned on only 3-4 days after the installation is completed.
Ways of laying
Porcelain stoneware can be laid according to any scheme that you like. You can combine different sizes, colors, embed decorative elements.
In addition to choosing a laying pattern, it is necessary to determine the width of the seam. It can be from 0 mm to 10 mm. Seamless laying is most often used with polished material. Then the effect of a continuous surface is created. This option is not at all suitable for underfloor heating – it does not allow you to compensate for thermal expansion.
In the case of laying with seams, they are maintained with the help of special inserts, traditionally using plastic crosses of the right size. After the glue has set, the seams are filled with a special paste – overwritten. The color of the paste can be selected “in tone” or be contrasting.
Floor installation
Further, according to the instructions, the glue is diluted (make no mistake with the volumes, as it hardens quickly). On the primed floor, a layer of glue is applied with a conventional spatula. Approximately a square meter is usually laid at a time – there is no more time and the composition will begin to harden.
The thickness of the standing adhesive depends on how even the base is, on the dimensions of the tile and the properties of the adhesive. Therefore, it is difficult to speak in general. But from experience we can say that when laying porcelain stoneware tiles up to 60 cm in size on a perfectly flat floor, you can take a notched trowel 8 or 10 and spread the glue with it. During the draft, the actual layer is 3-4 mm. This is quite enough. If you need more detailed information, it can be found on the official website of the adhesive manufacturer.
It is necessary to start laying from the center of the room. To make it easier to navigate, two lines are beaten off on the floor with a painting coated cord, which at the intersection give a center. Relative to this center, further laying is carried out, moving in one direction and the other towards the walls.
In the center there may be a corner of the tile (as in the photo below) or its middle – it depends on the scheme. In general, in order to evaluate how the selected layout scheme will look for you, it is worth laying it out “dry”. Besides the fact that you can really see if everything will look good, and change the luggage scheme if necessary, you will also clearly understand where which undercuts are needed and when which tiles to lay.
So the laying of porcelain stoneware occurs in the following sequence:
- Apply glue to the floor measuring approximately 1 sq.m.
- With a notched trowel, remove the excess, forming a relief.
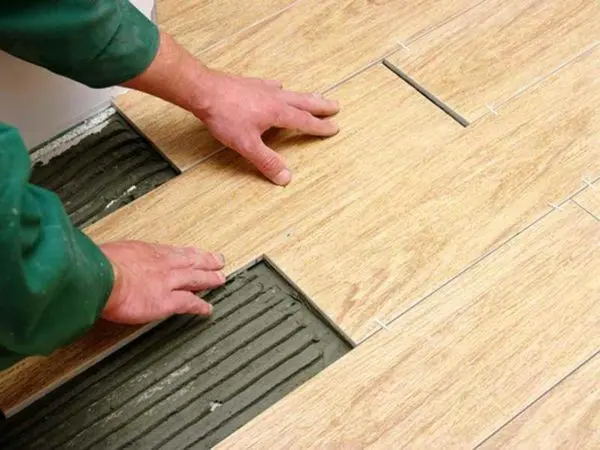

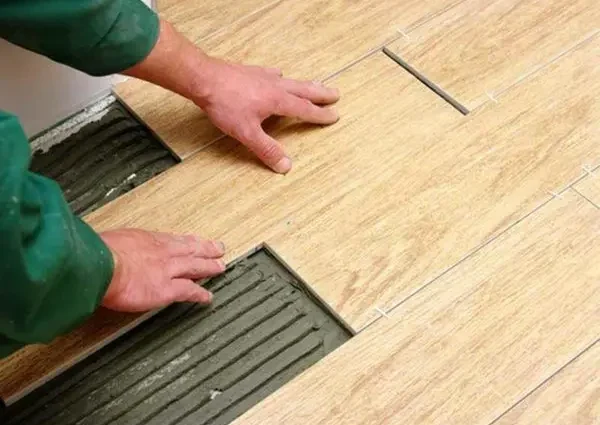
Applied glue, formed a relief - We take a dry porcelain stoneware tile, lay it in the right place. It must be properly pressed down and moved back and forth or with a circular offset.
- The fragment is put in place, crosses are inserted (if laying with a seam).

Place tiles, press down, move - They take the second one, put it in the same way.
When laying, glue often appears in the seams, sometimes it gets on the front surface. The fact that the glue protrudes is good, so there are no voids under the tile. But it must be immediately wiped with a damp sponge, then with a dry cloth. Even the slightest trace should not remain on the surface: if the glue dries, it is almost impossible to remove it.
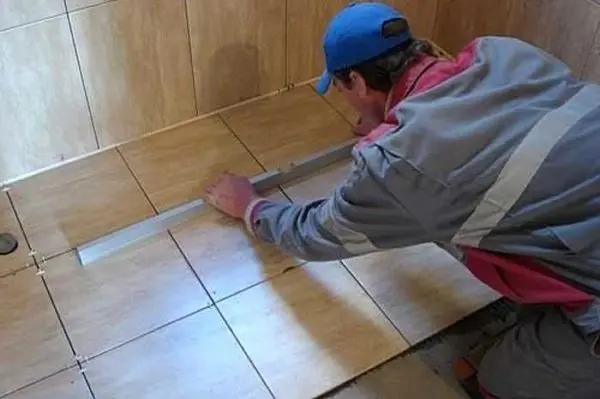
The tile installation process is repeated over and over again until the entire space is filled. In this case, it is necessary to monitor the planes so that the seams are even and of the same thickness, and the edges of the tiles are in the same plane. All this is checked by a building bubble level. When laying porcelain stoneware with your own hands, it is worth remembering that you can only correct the position of the tile for 4-5 minutes after laying the mortar. Then he grabs, and you can’t do anything. Therefore, check the planes and seams regularly.
Please note that there should be no voids under the tiles, even minimal ones. Then the finish will last a long time and without problems. In the presence of voids, porcelain stoneware in this place may crack or rebound.
Features of laying on the wall
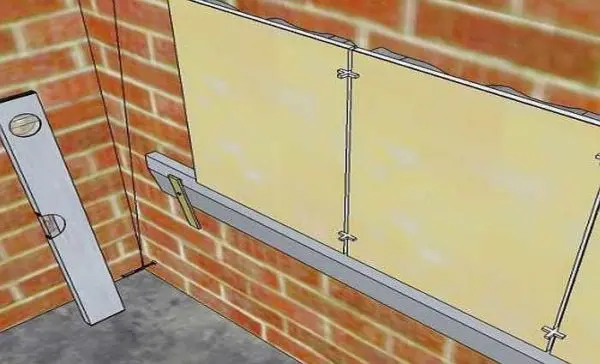
When installing porcelain stoneware on the wall, special glue is also used. The peculiarity is that the laying starts from the bottom, and from the second row. Along the perimeter of the wall, a line is marked where the first row of porcelain tiles will end (including the seam). A wooden plank (necessarily flat) or a profile for drywall is nailed along this line. The second and subsequent rows will “stand” on this bar. This is necessary, since the weight of even one element is quite solid, and even more with glue. If such a tile is simply installed on glue, most likely it will float – it will move down. That is why this support is necessary.

The bar is removed after the topmost row is laid, and then the first one is laid. By this time, the second row has long been “grabbed” and it will not be possible to move it, so you can safely work.
Grouting
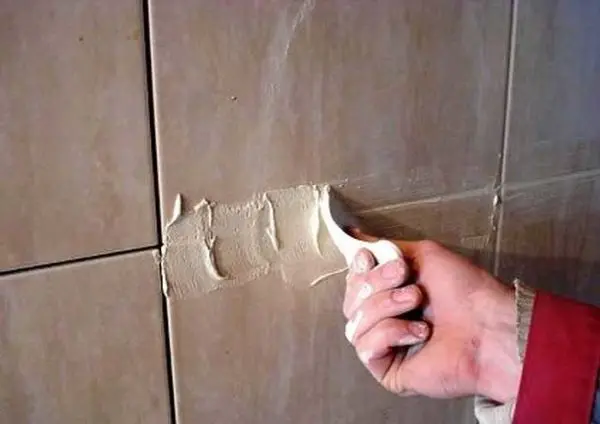
The selected paste is diluted according to the instructions on the package. You should get a consistency close to sour cream, maybe a little thicker. Take a rubber spatula, scoop up a small amount of grout. With movements obliquely in relation to the seam, the paste is applied, then the excess is picked up by running a spatula along the seam.
After processing a piece of 1-1,5 squares, wipe the rest of the paste with a clean, damp sponge. You also need to carefully remove the paste, it sticks a little worse than glue.
How and what to cut
Porcelain stoneware of large thickness is cut on special equipment with water blowing. But this is very rarely used for finishing the floor in an apartment or house. Usually the thickness of porcelain stoneware floor tiles is 4-8 mm. Very rarely they take a thicker one: it is too expensive, and the weight is decent – you should not heavily load the floors unnecessarily. Such specimens can be cut with a good tile cutter or grinder. If you find discs, take special ones, for porcelain stoneware, if you haven’t found them, you can try discs for stone.
The tile cutter must be of high quality, with a massive frame. It is very important that the cutting element (roller or rod) is of good quality.
It is possible to walk on the tiled floor three days after laying.
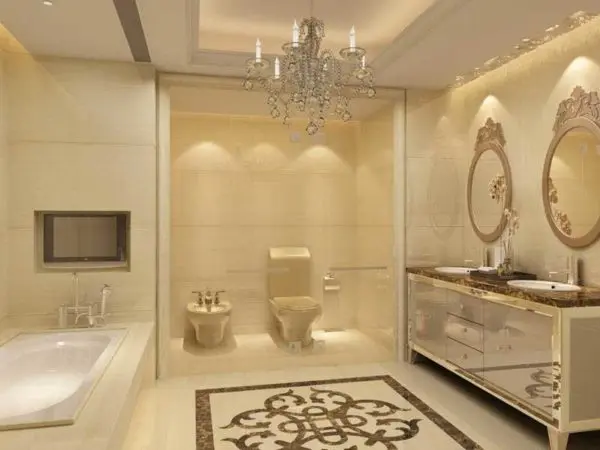
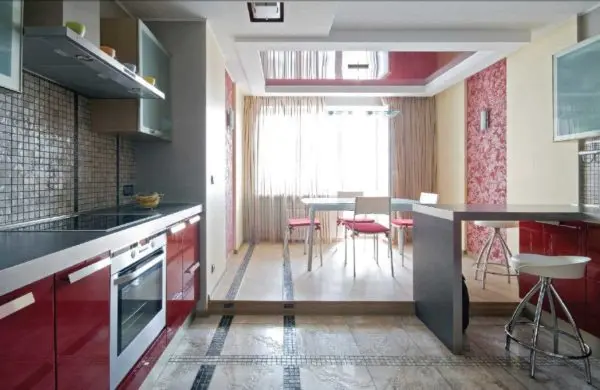
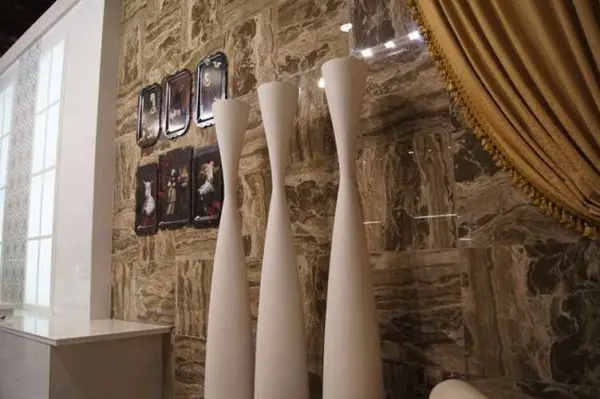
Photo examples of interior decoration with porcelain stoneware