


Contents
Neat paved paths in the country house made of paving slabs perfectly complement the design of any personal plot. It is not difficult to make such a path with your own hands if you have the necessary tools at hand and know the rules of laying technique.
General rules
The construction market has a large selection of paving slabs, which differ in shape, parameters and color. The advantages of the material include:
- durability;
- ability to withstand large dynamic loads;
- no difficulties with installation;
- ease of operation of finished structures;
- variety of shapes, sizes, textures and colors.
When choosing a building material, it is recommended to pay attention to the surface texture, size, shape and color of the stone. It is equally important to familiarize yourself with the features of the stone manufacturing process. For arranging garden paths, a stone with a thickness of 2,5 to 4 cm is suitable. If the path will be used by vehicles, it is better to choose denser paving stones. For this reason, the degree of dynamic load of paving slabs is one of the most important criteria for choosing a building material. Side plates must be equipped with drainage systems.

As for the type of laying of paving slabs, the classic version of the location of the stone is very popular with summer residents. The “chess”, “offset”, “herringbone” or “geometry” pattern looks no less interesting.
Video “Technology for arranging a garden path”
In this video, experts share secrets and recommendations on how to lay a street path out of paving slabs.
Stacking technology
The garden path is an important element of the suburban area, since it connects all significant functional objects. For arranging the paths, you can use wooden boards, wood boards, gravel and paving stones. The latter option is considered the most practical, strong and durable. Paving stone paths are resistant to temperature extremes and various precipitation. Subject to the laying technique and proper care, such a path in the country will last for more than a dozen years.
So, let’s figure out how to make paved street paths with your own hands:
First you need to develop a drawing diagram and come up with a sketch of the future pattern. Drawing can be done manually or use specialized computer programs for drawing. The next stage involves the selection of materials and the preparation of a construction tool. When choosing paving stones, one should take into account the texture, size and color of the stone, as well as the degree of dynamic load.
In the process of laying paving stones, you will need the following devices and tools:
- control and measuring and marking devices;
- shovels – bayonet and shovel;
- a special device for compacting the soil;
- perforator with a mixer nozzle or a small concrete mixer;
- grinder machine with discs for working with concrete and stone;
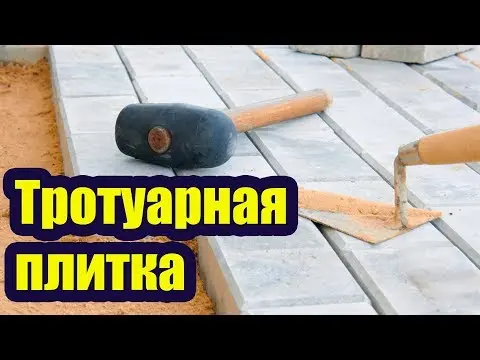
- trowel, small sledgehammer, mallet with rubber base;
- garden cart, broom, hard broom, watering hose;
- protective gloves and work clothes.
Substrate preparation
A properly prepared base is a guarantee of the durability of the garden path. First of all, you need to break down the site into sectors. Then the marking of the future path is made, the width, length and bends of which must correspond to the measurements specified in the scheme.
The beginning of the path is marked with a wooden stake. Subsequent pegs are driven in at a distance of 1,5–2,5 m from each other; at turns and bends, the guides are set much closer.

Upon completion of the marking, you can begin to form the base. With the help of a bayonet shovel, recesses are made along the marking line and the top layer of the earth is removed. The depth of the trench in the center should be within 20-30 cm, on the sides – 35-45 cm. The side recesses are designed for installing curbs.
The tamping device is used to level the working platform and check the evenness of the horizontal plane. Then a three-layer cushion base is formed from crushed stone, sand and dry cement mortar. It is worth noting that each layer must be carefully leveled and compacted. Between the layers, you can make a layer of geotextile fabric, which prevents soil subsidence and performs the functions of a drainage system.
Curb installation
The border prevents the gradual spreading of the base of the garden path. Sometimes, instead of a curb, stormwater or formwork from a corner is used.

The installation of the curb is carried out on a base cushion formed from sand, geotextile material, crushed stone and concrete mortar. Such a “lock” securely fixes the curb and prevents the displacement of paving slabs.
Laying paving slabs is possible after 20-24 hours. If there is damp and cloudy weather that prevents the concrete from hardening, it is better to wait another 1-2 days.
Tile laying
Laying paths from paving slabs starts from you. Otherwise, there is a high probability of subsidence of the surface during the formation of each subsequent row. The paving of paving stones takes place row by row, while each line is checked with a building level. Sagging and tilted stones are lifted with a trowel and leveled by adding a dry cement-sand mixture.

If the pattern involves cutting paving stones, it is recommended that you first lay the solid elements. Then, using a grinder and discs for working with concrete, side and corner stones are cut.
According to the recommendations of experienced builders, the side elements are laid at a slight slope to the curb. Accordingly, during rain, water will not collect in the center of the track.
Seam sealing
At the last stage of laying a garden path from paving slabs, the surface is leveled and the seams are sealed. Using the building level, you need to check each row horizontally and vertically. Even a slight deviation from the norm requires dismantling and troubleshooting. Since in the future it is in this place, when the paving stones begin to sag, a pit will appear.

When the path is completely ready, you can start sealing the seams. Cement and sand are mixed in a ratio of 1:4. Dry cement-sand mixture is applied evenly on the surface of the track. Using a brush with stiff bristles, fill the inter-row seams. The remains of the dry mixture are swept away with a broom, the surface of the path is watered with water from a hose. When the surface is completely dry, the procedure for filling the joints with a dry cement-sand mortar should be repeated.
The design and pattern of the garden path depends on the preferences and skill of the summer resident. To make the personal plot look harmonious, it is recommended to design all functional areas in the same style. Often, the color and shape of the tiles are chosen in accordance with the decor of the country house, garden gazebo and other architectural buildings on the territory of the summer cottage.