


Contents
For wall decoration, two types of finishing materials are most often used – wallpaper and paint. Moreover, the paint, once lost its popularity, regains it. This is because new compositions have appeared that look beautiful, are easy to apply, do not smell, many are washed and do not lose their attractiveness for a long time. At the same time, painting the walls in the kitchen takes much less time than wallpapering, but it looks at least as good.
What color and why
The kitchen is a room in which there is a high probability of stains. Moreover, their nature can be very different. These can be stains of fat, any caustic substances, juices and sauces that have a bright color. Hence the main requirement when choosing a paint – it must be well washed.
These requirements are met by special washable paints (Tikkurila Remontti Assa, Teknos Biora Balance), which create a dense film on the surface. These paints are made on the basis of latex or acrylic, they are an aqueous dispersion, that is, they almost do not smell. They can be washed with brushes, and some even with abrasives (DULUX Realife, DULUX Diamond Matt, Tikkurila Luja 40, Johnstones Acrylic Eggshell).
Even better is the situation with washing walls covered with anti-vandal or resistant paints. They withstand several thousand cycles of brushing with detergents (Johnstones Acrylic Durable Matt, Johnstones Anti-Mould Acrylic, Teknos Timantti 40, Novatic Feste Farbe, Novatic Innenlatex matt).
A little about the type of surface that is obtained after painting the walls. It is best to wash stains from glossy surfaces, worst of all – from matte ones. The matte surface is obtained due to the heterogeneous, porous structure. The contaminant is clogged into these heterogeneities and it is more difficult to wash it (there are rare exceptions – DULUX Diamond Matt). Therefore, on walls that will have to be washed frequently, it is better to use glossy, semi-gloss or at least semi-matt compositions.
Substrate preparation
Some acrylic, acrylate and latex paints have good hiding power, which can make small defects invisible. But, basically, good preparation is required – the walls are first plastered, then puttied and sanded until a perfectly flat plane is obtained. To obtain a reliable base, fiberglass is glued onto the layer of starting putty – a gossamer. It serves to reinforce the base. After the glue has dried on the “spider web”, the walls are leveled with finishing putty and finally polished.
Painting the walls in the kitchen with glossy or semi-gloss paints requires very even walls: gloss reveals even the smallest irregularities. To get a good result, pay maximum attention to this issue. You can highlight all the bumps using an LED lamp. She very clearly indicates all the irregularities.
In order for the paint to lie evenly, the walls are primed. The composition is selected depending on the type of paint: under latex you need your own primer, under acrylic – your own. This stage equalizes the absorbency of the base, which reduces the consumption of paint that is not at all cheap. It is absorbed into the surface covered with soil in the same amount, a beautiful even coating is obtained.
Even if the wall to be painted is deliberately made uneven – brickwork or other similar relief surfaces – a primer is desirable. It also improves adhesion to the base, the paint lays down better, holds tighter, and does not peel off.
The choice of color
It is not easy to decide what color to paint the walls in the kitchen. The choice of colors and shades is very wide, many companies offer to tint the composition on branded equipment in one of the RAL colors, which is more than 200 shades. In addition, special shades can be created – metallic, sparkles, etc. can be added. Considering that the painting of the walls in the kitchen can be multi-colored – stripes, geometric and floral patterns, ornaments, paintings and any other ways to decorate the walls, the number of options tends to infinity. However, first you need to choose the main color of the walls in the kitchen. When choosing a dominant color, there are two approaches:
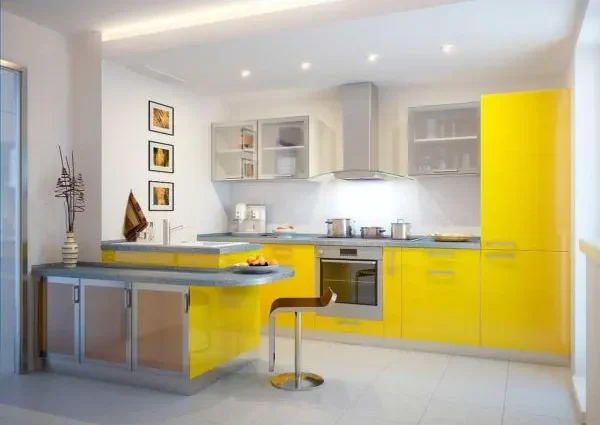
- Paint the walls of the kitchen in a soft “background” color. This will create a calm atmosphere, which, if desired, is made more dynamic with the help of a kitchen set and accessories in bright colors.
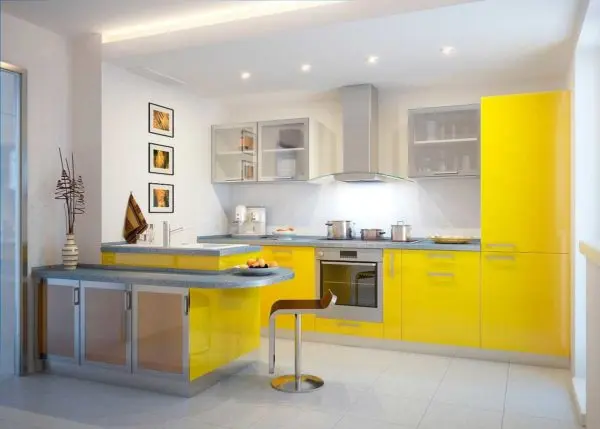

Walls painted in a neutral color for a calm atmosphere - Make walls bright. The color is in harmony with the color of the kitchen facade, or it can be a contrast. It depends on the color of the kitchen facade and how bright you see your kitchen.

Cheerful colors – for a bright mood
When choosing a color, it is worth remembering its influence on the emotional state of a person. Red – the color of danger, accelerates the work of all body systems. Staying in such a room for a long time is tiring. If you crave activity – you can choose it, or a softer orange. If relaxation is needed, something calmer is needed. For example, green color and its shades. It creates a calm atmosphere, and to make it not so boring, you can add yellow. With it, green becomes more active.
Brown creates a sense of stability, but do not use too dark shades – it will be too gloomy. Black in its purest form is overwhelming, but as an “additive” to all windings, it makes the interior more dynamic. It’s good in small doses.
White, gray, beige are the perfect “background” shades that allow you to highlight brighter interior items without overloading it. That is why painting the walls in the kitchen in these tones is used where the facades are decorated in rich colors.
Painting technology
The exact order in which the paint is applied depends on the type of binder and base, which influences the effect you want to achieve. But there are common points:
- Before starting work, remove the skirting boards, door trim, take everything out of the room that is possible.
- Cover all surfaces that may be soiled. This is a window, doors, an apron in the working area of uXNUMXbuXNUMXbthe kitchen, the floor. For windows, doors and an apron, it is easiest to use plastic wrap glued with masking tape. This coating can be easily removed without leaving any residue. You can also spread polyethylene on the floor, or you can use old wallpaper, newspapers, etc. You can fix them with double-sided tape, and preferably also masking tape (it leaves no traces of glue after peeling off).
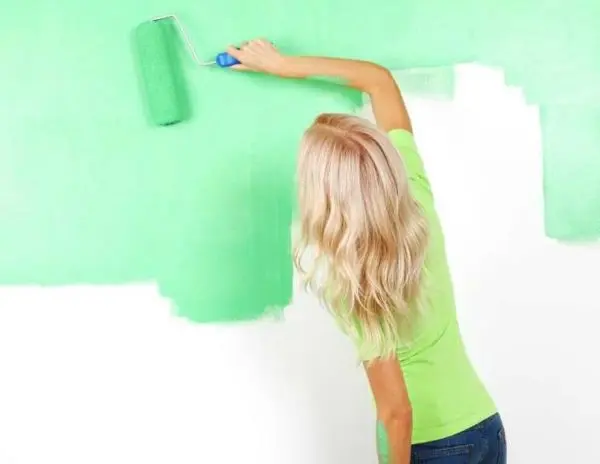
- The paint is applied with a roller or brush. Usually two or three coats are required to obtain an even color. Each subsequent layer is applied after the previous one has dried. This time is indicated in the technical characteristics of the composition as “tack dry time”.

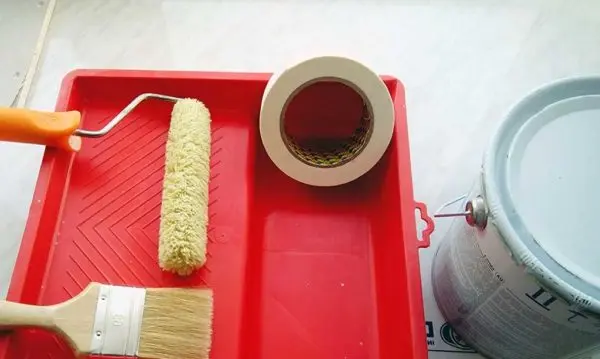
Tools for painting walls in the kitchen - When applying paint to a brush or roller, take a small amount of the composition, evenly distribute it. It is easier to do this with a paint tray, which has a special platform for removing excess. The paint is applied as much as possible by rolling it out in a thin layer. The most common mistake is the desire to paint over everything with the first layer of paint. This is wrong and threatens with the appearance of streaks – they try to apply more paint. It is much more difficult to get rid of streaks than unpainted areas. You will have to wait until they are completely dry, and then remove the sagging with fine sandpaper. Therefore, it is better to apply the paint thinly, and all the imperfections will be covered by the next next layer. The result is an even, deep color.

Painting the walls in the kitchen: the paint is applied in a thin layer - When using a roller, hard-to-reach places are passed with a brush – corners, the junction of the ceiling and walls, etc. After, with a roller, paint over the rest of the space.
- To obtain a uniformly painted wall, layers of paint are applied in different directions – one layer is horizontal, the other is vertical.
When painting the walls in the kitchen is over, do not rush to test how well the paint you have chosen washes. Please read the instructions carefully first. Some of the compositions acquire their performance characteristics only a month after application. So there is no need to rush.
All of the above is true for all types of paint – water-dispersion acrylic, latex. But, before starting work, carefully read the manufacturer’s recommendations. If there are different recommendations, they must be followed.
Kitchen wall painting options – photo
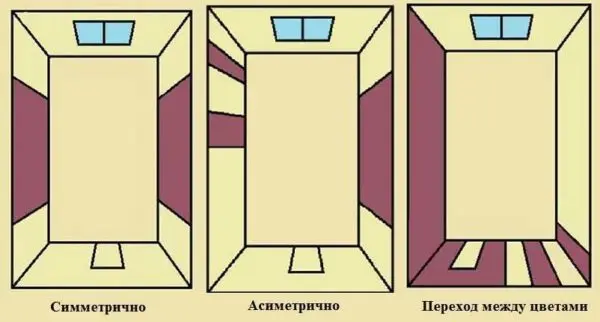
Not so long ago, a third trend appeared – painting the walls in the kitchen in two colors. Companion colors are chosen. These can be shades of the same color – dark and light, they can be contrasting or combined. If you want to choose different colors, use the designer color matching tables.
In any case, the most popular trend is painting one wall a different color. This allows you to clearly define the accents. In the kitchen, this is usually a wall near which there is a dining table, but not necessarily.
Striped walls in the kitchen
Another option is to apply stripes of a different color. More often – the stripes are vertical, which helps to visually “raise” the ceiling. They are usually of different widths, located at different distances from each other, but this is far from canon. The options are different. A few are shown below.
If you do not want variegation, you can play with the texture of the colors. The combination of stripes of glossy and matte paint of the same color gives a very interesting effect. It’s like a combination of velvet and satin. Looks very interesting.
If the stripes are narrow, first paint the walls in the dominant color. After drying, stick strips of masking tape, which will serve as borders when stained in a different color. After the second shade completely overlaps the first, the adhesive tape is removed, clear boundaries are obtained without a “transition”.
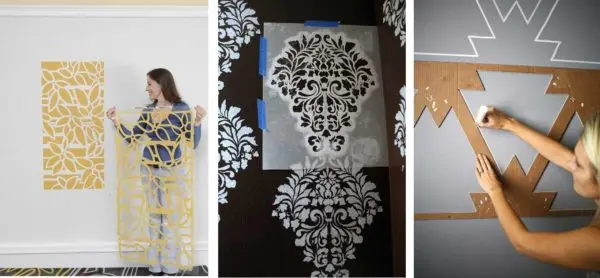
Ornaments and stencils
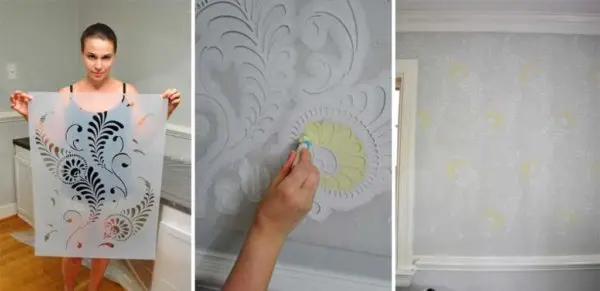
So that painting the walls in the kitchen is not boring, you can revive it with a pattern, ornament. Drawing is more difficult to handle – professional skills are needed, and applying ornaments to the walls can be easier than you think. With the use of stencils, this is not difficult at all. They can be made independently from thick paper, pasted over with adhesive tape (to make it easier to cut and not tear), or you can buy ready-made ones, cut out on a thick plastic film.

A suitable stencil is fixed on the wall. The easiest way to do this is with masking tape. The paint is applied with a regular sponge (you can use a kitchen sponge). They take a little paint on the sponge, distribute it evenly over the entire surface (a plastic plate is suitable as a palette). With this “tool” we paint over the wall in the slots. Since there is not much paint, it dries quickly.

If you want to get a two-color ornament, cover the parts that you will paint in a different color with adhesive tape (also masking). Apply the pattern in one color, wait until the paint dries. Tape these parts with tape and add the missing part with a different color.
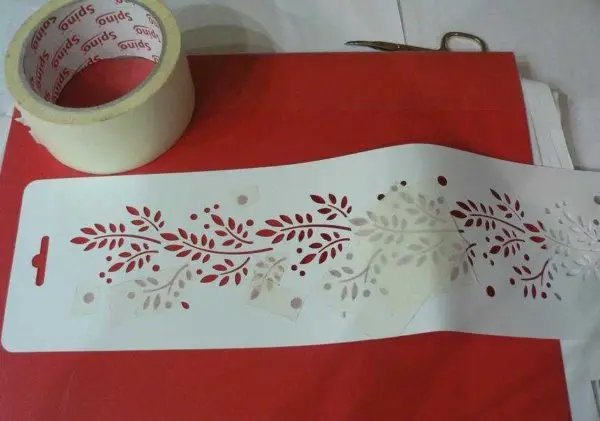
You can choose a suitable pattern for the kitchen in the catalog of sites selling ready-made stencils. There are a lot of them in different styles. You will definitely find the one that suits you best.