


It just seems like postcards are a thing of the past. It is very pleasant to receive them – especially in the New Year, when each of us is waiting for a miracle and magic! Watch our detailed master class with step-by-step instructions for creating a New Year’s card with your own hands. It will definitely turn out magical – shiny, with embroidery and drawings, and, most importantly, with a pleasant secret inside!
You can call on the help of children. Someone will be happy to come up with a drawing, someone will do embroidery. But, when the time comes to take up an awl or a clerical knife, do not leave the process unattended. And better – for security reasons – take on this part of the work.
We wish you success! The process of making a New Year’s card with your own hands promises to be creative and very exciting!
How to make a card for the New Year 2023: step by step instructions
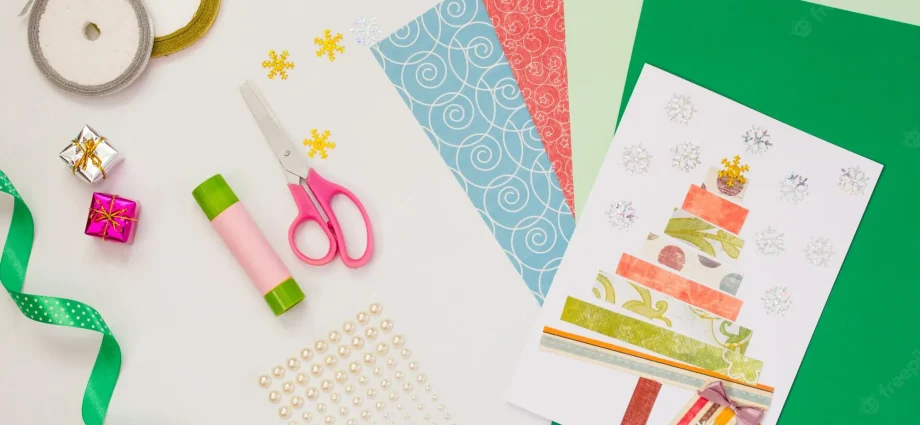
Step 1. To make a New Year’s card, we need:
- 3 sheets of A4 paper. One is for making a snowflake, the second is for a sketch of the front part of the card, the third is for a sketch of the congratulatory part.
- 2 sheets of cardboard. I have this double-sided coated cardboard. One sheet is the basis of the postcard. The second, divided in half, will serve as a design field for the front and greeting parts of the postcard.
- Simple pencil
- Compass, protractor
- Scissors
- Stationery knife
- Spica
- Awl
- Needle. Need a small embroidery needle with a blunt point and a large eye, or a fine sewing needle
- Mouline threads. I chose metallic threads. The main task is to choose such that they can be clearly seen on the cardboard.
- Narrow tape
Step 2. Draw a postcard
Our postcard is not simple – it consists of several parts. And we will start doing it from the front. First of all, we need to make a snowflake!
We fold a sheet of paper, as in the photo. (one)
Cut off the excess and mark the middle of the fold line. (2)
Using the midpoint, use the protractor to divide the sheet into three. (3)
We fold the workpiece in three. (four)
Now fold in half again. (5)
Draw a picture of a snowflake with a pencil. (6)
Do not draw too complex a pattern – it will certainly look very cool, but cutting it out on cardboard will be quite difficult with a clerical knife.
Cut out our beautiful snowflake and unfold it.
We translate the outline of the snowflake into a sketch. To do this, fold the second sheet of A4 in half. We impose an unfolded snowflake on the upper right corner of the folded sheet. We transfer the contour of the snowflake to the sheet with a pencil. This contour can be given at least to every corner, but do not get carried away, leave room for embroidery.
What do you want to see on a postcard? Thinking about what we will embroider. I drew a spruce branch with needles and a New Year’s ball on it. At your discretion, you can change the shape of the Christmas toy. When you think over the drawing, draw segments with dots that will turn into stitches on the cardboard. Divide the contour of the toy with points into approximately equal segments and think over the pattern with which you want to fill the ball.
Choose a pattern to fill the ball. When embroidering a Christmas decoration, different options are possible. With a different arrangement of stitches, the appearance of the toy changes. After watching this video tutorial, you can fill the ball with a thread, as on our postcard, or choose a ball that you like best.
Step 3: Animate the Sketch
On the cardboard, which will be the basis of the postcard, we outline the middle. We find it with the help of a ruler along the long sides of the cardboard. With a knitting needle (with pressure), draw a line (this can also be done with a clerical knife, but without pressure). The line should connect these two midpoints. Fold the sheet in half. The base of the postcard is ready.
We cut the second sheet of cardboard in half and remove it along the edges – so that when applied to the base, a frame is formed.
Now it’s time to transfer the sketch of the front side of the card onto cardboard. We impose a sheet with a sketch on top of the cardboard and transfer all points to it with an awl. Yes, yes, every point needs to be pierced. The process of translating a bitmap should be carried out on a piece of thick cardboard or a cutting board so as not to damage the surface of the table.
Now the cardboard base is ready for embroidery. Let’s get started!
Pick up the threads so that they are clearly visible on the cardboard. There is no need to tie the thread in a knot, just fasten the end of the thread with a piece of tape on the back of the cardboard. And we begin to flash all the segments with ordinary stitches.
It’s time to cut out the snowflake on the card. We draw the contour of the snowflake in the same way with a pencil, but now on embroidered cardboard. Scissors are unlikely to be able to do this, so arm yourself with a clerical knife and proceed! Just protect your workspace with something.
The front part of the postcard is ready.
And this is what the reverse side looks like.
Step 4. Write a congratulatory text
First, of course, write the text of the congratulations. Since we will also embroider it, it is important to find a middle ground. Small letters are difficult to embroider, and large text does not fit too much. Therefore, be brief. Then, the compiled text can either be written by hand in an angular font (on half of an A4 sheet), or you can choose a suitable font on a computer and print it (for the same sheet size).
I chose the font SW Mono, size 32, which seemed to me convenient for embroidery. I printed the text so that it would fit on the cardboard prepared for the congratulatory part of the postcard.
Step 5. Embroider a congratulation
Now it’s time to transfer the intended text to cardboard with an awl, and then embroider letter by letter. How to embroider your wishes, see our video instruction. Be patient and you will surely succeed.
This is where our heartfelt wish was born! I don’t know about you, but I myself already wanted to receive such a card as a gift.
Step 6. Making Curly Cuts
You can, of course, just stick our embroidered blanks on the base. But let’s create a truly magical New Year’s card with our own hands.
We need to make figured cuts on a postcard basis with a clerical knife, so that we can then insert blanks into them. To do this, we put the embroidered cardboard on the base and mark the place of the planned incision with a pencil. What do you want to see in these cuts? Christmas tree? Snowflake? Snowman? Decide and stick with it! All in your hands!
We cut the planned diagonal contour with a clerical knife. Attention: the sides of the corner do not need to be cut. And be sure to put a plank when working with a knife.
Here’s what should happen.
Step 7. Assembling the postcard
Now insert the embroidered parts into the cuts. You can drop a little PVA glue for more reliable adhesion of the base and embroidery. But wait a little with the glue! Let’s take a closer look at our congratulations! There is an empty space next to the text. Ugly … Let’s fill it with something!
Step 8. Putting the “secret”
If you are making a postcard for relatives living far away, then they will be pleased to see your family photo in an empty place. Perhaps you could not find a suitable gift for the person you are preparing a card for? Then glue some figured pocket and put a banknote in it, and he will choose the right thing for himself. Or maybe you have an invitation card for some New Year’s event – you can also put it in such a pocket.
I filled this void with an inscription. You already know how to embroider it on cardboard by watching our master class. But you will have a logical question: how to embroider, because the wrong side of the stitches will be visible on the front of the postcard. The answer is ready!
Before making a sketch of the text, or perhaps a drawing, you need to cut out a piece of paper that will cover the inside.
On the reverse side of this flap we will plan a text or a drawing.
We transfer the key points of the pattern to the base cardboard with an awl.
We embroider the planned pattern.
And now a very important point! We keep a sketch at hand so as not to get confused in the transferred points. The ends of the threads, as before, are fixed with adhesive tape on the back of the cardboard. You need to glue the threads in the invisible zone so that they are not visible through the carved contour of the front of the postcard!
We hide the wrong side “ugliness”. To do this, insert the front of the card into the slots. Now you can use glue.
And now our wonderful postcard is ready!
It remains only to wait for the magical moment and give it to the one you love.
Happy new year!