


Contents
Growing medlar at home is quite realistic. To do this, they take a bone, file it, clean it of pulp and soak it in warm water, after which it is immediately planted in a container. You need to grow at a sufficiently high temperature, in conditions of high humidity. Shoots will appear only in a month. At the same time, 4-5 years after planting, the tree will begin to bear fruit even without grafting. It will delight not only with the harvest, but also with an attractive appearance.
Conditions for growing medlar at home
To grow medlar at home, you need to create and maintain suitable conditions. The plant is thermophilic, so in spring and summer it is desirable to maintain the temperature at the level of 23-25 degrees. At the same time, it should be cooler at night – 17-18 degrees (not lower than 15 ° C).
The tree loves moisture, so watering should be regular. On hot days, the leaves should be sprayed with water. It is also advisable to place a container of water next to the pot to maintain air humidity.
Another important point is lighting. The medlar is photophilous, therefore, in early spring until mid-April, additional lighting should be used at home. Then the plant will be able to grow beautiful and healthy. Pots should be placed on the sunniest window on the south, east or southeast side.
Growing medlar from the bone at home
Growing a tree at home is quite simple. It will decorate the room with an unusual look. In addition, the plant will bear fruit already 4 or 5 years after planting.
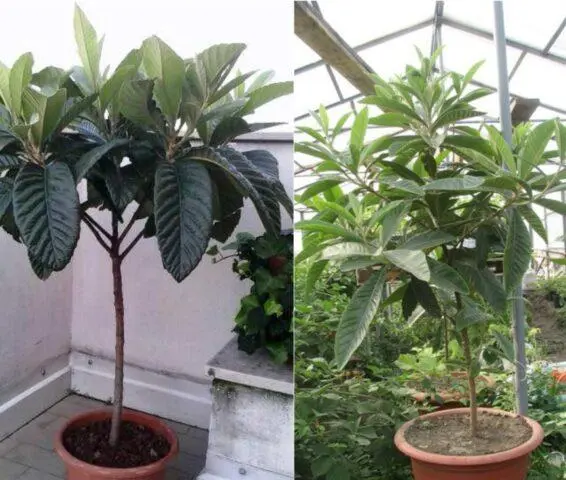
Pot selection
Initially, a loquat seed can be grown in a small pot for seedlings with a diameter of 5 cm. After 3 or 4 leaves appear, the seedling is transferred to a container whose diameter is 1,5-2 times larger (10 cm). The young plants are then transplanted annually for the first five years. Each time, a container with a diameter of 3-5 cm larger than the previous one is selected. In the future, this procedure is repeated after 3-4 years.
The tree pot should be spacious and deep enough
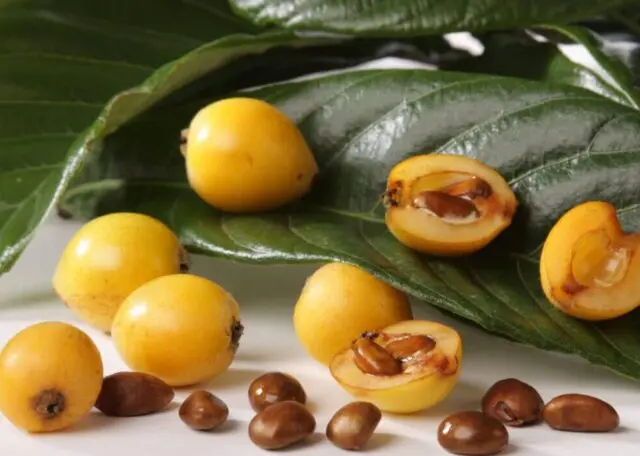
Seed preparation
To grow medlar at home, you need to take only fresh seeds – dry ones may not sprout. You can extract them from the pulp only a day or a few days before planting. Further preparation includes the following steps:
- Scarification – rub a dense shell with sandpaper or a file.
- Dip the prepared bones for a day in warm water.
- Then pickle for an hour in a weak (1%) solution of potassium permanganate.
Soil preparation
To grow a healthy medlar at home, you need to prepare the soil. It can be purchased at the store or compiled independently based on several components (ratio 4:2:1:1):
- sod land (surface layer);
- leaf ground (soil from decaying leaves);
- coarse sand;
- compost or manure.
Since the bones of the medlar are kept in potassium permanganate, it is not necessary to disinfect the earth. In addition, its sterilization will lead to the death of beneficial bacteria. Therefore, loosen the soil well enough, and after planting, water it.
Rules of landing
Growing a medlar at home from a bone is quite simple. The landing algorithm is as follows:
- A small layer of small stones is placed at the bottom of the pot.
- From above fall asleep fertile, loose soil.
- Medlar bones are planted with a sharp end up to a depth of 2 cm.
- Sprinkle with soil on top, without tamping.
- Watered with settled water.
After how many days medlar bones sprout
Even if all the growing conditions are met, the medlar seeds sprout for quite a long time. The process can take 20-30 or even 40 days. Much depends on the condition of the seed – the fresher it is, the faster the sprout will appear.
For successful germination, you need to put the container in a warm, well-lit place. At the same time, the sun’s rays should not be direct – it is better to slightly shade with a light curtain or white paper. Even if the room is warm, the pot is still covered with a film with several small holes.
Even when creating the right conditions at home, the bones sprout in about a month.
The mini-greenhouse is regularly ventilated, especially when condensation accumulates. To successfully grow medlar at home, the soil is moistened from a sprayer.
Under these conditions, shoots will appear in 3-4 weeks. When they reach at least a minimum height of 3 cm, the film can be removed. It is important to consider that the temperature in the room should not fall below 18 degrees. Watering is done regularly, using warm, pre-settled water.
How to care for medlar at home
It is not very difficult to care for a medlar in room conditions. The plant needs to be provided with regular watering and top dressing, as needed, pruning. To grow a medlar healthy and strong, a transplant is necessary. During the first five years of life, the plant is annually transferred to a container of a larger diameter.
Watering
To grow medlar at home, you should maintain a humidity regime. During the first month, watering should be daily. Further, water is given regularly, making sure that the surface layer of the soil remains slightly moist, having time to dry out.
Normal mode – 2 or 3 times a week. At the same time, after each watering, the soil is carefully loosened. This will allow oxygen to freely flow to the roots, so that they will normally absorb water and nutrients.
In hot weather, the leaves can be additionally sprayed from the sprayer. Moreover, it is better to do this at home in the late evening in order to prevent sunburn on the surface of the leaf plates.
Feeding
If you grow a tree at home, you should take care of top dressing. It is enough to feed adult plants three times a season. For this, complex mineral compositions are used, for example, Kemira Lux. At the same time, young seedlings need 5-6 top dressings – they are applied at intervals of three weeks. Along with complex fertilizer, you can also use organic matter, for example, mullein infusion.
Trimming
It is quite possible to grow a tree at home even without special pruning. But if you want to achieve the right crown, it is recommended to periodically do a shaping haircut. As a rule, gardeners get a tree with a spherical crown. You need to act like this:
- After forming 2-3 leaves, immediately pinch the top.
- Grow the plant at home for another six months, and then pinch off the side shoots for good tillering.
- Further, remove all clearly prominent shoots, keeping the crown attractive.
The main pruning option when growing at home is a spherical crown. Another option is to get a beautiful composition at home by intertwining the branches of several seedlings with each other until they are covered with wood. At the same time, all old and incorrectly growing branches are regularly removed. Slices are sprinkled with charcoal powder. This must be done before flowering – then at home it will be possible to grow a beautiful, attractive plant.
Transfer
If you grow medlar at home, the tree must be replanted. The first few years this is done regularly, then a break – 4 years and transfer to a container. Each new pot should be slightly larger than the previous one. The composition of the soil can be chosen as follows:
- turf (surface) land – 4 parts;
- compost or humus – 1 hour;
- coarse sand – 1 tsp.
You can also use the composition with leafy soil, peat, humus and sand (in the ratio 1:1:1:1). Another option is to purchase ready-made soil designed to grow palm trees or roses at home.
Will medlar from the stone bear fruit
Even at home, it is quite possible to get the fruits of medlar. But the first drupes will appear only 4-5 years after planting. You don’t even need a vaccine to do this.
It should be borne in mind that if stale seeds were originally used for planting, the tree will not bear fruit. Therefore, to obtain even a small crop, it is necessary to take exclusively fresh bones, just peeled from the pulp.
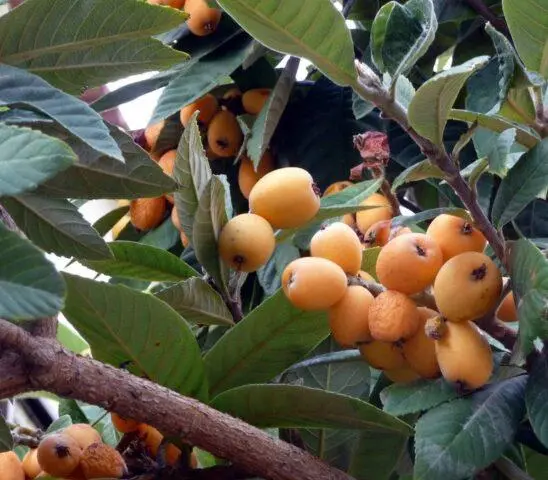
If you plant a fresh seed, the tree will bear fruit.
Diseases and pests
To grow a healthy medlar at home (pictured), you need to take care of the prevention of plant diseases and pests. It is necessary to observe the watering rate so that the soil is not too wet. If spots or plaque appear on the leaves, they are treated with a fungicide:
- Bordeaux liquid;
- “Tatu”;
- “Score”;
- “Ordan”.
If aphids, spider mites, scale insects and other pests are found, spraying with insecticides is carried out:
- “Aktellik”;
- “Confidor”;
- “Vertimek”;
- “Inta-Vir”.
Conclusion
Growing medlar at home is not very difficult. Normal temperature, light and humidity should be provided. The soil must be fertile, periodically it needs to be loosened. If you grow a tree at home, care should be taken to protect against pests and diseases. Then the plant will be able to grow healthy, and after 4-5 years it will bear the first fruits.
