Contents
- How to grow bees
- Queen Hatching Calendar
- Artificial insemination of queens
- Simple ways to hatch queen bees without transferring larvae
- Conclusion of queen bees with the transfer of larvae
- Nicot system for queen hatching
- Conclusion of queens according to the Kashkovsky method
- Conclusion of queens in micronuclei
- How to breed queen bees using the Kemerovo system
- Conclusion
Every beekeeper knows that independent breeding of queens must be carried out in accordance with the calendar. This will help to prepare the replacement of the old uterus in time in unforeseen situations. There are a number of rules that are important to follow during this process.
How to grow bees
In each bee family, reproductive functions are performed by the uterus. Her duties include mating with drones and laying eggs. The life expectancy of a queen bee under certain conditions can reach 8 years. But its reproductive capacity is declining every year, which has a negative impact on the quality of the crop. Therefore, beekeepers try to replace the queen of the family with a younger individual every 2 years. There are several ways to remove queens:
- transfer method;
- Zander method;
- artificial insemination;
- Alley method.
Beekeepers carry out the removal of queen bees in a natural and artificial way. Most often, artificial swarming is stimulated or bees are inclined to deposit fistulous queen cells. Also, the Kashkovsky method is often used and insulators are used.
If the beekeeper does not pay enough attention to the breeding of swarm queens, fistulous queens are naturally hatched. They are inferior to artificially grown queen bees in quality.
Queen Hatching Calendar
Before thinking about breeding a new queen, it is advisable to familiarize yourself with the queen bee breeding calendar. You also need to take care of the presence of a rich bribe. Lack of food and bad weather conditions can trigger the hatching of unproductive queens. The most optimal option is to carry out work on the removal of queen bees from late spring to early summer. In the middle lane, it is recommended to start breeding immediately after the first honey plants bloom.
The withdrawal of queens in September is a rare occurrence. Its bees carry it out on their own if the old queen is sick. In such families, the queen manages to fly around in time and prepare for wintering. In the spring, the bee family does not have any problems.
After how many days does the uterus come out of the mother liquor
Every experienced beekeeper should familiarize himself with the development of the uterus of bees by day. This will allow a more in-depth understanding of the process of breeding new queens of the bee family. The withdrawal of the queen bee is carried out in several stages. If drones hatch from unfertilized eggs, then the uterus is from fertilized ones. From the egg, a larva is formed, which the working individuals feed on royal jelly throughout the entire life cycle. The fistulous queen can eat food intended for ordinary bees.
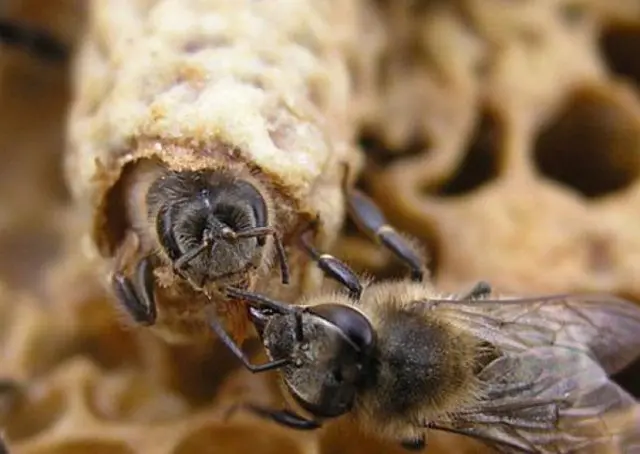
In the process of growth, the bee larvae begin to form a mother liquor. They carry out the process of sealing it on the 7th day. On the 9th day after sealing the mother liquor, the new queen gnaws through its shell. The first days after hatching, the uterus is still too weak. During this period, she is engaged in the elimination of competitors. After 4-5 days, she begins to fly around.
How many days does the uterus begin to sow after leaving the mother liquor
2 days after the flight, the process of mating with drones begins. After another 3 days, the first seeding is made. About 10 days pass from the moment of exit from the mother liquor. Experts recommend not to disturb the bee family during the reproductive period. Any intervention in the life of bees can frighten off the queen bee. Inspection should be carried out only in case of urgent need. It is desirable to carry it out in the morning, without using irritating factors.
Artificial insemination of queens
Breeding queen bees artificially is considered more productive. But it takes a lot of time and effort. It should be borne in mind that a fertile individual hatches from 12-hour large larvae. With a good honey collection, the quality of the uterus will be better. The most common methods of artificial insemination include:
- activation of the insulator;
- application of the Nicot system;
- Tsebro technique;
- emergency way.
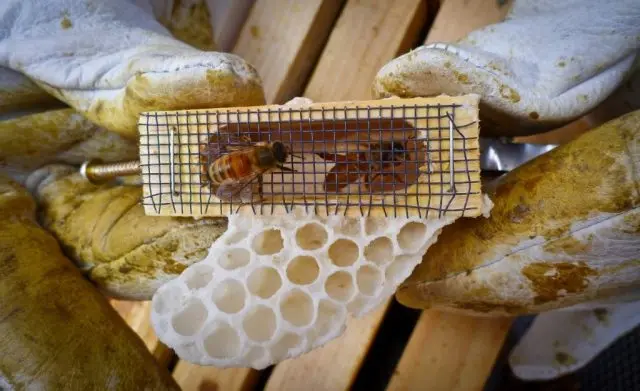
Instrumental insemination of queen bees is considered the most time-consuming. It is resorted to if it is necessary to reproduce offspring in infertile queens. The procedure is carried out in the laboratory. First, semen is taken from the drone. Stimulation of muscle contractions is carried out by pressing on the front wall of the drone’s abdomen. At the next stage, the queen of the family is released for a flyby, during which she cleanses the intestines from feces. To do this, it is enough to plant an insect on a previously closed window frame. Then, with the help of special devices, insemination of infertile queens is carried out with the collected material.
Simple ways to hatch queen bees without transferring larvae
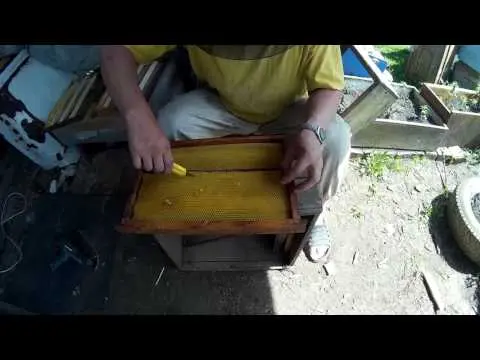
The hatching of queens in beekeeping is often carried out in the simplest way, which does not involve the transfer of larvae. It consists in moving a frame with larvae from one family to one where there is no queen. The low productivity of the method is due to the close location of the queen cells in relation to each other.
When using this technique, it is important to ensure that the queen of the family does not develop active egg production. After its transplantation, honeycombs with oviposition should be removed from the bee nest.
Zander method
The Zander method is considered to be one of the simplest in queen breeding. The withdrawal of queens is carried out by replanting mature queen cells in nuclei or bee colonies. First of all, it is required to prepare narrow strips of combs with larvae. In the next step, the strips are divided into parts, in each of which the germ of the future bee will be located. With the help of molten wax, the resulting pieces are attached to wooden bars. Subsequently, they are placed on a grafting frame.
Alley method
As a result of using the Alley technique, it is possible to rebuild the queen cells at a distance far from each other. Combs with young larvae are divided into strips with a hot knife. In places with a large accumulation of brood, more than half of the cells are cut. At the next stage, the strip is unfolded in such a way that the cut part is located on top. In this position, the cells are thinned out (one is left, the next two are crushed). To make the bees more willing to build queen cells, the cells are expanded with special sticks, avoiding touching the larvae.
The resulting strips of honeycombs are attached to a frame 5 cm high. It should have two holes. The attachment process is carried out using hot wax or wooden pins.
Conclusion of queen bees with the transfer of larvae
The queen hatching system by transferring larvae was first used in 1860 by Gusev. The transfer was carried out using bone sticks with rounded ends made of wax, outwardly resembling bowls. Bee individuals were carried in the life cycle of eggs. Wax bowls were attached to a frame and then transferred to a new family. This method has become widespread in large bee-breeding farms and farms.
How to make queen bowls
For self-made bowls, wooden templates will be required. They are sticks up to 12 cm long. Their end has a rounded shape. After preparing the templates, it is necessary to melt the white wax in a water bath. The first time the template is lowered into a container with wax to a depth of 7 mm. Each next time the depth changes by 2 mm. Such manipulations allow you to get a bowl with a solid base and thin walls. The more templates prepared, the faster the process of making bowls. In modern beekeeping, ready-made plastic bowls are often used. They can be purchased at a specialized store.
Preparing the bowl for grafting
Before inoculation of larvae, it is necessary to perform preparatory steps. Initially, bowls are placed in a queenless family. This process is carried out directly on the day of the collection of the queen of the family, in the evening. For 8 hours, the bees will polish the bowls, preparing them for the transfer of larvae. During this period, it is important to provide them with royal jelly nutrition. In the future, this will simplify the transfer process by securing the bowl at the bottom.
Transfer of larvae
The transfer of larvae to a homemade bowl is called grafting by beekeepers. It is considered quite painstaking, as it requires good eyesight and dexterity. The larvae are transferred using a special spatula, which is easy to find in any beekeeping store. In extreme cases, it can be built independently using aluminum wire. Its diameter should not exceed 2 mm. One end is carefully polished, forming a kind of blade out of it.
When transferring, take into account the temperature and humidity in the room. The optimum humidity level is 70%. The air temperature should be between 20 and 25°C. To achieve the required humidity, it is advisable to hang a damp cloth in the room. The transfer process is best done during the day, in natural light.
For ease of transfer, the honeycomb is cut. Using a spatula, each brood representative is carefully placed in a bowl. It is important to bring the tool under the back of the larva, pressing it to the bottom of the cell. This will avoid damage.
Checking the larvae
Regardless of the replanting method, the survival test is carried out after 2 days. In the event that there was no open brood in the bee colony, the larvae should be accepted. The success of the reception is indicated by the presence of a sufficient amount of food and the active detuning of the bowls.
Acceptance of less than 70% of the total indicates the cultivation of a family of fistulous queen cells. In such a situation, it is necessary to detect and dispose of fistulous queen cells. If all actions are performed correctly, the bee family will accept more than 90% of the larvae.
Nicot system for queen hatching
Beginners in beekeeping prefer to use the Nicot system to hatch queens. The instruction is understandable even for a person who is far from caring for a beehive. The advantages of the system include:
- rapid transfer of larvae without physical contact with them, which reduces the risk of injury;
- uninterrupted oviposition;
- timely hatching of young queens.
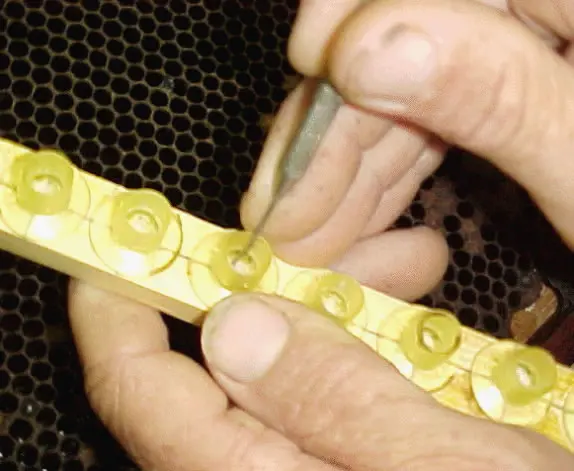
The Nicot system includes 110 cells. Its basis is cells for breeding queens. In addition to them, there are bowl holders. Cassettes of artificial honeycombs are covered with a dividing grid. Bowls on the back side are closed with plates.
The set is designed for fast and high-quality hatching of queens. It eliminates the need to use additional tools for transporting larvae. The Nicot system can be made independently using improvised materials. The standard set helps to breed up to 30 queens, which is quite enough for an average apiary.
Conclusion of queens according to the Kashkovsky method
The withdrawal of queens according to the Kashkovsky method is carried out in several stages. The procedure is performed at the very beginning of the honey collection. Initially, layering is done, where wax, sealed brood, bee bread, worker bees and the queen of the family are transferred. Layers are cleaned in a warm place for a month. After the discovery of fistulous queen cells, the beekeeper must sort out the larvae, leaving the largest and healthiest. After some time, the old queen is removed from the hive and a new one is placed in its place.
Conclusion of queens in micronuclei
With the help of micronuclei, elite queens are often hatched. In beekeeping, a micronucleus is a structure in which the mating process of infertile queens with drones takes place. Outwardly, it is a miniature of an ordinary hive. The use of micronucleuses helps to solve the following tasks:
- the possibility of storing fetal bees;
- the process of flying around the young queen is faster than usual;
- spare queens can overwinter in myronucleuses.
The advantages of using the design also include the ability to save feed. Beginning beekeepers can settle defective queens in miniature houses and train their skills on them.
How to breed queen bees using the Kemerovo system
During the period of honey collection, it is often practiced to remove fistulous queens according to the Kemerovo system. It is based on the stimulation of the natural breeding of queens as a result of the isolation of the existing queen. In this case, the productivity of the bee colony does not decrease. The advantages of the technique include:
- the possibility of implementation by beginners;
- simplification of the queen bee hatching process;
- no need for swarming.
The main task of the beekeeper in the framework of the application of the Kemerovo system is to timely remove the queens and strengthen the family by the time of honey collection. To increase the chances of getting quality queen bees, you must do the following:
- carry out work in the first half of June;
- timely reject low-quality open and sealed queen cells;
- use bee families during the period of increasing their strength;
- laying queen cells in close proximity to the old uterus.
The highest productivity of grown bees was noticed during the period of good honey collection. Isolation of the uterus from the main family does not have a depressing effect on the activity of workers. Transferring the queen of the family to the grafting box for the removal of queens contributes to the active laying of queen cells. At the initial stages of honey collection, the number of queen cells can reach 50 pcs.
Conclusion
The withdrawal of queens is a mandatory procedure that allows you to maintain the activity of the bee colony at the proper level. Regardless of the method chosen, it must be carried out in accordance with the beekeeper’s calendar. Proper breeding of queens will help the bee family to endure crisis moments without complications and increase productivity.