


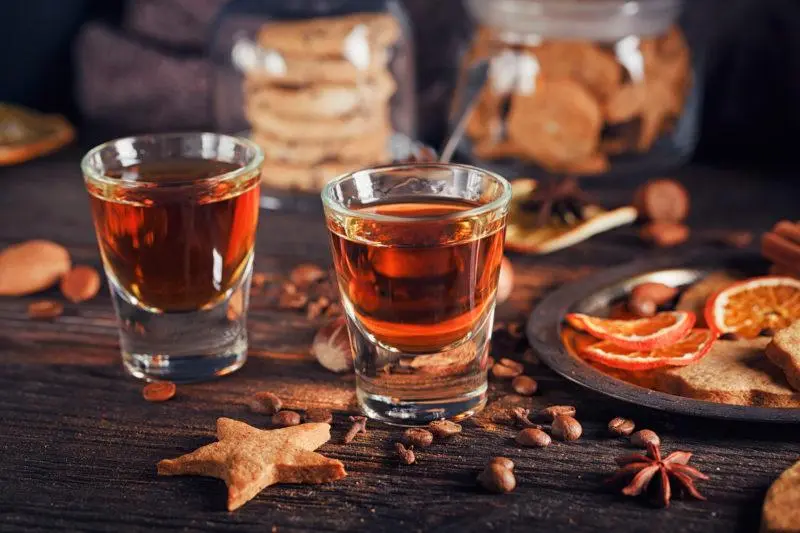
Almost all manufacturers have long moved away from the original image of whiskey. Often unacceptable spirit yeasts, liquid phenols instead of malt smoking and little related to traditional equipment are used. And sometimes, in order to taste a real original whiskey, it is more expedient to cook it at home yourself.
It took me more than a year to write this article. Often there was not enough strength, sometimes time, but the main reason was the fear of the colossal amounts of information needed to compile an adequate manual for making whiskey. Well, I managed to overcome this fear. Meet more than 3500 words on how to make 100% real whiskey at home.
I want to immediately draw your attention to the fact that this manual consists of 2 main subsections. In the first one, I decided to offer 4 basic recipes for this drink: smoked and not smoked Scotch whiskey, Irish Pure Pot Still and American rye whiskey. Logically, a bourbon recipe should also appear here, but I already somehow wrote a separate article about it. I repeat once again – the recipes below are basic, presented solely for general educational purposes and in no case are the ultimate truth.
“Always carry a bottle of whiskey with you in case you get bitten by a snake. Moreover, always carry a small snake with you in this case.
W. C. Fields
Recipes are described superficially only because they are very similar to each other. It is because of their similarity that I decided to describe the technology of making whiskey in a separate chapter. I think that this manual should be enough for any person for the first experiments with whiskey. I also rely on your enthusiasm and desire to independently study some of the basics of home brewing. In particular, I really hope that you will read articles on homebrewing and fractional distillation – this material should be more than enough to understand all the processes.
Here I also skipped the malt germination stage, as a separate material on the site is devoted to this. This, by the way, is the most time-consuming process in the preparation of whiskey, which is hardly within the power of a beginner. Fortunately, today you should not have problems with the purchase of ready-made malt, including peated malt. Read all the articles carefully, ask questions, but most importantly, remember that any alcoholic drink requires complete dedication and no fear of experimentation. Whiskey definitely needs it.
Basic whiskey recipes at home
Whiskey production technology in a nutshell:
- Barley grains are soaked and germinated, turning into malt.
- The malt is dried in kilns at moderate temperatures (direct flue gases or hot air).
- After drying, the malt is crushed and soaked for some time in hot water – at this stage, a liquid is obtained, which is called the wort.
- The wort is filtered from solid particles (grains), infected with yeast fungi and fermented – the wort turns into mash.
- Braga is distilled for the first time without division into fractions – raw alcohol or “low wine” is obtained.
- Raw alcohol is distilled a second time with the separation of “heads” and “tails”.
- The middle fraction of the distillate is diluted with spring or purified water to a certain strength and subjected to a long aging in an oak barrel.
As you already understood, we will miss the first 2 points, since it is very laborious and often impractical to mess with the germination of malt and its drying at home. The rest of the processes will be observed in accordance with tradition. The first 4 points are fully consistent with the preparation of beer.
Single Malt Scotch Whiskey Recipes
Originally from Scotland, but now produced all over the world, single malt whiskey opens up a limitless world of possibilities to the distiller. The only rule is to use 100% malted barley and nothing else. You can use smoked malt to get an Islay-style drink (Island and Highland Scotch whiskey has a characteristic smoky taste, because the malt is smoked on direct flue gases), or opt for less smoked malt and get a soft drink that is characteristic of the lowlands of Scotland and mostly Ireland. You can spend a lifetime experimenting with single malt whiskey and only scratch the surface of this drink category.
There are two main sub-styles of single malt whisky: smoked and unsmoked (but even unsmoked Scotch whiskey is still peated). You can buy smoked malt in numerous beer shops. To understand the level of smokedness of malt, pay attention to its description. It should contain the abbreviation ppm (parts per million), which indicates the content of phenols in the malt (phenols are found in peat smoke). Today, manufacturers divide smoked malt into: low-peaty (1-5 ppm), medium-peaty (5-15 ppm) and strongly peaty (15-50+ ppm).
To begin with, I want to offer you the simplest, most basic recipe for lightly smoked single malt whiskey.
Basic Unsmoked Single Malt Whiskey Recipe
- 7,6 liter of clean water
- 1,35 kg barley malt
- 0,1 kg smoked barley at 40 ppm or 0,2 kg at 20 ppm
- 1 sachet of yeast
- 1-2 tsp starter cultures for yogurt or cheese
Preparation:
- Heat ¼ of the water to 71оC and pour malt into it. Maintaining a temperature of 66-68 degrees, pause for 1 hour 30 minutes. Strain the wort, rinse the grains 2 times: the first time with a quarter of water at a temperature of 73-74оC, the second – a quarter of water with a temperature of 82-83оC. Combine all three drains, add the last quarter of the water, discard the pellet.
- Cool down the wort to 33оC, pour into a fermentation tank and add pre-prepared yeast and sourdough (read about lactic acid fermentation in the second part of the article with a detailed description of each stage of whiskey production). Install a water seal. Fermentation should take place at room temperature for 2 to 6 days.
- Remove the finished whiskey mash from the yeast sediment and pour into a distillation cube. The first distillation should be carried out as quickly as possible without the selection of head and tail fractions. The selection is stopped when the fortress in the jet falls below 30%. The remaining bard can be added to the next shoulder strap or poured.
- The resulting raw alcohol (hereinafter SS) is diluted to 25-30% alcohol and returned to the washed distillation cube. During the second distillation, select about 1 tablespoon of heads for each liter of wort (note, it is wort, not raw alcohol). Then you can take a little bit of distillate by eye, which in Scottish traditional distillation is called foreshots – this fraction, as a rule, does not have any taste and it is better to add it to the next first stage (in fact, these are heads, which in the compartment should be about 5% of SS).
- We select the middle fraction (“heart”, middle or heart of the run) in the range of 55-72% alcohol in the stream (to taste). The rest of the cube is tails (feints) – we select them to dryness and add them to the next first stage.
- The resulting distillate, namely the heart, is insisted on oak chips or placed in barrels of bourbon, sherry or wine (for example, Scottish distilleries often use Sauternes white wine barrels).
Basic Smoked Single Malt Whiskey Recipe

- 7,6 liter of clean water
- 1,35 kg barley malt with ppm 20-40
- 1 sachet of yeast
- 1-2 tsp starter cultures for yogurt or cheese
Preparation is similar to low-smoked whiskey.
Single malt whiskey is very sensitive to small changes in the recipe. For example, a small amount of smoked malt in a low-smoked whiskey recipe creates those same honey notes that are so characteristic of scotch. Yeast cultures, as well as lactobacilli, have a very strong influence. It is recommended to start with regular baker’s and Belgian yeast for ale, but more on that later, after the recipes.
Single Malt Pure Pot Still Irish Whiskey
Pure Pot Still is a unique Irish single malt whiskey currently produced by a very limited number of companies in Middleton (Redbreast, Green Spot and some premium Jameson brands). It is unique because not only barley malt is added to the mash, but also green unsprouted barley (unmalted green barley). Distilled Pure Pot Still three times, very laborious but incredibly interesting for home cooking.
There are three styles of Irish whiskey in total (there are also Single Malt and Single Grain), but in terms of production technology, only Pure Pot Still is fundamentally different from the Scotch brother. The recipe is not simple, but acceptable for a beginner to understand.

- 7,6 liter of clean water
- 1,4 crushed barley malt
- 1,4 crushed green barley grain
- 1 sachet brewer’s yeast for ale or lager*
- 1-2 tsp starter cultures for yogurt or cheese
* – lager yeast makes the drink softer, which is typical for Irish whiskey.
Technology of preparation:
- Heat half of the water to 71оC and put malt in it. Maintaining a temperature of 66-68 degrees, pause for 1 hour 30 minutes. Strain the wort, rinse the grains 2 times: the first time with a quarter of water at a temperature of 73-74оC, the second – a quarter of water with a temperature of 82-83оC. Combine all three plums, discard the pellet.
- Cool down the wort to 33оC, pour into a fermenter, add yeast and bacterial starter. Fermentation should take place at room temperature for 2 to 3 days.
- Remove the finished Irish whiskey brew from the yeast sediment and pour into a still. The first stage to do up to 30% alcohol in the jet.
- Received SS, if necessary, dilute to 25-30% and pour again into the distillation cube. Select 5% of the heads from the initial volume of the SS. Select the middle fraction in the range of 55-70% alcohol (to taste). Select tailings to dryness, adding them to the next haul.
- Overtake a third time, again selecting the heads (here, 1 tablespoon is enough from each liter of mash). Collect the middle fraction in the region of 80-90% alcohol. Tailings are taken dry and added to the next haul.
- The resulting distillate is diluted to the desired strength and insisted on oak chips or poured into charred barrels of bourbon or white wine.
American Rye Whiskey
This is the last recipe I want to share with you. American rye whiskey has a rich, dense and sometimes rough taste. It should not be confused with Canadian rye whiskey, which is completely different from it. Rye whiskey, by analogy with bourbon, in the United States can be called a drink that contains at least 51% rye (malt or grain). It must also be aged in new charred oak barrels. As with bourbon, rye whiskey mashes always contain barley malt, except for 100% malted rye mashes, which is extremely rare.
In this case, it is very important to add lactobacilli in the form of a starter for yogurt or cheese. Rye grain usually contains a large number of different bacteria that can simply destroy the wort. Yeast and lactobacilli inhibit their activity. The sourdough should only be added when the yeast has weakened (read the second chapter of the article).

- 7,6 liter of clean water
- 1,8 kg unmalted rye
- 0,45 kg malted rye
- 0,45 kg barley malt
- 1 tsp amylase enzyme powder
- 1 sachet of yeast
- 3-4 tsp starter cultures for yogurt or cheese
Manufacturing technology:
- Heat all water to 71оC and pour crushed grain and malt into it. Maintaining temperature in the range of 66-68оC pause for 1 hour. Then add the amylase enzyme and at the same temperature, pause for another 30-45 minutes.
- Cool down the wort to 33оC and place it together with the pellets in a fermentation tank. Add yeast and sourdough, ferment at room temperature for 2-3 days.
- Remove the finished mash from the sediment, if necessary, strain through a sieve or cheesecloth and pour into a distillation cube. Do the first distillation at maximum speed while there is 30% alcohol in the jet.
- The resulting SS is diluted to 25-30% and sent for fractional distillation. Heads are taken 1 tablespoon for each liter of wort. The average fraction to taste, in the range of 60-72% alcohol. Dry tails.
- The distillate is aged on toasted oak chips (about 20 seconds on a yellow flame) or poured into heavily charred new oak barrels.
Secrets of making real whiskey
Once again, the recipes described above are basic and the cooking technology in them is described superficially. This chapter should completely dispel all questions about the preparation of any type of whiskey.
“If I can’t drink bourbon and smoke cigars in Paradise, then I won’t go there”
Mark Twain
Malt selection
Modern industry allows you to buy really high-quality finished malt at an affordable price. For the first experiments, you can limit yourself to the so-called base malts. Base malt is called, which in the grist (malt or a mixture of malts taken to prepare the required volume of mash) can be used in an amount of 100%. These include: Pilsner (Pilsner), Vienna (Vienna), Munich (Munich) and Pale ale (Pale ale). Any of these malts can be used alone for the grist or combined.
You can also highlight “special malts”, which are added to the grist in limited quantities to obtain certain shades in taste. These, for example, include caramel (caramel malt: carapills, carared, carahel, etc.) and melanoidin. These are special malts of the first group, they are responsible for the formation of the taste of the distillate. Special malts of the first group reduce the total volume of alcohol in the mash and give a very specific taste. There are also special malts of the second group, there are only two of them: diafarin (Diastatic) and sour malt (Acidulated malt). These malts are used to correct some of the properties of the mash.
Well, some numbers. For each liter of 40% distillate, about 2 kg of purchased malt or 2,5 kg of home-produced malt are required. At home, for whiskey aging, it is optimal to use barrels with a minimum volume of 10 liters. Consider the option of filling a 15-liter barrel. So, in the barrel you need to pour distillate with a strength of at least 50%. Therefore, we need 15 * 0,5 u7,5d 20 liters of AC (absolute alcohol). Let’s add a minimum of 9% for heads and tails, for a total of 15 liters of AC. So, to get 50 liters of 9% distillate, we need 0,4 / 2 * 45 = 9 kg of purchased malt or 0,4 / 2,5 * 56 = 57-XNUMX kg of homemade malt (calculations were carried out according to the formulas of user victorchik from the forum .homedistiller.ru).
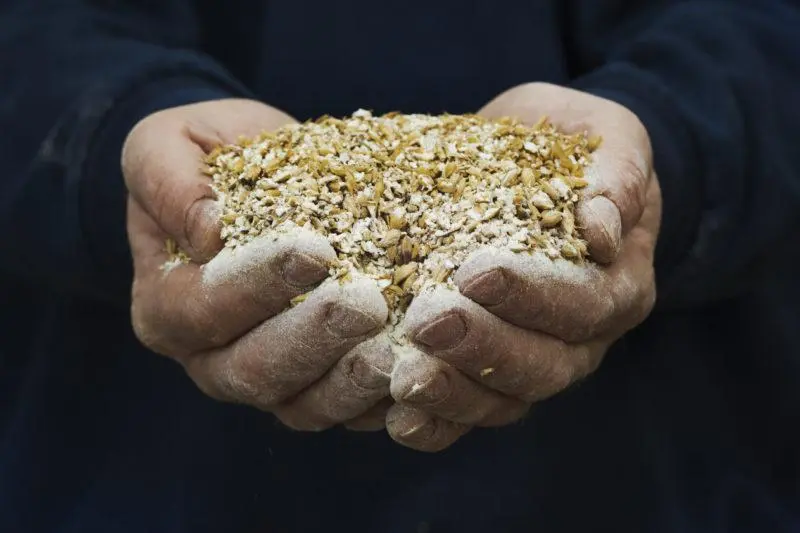
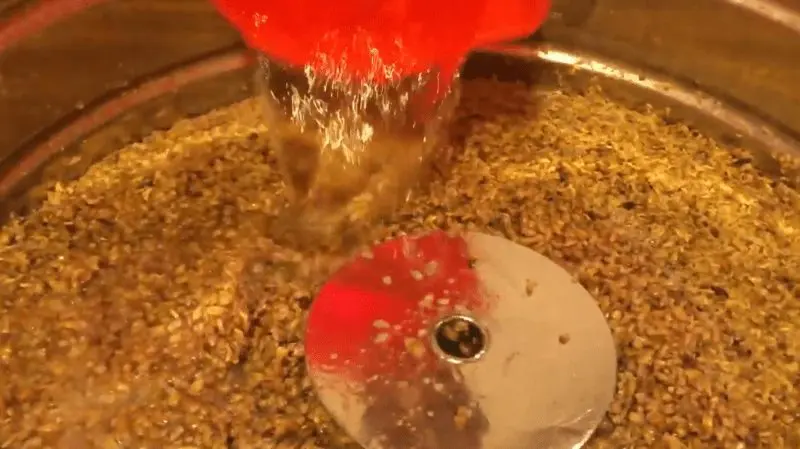
This is what properly ground malt looks like
Mashing malt
If you have brewed beer, or at least read my articles on brewing beer, then you understand the process. The task is simple: turn starch into maltose, which yeast can process. To do this, the malt is mashed with water – it is heated to a certain temperature in compliance with certain temperature pauses. I don’t see the point in going deep into the process, so I’ll describe the technology in a nutshell.
First you need to heat the water to 71оC and add crushed malt to it. Malt, in turn, should not be ground too finely – you need cereals, not flour. After adding the malt, the temperature of the mash should drop to the desired 66-68оC. If this is not the case, you need to bring the temperature of the mash to the required temperature over low heat, while the wort must be constantly stirred so that it does not burn. Now you need to maintain a temperature pause for 1 hour, which is usually enough to convert the sugars.
If the recipe provides for the addition of the amylase enzyme (a completely harmless enzyme that helps thin the wort and break down starch), it must be added after an hourly thermopause and maintained at a temperature of 66-68оWith another 30-60 minutes. Even if you did not add amylase, I still recommend holding the mash on pause for an extra 30 minutes to be on the safe side. Next, you can do an iodine test to make sure that the malt is sugared, and then proceed to wash the wort (this is not required in the rye whiskey recipe).
Hot water is used for washing. For the first time, you need to rinse with water at a temperature of 71-72оC, second – 82-83оC. After that, the grain (used malt) has nothing useful for us and can be thrown away (some use it as fertilizer or animal feed). The wash water is combined with the primary drain and all this must be cooled very quickly so that the wort does not become infected with pathogenic microflora. Brewers can use their chiller, ordinary people can use a sink with cold water and ice. Wort chilled to 33оReady for the addition of yeast and lactobacilli.
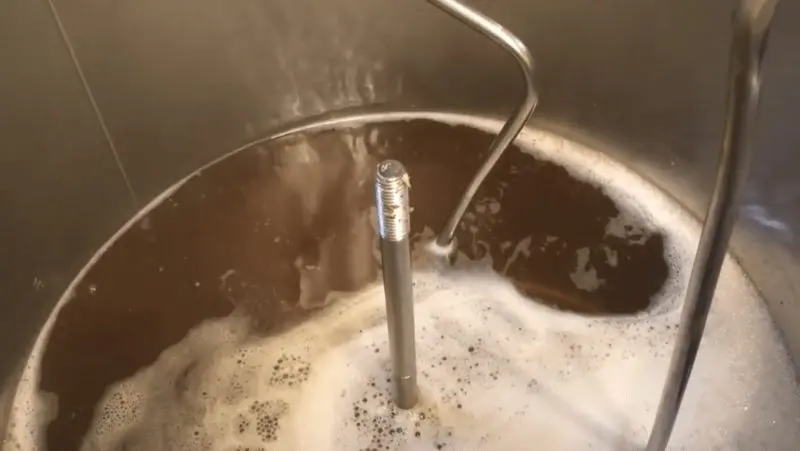
Whiskey mash fermentation
The first and most important difference between making whiskey mash and beer is that fermentation must take place at higher temperatures, at which more esters are formed in the mash (the main goal in making whiskey). Initial temperature at 33оC is optimal. Then you should maintain the temperature in the region of 25-29оC. After the saccharified wort has cooled, its density, that is, the sugar content, should be measured and how much alcohol can be obtained in the end (out of 1 g of maltose, about 0,46 ml of absolute alcohol). Objective: to obtain a wort with a predicted alcohol content of 6 to 10%.
If it is less, then the wort is not completely sugared, which is not good and this problem needs to be solved (for example, heat the wort and add amylase). If more – dilute with water to reduce sugar content. If you don’t have a hydrometer, just skip measurements. Why exactly 10%? Firstly, for brewer’s yeast, this is a critical level of alcohol content in their habitat. Secondly, it is not recommended to use yeast that is immune to alcohol for whiskey – they greatly impair the organoleptic.
The yeast strain has a great influence on the final taste of the drink, so the choice should be approached wisely. Of course, if you’re on a budget or for some reason unable to take the brewer’s yeast that is always recommended for whiskey production, feel free to use regular bakers (even Laphroaig, one of the largest and most famous distilleries in the world, publicly advertises that they use regular baker’s yeast). Lager yeast makes for a less complex whisky, ideal for ale yeast. I strongly advise against turbo yeast and champagne yeast.
Introduction of yeast
Before adding yeast, the wort must be aerated, saturated with oxygen. To do this, it is enough to pour it from one container to another from a great height. A large amount of oxygen slows down the formation of esters, so do not overdo it. Yeast must be prepared according to the instructions on the package before adding to the wort. There is one trick: add less yeast to the wort than is required for a certain volume. This contributes to a more intensive formation of esters. True, there is a risk of contamination of the wort.
Wort acidity
At the beginning, the acidity of the wort should be in the region of 5-6 pH, at the end – 3,5 pH. Under low pH conditions, yeast growth is slowed down and this, again, contributes to better ester formation. Distilleries have even developed a certain way of making wort, where the pH level is artificially lowered, and esters are more than enough. At home, this is quite simple to do: save some of the mash from the previous batch and add it to the new one, thus reducing the pH of the wort and slowing down the growth of yeast. It does not affect the production of alcohol in any way. Of course, such experiments should be carried out only when a pH tester is in service.
The recommended fermentation time for whiskey mash is 2 to 4 days, but you can always experiment. Prolonged fermentation increases the importance of choosing yeast cultures, as they begin to affect the taste of the distillate.
lacto fermentation
I want to say right away that the addition of bacterial starters is not mandatory for beginners, but it is highly recommended for pros who are in constant search. Esters, which make whiskey what it is, are formed as a result of chemical bonds between alcohol molecules and molecules of various acids. There are many sources of acids, from yeast to oak. But it is lactic acid bacteria that produce a huge amount of volatile acids, which, ultimately, make it possible to supplement the drink with the most unusual tastes.
For example, lactic acid brings creamy notes to the drink. There are acids that, after being converted into esters, give the drink more complex aromas and tastes: violets and jasmine, honey and strawberries. This is exactly the area of distillery where you can experiment for several lifetimes and always get whiskey with a completely different character. After all, traces of ethyl lactates have been found in nearly all major Scotch and Irish whiskeys. Now about the practical side of the issue.
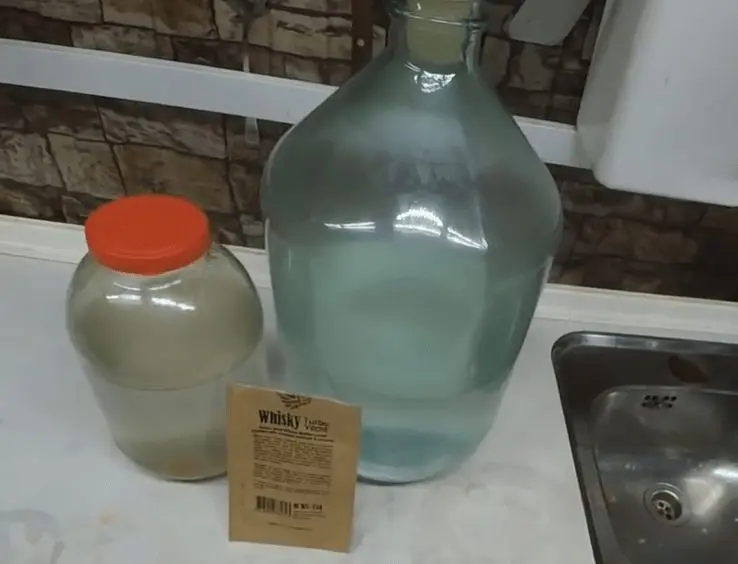
Prepared sourdough
Lactobacilli are most active at the beginning and end of fermentation. At the beginning of fermentation, they multiply very quickly. During the work of the yeast, they fall into “hibernation”, as the temperature and carbon dioxide content increase (lactobacilli are aerobes and need oxygen). At the late stage of fermentation, when the yeast begins to die off, lactobacilli become active again, absorbing the remains of sugar and substances left after the life of the yeast, and forming various acids.
Lactobacilli can be purchased almost anywhere. It can be a starter for yogurt or cheese, tablets from health food stores, frozen. They can be added to the wort along with yeast or a few hours before. They can also be added at the end of fermentation, 10-15 hours before you are about to drain and distill the mash (in this case, the fermenter should be left open). During lactic acid fermentation, the mash will develop a characteristic sour smell, reminiscent of the smell of sauerkraut. In turn, an unpleasant odor indicates that the wort is contaminated with unwanted bacteria and will have to be discarded. The line is thin, but without experiments, no matter how.
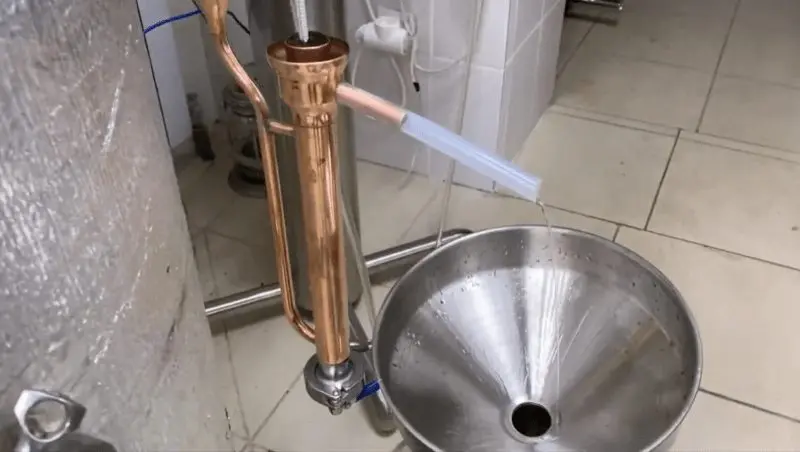
First distillation
So, the mash has fermented and it’s time to distill it. Hopefully, by the time you’ve moved on to this part of the article, you’ve already read about double distillation per se and you’re familiar with the basic principles. I see no point in chewing the same thing in each article. Now about whiskey. Firstly, it is not recommended to strongly lighten the mash – yeast residues also affect the organoleptic of the drink. During the first distillation, you need to get the SS as quickly as possible, but at the same time you need to ensure that the solid residue in the mash does not burn.
The first distillation should be carried out as long as there is 22,5-30% alcohol in the jet (at your discretion). At the end of the distillation, there is usually not a very pleasant-smelling liquid, but it also plays a role in shaping the final taste of the whiskey. The last fraction of the first distillation, down to the tails, is called “low wine” (in some sources, the entire product of the first distillation is called “low wine”, and not raw alcohol). In general, do not focus on the nose, focus on your alcohol meter.
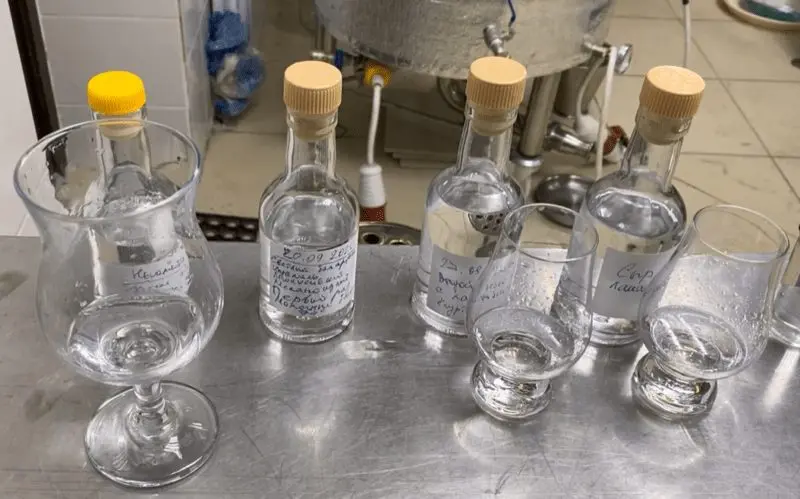
Second distillation
Everything, like everywhere else. We select 3 fractions: heads, heart and tails. Heads: 5% of absolute alcohol or organoleptically – this part is discarded. It is also possible to separately select a fraction, which is called “foreshots” in distillery. This is a liquid without the smell characteristic of whiskey and in the middle fraction it is useless. It can be poured or added to the next stage. Here, rely on your sense of smell (rub a few drops of distillate on your palms or on your wrists and smell).
We select the body slowly, focusing on the smell and alcoholometer. In most cases, the heart is sampled in the range of 52-72% alcohol per stream. More often, the selection of the body is stopped at 60% in the jet, after which the receiving tank changes and the selection of tailings begins. We squeeze the tail fraction to dryness, almost to 1% alcohol in the stream – it is in the next first stage. In fact, the tail fraction is also involved in the formation of the taste of whiskey, so you have to work out here too, trying this way and that.
barley moonshine
Tails give a very sweet taste and this taste is not bad at all. But if you overdo it, then the distillate will turn out to be too “nauseous”. If you do not get the tails, then the whiskey will turn out dry and neutral. Unfortunately, there are no clear recommendations regarding the timely selection of tails, especially since each whiskey preparation will be unique, and it will be very difficult to predict anything to the smallest detail. Rely only on yourself. Be sure to keep detailed records of each wort boil and distillation. Gain experience, and someday your whiskey may become a worthy rival of “premium” brands.
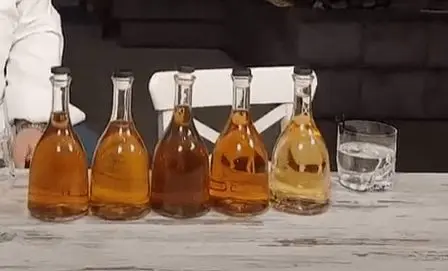
Aging, whiskey aging
Whiskey aging is also a whole science and you can experiment until the end of time. Each type of oak has a unique set of acids formed from lignin and hemicelluloses. For example:
- American oak – lots of vanilla, tree resins, light brown spices and tannins;
- French oak – strong cinnamon, lots of brown spices, light vanilla, tannins in moderation;
- Limousin oak – very strong vanilla, various brown spices;
- Hungarian oak – vanilla and earthy chocolate notes, a little pepper;
- Mongolian oak – caramel, vanilla, flowers.
In general, I wrote a separate article about the selection and preparation of kegs, which I recommend reading to all those who want to get a really good impression from their drink. Having a 15-50-liter barrel on hand, you can get a very high-quality product in six months or a year. I also recommend reading the work of Don Anointed with recipes for ersatz cognac, which describes the process of preparing oak chips and the technology of infusing distillates on it. For whiskey, 3 centimeter oak cubes per bottle are enough. Chips can be pre-soaked in wine – sherry, as always, showed itself very well. Vitaly also wrote an article on how to make ersatz whiskey from alcohol or moonshine (this is for those who are still afraid to practice distillation).
Well, on this, perhaps, I will round off. In this article, I have collected almost all my knowledge, and not only my own, regarding the preparation of whiskey at home. I believe that the material will be useful to you, and the results will warm not only the body, but also the soul!
“I never had to switch from whiskey to martini”
— Humphrey Bogart’s last words