Contents
Proper preparation of malt is a complex, lengthy and time-consuming process. If there is no cheap grain available, in most cases it is easier to buy a finished product made by professionals in the malt house than to do it yourself. For enthusiasts who decide to try their hand, I suggest studying the repeatedly proven recipe and technology for making malt at home.
Theory
Malt is a germinated grain of cereals (barley, wheat, rye, etc.), in which, under the influence of enzymes, starch is converted into the sugar needed to produce alcohol. In dry grain, vital activity is minimal, but the ingress of moisture activates enzymes that start the process of growth and breakdown of starch.
At the right time, growth is stopped by drying so that the germinated grain does not have time to use up the entire supply of nutrients. Without malt, it is impossible to make spirits such as beer, whiskey (bourbon) and grain moonshine.
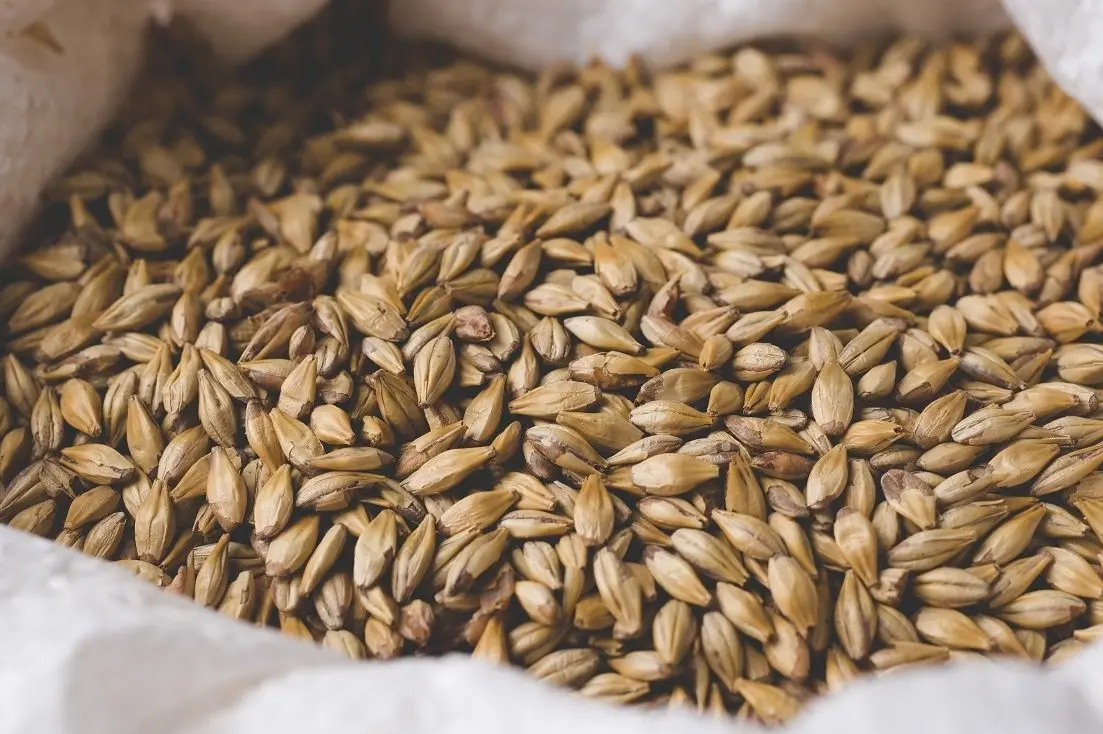
Only whole grains with a high germination capacity (90% or more) are suitable for making malt. You can not take recently harvested barley or rye, as they have a much lower percentage. At least 2 months must pass from the moment of collection. If possible, choose grains of the same size, this will simplify the work in the future.
An important role is played by the quality of water, which needs a lot. Suitable spring (from a well), filtered or settled water. With a high concentration of chlorine or heavy metals, the grains germinate very poorly.
To check the quality of the selected cereals, I first recommend doing a germination test. To do this, it is enough to soak 100-200 grains in water and after 2-3 days see how many sprouts have sprouted. If ninety or more sprouted out of a hundred, then the germination rate is good and you can make homemade malt. Otherwise, it is better to use raw materials for other needs.
You will need:
- grain (barley, wheat or rye) – 5-10 kg;
- water – the amount depends on the size of the container and raw materials;
- iodine or potassium permanganate – for the disinfection of grain.
Malt recipe (rye and barley)
1. Cleaning and disinfection
At this stage, we remove all debris that interferes with germination and kill pathogenic microorganisms that can spoil the raw material.
In a large saucepan or bucket, pour barley (rye) with warm water + 35-40 ° C. The layer of water should overlap the grains by 5-6 cm. After 5 minutes, mix the contents of the container, then remove the floating debris from the surface. Drain dirty water.
Pour cereals with cold water + 10-16 ° C, mix and leave for 60-80 minutes. Then remove debris from the surface and drain the water. Pour a fresh portion of water into which add a disinfectant solution at the rate of 30 drops of iodine or 2-3 grams of potassium permanganate (on the tip of a knife) per 10 liters of water. After 3 hours, drain the water.
It is not necessary to do disinfection, but it is very desirable, otherwise mold may appear.
2. Soak
We saturate the future malt with moisture and oxygen, preparing it for germination.
For a day and a half, alternately every 6 hours, we leave the grain with and without water. That is, first we pour water at a temperature of +10-16 ° C 2-3 cm above the grain level, wait 6 hours, remove the floating debris, drain the water, mix, wait 6 hours and fill it with water again. Soaking should be done in a dark and cool place (basement).
3. Sprouting
We start biological processes that break down starch into sugar.
Pour the grain in an even layer of 2-5 cm on a tray or baking sheet, cover with a cotton cloth on top, which will absorb excess moisture, and, if necessary, give it back to the cereals.
The optimum room temperature is 12-15 ° C, otherwise the grains will germinate poorly. For better air access, the room must be well ventilated. Once a day, cereals should be mixed and sprinkled with water.
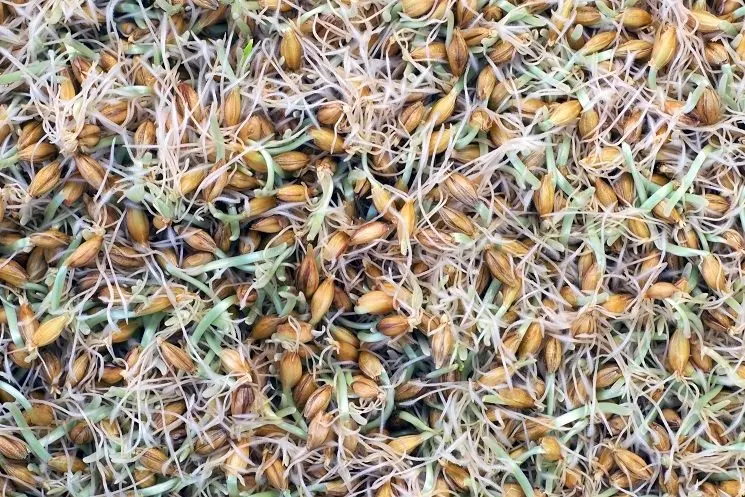

Duration of germination of barley – 6-7 days, rye – 4-5 days (in the last day, rye is not watered). Readiness is determined by the size of the sprout (root). For rye malt, the length of the sprout should not exceed the length of the grain; for barley malt, the root is considered to be the norm, which is one and a half to two times longer than the grain. Also, the grain should be sweet in taste and smell like cucumber.
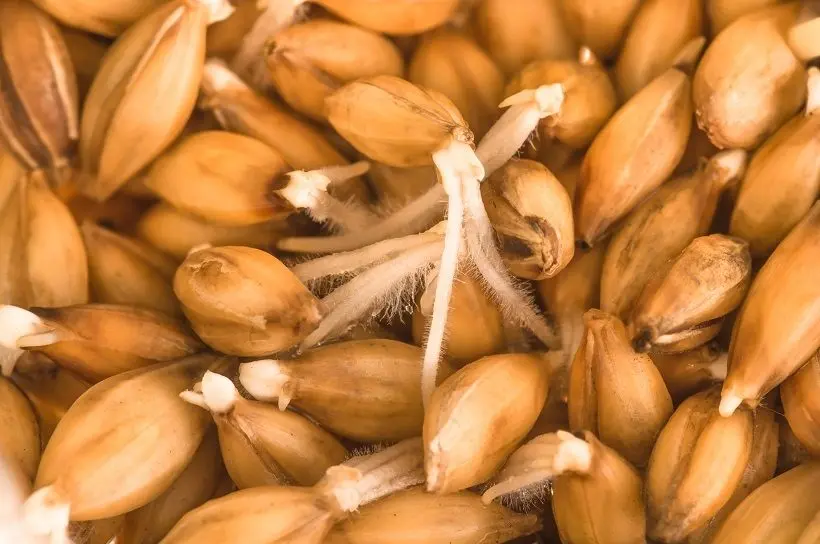

The result is the so-called “green malt”, which can be used in moonshine (for saccharification of raw materials), and in some cases for making whiskey. The disadvantage is that this type of malt is stored no longer than 3 days.
4. Drying
We prepare malt for long-term storage and brewing.
Remove the remaining water from the tray with germinated grain and transfer to a room with a high temperature. In summer, it can be an attic or a roof on a hot sunny day. In winter, the malt is dried on a radiator. Enough 3-4 days.
Another method is to put the sprouted grain in the oven at 25 °C for 30-40 hours and stir every 2-3 hours.
Further technology depends on the purpose for which the malt will be used.
To make homemade pale beer or whiskey, the malt must be further dried in an oven at 80°C, gradually raising the temperature over the first 30-40 minutes. To prepare dark beers, the malt is dried in the same way for 4 hours at 105 °C. In the latter case, the grains are actually roasted.
5. Separation of sprouts and exposure
We get rid of the unnecessary.
Knead the malt with your hands, removing the roots or pour into a bag and roll until the dry sprouts separate themselves. Then sift in the wind or under a fan.
Put the finished malt in bags and keep it in a warm, dry place for at least 30-40 days before preparing alcoholic beverages. The output of home malt from barley is 76-79% of the initially soaked raw materials, from rye – 75-78%.