


Contents
When thinking about making alcohol at home, novice distillers usually choose an inexpensive factory-made distiller. More experienced moonshiners prefer to make the device on their own, adjusting it to their own needs and living conditions. A home-made device does not require special costs, since available materials are used, and obsolete containers are often taken as a basis. The main thing is to have minimal skills in working with metal and construction tools.
In this article, Vzboltay will share the secrets of making a simple moonshine still.
The design of the moonshine still
Before starting work, you should decide on the package. The simplest distiller consists of two parts: a distillation cube and a coil (refrigerator), connected by a steam pipeline. Such a device is quite suitable for the manufacture of moonshine. However, the quality of the drink will be mediocre: to improve it, double or even triple distillation will be required.
To improve the device (and hence the characteristics of moonshine), it is recommended to include one or more additional elements in it:
Sukhoparnik (bubbler). It will remove some of the fusel oils, protect against splashing, and allow you to flavor the drink.
Dephlegmator. It will provide better purification, improve the taste and aroma properties of the distillate, and make it possible to limit oneself to a single distillation, which will save time.
Parrot with an alcoholometer. It will allow you to accurately measure the strength of the drink at the outlet and clearly separate the fractions.
Tsargu. It will turn the device into a beer column, producing stronger and better quality alcohol.
TEN. A special heater will allow you to abandon the use of open fire and make the device more mobile.
Any device will require connecting elements: hoses, fittings, adapters, etc. It will also be useful to equip the device with a thermometer to control the process. To connect parts of the device, it is better to use silicone / metal tubes, copper or stainless fittings / nuts / nipples, silicone gaskets, but not rubber.
Making a distillation cube
Pressure cookers / multicookers, beer kegs, pots, cans, buckets, etc. are often used as a tank. When choosing a container, you should pay attention to the following parameters:
Quality material. Food grade stainless steel or copper are ideal. Glass may be used, but is impractical. Avoid aluminum.
Volume. Optimum tank size: 15-30 liters. Less / more is possible, but inconvenient to use.
The presence of a tight-fitting cover and a pressure relief valve (in its absence, it is recommended to install it yourself).
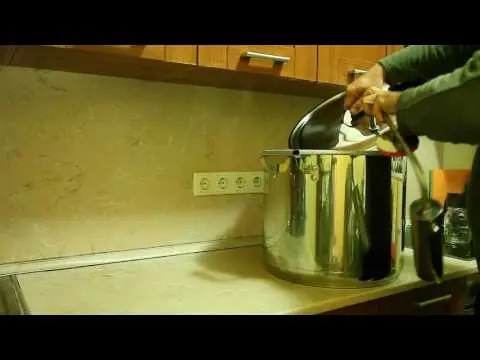
Instructions for making a simple and cheap cube from a pan
Cut a piece of silicone hose (d = 8 mm) lengthwise, pull it over the edge of the pan along the entire diameter to seal.
Drill a hole in the lid for the steam pipe, clean the edges.
Insert the adapter, secure it with a nut from the inside, providing a silicone gasket for tightness.
From the outside, connect the steam pipeline – a silicone hose or a metal tube to connect the cube with the rest of the apparatus.
Before distillation, fix the lid with paper clips along the entire diameter (6-8 times).
If desired, equip the structure with a heating element by drilling a corresponding hole in the cube just above the bottom, and inserting a coupling (clamp) into it.
Similarly, you can make a distillation tank from a bucket, pressure cooker or beer keg. When self-welding a container made of stainless steel or copper, it is recommended to carefully process the seams. To supply the device with a thermometer and a safety valve, you need to cut holes in the lid and fix the devices with fittings.
We make a steamer / bubbler
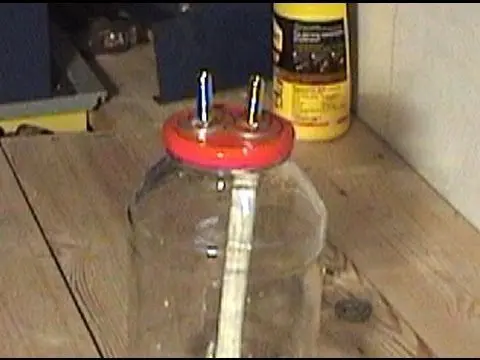
As a basis for a simple sump, a glass jar with a lid is usually used. For efficient operation, its volume must be less than the corresponding tank parameter by 10 times. An alternative option is made of stainless steel: it is stronger and more durable. It is very important to connect the device correctly to avoid an explosion.
Instructions for making a sump-bubbler from a can:
Make 2 holes in the metal cover with an awl or drill, round the edges.
Insert male fittings into the holes so that the ends for the hoses are on the outside.
Treat the joints on both sides with cold welding / hot melt adhesive for sealing or seal with a silicone gasket.
Connect a piece of silicone hose to one of the fittings on the inside of the lid so that in a closed jar its lower end is 2-3 cm above the bottom. From the outside, fix the end of the steam line coming from the cube.
Connect the second fitting from the outside to the refrigerator using a tube, and screw the lock nut to it inside.
In order to turn the bubbler into a dry steamer, the hoses should be placed as follows: the incoming tube (from the cube) should be lowered into the jar 2–3 cm lower than the outgoing tube (to the refrigerator). Otherwise, the pressure in the device will exceed the allowable one and cause damage to it.
The disadvantage of glass sukhoparniks is the absence of a drain valve, which complicates the removal of fusel oils from them. It is recommended to clean the container from impurities before collecting the main fraction (“body”). The use of several steamers in one apparatus is considered inappropriate, since it does not improve the quality of cleaning, but leads to losses of moonshine. The advantage of this design is an increase in the strength of the product. A more rational alternative is to connect a reflux condenser, which does a better job of pre-cleaning.
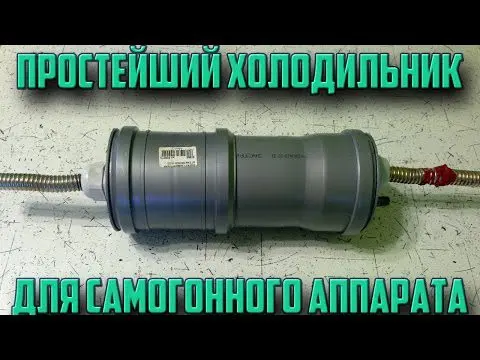
Making a refrigerator
The simplest version of the coil is a copper or steel tube twisted into a spiral. It is immersed in a bucket of cold water or snow, as a result of which the alcohol vapors inside condense and turn into moonshine. It is enough to connect such a design to a hose coming from the sump, and equip the bucket with a drain valve.
You can make a better and more modern refrigerator with a reservoir. For the coil, you will need a stainless steel or copper tube 1,5-2 m long, 0,8-1,2 cm in diameter, and about 1 mm thick in walls. The tank will require a wide metal (plastic) pipe with a diameter of 7–8 cm and 2 plugs for it.
Manufacturing instruction:
Fill a long tube with sand / soda to prevent deflection when twisting. Alternatively, you can fill it with water and freeze it.
Hammer the ends with wooden pegs / pinch / brew so that the filler does not wake up.
Wind the pipe on a smooth cylindrical object (d = 3,5 cm), observing a step of 1,2 cm between the turns.
Release the ends of the coil from pegs / soldering / clamps, remove the sand, rinse thoroughly with water under strong pressure.
Cut in a wide tube (refrigerator body) 2 holes for water inlet and outlet in accordance with the diagram, install branch pipes in them.
Place the finished coil in the housing: the ends of the spiral should come out. From above and below, provide the body with plugs, cutting holes for the output of the coil, sealing the joints.
Another version of a homemade cooler:
Connect the refrigerator to a sukhoparnik (reflux condenser) using a silicone hose or a metal tube. In this case, the hole for draining water should be closer to the sump, and the branch pipe for its supply should be further.
A simple moonshine is ready. Before distilling the mash, it is recommended to test it on the distillation of water.
Relevance: 16.02.2019
Tags: Vodka, mash, moonshine, Moonshine stills and accessories