When working with Excel, you can freely insert new rows and columns into the worksheet, and even delete them if necessary, for example, when the data is out of date. In this tutorial, we will take a detailed look at how to add rows and columns to a worksheet, as well as how to remove them.
As you work with an Excel workbook, you may need to insert new columns and rows into your worksheet or delete unnecessary ones. Excel allows you to insert new rows and columns on the sheet, while their total number does not change and remains fixed. For example, if you insert a new column, this will cause the other columns to shift to the right, and the last one will simply be deleted.
Insert rows in Excel
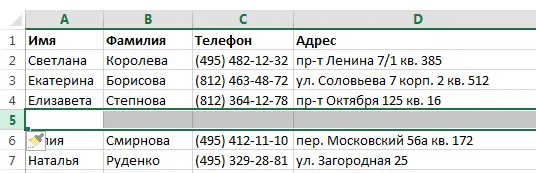
- Select the heading of the line above which you want to insert a new one. For example, if you want to insert a new line between lines 7 and 8, select line 8.
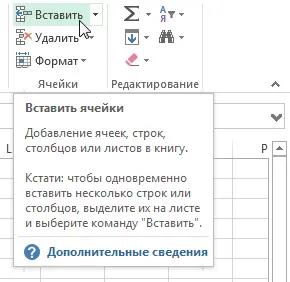
- Click the Paste command, which is in the Cells command group on the Home tab.


- A new row will appear above the selected one.
When inserting new rows or columns, you may see the Add Options smart tag. It allows you to choose how Excel should format the inserted cells. By default, cells are pasted with the same formatting as in the row above (column to the right). To access more options, hover over a smart tag and click the arrow.

Insert columns in Excel
- Select the column header to the left of which you want to insert a new one. For example, if you want to insert a new column between columns D and E, select column E.

- Click the Paste command, which is in the Cells command group on the Home tab.
- The new column will appear to the left of the selected one.

When inserting rows and columns in Excel using the method discussed earlier, make sure you select them in their entirety by clicking on the heading. If this is not the case, then the Paste command will only add new cells.
Deleting Rows in Excel
In Excel, it’s easy enough to delete any row that you no longer need over time.
- Highlight the lines you want to delete. In our example, these are lines 6, 7 and 8.
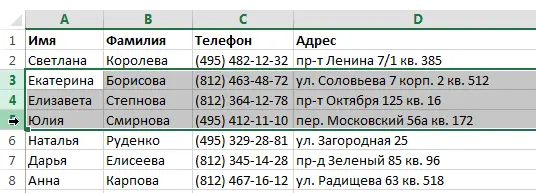
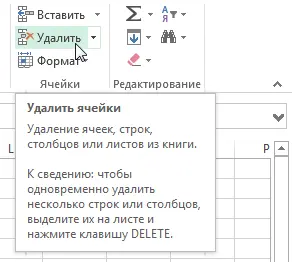
- Click the Delete command, which is in the Cells command group on the Home tab.
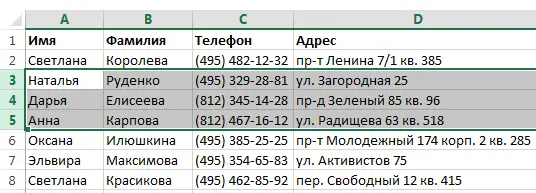
- The selected rows will be deleted, and those located below will move up. In our example, after deleting lines 6, 7 and 8, lines 9, 10 and 11 will move to their place.
Deleting columns in Excel
- Select the column you want to delete. In our example, this is column E.
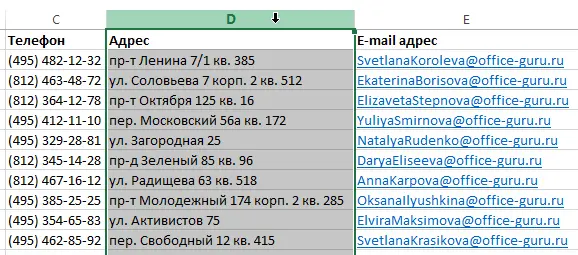
- Click the Delete command, which is in the Cells command group on the Home tab.

- The selected column will be deleted, and those on the right will be moved to its place. In our example, column F is now column E.
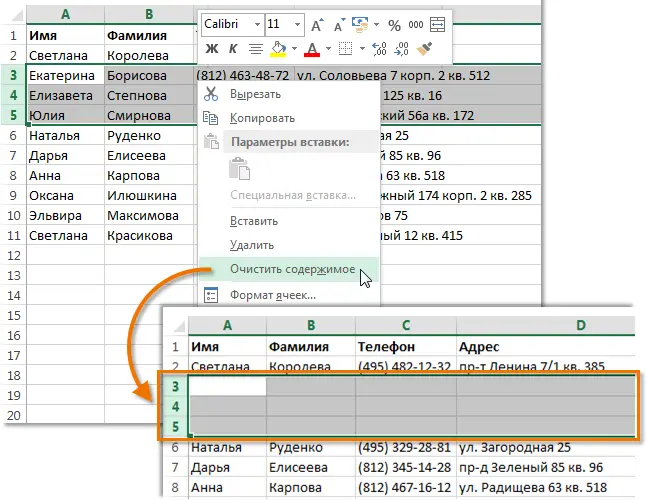
It is important to understand the difference between deleting rows (columns) and deleting their contents. If you just want to clear the content, then right-click on the title and select Clear Content from the context menu. All contents of the selected rows and columns will be cleared, but they will not be deleted themselves.