


Contents
Without additional lighting, healthy seedlings cannot be grown. February has short daylight hours. If it is not extended, the planting material will turn out to be weak, elongated and with thin stems. However, not all lamps are able to benefit plants. The best option is a do-it-yourself LED backlight for seedlings, which emits light spectra useful for development.
The need for additional lighting
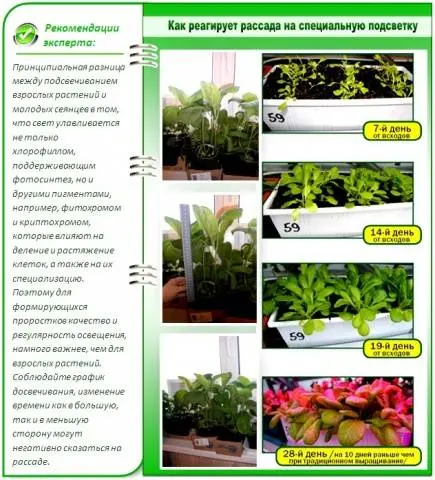
It is possible to grow seedlings without additional lighting, but the question is what will come of it. In order to get a good harvest in the fall, the plants must initially develop well. The lack of light inhibits the process of photosynthesis, the development of cells and the root system.
The benefits of LED lighting are clear:
- backlight prolongs the short daylight hours;
- uniform scattering of light does not allow seedlings to stretch and bend;
- LEDs emit the light spectrum needed for plant development.
All crops grown by seedlings in early spring need additional illumination.
Influence of light spectra on plants
Before you figure out how to make LED lighting for seedlings, you need to understand its benefits. Many vegetable growers think why invent something if you can just put a table lamp over the seedlings. The device will extend daylight hours, but whether such illumination will be useful is an important question.
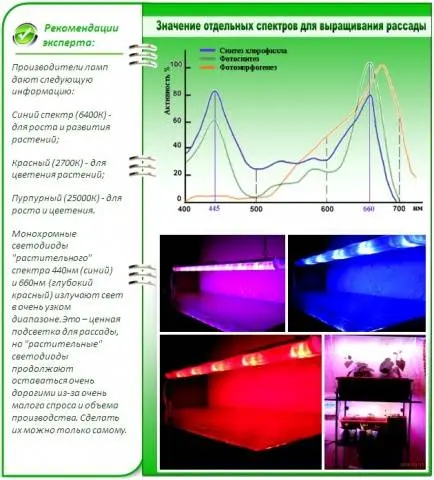
Most bulbs do not emit blue or red light. It is these two colors that positively affect the development of seedlings. The rays of the blue spectrum stimulate cell growth, and at the same time slow down the process. The stem of the plants is not thin and elongated, but strong. The red spectrum is needed for sprouting sprouts. The rays accelerate shoots, stimulate the development of the root system and the laying of inflorescences.
Green, yellow and other spectra of light are not absorbed by seedlings, but are even reflected from foliage. However, these colors are also useful for plants. Sunlight has a full spectrum of colors and green vegetation develops best under it.
Any do-it-yourself LED lighting for seedlings only partially replaces sunlight. Artificial lighting should be combined with natural light. It is better to grow seedlings on the windowsill, installing mirrored foil shields on the sides and on the opposite side of the window glass. Reflectors will evenly direct daylight to all plants.
When making LED lamps for seedlings with your own hands, it is important not to forget to equip them with frosted diffusers. The long light rays emitted by LEDs are difficult for plants to perceive. Diffusers bring the parameters of artificial lighting closer to natural light.
The advantage of using LEDs
On the forums, do-it-yourself LED lighting for seedlings is intensively discussed by gardeners because of the obvious advantages:
- You can collect LED lamps for seedlings with your own hands from individual light bulbs. The combination of LEDs of different luminescence allows you to collect spectra useful for the plant in one light source.
- The high cost of high-quality LEDs pays off with energy savings.
- For the normal development of seedlings, illumination of 6 thousand lux is required, which is able to provide a set of high-quality LEDs.
- Assembling a lamp from LEDs is no more difficult than soldering the ends of the wires.
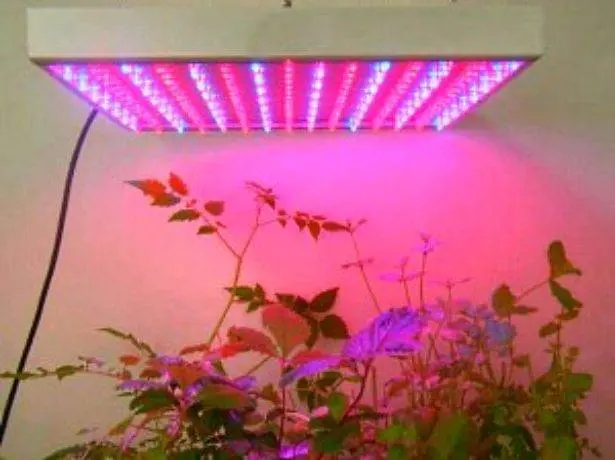
A homemade or factory-made LED downlight gives off a lot of light, but doesn’t radiate heat. For seedlings, this factor is optimal. Even at the maximum approach to plants, LEDs will not leave burns on the foliage.
Shelving with artificial lighting
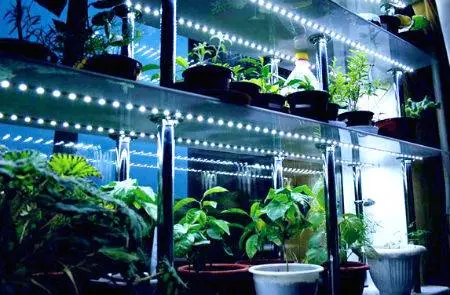
Often do-it-yourself illumination of seedlings with LEDs on racks is installed. This is the most convenient design for growing planting material. The rack allows you to place a large number of boxes in a small area.
For the manufacture of the structure, a wooden beam is used. You can use a metal corner, and even thin PVC sewer pipes. Shelves are cut out of plywood or other durable material. The number of tiers depends on the location of the rack. On the windowsill, it will be possible to build only three shelves, since it is necessary to maintain a minimum distance of 50 cm between them. The stationary rack of the floor installation is made of 4–5 tiers.
LED lighting is placed above each shelf. Lamps are best done on suspensions. Any chain or rope will do. The wire from the lamps is fixed along the elements of the rack frame.
Assembly of homemade lighting
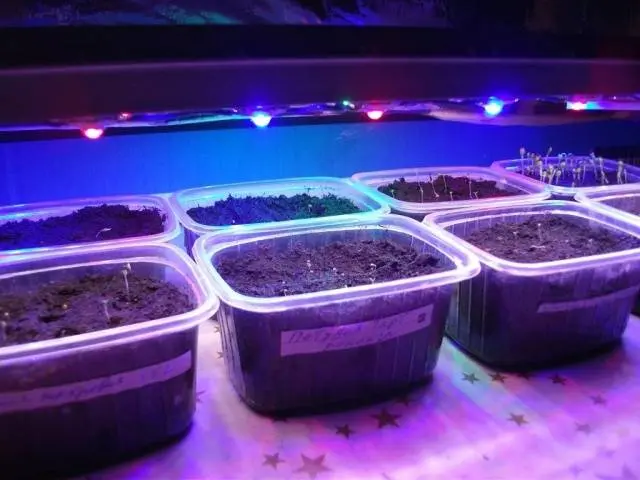
It is convenient to assemble a lamp from LEDs. Small bulbs can be placed on the base as you wish. Seedlings are usually grown on long shelves. In order for the lamp to cover the entire area, the LEDs have two stripes, alternating red and blue bulbs.
The distance between the LEDs depends on the emitted light cone. The lower the indicator, the closer the light bulbs are placed to each other. Cone projections of light should overlap. The lamp must be made adjustable, since seedlings at different times of growth are sensitive to certain spectra and light intensities.
From germination to picking, plants have a greater need for the blue spectrum. The lamp is made so that you can separately turn on different groups of lamps. For this period of growth, blue and red LEDs should glow in a ratio of 2: 1. The need for a blue glow is related to the development of the stem. It does not stretch up, but thickens. At the same time, the development of the root system occurs.
Immediately after picking, the brightness of the lighting is reduced for 2-3 days. After stress, seedlings need peace and recuperation. Further illumination for a month is carried out at normal brightness, only the ratio of red and blue LEDs is acceptable 1:1.
For a homemade lamp you will need LEDs:
- red glow with a wavelength of 660nm – 30 pieces;
- blue glow with a wavelength of 452 nm – 20 pieces;
- white glow with a color temperature of 4300K - 10 pieces;
- pure white glow with a color temperature of 5300K – 10 pieces.
The use of white LEDs with different color temperatures is due to the matching of the spectrum, which is close to midday and morning sunlight. To make the LEDs work, you need to buy drivers.
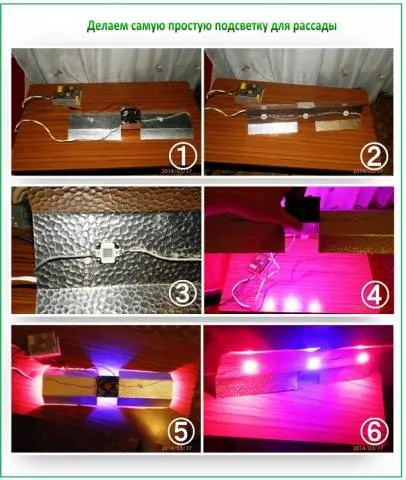
For a homemade backlight, a case from an old fluorescent lamp is ideal. First, remove the matte diffuser. It will come in handy for a new lamp. Remove all stuffing from the body. In its place, an aluminum strip is installed, where the LEDs are fixed with hot glue. At an equal distance from the sides and the center of the case, two fans are installed, taken from any power supply or computer coolers.
LEDs are soldered in a chain with a wire parallel to each other, not forgetting to observe the polarity. All groups of paws are connected to the drivers. From the fans, the wire is pulled to the power supply. If the circuit was properly soldered, after applying voltage, the bulbs will light up. It remains to install a matte diffuser, attach chain suspensions to the body and the lamp can be hung over the seedlings.
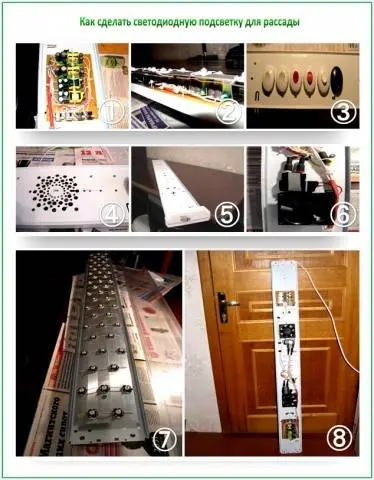
In order not to solder with each light bulb, it is easier to buy one blue and two red LED matrices rated at 10 watts. For power, a unit with an output voltage of 24 volts and a current of 2 A is used. Computer coolers will serve as fans. To connect them, you need a separate unit with an output voltage of 12 volts. An aluminum plate is suitable for removing heat from the matrices. The element needs to be anodized to avoid short circuits in the circuit.
The assembly of the lamp begins with gluing the matrices with hot glue to the aluminum strip. The ends of the wires are tinned in solder with flux, after which they are soldered to the terminals of the matrices so that the plus and minus are connected. The wires going to the power supply are soldered to the terminals of the extreme mats. Fasteners for coolers are fitted on an aluminum plate and wires are pulled from them to another power supply. When the whole circuit is assembled, you can apply voltage and check the performance.
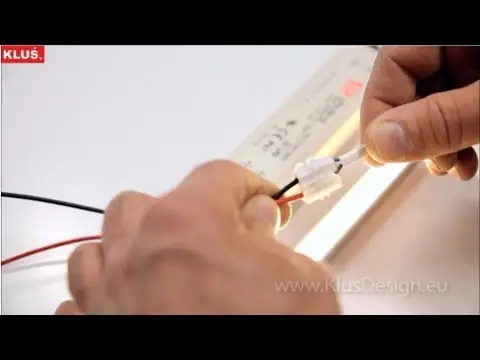
In the video, a do-it-yourself LED lamp for seedlings in the form of a profile lamp:
Determining the quality of homemade lighting
You can visually determine whether LED lighting is beneficial for seedlings:
- thin elongated stems with thin leaves indicate a lack of light;
- even thick stems with wide juicy foliage testify to the correctly selected brightness of the lamp.
LEDs emit little heat, but the aluminum plate of the lamp does get hot. To determine if the seedlings are too hot, place the palms of the hands over the plants. If you feel warm, then the lamp should be raised higher.
The seedlings themselves will let you know about the lack of light and the time the backlight is turned on in the evening. The leaves will begin to acquire a vertical position, trying to close together. It is easier to check the lack of light by turning on the lamp, even if it is day outside. If it becomes lighter over the seedlings, the lamp is left to work. The brightness of the lighting remained the same – additional lighting is not needed.