Contents
A basic skill that any person working with Excel should have is changing the structure of tables. This skill is general and implies many operations, among which are merging and splitting cells, adding additional rows, aligning cells according to a single width parameter, deleting columns or adding new ones.
If we talk about working with individual cells, they are initially indivisible, except for those situations where one large cell was created in advance by connecting separate ones. However, with the help of some features of Excel, the cells can be divided into individual elements. One such procedure is diagonal division.
How to split cells diagonally by formatting
Regarding the function of splitting cells in an Excel table into parts, this program has built-in tools that greatly simplify the implementation of such a task. Procedure:
- Select with the left mouse button the cell that you want to split into parts.
- Press RMB to open the context menu.
- Select the “Format Cells” function, after which a separate window with settings should appear on the screen.
- Go to the “Border” tab.
- Find a free area “Inscription”. Below it will be small icons that indicate the type of division that will be applied to the selected cell.
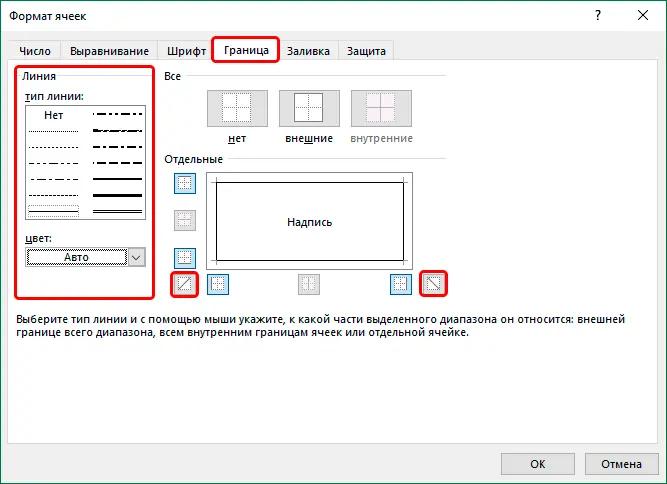
- It is necessary to select the appropriate parameter for cell division, click on the “OK” button.
Important! Even after dividing a cell into parts, one must not forget that the program regards it as a whole. This must be taken into account when adding coordinates to various formulas, hoping to get a certain result.
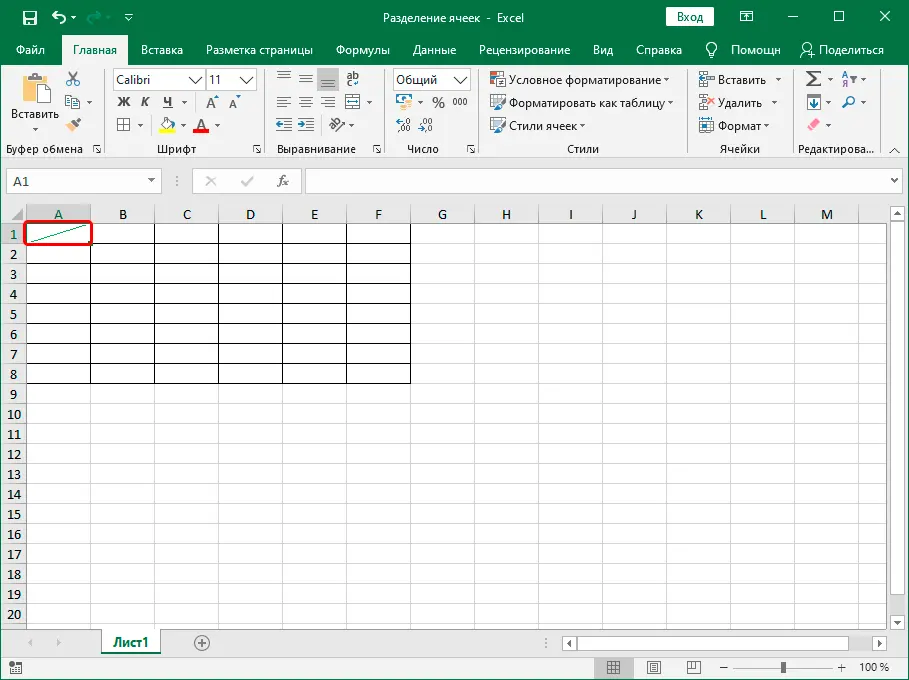
A way to divide cells diagonally by adding shapes
The second way to divide a cell in an Excel spreadsheet into parts is by adding geometric shapes. To do this, you need to follow a few simple steps:
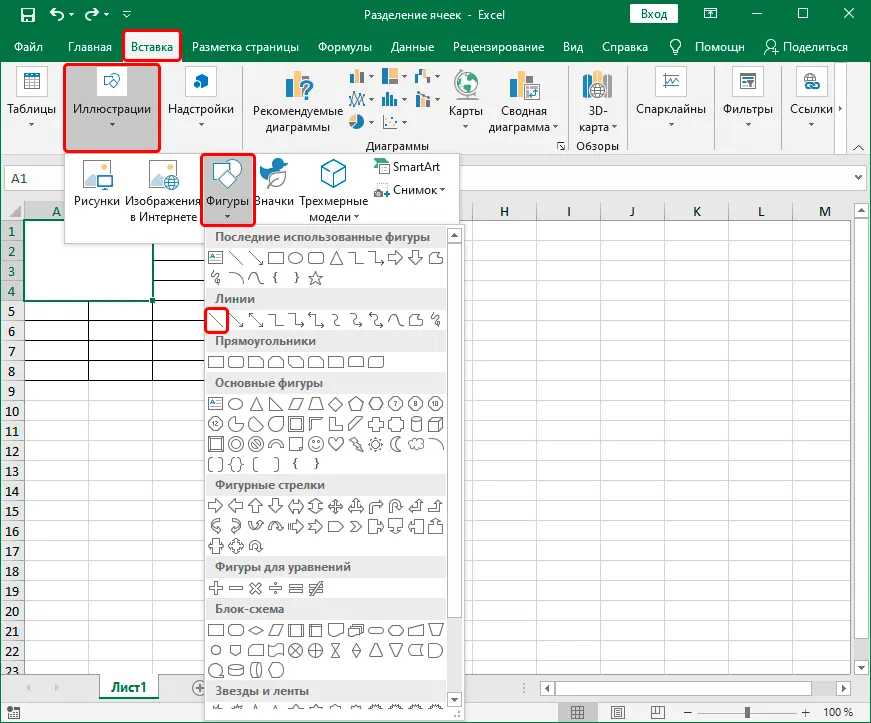
- Go to the “Insert” tab, which is located on the main toolbar.
- Go to the Illustration tool group. Select the icon labeled “Shapes”.
- A small window will appear on the screen with many geometric shapes, symbols that can be added to the table.
- Select the desired shape (to split the cell horizontally – the horizontal line icon).
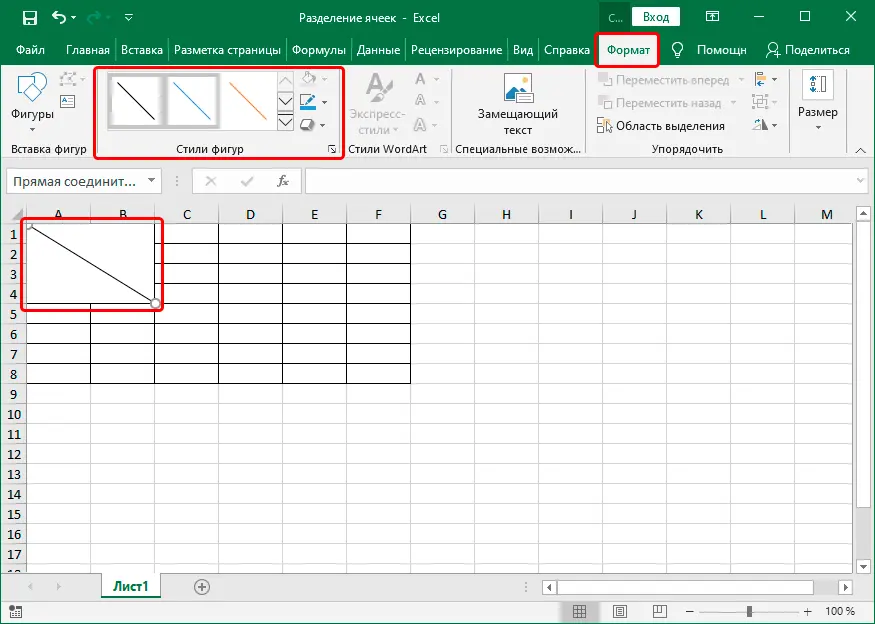
- Hold LMB after selecting a symbol for the desired cell. If it has a standard size, the line will be added automatically, if several cells were previously merged into one, you will have to draw a dividing line yourself while holding down the left mouse button.
In order to finalize the appearance of the future cell with a diagonal line, the program will automatically open the “Format” window.
Splitting Merged Cells
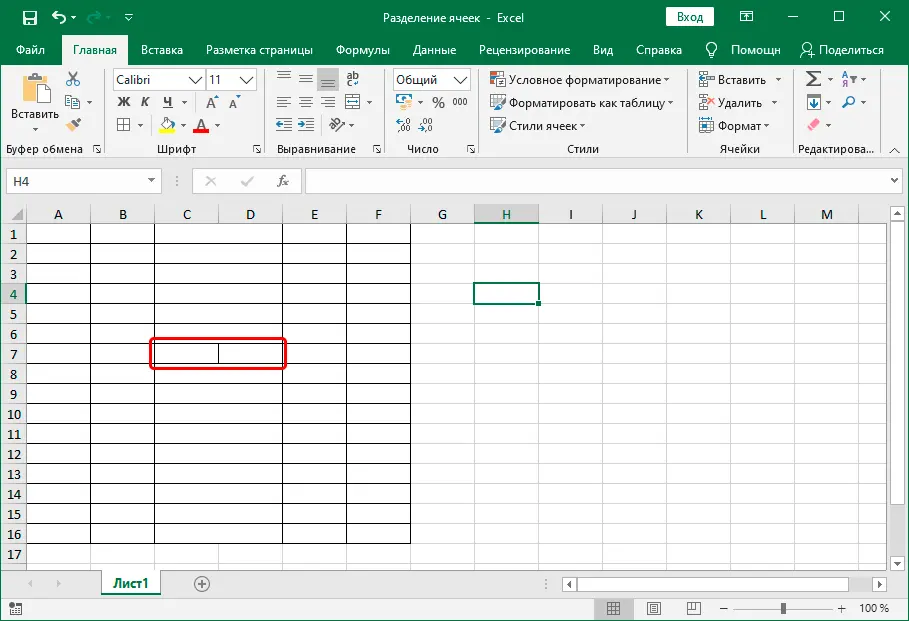
If the table contains merged cells, it may be necessary to separate them into separate cells. To do this, you must perform the following steps:
- Select merged cells or entire columns.
- Go to the “Home” tab on the main toolbar.
- In the alignment box, click on the “Merge and Center” icon.
After that, a vertical separation line will appear in the center of the merged columns.
How to merge cells
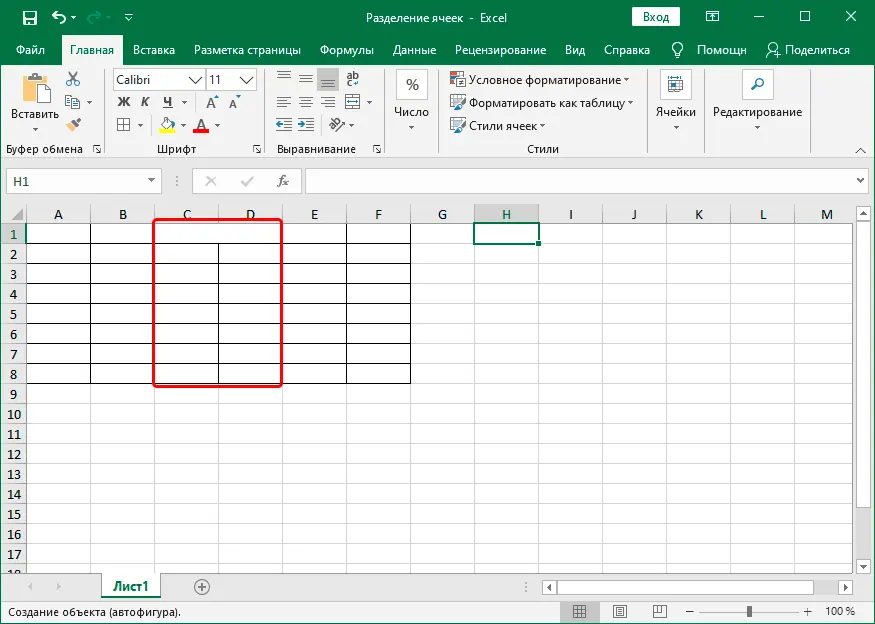
One of the interesting features of Excel spreadsheets, which concerns resizing cells, is the combination of individual cells into one. Procedure:
- Select all the cells that you want to merge with each other.
- Next, you need to go to the “Home” tab, which is located on the main toolbar.
- Find the “Alignment” block, click on the “Merge and Center” button.
After performing all the steps described above, the selected cells will merge into one, and the columns below will remain with central separators.
Create cells of the same size
To make the table look like when it was originally created, all cells were the same size, you need to perform several actions:
- Select all cells that you want to make the same size.
- Click on the Latin letter above the column with the right mouse button.
- Select the Column Width option.
- In the appeared free field of the window that opens, write the required parameter in width. Press the “OK” button to save the setting.
If you need to change the width of each cell in the entire sheet, you must click on the triangle symbol, which is located in the upper left corner of the table itself, and enter the required settings. In order not to search for a symbol, you can use the key combination “Ctrl + A”.
Separating cells into separate lines
Another possible situation when working with Excel spreadsheets is to record several products, street names, etc. into one cell, but they do not have to be ordered. To do this, you can make several separate lines in one cell. It is necessary to mark the required cell by pressing LMB. Go to the “Alignment” tab. Click on the “Text Wrap” button. After that, a separate line will appear in which you can add the required information.
Conclusion
As such, there is no separate tool for splitting cells in an Excel table into parts. To do something like this, you need to combine the capabilities of this program with each other. Two proven methods are through the cell formatting tab, with the addition of certain geometric shapes or symbols. Each of them allows you to add a horizontal separator, however, in the calculations, such a cell will be taken into account as a single cell. This is important to keep in mind when formulating formulas.


