Contents
Gladiolus are luxurious flowers. Gardeners love them for their species diversity and splendor. After all, they are able to please with their flowering for quite a long time, especially if you correctly select varieties of early and late flowering.
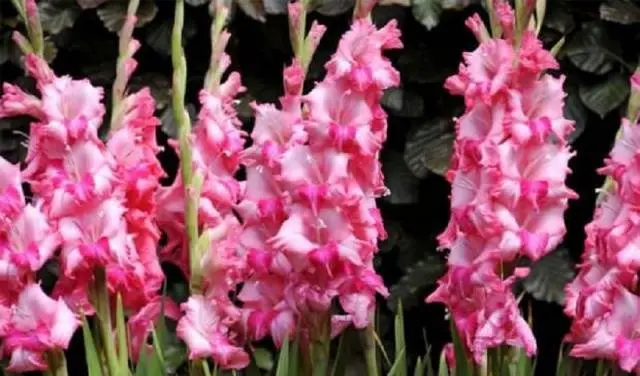
Gladioli are grown for cutting and for designing design projects on sites. At the end of the season, summer residents face an important question: how to prepare gladioli for winter? The preservation and reproduction of your favorite flowers depends on the fulfillment of this task. Annual digging, winter storage and spring planting are mandatory activities for the main list of gladiolus varieties. Modern breeders always delight summer residents with their new products. Frost-resistant varieties of gladioli are a real gift to flower growers. However, in the northern regions, they are also not able to withstand long-term low temperatures. Therefore, they are also dug up after flowering and planted in winter. In fairness, it should be noted that there are very few such hardy varieties: Gladiolus imbricatus and Byzantine (Gladiolus Byzantinus). And all the rest require special attention in the winter.
In order for gladioli to be able to winter well, certain measures have to be taken. Their further development and flowering depends on how well the storage of gladiolus bulbs is organized. After all, it is impossible to leave the bulbs in the soil, they will die when the temperature drops below zero. How to properly prepare and store gladiolus bulbs?
Preparing for winter storage
So that your gladioli will delight you with lush flowering and health next year, heed the advice of experienced flower growers.
Preparation of gladioli for winter begins during the flowering period. During this period, it is important to monitor the timely cutting of flower stalks. They must be cut before seed formation. This factor is the key to the good development of the main gladiolus bulb and children. By cutting flower stalks in time, you will get a double benefit:
- Save the decorativeness of the flower bed. Withered flowers will not spoil her appearance.
- Give the gladiolus bulbs the opportunity to accumulate strength for wintering.
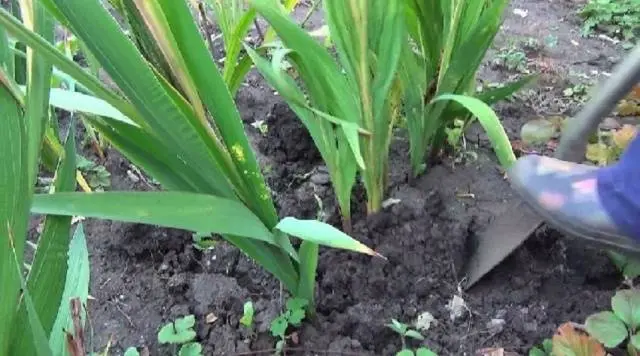
At the time of cutting flower stalks for a bouquet, leave the leaves. After the flowering process is over, the formation of the bulb continues for another 50 days. At this time, the leaves play an important role. Digging up gladioli begins without waiting for the leaves to turn yellow. After all, the first thing is to meet deadlines. Overexposing the bulbs in the ground means allowing the development of fungal infections.
Depending on the region, digging begins in September – early October. The term varies from the time of the end of flowering and the onset of cold weather. For the middle lane, the optimal time is September. In more southern regions, October is optimal. They start digging up gladioli from early varieties, then move on to medium and late ones. The latest bulbs of young gladioli grown from children are removed from the ground.
Digging Bulbs
The procedure is carried out on a sunny dry day. Before digging up the bulbs, decide on a place to store them. Suitable cardboard boxes, rag bags, small wooden boxes. For different varieties of gladioli, prepare separate containers so as not to be confused during storage. Be sure to label the boxes.
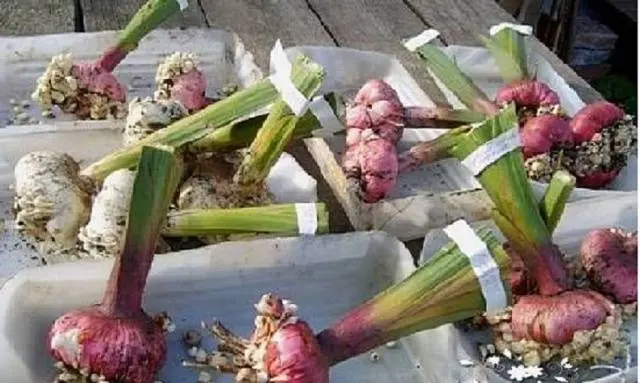
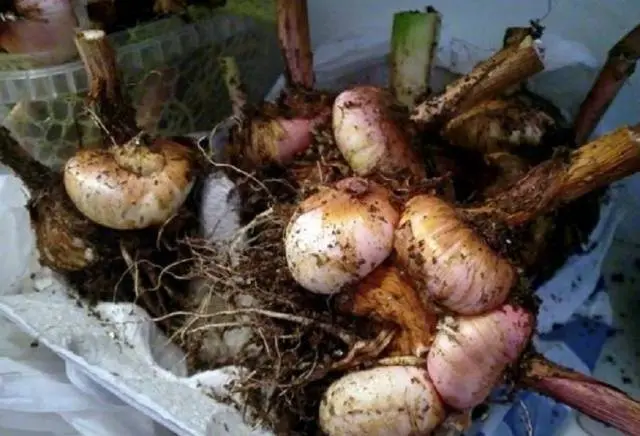
Dig up corms carefully. It is best to use a pitchfork or a shovel. Try not to damage the planting material. Bury a shovel or pitchfork into the ground away from the gladiolus, stepping back from the ground part by 10 cm.
After digging, pull the plant by the leaves, remove it from the ground and lightly shake it off.
Immediately cull spoiled or damaged gladiolus bulbs. Examine the clods of earth. If you find small children, be sure to save them. Cut off the remaining stems at a height of 2 cm to 5 cm.
Do not try to leave all the bulbs for the “wintering”. Choose the healthiest ones and in the quantity you need for next year’s planting. Criteria for selection of planting material:
- No damage or disease.
- Age. Store bulbs no older than 4 years.
- The form. Choose rounded ones with equal height and diameter values uXNUMXbuXNUMXb(ideally). Send flat ones with a large bottom to the rejected ones, it is better to leave those grown from children.
- Children select the largest with intact covering scales.
Do each action with high quality and do not rush so that damaged or diseased gladiolus bulbs do not get into storage.
Primary processing of bulbs before sending to storage
After selection, begin primary processing.
Primary processing of tubers includes washing and drying of planting material:
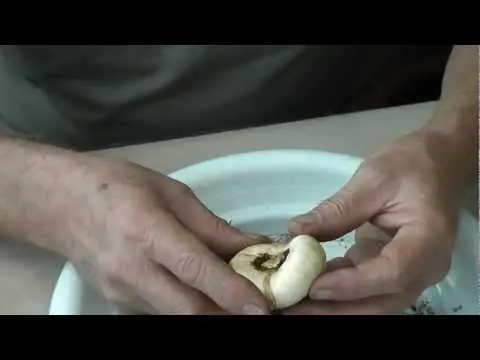
- Rinsing with the addition of potassium permanganate to the water allows you to clean the bulbs from contamination and protect against diseases. Do not remove the scales and keep them in the solution for at least half an hour (optimally an hour) or treat with a disinfectant. At this point, carefully examine the quality of the children. Inferior ones float in solution, while healthy ones sink to the bottom.
- Drying must be done with high quality. If the bulbs are not dried well, they will rot and you will lose valuable material. At room temperature, this operation takes about two months. It is recommended to keep the bulbs at t° from +28°C for the first week, then lower it to 18°C for a month.
The next preparatory step is the cleaning of adult bulbs from plant residues.
Winter storage technology
After processing and cleaning, planting material is sent for storage until the next season. Several styling options:
- In cardboard boxes. Spread the bulbs in one layer so that they do not touch. Poke a few holes in the box for easy ventilation. Pre-punched drawers are a great alternative to boxes. Experienced flower growers are advised to wrap the bulbs in newsprint.
- In vegetable nets. Ordinary nets for vegetables and fruits from the store chain will come in handy. Summer residents stock up on nets in advance during the summer season, and then place gladiolus bulbs in them.
- In paper bags. This option is chosen for the storage of children. Due to their small size, they can fall out of boxes or nets. The bags are periodically ventilated so that the children get air access.
There are some nuances when choosing storage containers. They must be able to ventilate. Plastic bags or plastic containers without holes are not suitable for this purpose. Gladiolus bulbs in them will quickly begin to rot.
Wood ash can be a great substitute for garlic, you just sprinkle it on the bulbs.
The temperature regime during winter storage is maintained within the range from +3°C to +8°C. Air humidity – 80%. In order to ensure the desired performance, the boxes are placed in the basement or refrigerator (on the bottom shelf in the door). Make a monthly bulkhead. The bulbs are carefully inspected and dried as necessary.
As soon as the dormant period ends at the bulbs, it is necessary to change the storage conditions. It takes place in the middle of winter. If you miss the moment, then the gladioli will begin to sprout.
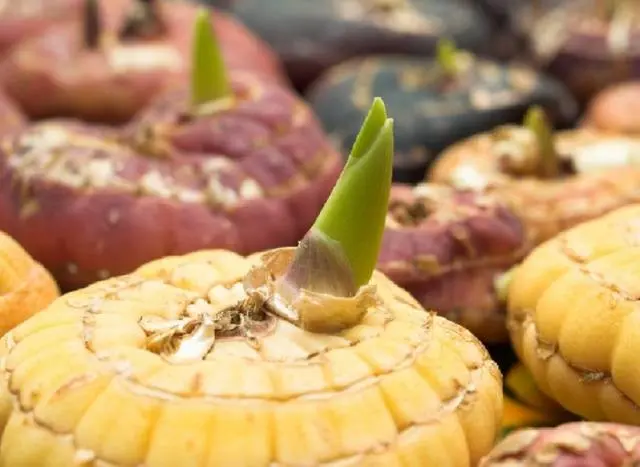
The boxes are moved to another place where they can be provided with diffused sunlight. Direct sunlight at this time is detrimental to the bulbs.
A few tips for lovers of gladioli
- Keep different varieties separate and be sure to label each box. This will make it possible, when planting, not to confuse the types of gladioli.
- Try to provide bulbs with a ventilated area for winter storage. If this is not possible, regularly air the planting material.
- If moisture appears on the bulbs, dry them, if dry, then soak before planting.
- If you find pests, be sure to treat with Inta-vir or another agent, then dry and store again.
From the foregoing, it should be concluded that it is necessary to inspect the bulbs during the winter period regularly and carefully. In this case, you will save the planting material of gladioli until spring with minimal losses. Requirements for the conditions of winter storage of gladioli are not at all difficult for experienced gardeners. And for beginners, you need to carefully follow all the recommendations, and your favorite varieties will delight with their flowering every year.