


Contents
Sometimes Microsoft Office Excel users need to transfer charts built on a table array to a separate worksheet. How to do this will be discussed in this article.
How to insert a chart into a separate Excel sheet
There are several common ways to accomplish the task. Each method can be used with any version of the software. Next, the simplest and most effective of them will be considered.
Method 1: Copy a chart
This method is implemented in a few seconds according to the following algorithm:
- Build the desired chart for the source table.
- Select the constructed graph by clicking on it with the left mouse button.
- Switch the computer keyboard to the English layout and simultaneously hold down the “Ctrl + C” buttons to copy the selected diagram to the clipboard.
- Go to a blank Excel sheet. To do this, click on the word “Sheet 1” or “Sheet 2”, etc., located in the bottom panel of MS Excel.

- An empty worksheet will open, on which the user will need to press the “Ctrl + V” buttons.
- Check result. After completing the above steps, the constructed graph will be displayed on a new page.

Pay attention! The copied chart from Excel can be inserted into MS Word in the same way.
Method 2: Use the move option
In Excel, the chart can also be transferred to a separate sheet, where it will be subsequently adjusted. The transfer process is divided into the following steps:
- Build a chart on the original data table.
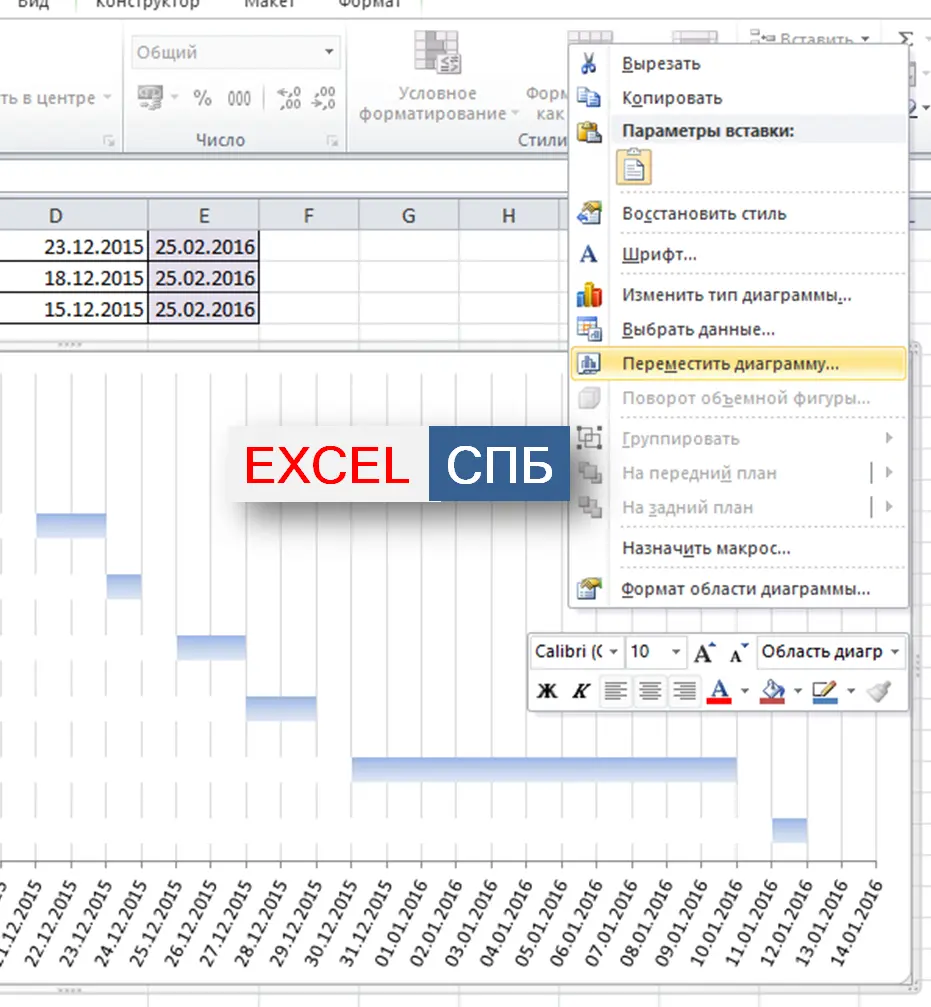
- Move the mouse cursor to any extreme place of the graph. Instead of the usual cursor, an icon in the form of four arrows should appear.
- Right click on this place.
- In the context menu, click on the line “Move chart …”.
- In the menu that opens, the user needs to put the toggle switch in the position On a separate sheet and in the field next to it, write the appropriate name for the chart. The sheet on which the chart will be inserted in the future will also be called.
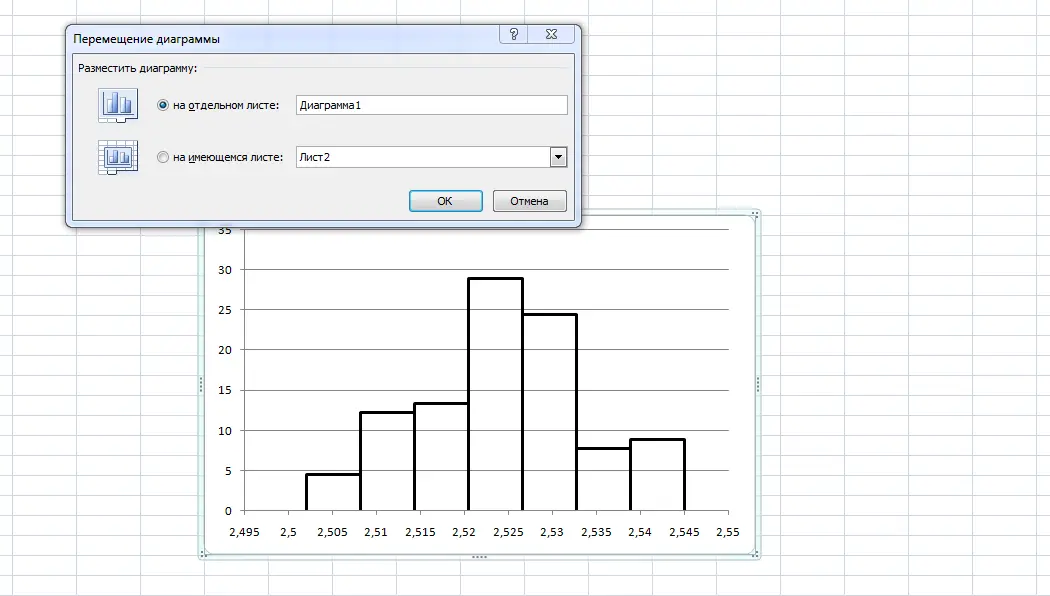
- When all the steps are completed, you will need to click on OK at the bottom of the window.
- Check result. After performing the above manipulations, the original chart will move to a separate sheet of Microsoft Office Excel. Here the user will be able to customize the graph, for example, change its color, location, scale, etc.
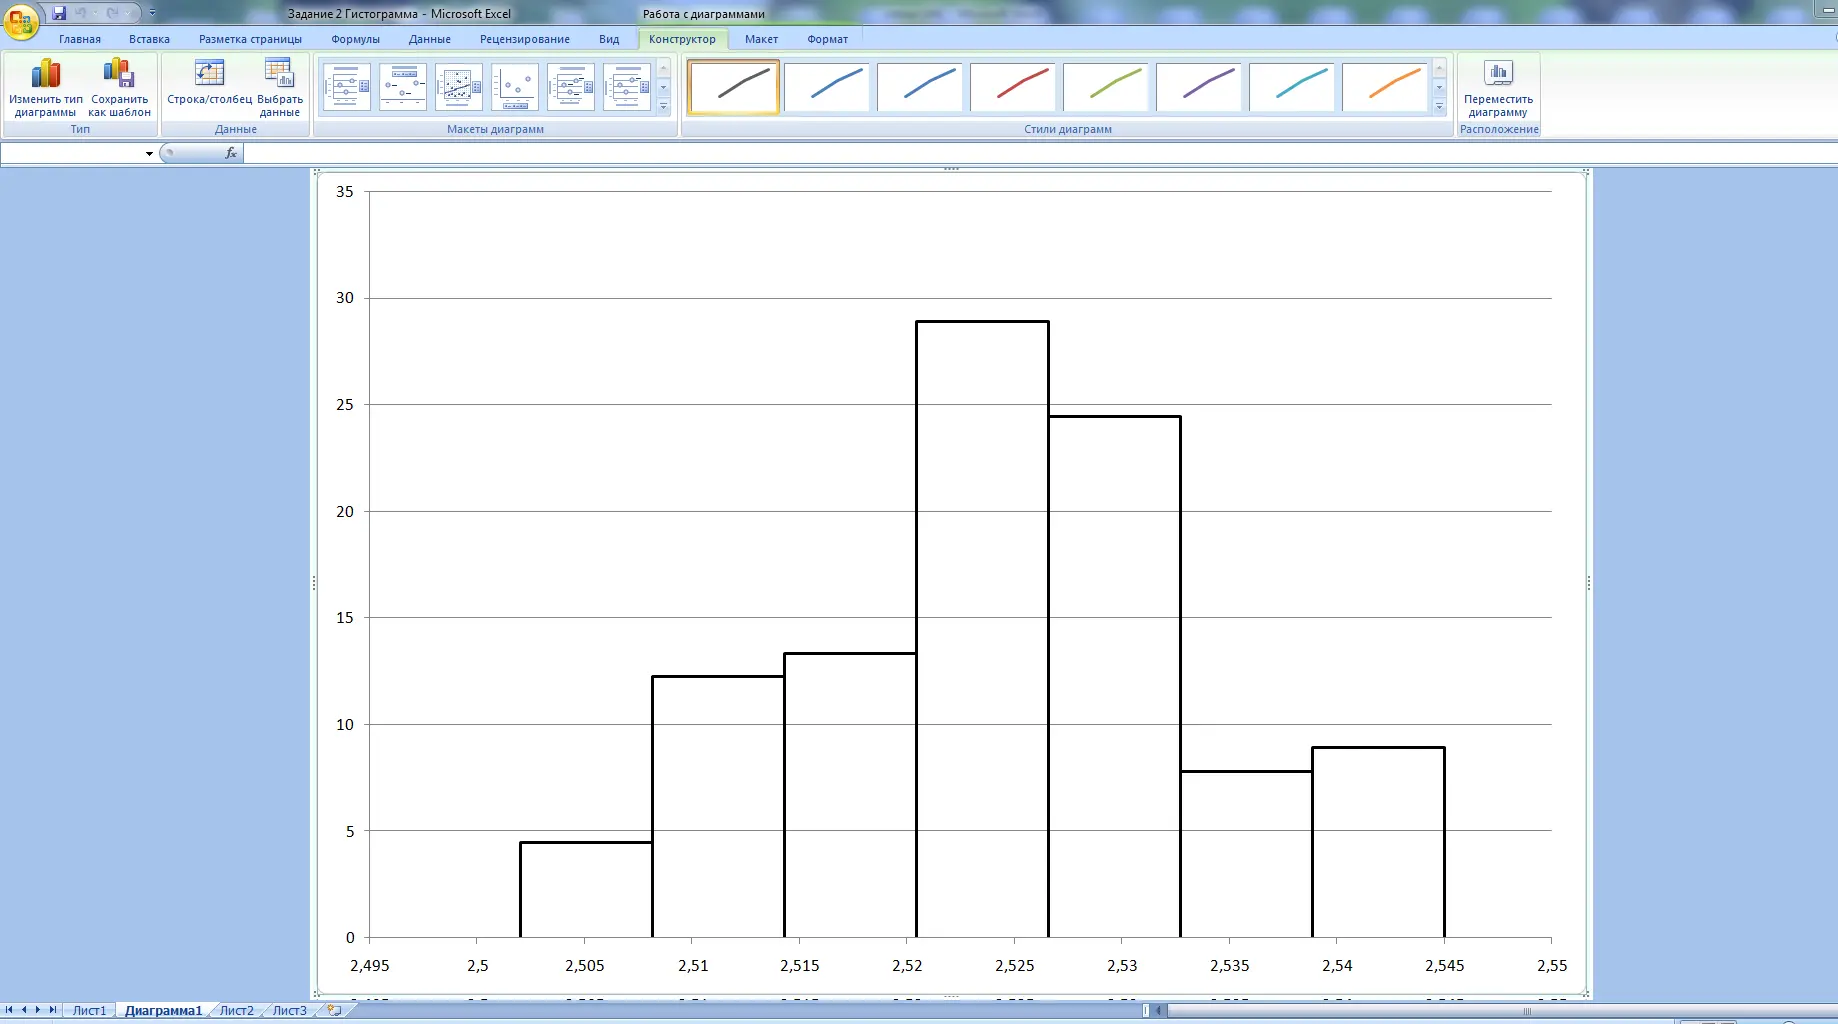
Important! After moving to a separate sheet, the chart will be removed from the original worksheet. Work on the schedule can be done in the created area of the program.
When changing the parameters of a chart on a separate sheet, the data in the original table array will also change. This principle also works in reverse.
How to build a chart in Excel
To fully understand the topic, it is necessary to consider the methods for constructing various graphs in Excel.
Method 1. Building on the original plate
This is the easiest and fastest way to create a chart, which is as follows:
- Create a table, according to which the graph will be built.
- Select the source array with the left mouse button and move to the “Insert” tab located in the top toolbar of the program.
- All possible options are presented in the “Diagrams” block. Here you can select line, pie, bubble, etc.
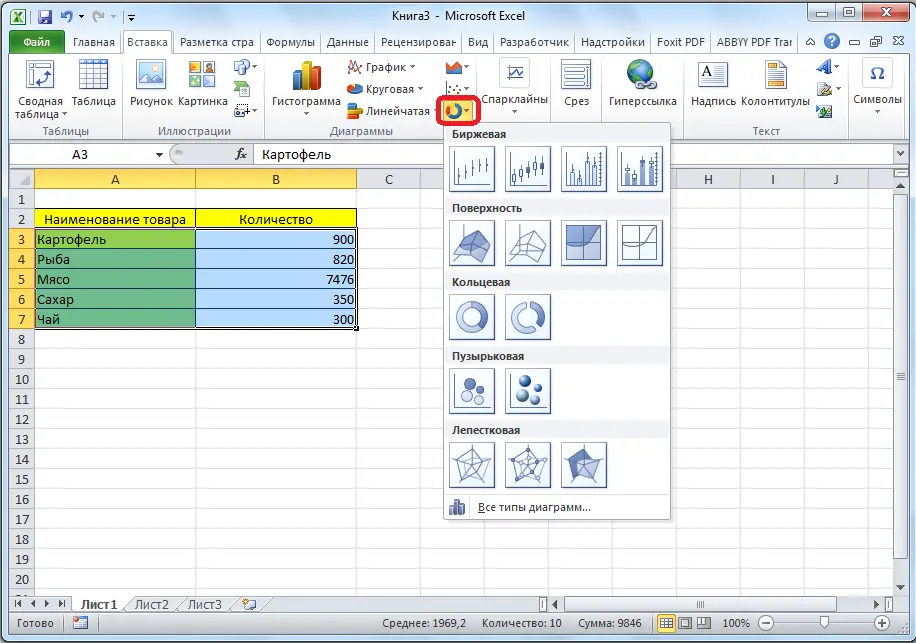
- Click on the appropriate option and check the result. The selected chart appears next to the table on the Excel worksheet. If necessary, it can be edited, for example, by signing the axis, the name.
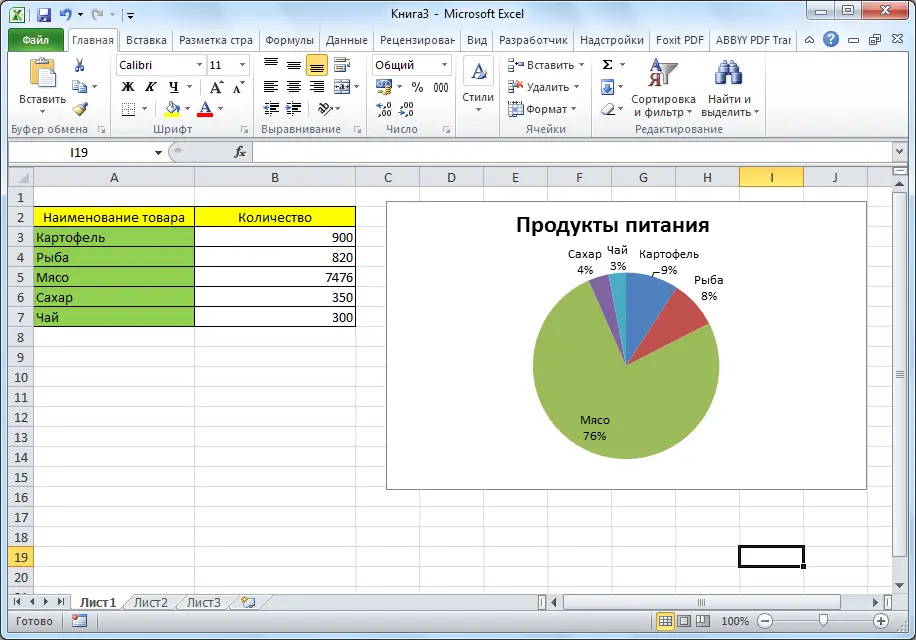
Method 2. How to make a percentage chart in Excel
With the help of a pie chart, you can compare the indicators presented in the table in percentage terms. This allows you to visually analyze the current situation, assess the risks. To make a percentage chart, you need to follow a few simple steps according to the instructions:
- In the original plate, select the range of cells, the parameters that need to be compared.
- In the same way, move to the “Insert” section and select a pie chart in the list of possible charts.
- After displaying the graph on the worksheet, you will need to move to the “Designer” tab.
- Here the user must find the “Express Layout” button and click on it with LMB.
- In the list of pie chart options that opens, select the one that displays percent signs and click on it.
- Analyze the result. The constructed chart should change, and the size of the areas on it will be shown as a percentage.
Additional Information! Any of the constructed charts can be transferred to a separate sheet, as well as change some of the values on it.
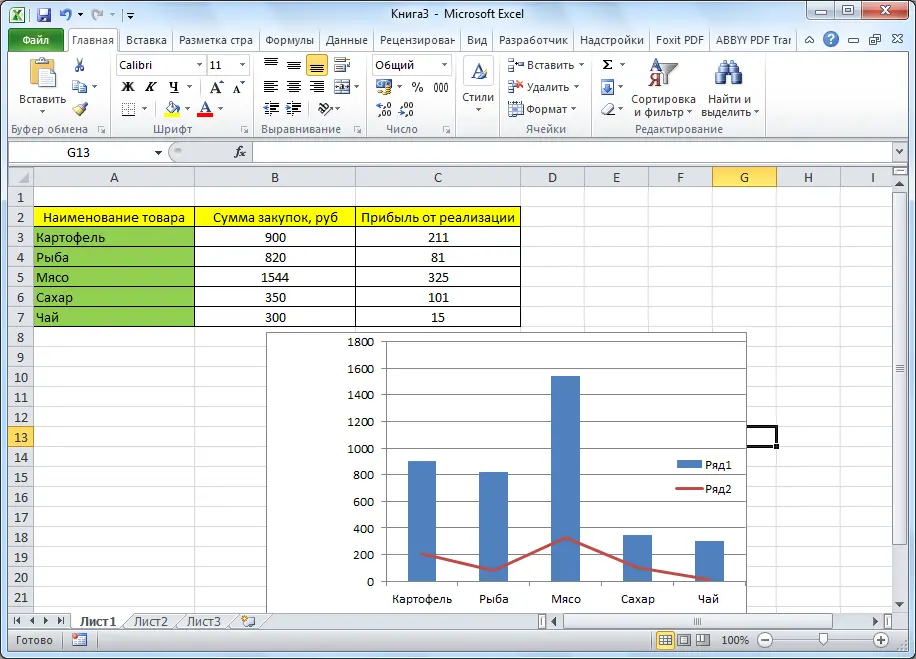
Method 3. Building a Pareto chart
This is the most common type of chart, with which you can quickly assess the quality of a product. The construction is carried out according to the algorithm:
- In the “Insert” tab, expand the Histogram block and select the very first option.
- After plotting the chart, click on the “Change chart type” button at the top of the window.
- In the next window in the Graph section, select the appropriate option and click on OK.
- Check result. Pareto chart should be built.
Conclusion
Thus, moving charts, graphs in Excel to a separate sheet is performed in a park of clicks. To cope with the task, you must carefully read the above information.