


Contents
The use of raised beds is relevant for suburban areas with frequent flooding and poor soil. However, even in the absence of these reasons, an earthen embankment fenced with boards allows you to increase productivity, as well as simplify plant care. They make fences from any improvised materials available on the farm. Due to environmental friendliness, it is best to make wooden beds with your own hands, which we will do now.
Pros and cons of raised beds with wooden sides
Having made raised beds from boards in the yard or any part of the garden, the vegetable grower receives the following benefits:
- Wooden fences make garden beds easy to maintain. Weeding, watering, harvesting is simplified.
- On areas unsuitable for agriculture, fenced mounds of boards are made with purchased fertile soil. Nutrient soil can also be prepared independently. The technology makes it possible to obtain good yields even where vegetation cannot grow in principle, for example, on a stone.
- Thanks to the fence made of boards, bulk soil does not spread. It is easier to attach arcs to the sides to stretch the greenhouse than to install them directly into the ground.
- Boards are an inexpensive material, easy to process. The wood does not warm up strongly by the sun, which relieves the root system of plants from burns.
- Wooden fences are environmentally friendly. The vegetable grower does not have to worry about contamination of the soil with harmful substances, as is the case with asbestos-cement slate.
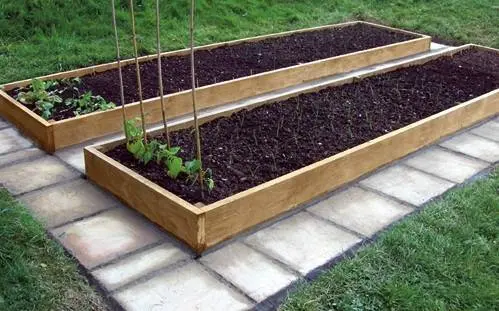
In addition to the benefits of high beds made of boards, there is an aesthetic side to the use of this technology. Country gardening takes on a well-groomed appearance. Each crop grows in its own bed without weeds. Hard-surfaced paths are laid out around the fences made of boards, which makes it easy to access maintenance even after rain. There will never be dirt around the beds.
If we touch upon the shortcomings of the technology, then only a short service life of wooden boards can be distinguished. Boards are subject to rapid decay in the ground, and nothing can be done about it. Wooden boards, at best, will last for 5 years. Gardeners, trying to increase the life of the fence, treat the boards with paint or antiseptic impregnations.
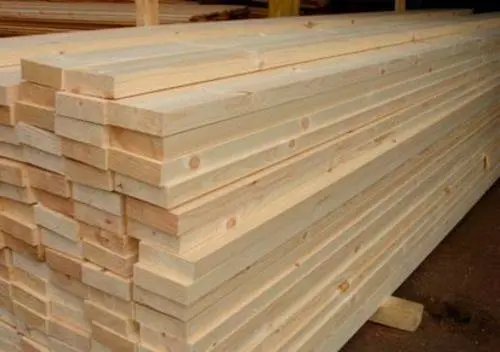
We select boards for the box
You can make wooden beds from any blanks available on the farm. In the course is timber, lining, slab and round timber. But when the question is about purchasing material, it is important to pay attention to what types of wood the boards are made of:
- A fence made of oak boards or ash will last a long time. The cost, of course, of such material will hit the gardener hard on his pocket.
- Pine in terms of processing and low cost is beneficial. As for the service life, pine boards rot very quickly in the ground. You can extend the life of such a fence for a couple of years with the help of impregnation treatment.
- If you are lucky enough to buy larch or cedar boards, this will be the best material for building boards. Larch wood is so impregnated with resin that it will lie in the ground for many years without additional processing. Cedar boards are less resinous, but will last a similarly long time, plus their cost is low.
- Acacia boards are well preserved in the ground. However, wood has a very hard structure. To process the boards, you will need a powerful power tool.
It is worth noting that you should not save on the quality of the boards. Bad wood will quickly rot, and after 2-3 years the sides of the beds will be covered with holes, from which the soil will be washed out by rain.
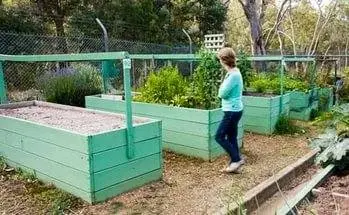
We calculate the size of the fence from the boards
The photo shows that the fences from the boards are made rectangular. Wood is an inflexible material to make curved shapes out of it. The only thing you need is to correctly calculate the dimensions of the wooden box. The convenience of caring for the garden depends on this.
In the manufacture of the box adhere to the following dimensions:
- One of the important parameters of the beds is the height. There is an erroneous opinion of gardeners who think on the principle that the higher the better. High sides up to 70 cm are relevant only for the “warm bed” technology, where the filler is laid in layers. For simple raised beds, a side height of 15–20 cm above ground level is sufficient. It is unprofitable to make high boards because of the excess consumption of boards. In addition, in winter, the soil inside the fence will freeze, which is accompanied by its expansion. From this, the high sides will inflate or they will bend and take on an ugly curved shape.
- The convenience of work depends on the width of the wooden box. Experienced vegetable growers equip the width of any beds, equal to half their height. Usually this parameter is kept in the range of 90–120 cm. When processing the beds, a person must reach the middle on each side of the side board.
Length is the only parameter that has no limit. It all depends on the location of the garden. Although a too long box weakens the rigidity of the side walls. Boards will buckle outward over time. It is optimal to stop at a length of 4 to 6 m.
How to protect wood from decay
Boards, even from the best tree species, require protection from moisture. This will determine how long the structure will last. However, wood protection should not be undertaken at the expense of soil contamination. The cheapest and most affordable way to protect boards from rotting is to treat them with a thick lime solution. The best result is shown by harmless impregnations, for example, the preparation “Senezh”.
Serious protection is provided by wood varnish or oil-based paint. The non-toxic coating is harmless to plants and soil. The only caveat – when painting the boards, you can not touch their ends. In these areas, the wood will breathe, removing moisture from itself. If the ends of the boards are painted over, they will rot faster than unpainted ones.
How many boxes to make
The number of beds depends on the area of uXNUMXbuXNUMXbthe summer cottage, the number of crops grown and personal preferences. However, if space permits, it is advisable to make one spare compost box. All summer the fence will be empty. Soil is not poured inside, but all organic waste is dumped. Only after the box is completely filled with organic matter, a layer of earth is poured on top, and green manure is sown. Mustard is most often preferred, but peas can be sown.
After wintering, the spare bed will turn into an ideal area with nutritious soil for planting cucumbers or tomatoes. It is only necessary to loosen the soil before planting crops. A new spare bed is made from a neighboring box, where garden crops grew last year. The use of this technology allows you to get rid of the separate arrangement of the compost heap.
The procedure for making beds from boards

So, we slowly approached the moment when we need to consider how to make beds from boards in our summer cottage.
Let’s get to work:
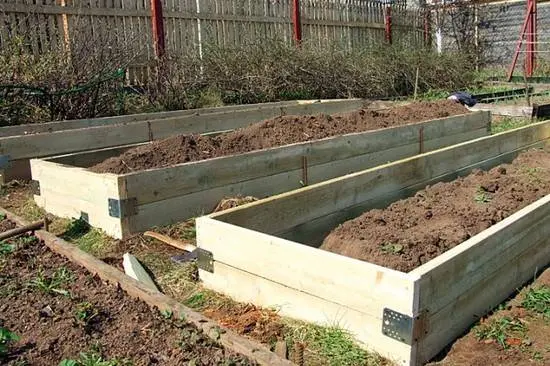
- In the area allotted for the bed, the sod is removed according to the size of the future box. In the pit around the perimeter, the first row of boards is installed on its side. In order for the design to have an aesthetic appearance, the blanks are leveled. You can level it by placing pieces of wood or stone under the boards.
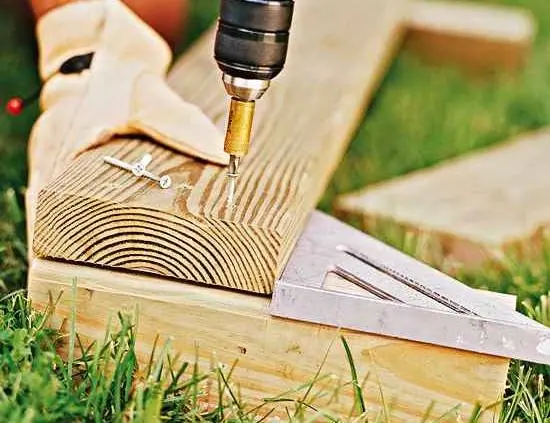
- With a tape measure or construction cord, measure the diagonals of the box between opposite corners. They achieve the same distance, after which they begin to connect the boards at the corners of the box. They are screwed on with screws. Additionally, it can be reinforced with overhead metal corners.
- After the first row of the box is made, the second row is built up. At the corners, the blanks are connected similarly with self-tapping screws, after which both rows are sewn together with metal strips or wooden slats. A similar procedure is continued until the required side height is obtained.
- When the wooden fence is completely ready, the bottom of the pit is covered with a geotextile sheet. The fabric prevents the penetration of weed roots and infections from the lower soil into the bed.
- The canvas is shot with a stapler to the sides and proceed to the drainage embankment. Any small stone will do. Fertile soil is poured on top of the drainage 3 cm below the upper edge of the box. Now you can plant the plants, and sprinkle the soil on top with mulch.
It remains to organize paths around the established beds. You can leave lawn grass or make a hard surface, for example, from paving slabs.
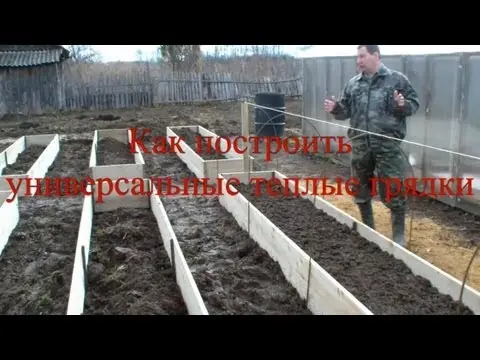
On the video you can see the manufacture of a universal bed:

We examined how to make a bed of boards with our own hands, as well as all the nuances of the preparatory work. We hope our advice will help gardeners organize their site.