


Contents
Winemaking is an art, the secrets of which take years to learn, but anyone can make homemade grape wine. It is clear that this will not be a masterpiece worthy of world exhibitions, but if the instructions are followed, the taste of a home-made drink will be better than that of many store-bought ones. I bring to your attention a detailed technology for making wines (red and white) at home. The recipe uses only grapes and sugar, in rare cases additional water is required.
For home winemaking, such grape varieties as Stepnyak, Platovsky, Rosinka, Druzhba, Regent, Saperavi, Crystal, Festivalniy are better than others, which do not require special care and have a fairly high sugar content. But this does not mean that you cannot make wine from other varieties, such as Isabella or Lydia, you just have to add more sugar.
Before starting cooking, take care of all the containers and appliances used. In order not to infect the juice with pathogenic microorganisms, such as mold, containers must be perfectly clean and dry. Kegs, bottles, buckets can be smoked with sulfur, as is done in industry, or washed with boiled water, then wiped with a dry cloth. I strongly recommend avoiding vessels that have previously held milk, as even thorough cleaning does not always help.
Ingredients:
- grapes – 10 kg;
- sugar – 50-200 grams per liter of juice;
- water – up to 500 ml per liter of juice (in rare cases).
It is advisable to add water only if the juice is very sour – it stings the tongue and reduces the cheekbones. At the same time, remember that adding sugar in itself reduces acidity. In all other cases, dilution with water impairs taste and is therefore not recommended.
Grape wine recipe – manual
1. Harvesting and processing
In order to ensure that the wild yeast necessary for fermentation remains on the grapes, it is advisable to pick the berries in dry, sunny weather. There should be no rain for at least 2-3 days before.
Only ripe fruits are suitable for winemaking. There is too much acid in unripe grapes, and acetic fermentation begins in overripe berries, which can subsequently spoil all the must (squeezed juice). Also, I do not advise you to take carrion, because of which the grape wine has an unpleasant aftertaste of the earth. Picked berries must be processed within two days.
Carefully sort the harvested grapes, removing twigs and leaves, unripe, rotten and moldy fruits. Then crush the berries, place the pulp together with the juice in an enamel pan or plastic bowl, filling the container with a maximum of ¾ of the volume. It is better to crush the grapes with your hands so as not to damage the seeds, which contain substances that make the wine bitter. If there are a lot of berries, they can be carefully crushed with a wooden rolling pin (pestle).
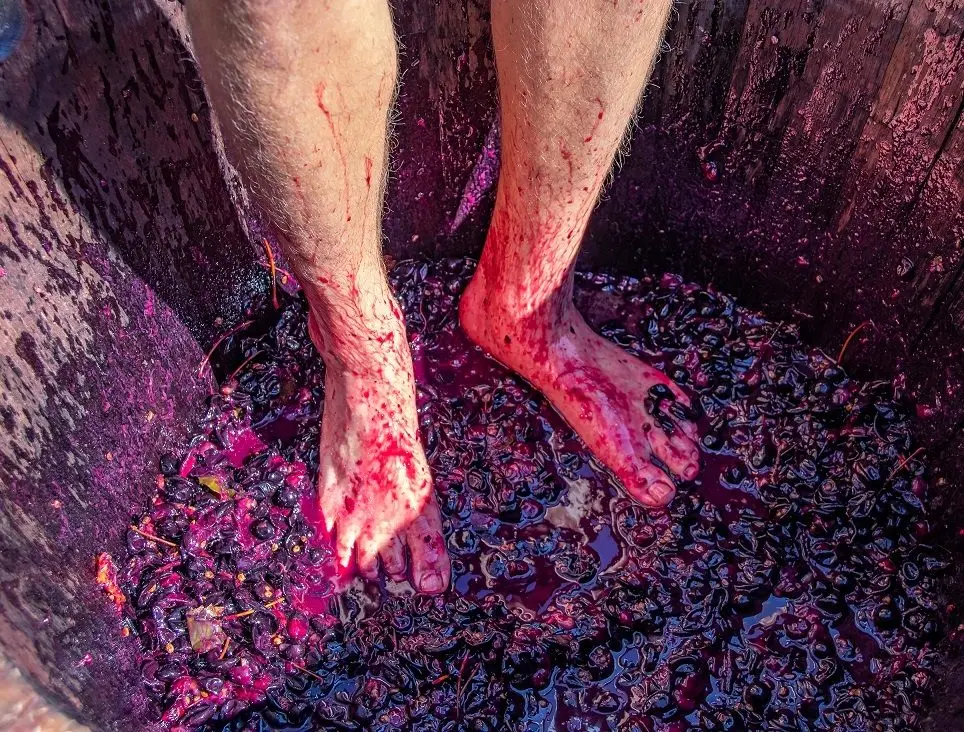

Contact of the juice with metal (except stainless steel) should be avoided, as this causes oxidation, which impairs the taste. That is why the berries are kneaded with hands or wooden tools, and the pulp (crushed grapes) is placed in an enameled dish with a wide neck – a bucket or a saucepan. You can also use a food grade plastic container or a wooden barrel.
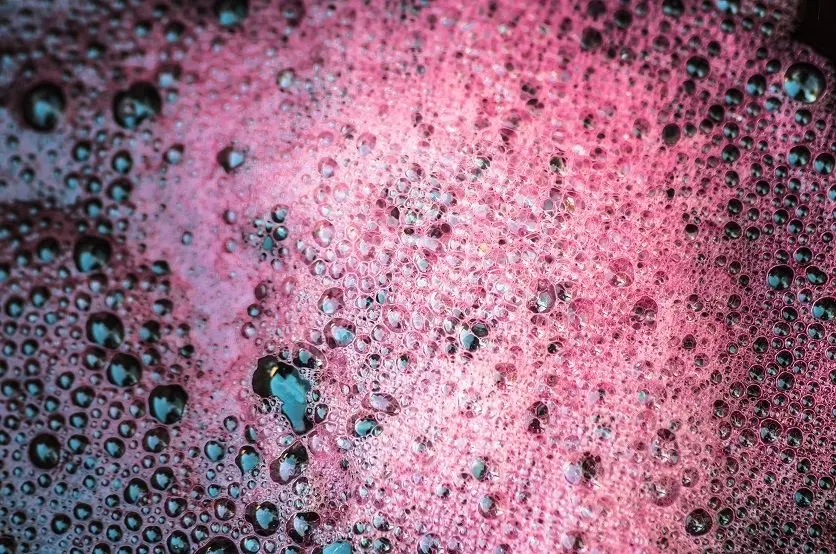
Cover the container with the pulp with a clean cloth to protect it from flies, put it in a dark, warm (3-4 ° C) place for 18-27 days. After 8-20 hours, the juice will begin to ferment, a “cap” of skin appears on the surface, which should be knocked down 1-2 times a day, stirring the pulp with a wooden stick or hand. If this is not done, the wort may turn sour.

2. Getting pure juice
After 3-4 days, the pulp will brighten, a sour smell will appear and a hiss will be heard. This means that the fermentation has successfully begun, it’s time to squeeze the juice.
Collect the top layer from the peel in a separate container, squeeze it out with a press or by hand. Filter all the juice (drained from the sediment and squeezed out of the pulp) through gauze, pouring 2-3 times from one container to another. The transfusion not only removes small particles, but also saturates the juice with oxygen, which contributes to the normal functioning of wine yeast at the initial stage.
When working with grapes that are not ripe or grown in northern latitudes, water may be required in rare cases. If the juice turned out to be very sour (it reduces the cheekbones and pinches the tongue), add water – a maximum of 500 ml per 1 liter. The more water, the worse the quality of the wine. It is better to leave slightly increased acidity, since the concentration of acids decreases slightly during fermentation.
Fill containers with pure juice (maximum 70% of the volume) intended for fermentation. Ideally, these are large glass bottles, in extreme cases, if the volume of wine is small, cans are also suitable.
3. Water seal installation
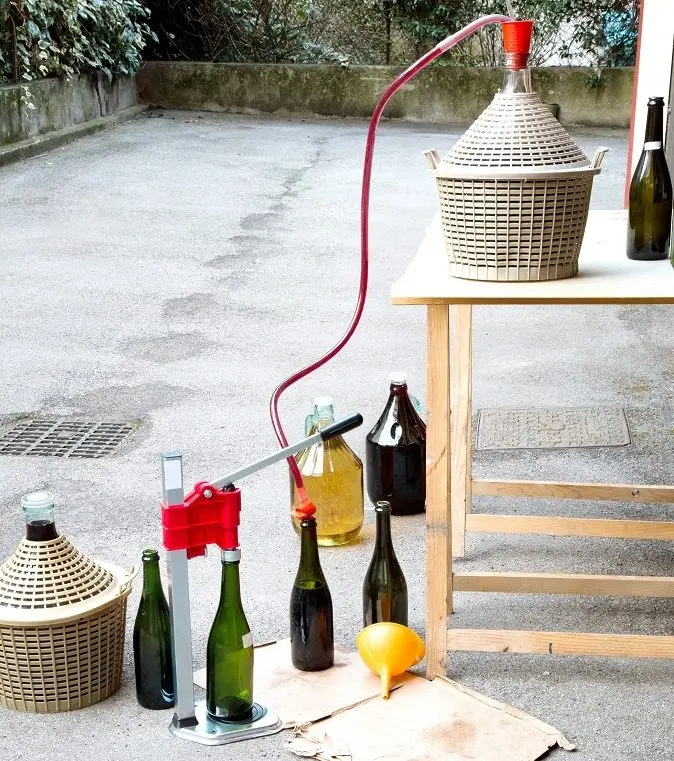
In order for homemade grape wine not to turn sour, it must be protected from contact with oxygen, while at the same time ensuring the release of a by-product of fermentation – carbon dioxide. This is done by installing one of the water seal designs on the juice container. The most common option is a classic water seal from a lid, tube and can (pictured).
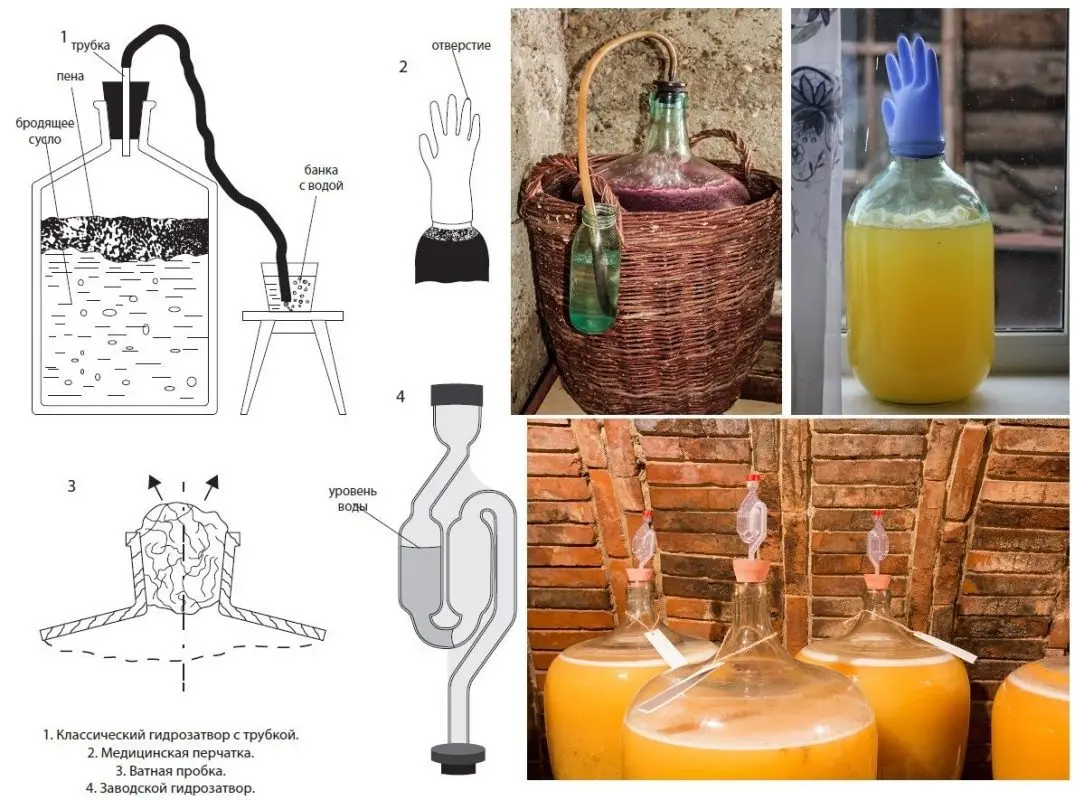

Also, an ordinary medical glove with a hole in one of the fingers (pierced with a needle) has proven itself well.
The design of the water seal is not of fundamental importance, but in terms of convenience, it is better to put a classic water seal on large bottles, and on jars – a glove or a closure in the form of a lid (sold in stores).
4. Initial (active) fermentation
After installing the water seal of the container with fermented juice, it is necessary to provide suitable temperature conditions. The optimum fermentation temperature for red homemade wine is 22-28°C, for white wine 16-22°C. The temperature must not be allowed to drop below 15 ° C, otherwise the yeast will stop before it has time to process all the sugar into alcohol.
5. Adding sugar
Approximately 2% sugar in the must yields 1% alcohol in the finished wine. In most regions of Russia, the sugar content of grapes rarely exceeds 20%. This means that without the addition of sugar, at best, you will get a wine with a strength of 10% and zero sweetness. On the other hand, the maximum possible strength is 13-14% (usually 12), with a higher concentration of alcohol, wine yeast stops working.
The problem is that it is impossible to determine the initial sugar content of grapes at home without a special device (hydrometer). It is also useless to focus on average values for varieties, since this requires data on the sugar content of the selected variety in a specific climatic zone. In non-wine-growing areas, no one conducts such calculations. Therefore, you have to navigate by the taste of the juice – it should be sweet, but not cloying.
To maintain normal fermentation, the sugar content of the wort should not exceed 15-20%. To ensure this condition, sugar is added in parts (fractionally). 2-3 days after the start of fermentation, taste the juice. When it becomes sour (sugar has been processed), 50 grams of sugar should be added for every liter of juice. To do this, pour 1-2 liters of must into a separate container, dilute sugar in it, then pour the resulting wine syrup back into the bottle.
The procedure is repeated several times (usually 3-4) during the first 14-25 days of fermentation. At some point, the sugar content of the wort will decrease very slowly, which means that there is enough sugar.
Depending on the temperature, sugar content and yeast activity, the fermentation period for homemade grape wine is 30-60 days. If the fermentation has not stopped 50 days after the installation of the water seal, in order to avoid the appearance of bitterness, the wine should be poured into another container without sediment and placed under a water seal to ferment under the same temperature conditions.
6. Removal of wine from sediment
When the water seal does not blow bubbles for 1-2 days (the glove is blown off), the must is clarified, forming a layer of loose sediment at the bottom, it’s time to pour the young grape wine into another container. The fact is that dead fungi gather at the bottom, being in wine for a long time, they cause bitterness and an unpleasant odor.
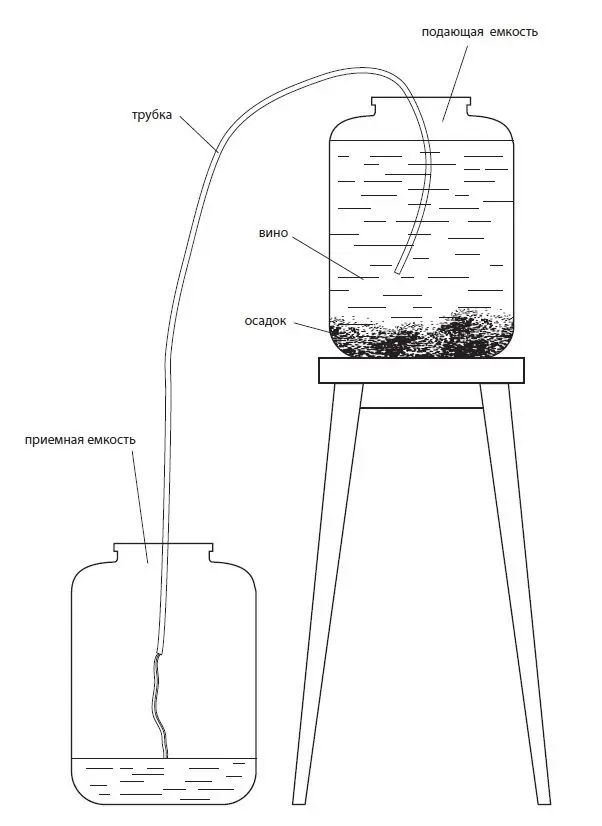
1-2 days before removing the wine from the sediment, put the fermentation tank on a raised platform above the floor (50-60 cm). It can be a bench, chair or any other device. When the sediment is again at the bottom, pour the wine into another container (clean and dry) through a siphon – a transparent soft hose (tube) with a diameter of 0,7-1 cm and a length of 1-1,5 m. The end of the tube cannot be brought closer to the sediment, than 2-3 cm.
Drained homemade wine will not be completely transparent. It’s not scary, the appearance of the drink has not yet formed.

7. Sugar content control
It’s time to decide on the sweetness of the wine. Since active fermentation has already ended, all the sugar added at this stage will not be processed into alcohol.
Add sugar, focusing on taste preferences, but not more than 250 grams per liter. The application technology is described at the 5th stage. If the sweetness suits you, you should not sweeten it further. Strong spirits lovers can make fortified grape wine by adding vodka (alcohol) at the rate of 2-15% by volume. Fixing contributes to the storage of wine, but makes the taste tougher, and the aroma is not so rich, alcohol notes appear.
8. Quiet fermentation (ripening)
The stage during which the final taste is formed. Lasts from 40 to 380 days. A longer aging of homemade grape wines is not advisable, because it does not improve the properties of the drink.
Place the bottle of wine (preferably filled to the top to avoid contact with oxygen) under the water seal (recommended if sweetening was done) or tightly close the lid. Store the container in a dark cellar or basement at a temperature of 5-16°C. If this is not possible, the young wine should be kept at a ripening temperature of 18-22°C, but not higher. It is important to avoid sudden temperature changes, for example, day and night, otherwise the taste will deteriorate. The minimum aging period for white wine is 40 days, for red wine – 60-90 days.
When a sediment appears at the bottom with a layer of 2-5 cm, pour the wine from one container to another through a tube, leaving the sediment at the bottom, as described in the 6th stage. As a result, the drink will gradually lighten up.
9. Artificial lightening (pasting)
Even after several months in the cellar, homemade grape wine can remain hazy. The problem is solved by methods of purification of wine from impurities. The most common methods are pasting with gelatin or egg white.
Clarification improves only the appearance, but does not affect the taste in any way, so I recommend cleaning only in extreme cases.
10. Bottling and storage
At the last stage (when the sediment no longer appears), the wine can be bottled and tightly closed with corks.

Shelf life at a temperature of 5-12°C – up to 5 years. Fortress – 11-13% (without fixing with vodka or alcohol).


The video shows the technology for making wine from sour grapes, in which the squeezed juice is half diluted with water. Only relevant for northern regions with very sour berries, since the addition of water worsens the taste.
https://www.youtube.com/watch?v=zglgFHAPg7E

Watch this video on YouTube
سلام اگر بجای شکر نمک ریخته باشم چکار میشه کرد؟قابل درست شدنه؟
یه سرکه عالی میشه برات ولی شراب هرگز
سلام ….شمارا بخدا یکی تهیه درست را بفرماید تا همه بتوانند استفاده بکنند ازمن که سرکه شد همدیگر گول نزنیم کیلوی چقدر قیمت داره
اگه به جای شکر عسل بزنیم چی میشه؟؟
انگور را له کنید در یک دبه بریزید یک در مناسب مثل بشقاب روی آن قرار دهید که زیاد محکم بسته نشود ، تا سه روز در مکان مناسب با دمای حدود ۳۰ درجه بعد از سه روز روزی یک یا دو مرتبه محتویات دبه رابهم بزنید بعد از سی روز شراب را با الک یا پارچه صاف کنید و آن را وارد بطری نمایید ، در بطری محکم بسته شودکه هوا نکشد. بطری ها را بطور افقی در محلی مناسب انبار کنید .
انگور خوب برای شراب به نام انگور شانی ( شاهانی) و قبل از له کردن چوب ها و ضایعات ان را جدا کنید حبه های انگور نباید اصلا خیس شوند
حتی ذره ای آب آنرا سرکه میکند .دوستان ریختن شکر یا عسل اجباری نیست من مواد ی مثل شکر یا مخمر هرگز استفاده نمیکنم شراب شما بعد از یک ماه آماده است البته هر قدر بیشتر بماند بهتر است ،نوش جان
لطفا یک نفر که مسلط به زبان فارسی هست بنویسد . این مقاله برای فارسی زبانان قابل استفاده نیست. به جای کلمه توت بنویسید حبه انگور
لطفا یک نفر که مسلط به زبان فارسی هست بنویسد . این مقاله برای فارسی زبانان قابل استفاده نیست. به جای کلمه توت بنویسید حبه انگور
لطفا یک نفر که مسلط به زبان فارسی هست بنویسد . این مقاله برای فارسی زبانان قابل استفاده نیست. به جای کلمه توت بنویسید حبه انگور
خار کوسه اگه آب بریزیم سرکه میشه
جناب فارس حبه که کلمه عربی است!
حاج آقا
سلام اگر انگور ریخته شده در دبه شروع به درست کردن شته انگور کرد موردی دارد یان
سلام من ۲ماه انگور لح شده را ریختم داخل یک بطری ۲۰لیتری الان باید پستشا جدا کنم یا ازهمون اول بوع طعم شم عالیه الان میتونم بعد دوما ابشا جدا کنم لطفلا جواب بدین
دوستان وقتی کپی کردن مطالب انگلیسی و ترجمه آن به فارسی توسط گوگل انجام میشود بسیاری از معانی جمله ها تغییر میکند وکلا به هم میخورد و قابل استفاده نمیباشد پس به این مطالب اتکا نکنید. خواستین بهم ایمیل بزنید تا بهترین روش شراب سازی آذربایجان غربی رو در اختیارتون بزارم. 🙏 همه ی ایران سرای من است و تک تک هموطنان عشق من ❤❤❤
درود فراوان بر آذریهای با غیرت و وطن دوست.پیروز و دلشاد و تندرست باشید.
سلام طرز تهیه شراب خانگی باانگورسیاه وبهم توضیح بدین تشکر
کیرم تو دستورالعملت اینطوری تو کارخونه باید شراب بسازیم
اخه توت این وسط چیکار میکنه که با وردنه لهش کنی
اون وردنه را بکن تو کص مادرت با دستورالعملت
سلام دوستان بعد از مهر و موم دبه شلنگ ها از داخل خیس شده انگار عرق کرده آیا مشکلی پیش میاد
سلام دوستان
بعد از مهر و موم دبه پس از دو روز عرق کرد و قطرات آب داخل شلنگ بود آیا مشکلی پیش میاد یا درسته
سلام من با تمام میوه ها میتونم شراب درست. مثل خرمالو. گلابی. انجیر. یا نارنگی شیرین. انار. لطفا راهنمایی کنین
سلام خسته نباشید ببخشیدمن شراب درست کردم کامل صاف کردم گذاشتم بیست روز بمونه اما الان یه پودری روش زده میخواستم ببینم کپکه ؟؟؟
اصلااین روش درست کردن شراب انگوریاهندونه اصولی نبودوکلااشتباه گفتیدفقط اونایی که انتقادکردن اوناروش درست وخوبی راارائه دادن باتشکرازهمه دوستان