


Contents
Most vegetable growers are engaged in growing seedlings at home. Sowing seeds is carried out in boxes. Under the container fit any boxes available on the farm. Special cassettes are sold in stores, but their disadvantage is the high price. Homemade seedling boxes can turn out no worse than factory products, you just need to turn on your imagination and put in the maximum effort.
Factory made cassettes

When growing different varieties, vegetable growers use a seedling box with partitions that separate crops into separate groups. If it is difficult to make a homemade reusable container, you can visit the store. Factory-made cassettes consist of a set of small cups soldered together. It turns out a kind of box with many partitions. You can sow different crops or varieties in each cup without worrying about mixing them. Cassettes are produced from various types of plastic. The cups themselves differ in depth and shape. There are cassettes equipped with a tray and a lid made of transparent plastic. The design allows you to make a mini-greenhouse.
Homemade container for growing seedlings
To save on the purchase of store boxes, vegetable growers resort to tricks. At home or in a landfill, you can always find cans, packs, plastic bottles. This is not garbage, but an excellent container for growing seedlings. If you group a set of containers, you get a home-made analogue of a cassette. Now we will look at the photo boxes for seedlings with our own hands, and also get acquainted with the secrets of their manufacture.
Plastic container
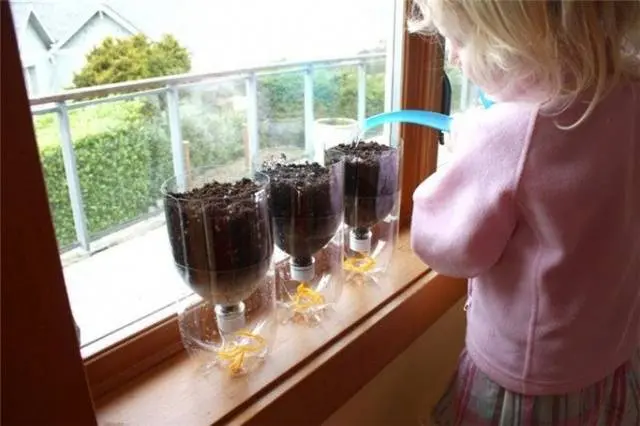
Any plastic cannot be considered an environmentally friendly material, but if it is suitable for food, then seedlings will not be harmed. A homemade cassette can be made from beer cups, containers for sour cream, yogurt. Even any PET bottles will do. You just need to cut off the top to get a jar 10 cm high.
It is inconvenient to rearrange one container on the windowsill. In addition, water will flow out of the drainage holes after watering. The cups must be grouped so that you get a box for seedlings with a pallet, where excess moisture will be collected. The easiest option is to find a plastic container made of vegetables and place it inside the jar. The walls and bottom of the box are slatted. To prevent water from flowing onto the windowsill after watering, the container can be placed on a regular table tray. He will play the role of a pallet.
If the cultivation of heat-loving seedlings requires the creation of a greenhouse, then when cutting a PET bottle, you should not throw away the upper part. After sowing the seeds, the top is put back on the cup. By unscrewing and tightening the plugs, they regulate the flow of fresh air into the greenhouse.
Foil packs
The assembled do-it-yourself seedling box should be not only neat, but also well retained heat at the roots of plants. Tetrapack paper boxes do an excellent job with this task. The container for juice, milk and other drinks inside has a foil covering. It does not allow the paper to soak, plus it protects the contents of the tetrapak from sudden temperature changes.
For the root system of seedlings, the foil coating will retain heat. The cold coming from the window glass will less chill the soil in nearby seedling boxes.
To make boxes for seedlings, tetrapacks are cut in half. You can use not only the bottom, but also the top. The cork from the tetrapack does not protrude much, which makes it possible to install the other half in a common container.
Homemade peat packaging
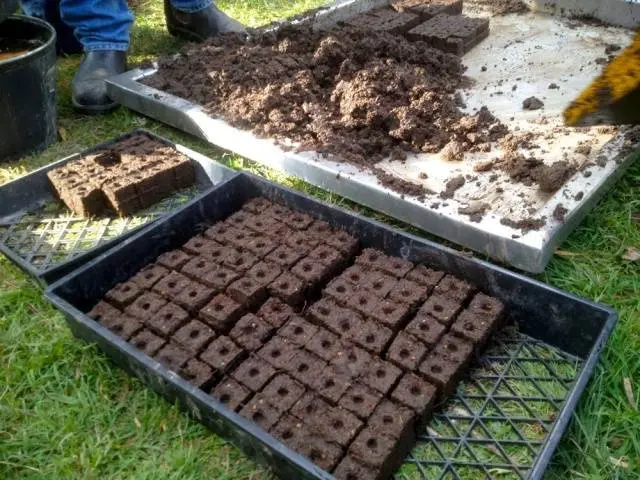
Peat tablets or cups are convenient for growing seedlings. The grown plant is planted in the garden along with the container, which saves the root system from unnecessary injuries. Buying peat cups every year is expensive. If there is peat and humus at home, then soil calcined in the oven is added to these ingredients, after which everything is mixed. They take the same proportions, add mineral fertilizer, water and knead.
The resulting paste-like mass is laid out in a layer 5 cm thick on any site. Drying should occur naturally in the shade. When the peat slab gets stronger, but does not dry out, squares with a side size of 5×5 cm are cut with a knife. A depression of about 2 cm is made in the center of each cube. A hole is needed for sowing seeds. Ready peat cubes are placed in plastic boxes with a slatted bottom. To collect water after watering, the container is placed on a deep pan.
paper cups
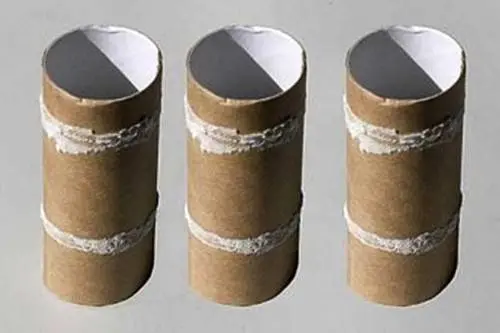
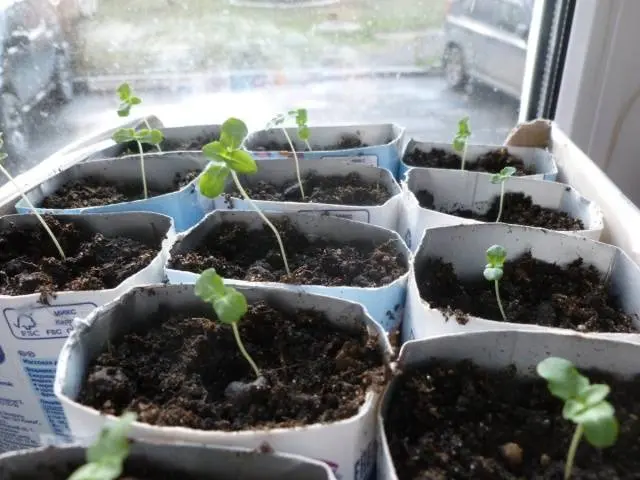
Good boxes for seedlings with cells will turn out if the container is filled with paper cups. The easiest way to make a container is from a cardboard tube cut into pieces, used for winding film, foil and other similar material.
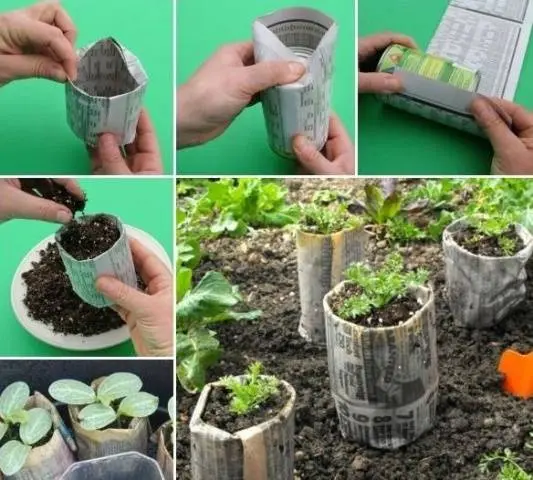
If there is no such blank at hand, cups are made from newspapers:
- As a template base, take any deodorant bottle or a plastic bottle with even walls. Stripes 15 cm wide are cut from newspapers. The length is 2–3 cm greater than the diameter of the solid base.
- A newspaper strip is wrapped around a balloon or bottle, and the joint is glued with glue. You can use tape.
- 10 cm of the paper tube is left on the template, and the hanging 5 cm are folded over, forming the bottom of the cup.
The finished container can be removed from the template and proceed to the manufacture of the next glass. When the required number of paper containers is collected, they are placed in a plastic container, filled with soil and the entire box is placed on a pallet.
Container from tin cans
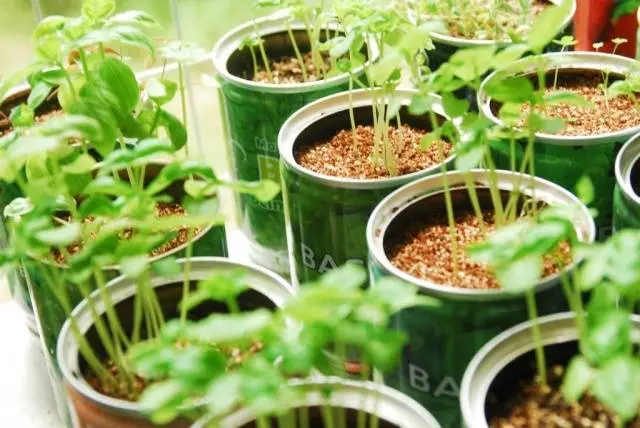
Any tin can will be an excellent container for growing seedlings, which can be installed in a box. It is undesirable to use the container in its entirety. In the spring, when planting on a bed from a tin, it will be difficult to remove a plant with a clod of earth.
To upgrade the glasses, you will need metal scissors. You will have to cut off not only the lower part of the jar with the bottom, but also the upper part so that the rim does not interfere. It turned out to be a tin tube. Now two cuts are made at the top and bottom, but the metal is not moved apart.
Glasses without a bottom are placed in a plastic container with a solid bottom, tightly pushed with soil and sowing is carried out. Excess water after watering will flow freely into the box. In the spring, when planting seedlings, they remember about the incisions on the banks. The tin walls are moved apart, the glass expands, and the plant with a clod of earth freely falls out of the container.
Collapsible container
A do-it-yourself collapsible box for seedlings is convenient in that in the spring its parts are easily removed, and the seedlings, along with a clod of soil, neatly fall out into the garden. A good container will come from the drawer of an old cabinet. The plywood bottom is perforated with a thin drill and part of the fastening is removed. The box during the cultivation of seedlings constantly stands on the pallet. In the spring, the remaining bottom fastening is removed, and the plywood, along with the ground and seedlings, falls out, remaining neatly standing on the bed.
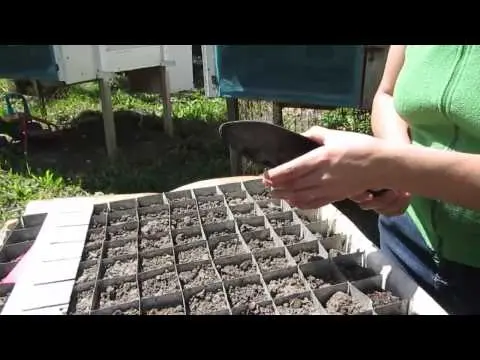
The video shows the process of making reusable cassettes:
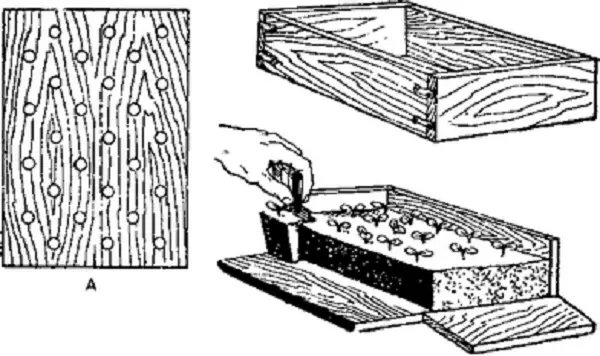
board container
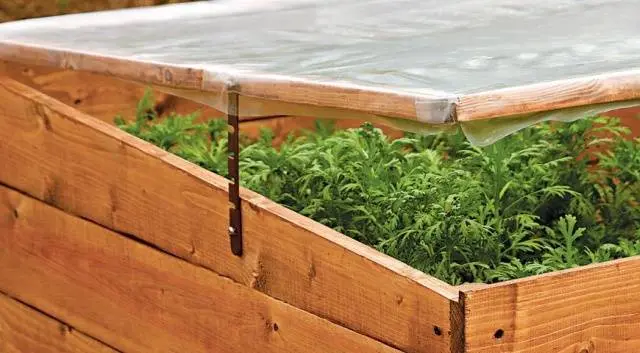
If you decide to assemble a reliable do-it-yourself seedling box made of wood, you will need a 20 mm thick pine edged board. The container can even be used as a mini-greenhouse if you install a lid with a film or glass. The optimal dimensions of the seedling box are 1×2 m. The height of one side is 30 cm, and the other is 36 cm. A difference of 6 cm allows you to make a transparent lid with a slope.
The box making process consists of the following steps:
- From a bar with a section of 40×50 mm, 2 blanks 30 cm long and the same number of bars 36 cm long are cut off. 6 blanks of 2 m each for long shields and 6 blanks of 1 m each for short shields are cut from the board.
- Two shields are assembled from bars and two-meter boards. These will be the long sides of the box. The height of one shield should be 36 cm, and the other – 30 cm. The extra 6 cm can be cut off the board with a grinder, electric jigsaw or a circular electric saw.
- Three short boards are screwed to the bars fixed on the shields on both sides with self-tapping screws. These will be the side walls of the box. Using the same power tool, the top boards of short shields are cut off at an angle. The result is a rectangular box with a beveled top.
- The bottom of the container is not needed, but the lid on the wooden box for seedlings must be done. The frame is assembled from a bar. For reliability, corner joints are reinforced with jibs and overhead metal plates. The frame is hinged to the long side of the box, where the height of the shield is 36 cm. Window clips are installed on the sides. The mechanism will help keep the lid open.
- The finished wooden box is treated with protective impregnation, and after drying, it is opened with varnish.
In the spring, soil is poured into the box, seeds are sown, the lid frame is covered with a transparent film, the box is covered and seedlings are expected to emerge.
Results
Plants need light to grow. To make a backlit seedling box, a fluorescent or LED lamp is fixed on the racks. A traditional incandescent light bulb will not work as it puts out more heat than light.