


Contents
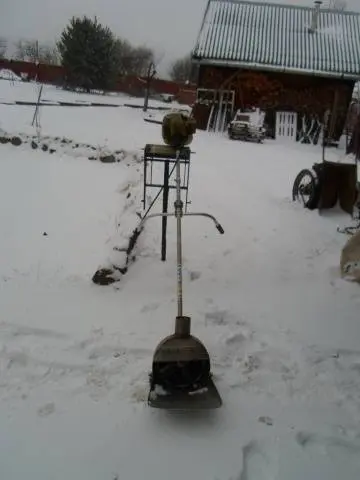
Equipment for clearing snow in a store is expensive and not everyone can afford it. A way out of the situation can be found if you assemble a homemade snow blower from a trimmer, which will help clear the yard of fresh snow.
Conversion of the trimmer into a snow blower
The device of such a homemade product is so simple that you do not have to build complex drawings and grind out details. You just need to make an impeller, which is attached to the trimmer instead of a knife, and place this whole structure in a casing.
Snow Blower Assembly Manual
Not every trimmer is suitable for making a snow blower. If the farm has an electric or brushcutter with a curved bar, in which torque is transmitted to the knife by a flexible cable, then the conversion process does not even need to start. The fact is that such trimmer models are low-power. The performance of the snow blower will be poor and the engine will constantly overheat.
A good snow blower will come from a powerful trimmer with a straight boom. Such an electric or gasoline scythe is characterized by the transmission of torque to the knife through a rigid shaft and a gearbox.
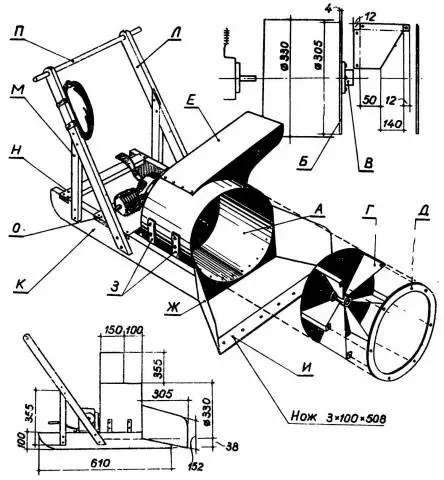
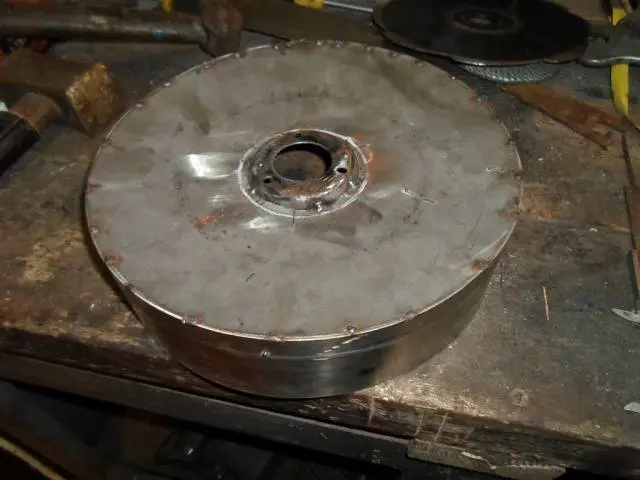
The device of snow removal equipment is simple. The working element is a nozzle, which is placed instead of a knife. It is an impeller with blades. For the manufacture of this part, you need steel with a thickness of 1,5 mm. The impeller must be placed in a casing – a snail. For its manufacture, a large-diameter pipe segment is taken, usually within 300 mm.
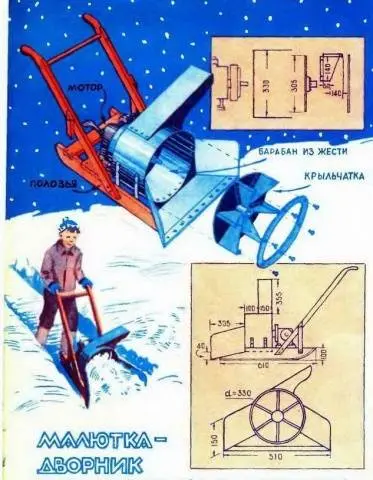
Re-equipping the trimmer with your own hands into a snow blower will do without complicated drawings, but at least the simplest diagram should be at hand. It will help create a general understanding of the design.
Now let’s take a step-by-step look at how to make a do-it-yourself snow blower from an electric or brushcutter:
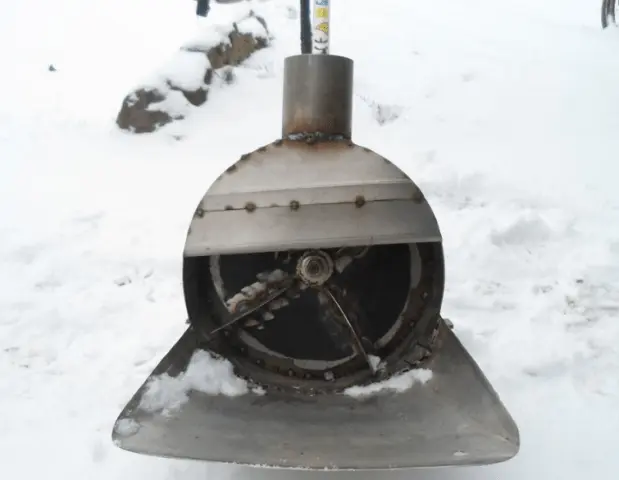
- Snow blower manufacturing begins with the body. If you are lucky enough to get a beer barrel, then you need to cut off a piece of 150 mm long from it. The workpiece is needed together with the bottom, since the trimmer gear will be fixed on it.
- A hole is drilled in the center of the bottom. Its diameter should be enough to pass the trimmer’s working shaft, on which the impeller-shaped attachment will be put on. Mark the mounting points of the gearbox around the large hole. Usually there are three points. Bolt holes are drilled according to the marking.

- Now for the snow blower you need to make an exit – a deflector through which snow will be thrown out. A hole is cut in the side shelf of the case. It can be made square or round as you like. The hole diameter is 100 mm. The branch pipe is welded to it later. And now we need to cut a blank in the shape of a half circle from a sheet of steel. This plug is used to weld 1/3 of the end of the face of the snail body. The plug will prevent snow from flying out of the snail forward, but will direct it into the deflector. The vent hole should be centered on the front end cap.
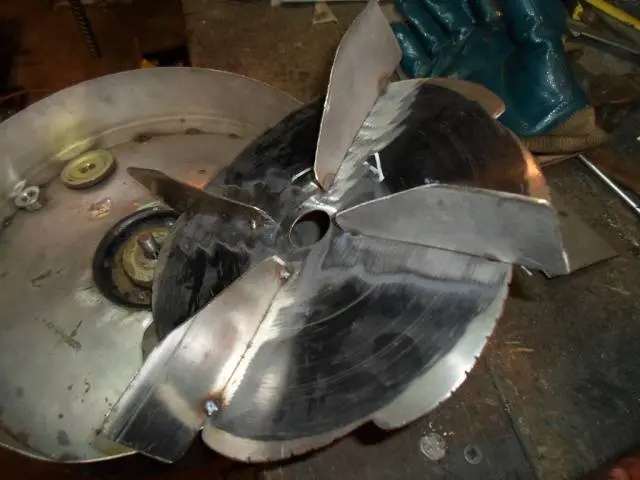
- Next, you need to make a rotor for the snowplow, that is, the impeller itself, which will throw snow. Trimmer disc knife is taken as a basis. But first, four blades of 250×100 mm are cut out of steel. The workpieces are made ideally the same size to avoid imbalance. The finished blades are cross welded to the disc.
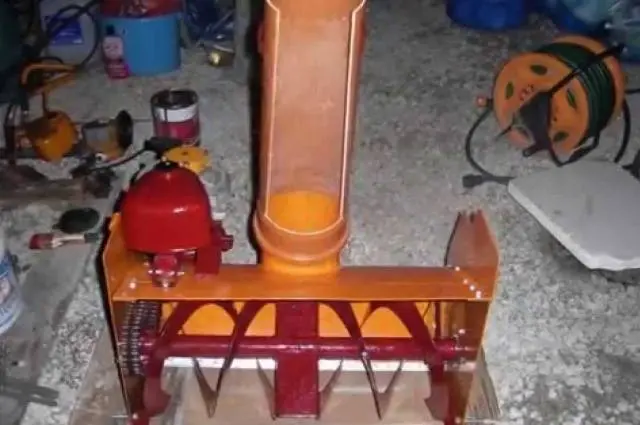
- Now it’s the turn to finish the deflector. The hole on the body is already ready, now you need to fix the pipe to it. It can be bent out of galvanized steel. The branch pipe is made 100 mm high and welded to the body. A knee is fixed to it of a similar length so that the snow is ejected to the side. It is better to make the deflector round. You don’t have to make a knee on such a pipe. It can be taken from a plastic sewer with a diameter of 100 mm.
- The last piece left to make is the guide vane. It is cut from a sheet of steel. You should get a workpiece measuring 300×400 mm. On the sides, the sides are folded with a height of 20 mm. The finished blade is welded to the bottom of the body from the front side.
- All parts of the snow blower are ready, it remains only to assemble them into a single structure. First, the trimmer gear is bolted to the volute. A shaft protrudes inside the housing. They put on a homemade nozzle with blades.
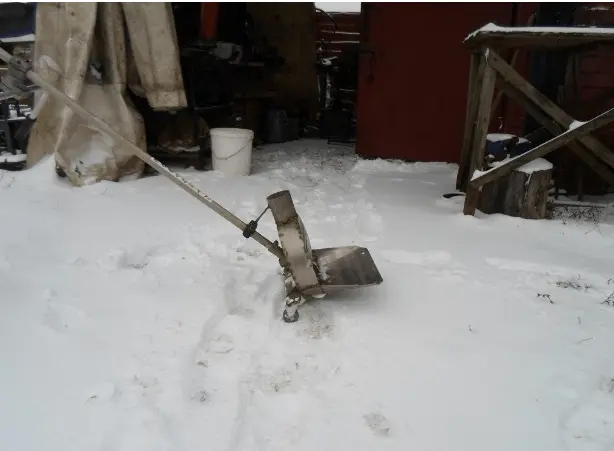
A do-it-yourself snow blower from a trimmer will be considered ready when the rotary structure is installed on the frame. It is enough to weld a regular rectangle from the corners. Wooden runners are fixed to the frame from below. On skis, it is easier to push the snow blower through the snow. The control handle is the native trimmer bar.
The video shows an example of a snowplow from a trimmer:
What is better to attach to the trimmer: auger or rotor
When making a snow blower from a trimmer, there are two options for installing the working mechanism: auger and rotor. Let’s look at what is the difference between designs, as well as their positive and negative sides.
Screw mechanism
In terms of efficiency, the auger outperforms the rotor. The mechanism consists of screw disc knives. Rotating, they cut even stale, wet and icy cover. The coils of the helix shift the collected mass to the center of the body, where the blades push it through the deflector. If such a nozzle is connected to the trimmer, it will be able to throw snow to the side at a distance of up to 3 m. However, it must be taken into account that the auger mechanism creates a large load on the engine. Especially – this is observed when cleaning hard snow. For such a nozzle, you can only use a powerful trimmer.
It is difficult to make a nozzle on your own due to the design of the auger. You will need to accurately measure the distance between each turns. If it is different, the snow blower will throw around during operation. Still need a lot of turning work. The auger rotates on bearings, so you need to grind the trunnions and hubs. Alternatively, you can buy an auger shovel at the store, and at home it will remain to be adapted to the trimmer.
Rotary mechanism
The advantage of the rotary mechanism is the ease of assembly. After all, the mechanical part practically remains native. The impeller is made from a circular knife that fits the attachment to the trimmer head. The range of snow ejection for such a design can reach 6 m.
The disadvantage of the rotor is its use only on loose and freshly fallen cover. Wet snow will stick in the snail, and pieces of ice can get stuck between the blades.
The mechanical part of the snow blower can be chosen as you wish. But in any case, you need to remember that the trimmer is not designed for such a large load. The engine needs to take a break during operation so that it does not overheat.