


Contents
- Pros and cons of homemade greenhouses
- From what improvised material can greenhouses be built in the country
- The simplest arched tunnel
- Insulated arched greenhouse
- Construction of plastic bottles
- Greenhouse from old windows
- Greenhouse in the form of a hut for growing cucumbers
- The simplest greenhouse from the vine
Not every owner of a summer cottage can afford to acquire a stationary greenhouse. Despite the simple device, the construction requires large investments and the availability of building skills. Because of this trifle, you should not give up the desire to grow early vegetables. The solution to the problem will be an installed greenhouse with your own hands from improvised materials on your site.
Pros and cons of homemade greenhouses
A greenhouse shelter is practically the same greenhouse, only reduced several times. Due to the modest size, building material and time for the construction of the structure are significantly saved. Homemade greenhouses are rarely made more than 1,5 m high, except perhaps only for cucumbers. Usually the shelter is built no higher than 0,8-1 m.
Of the advantages of a greenhouse structure, one can single out free heating by sunlight or the heat of decaying organic matter. The vegetable grower does not have to bear the cost of artificial heating of the shelter, as is done in a greenhouse. Do-it-yourself greenhouses built from improvised materials are quickly dismantled to be put away for storage. Similarly, they can be quickly re-harvested in the summer when it is necessary to protect plantings from pest attacks or to prevent birds from eating berries, such as ripe strawberries. A homemade shelter has no size restrictions, as is observed in many factory counterparts. Constructions from improvised materials give such dimensions at which it will fit in the selected area.
The disadvantage of greenhouses from improvised materials is the same heating. With the onset of frost, it is impossible to grow plants under such shelter. Another disadvantage is the height limitation. Tall crops in a greenhouse simply do not fit.
From what improvised material can greenhouses be built in the country
The design of the greenhouse consists of a frame and a covering material. For the manufacture of the frame, plastic or metal pipes, a profile, a corner, rods are suitable. A very simple design can be made with willow twigs or wire inserted into the irrigation hose. A reliable frame will be made of wooden slats, only it will be more difficult to disassemble it.
The most common covering material is film. It is cheap, but will last 1-2 seasons. The best results are shown by reinforced polyethylene or non-woven fabric. During the construction of a greenhouse from window frames, glass will play the role of frame plating. Recently, polycarbonate has become a popular sheathing material. Rarely use plexiglass. Craftsmen have adapted to sheathe the frame of the greenhouse with fragments of plastic cut from PET bottles.
The simplest arched tunnel
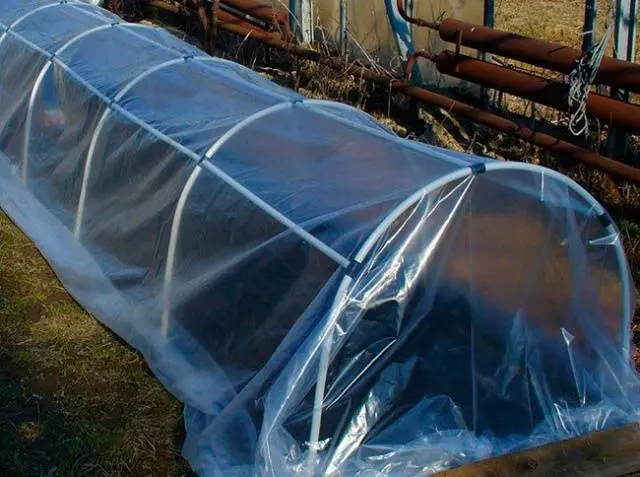
An arched greenhouse is also called a tunnel and arc shelter. This is due to the appearance of the structure, resembling a long tunnel, where arcs serve as a frame. The simplest greenhouse can be made from ordinary wire bent in a semicircle and stuck into the ground above the bed. A film is laid out on top of the arcs, and the shelter is ready. For more serious structures, arcs are made from a plastic pipe with a diameter of 20 mm or a steel bar 6–10 mm thick inserted into an irrigation hose.
Usually, to access the plants, the film is simply lifted from the sides and fixed at the top of the arcs. If long slats are nailed down along the edges of the film, the shelter will become heavier and will not dangle in the wind. To open the sides of the greenhouse, the film is simply rolled onto a rail, and the resulting roll is laid on top of the arcs.
So, having cleared the site for construction, proceed to install the arched shelter:
- For a capital arched greenhouse made of boards or timber, you will need to knock down the box. The boards will allow you to equip even a warm bed with compost, plus arcs can be fixed to the boards. The bottom of the bed in the box is covered with a metal mesh so that earthen rodents do not spoil the root crops. On the outside of the side, sections of the tube are fastened with clamps, where arcs from a metal rod will be inserted.
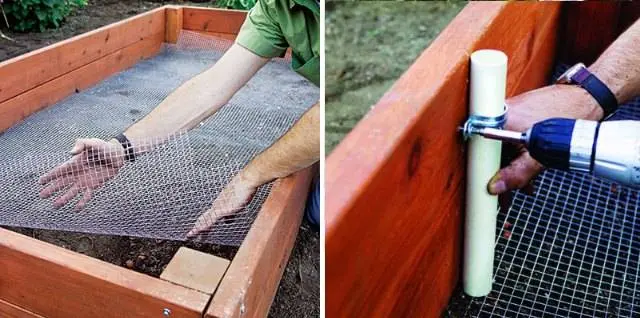

- If it is decided to make the arches from a plastic pipe, then there is no need to attach pieces of tubes to the board. The arc holders will be pieces of reinforcement 0,7 m long, driven in from both long sides of the box in steps of 0,6-0,7 m. The plastic pipe is cut into pieces, bent in a semicircle and simply put on the pins, as shown in the photo.
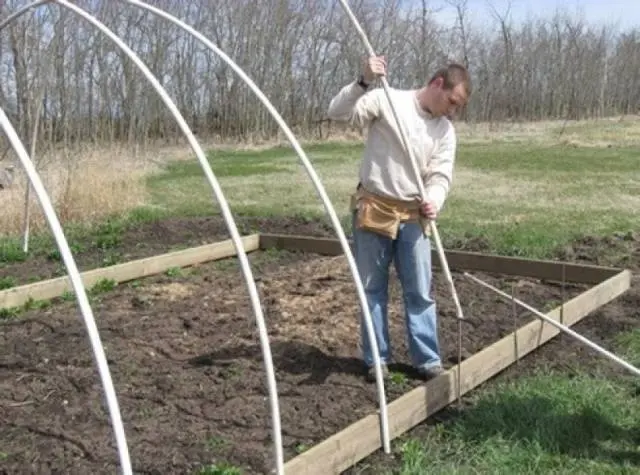
- If the height of the arcs exceeds 1 m, it is advisable to reinforce them with a jumper from the same pipe. The finished skeleton is covered with polyethylene or non-woven fabric. The covering material is pressed to the ground with any load or slats are nailed along the edges for weighting.
The arched greenhouse is ready, it remains to prepare the soil and break the bed.
Insulated arched greenhouse
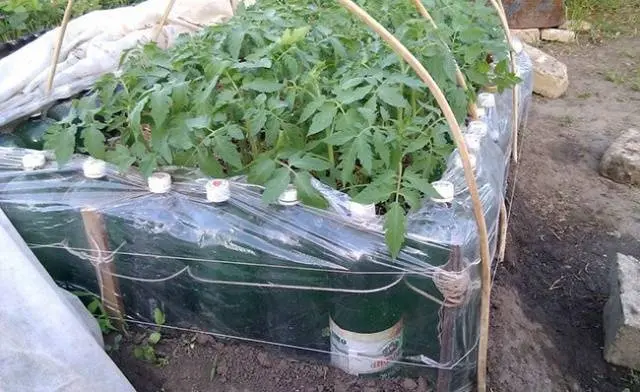
The disadvantage of greenhouses is their rapid cooling at night. The accumulated heat is not enough until the morning, and heat-loving plants begin to experience discomfort. A real heated greenhouse from improvised materials can be made from plastic bottles. They will play the role of an energy accumulator. The principle of arranging such a shelter from improvised material can be seen in the photo.
For work, you will need two-liter containers from green or brown beer. The bottles are filled with water and tightly stoppered. The dark color of the walls of the containers will contribute to the rapid heating of the water in the sun, and at night the accumulated heat will warm the soil of the bed.
The further process of making a greenhouse involves the installation of arcs. Arches from a plastic pipe are strung on metal pins driven into the ground. If the arcs are made of rod, they are simply stuck into the ground. Further, from the PET bottles filled with water, the sides of the box are built around the perimeter of the beds. So that the containers do not fall, they are dug in a little, and then the entire board around the perimeter is covered with twine.
The bottom of the future beds is covered with black polyethylene. It will protect plantings from weeds and cold soil from below. Now it remains to fill the fertile soil inside the box, plant the seedlings and lay the covering material on the arcs.
Construction of plastic bottles

Plastic bottles are a handy material for many designs, and the greenhouse is no exception. For such a shelter, you will need to knock down a frame from wooden slats. The roof of the greenhouse is better to make a gable. It will not be possible to bend arcs from a tree, and a shed plane with a slight slope will accumulate rainwater and may fail.
For sheathing the frame, you will need at least 400 two-liter bottles. It is advisable to choose them in different colors. Scattered light will favorably affect the development of plants, but it is better to give preference to transparent containers. In each bottle, cut off the bottom and neck with scissors. The resulting barrel is cut lengthwise and flattened to form a rectangular piece of plastic. Next, there is the laborious work of stitching all the rectangles with wire to get fragments of the required sizes. Plastic is shot to the frame of the greenhouse with staples of a construction stapler.
Such a greenhouse cannot be called collapsible, but it is made 100% from improvised materials.
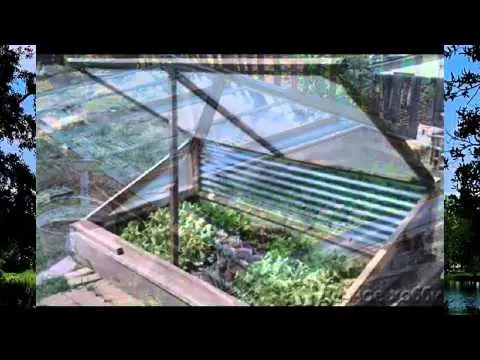
Greenhouse from old windows
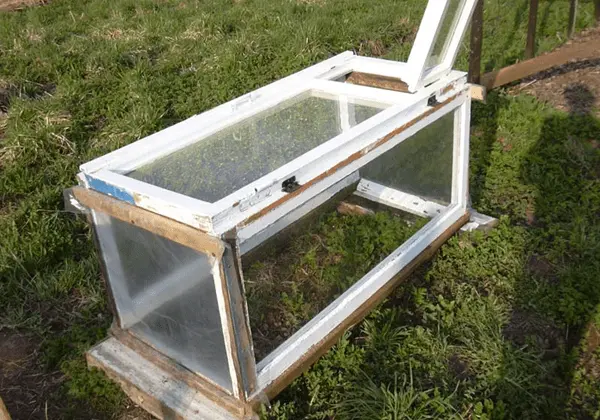
Used window frames are the best material at hand for making a greenhouse. If there are enough of them, you can make a completely transparent box with an opening top. Shelter from window frames is sometimes attached to the house, then the fourth wall of the box is not made. The main condition for the manufacture of the structure is to observe the slope of the top cover of the box in order to prevent the accumulation of rainwater on the glass.
So, after preparing the installation site for the greenhouse, the box is assembled from boards or window frames. It is advisable to treat the wood with impregnation from decay and paint it. At the finished box, the back wall must be higher than the front so that a slope of at least 30о. A window frame is hinged to a high wall. On a long box, the roof is made of several frames, then you will have to make jumpers between the back and front walls. They will serve as an emphasis on closed frames. Handles are attached to the front of the frames so that it is convenient to open the roof. Now the box made, or rather, the frames, remains to be glazed and the greenhouse from improvised materials is ready.
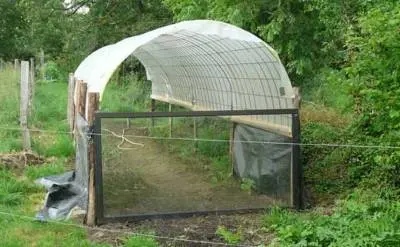
Greenhouse in the form of a hut for growing cucumbers
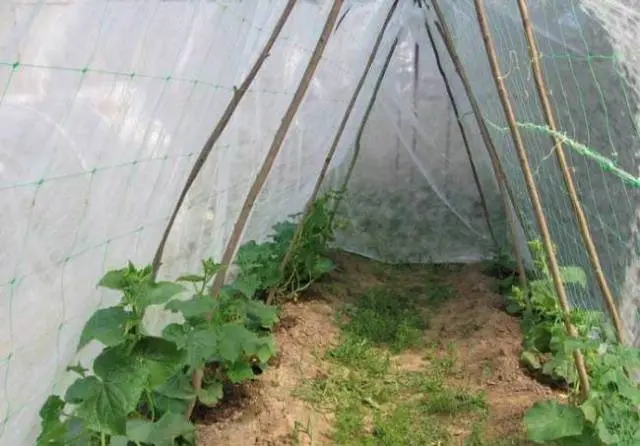
To build a greenhouse for cucumbers with your own hands, you have to show a little imagination. For these weaving vegetables, you will need to build a shelter at least 1,5 m high. It is undesirable to use arcs for such a greenhouse. The structure will be shaky. Arches can be welded from metal pipes, but such a greenhouse will turn out to be expensive and heavy.
Returning to the materials at hand, it is time to recall the construction of huts, often built in childhood. The principle of such a structure will serve as the basis for a greenhouse for cucumbers. So, according to the size of the beds from boards or timber, they knock down the box. A beam 1,7 m long and with a section of 50×50 mm is attached at one end to the box using the same method as was done with arcs. At the same time, it is important to ensure that each rack of timber is fixed at a slope towards the center of the bed. When from above the two ends of the opposite supports close into an acute angle, you get a hut.
The installed supports of the hut are fastened together with crossbars from the board. The film will be fixed to them. From above, where an acute angle is obtained, the ribs of the hut are fastened with a solid board for the entire length of the greenhouse. From above, the finished frame is covered with a film. To prevent the covering material from being torn by the wind, it is nailed with thin strips to the transverse boards. A garden net is stretched inside the hut. Cucumbers will trail along it.
The simplest greenhouse from the vine
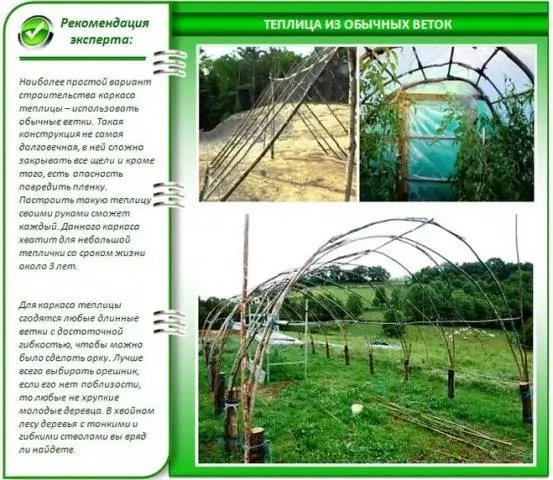
Having an old irrigation hose on the farm, you can make excellent arcs for a greenhouse. However, first you have to go to the reservoir and cut rods from a vine about 10 mm thick. For a greenhouse with a covering material width of 3 m, rods 1,5 m long will be needed. The vine is cleaned of bark and knots. Next, cut the hose into pieces of 20 cm, and insert rods on each side. The vine should go in very tightly. As a result, from two half-arcs connected by a hose, one full-fledged arch for a greenhouse turned out.
When the required number of arcs is ready, they make a frame according to the principle of an arched greenhouse and stretch the covering material.
The video shows a greenhouse made from improvised materials:
With several examples, we looked at how to make a greenhouse with our own hands from improvised materials available in the household. As you can see, everything is quite simple and if you have imagination, you can come up with your own options for shelter for plantings.