


Contents
The design of the snow blower is not so complicated that the working units often fail. However, there are parts that wear out quickly. One of them is the friction ring. The detail seems to be simple, but without it the snow blower will not go. If you wish, you can make a friction ring for a snow blower with your own hands, but it’s easier to buy it.
The purpose of the friction ring and the reasons for its wear
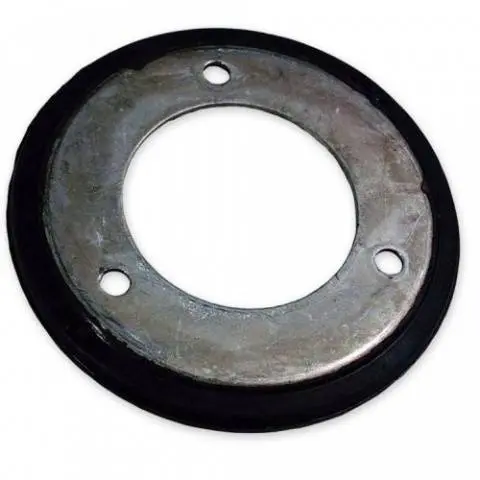
In wheeled snowplows, the clutch ring is an important part of the transmission. It is responsible for the rotation of the wheels at the speed set by the gearbox. Usually the ring is made of aluminum alloy, but steel stamping is found. The shape of the part resembles a disc with a rubber seal on it.
During natural normal operation, the ring wears slowly. In case of violation of the rules for using a snow blower, the part fails quickly.
Let’s take a look at some of the most common causes of wear:
- During the work of snowplows, gears are switched without stopping it. The first load falls on the rubber seal. The elastic material protects the metal part, but not for long. The rubber seal wears out quickly. Behind him, the metal ring is subjected to the load. Over time, it collapses, and the snow blower stops.
- The rapid wear of the part is facilitated by a careless attitude to the control of the snow blower. In large snowdrifts, on the rise and other difficult sections of the road, the car often slips. From this wheel create a large mechanical pressure on the ring. The part quickly begins to wear out, and deep grooves form on its surface.
- The big enemy of the friction ring is dampness. There is no getting away from it, since snow is water. Corrosion destroys a part of any material. Aluminum crumbles with fine powder, and the metal becomes overgrown with rust. Only the rubber seal does not give in to dampness, but without a metal part it is of no use.
It is clear that in winter, from melted snow, moisture will definitely get into the knot. However, during the spring and autumn storage of the snow blower, you should try to protect the machine from dampness.
Self-replacing the clutch ring on a snow blower
It is impossible to restore the friction ring using various folk tricks. If the part has worn out to a critical maximum, it only needs to be changed. There is no other way out. You can do this yourself without contacting the service department. The principle of construction of many snow blowers is the same, so the procedure for performing repair work also has similar actions:
- Repair work begins with the engine turned off and completely cooled down. The spark plug is unscrewed from the engine, and the tank is emptied of the remaining fuel.
- All wheels are removed from the snow blower, and with them the stopper pins.
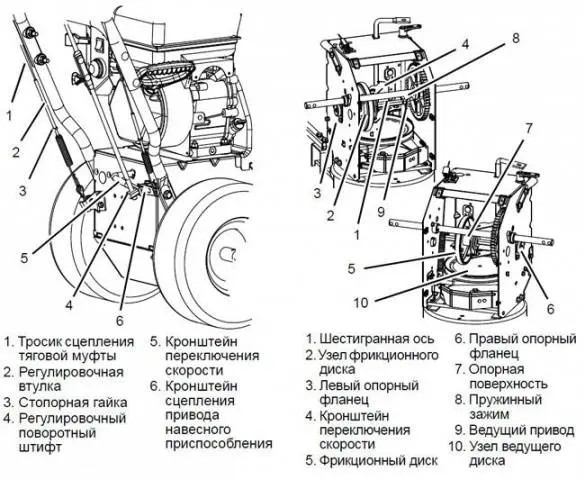
- The next part to dismantle is the gearbox. But it is not removed all, but only the upper part. There is a pin on the spring clip. It also needs to be removed.
- Now you have reached the right place. First you need to remove the support flange, after which access to the clutch mechanism opens. It is dismantled in the same way.
- Now it remains to remove the remnants of the old clutch ring from the mechanism, put a new part and proceed with the reassembly.
All parts that were removed during disassembly of the snow blower are put in their place. Now comes the testing of the gearbox for performance.
The first step is to fill the tank with fuel and start the engine. It should work for a couple of minutes to warm up. Without capturing the snow, the car is rolled around the yard. The positive results of the correct replacement of the clutch ring can be judged by gear shifting. If there are no squeaks, clicks and other suspicious sounds when performing these steps, then the repair work has been done correctly.
The video talks about replacing the friction ring on a snow blower:
Self-manufacturing of a clutch ring for a snow blower
The friction ring is not so expensive that you have to struggle with its manufacture. The part can be bought at any specialized store or ordered online. However, the craftsmen have not yet died out, who, for the sake of this little thing, are ready to spend their time and nerves on its independent production. It should be noted right away that the part needs to be machined perfectly even, so you will have to work a lot with a file.
First, find a blank for the disk. Better if it is aluminum. Soft metal is easier to work with. According to the outer size of the old part, a disk is cut out of the workpiece. An ideal circle when using a grinder will not work. Rough edges of the disc will have to be carefully filed.
The most difficult part in making the part is cutting out the inner hole in the disk to make a ring. As a way out of the situation, you can use a drill. Holes are drilled in a circle with a thin drill, as close to each other as possible. The remaining jumpers between the holes must be cut with a sharp chisel. As a result, the inner unnecessary part of the disk will fall out, and the ring will remain with a lot of jagged burrs. So they will have to be filed for a long time.
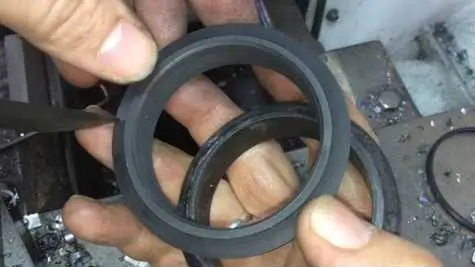
If your efforts were successful, it remains to put on the seal. To do this, you need to find a rubber ring of the appropriate diameter, and then pull it onto the machined workpiece. For tight fixation, the sealant can be planted on liquid nails.
Installation and testing of a home-made part occurs according to a similar principle, as was done with a factory-made ring. The savings from the work performed will be small, but a person can be proud of his skillful hands.