


Contents
Breeding quails on farms is quite a profitable business, so many people do this not only in private homes, but also in city apartments. The cost of keeping quails is small, and there is always healthy tasty meat and equally healthy eggs on the table. To keep the chicks, you can use the most ordinary cages from the pet store, but the chicks will grow much better in “houses” – brooders. The article is devoted to how to make a brooder for quails with your own hands. The drawings, videos and photos given in the article will help you build a good room with your own hands.
Bruder: what is it
This is the room where the chicks that were born are kept. Quails stay in the house until they are three to four weeks old.
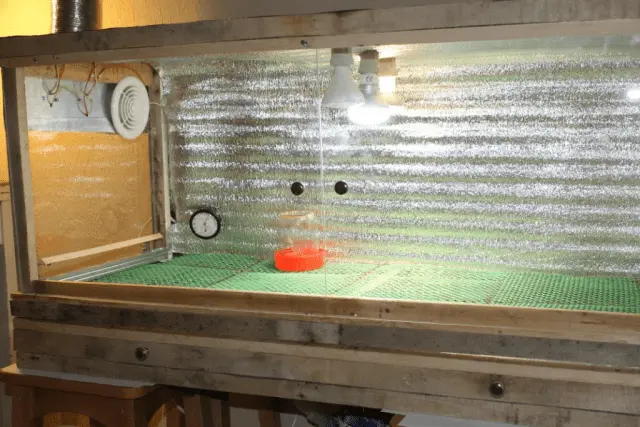
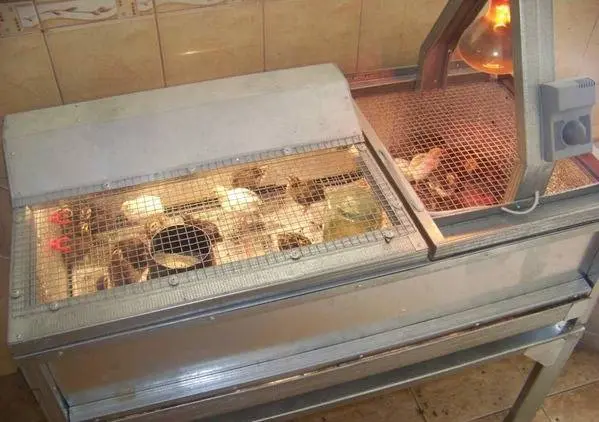
The device is equipped with infrared lamps, which serve simultaneously for light and heating of the room. In addition, the quail room is equipped with feeders.
The indicators of the microclimate in the brooder are as follows:
- The initial temperature in the brooder is 35-37 degrees;
- When the birds reach 10 days of age, the air temperature is lowered to 30 degrees;
- Three-week-old juvenile chicks are moved to cages with adult birds.
Requirements for a brooder
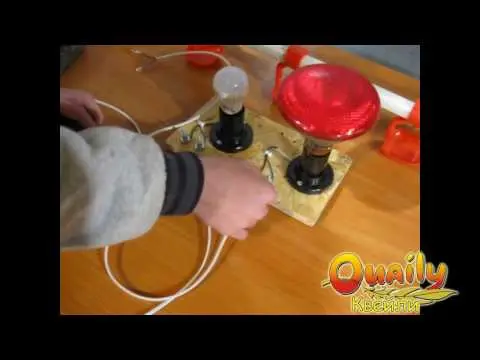
First of all, it is the presence of a good source of heat. As already mentioned, the heat source is an infrared lamp. In addition, an automatic thermostat is also required. The infrared lamp also serves as a light source. The first two weeks it is necessary to keep the lighting constantly on. The impact of infrared radiation on the chicks accelerates their puberty.
Feeders and drinkers are also special. The feeding scheme that is used for adult birds is unacceptable. Otherwise, it will be quite difficult to maintain order in the brooder, and young livestock will die in a dirty room. It is necessary to equip drinkers and feeders so that they exactly match the size of the room.
- Convenience for restoring order in the room.
- Reliability, structural strength.
How to choose the right materials
The first thing you need to pay attention to before making a quail brooder is the selection of materials. Since the structure is intended for reusable operation, it is necessary to choose durable and solid materials for the brooder:
- A board or plywood sheet with a thickness of 2-3 cm. The tree must first be treated with an antiseptic composition. The use of fiberboard sheets is acceptable, but such a construction will last less than a board or plywood sheet.
- For the manufacture of a brooder, you can use polycarbonate. The material is durable and very hygienic. Washing a polycarbonate structure is a real pleasure. But polycarbonate has a significant drawback. It does not allow air to pass through, so the chicks will not be very comfortable even if you establish high-quality ventilation.
- The front wall of the brooder can be made of metal mesh with 10 x 10 mm cells. While the quails are very tiny, a mesh with a mesh size of 5 x 5 mm is used.
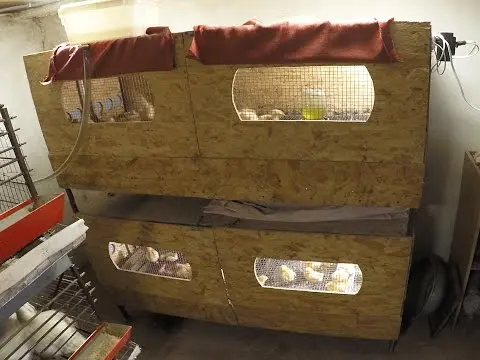
Dimensions
It all depends on how many chicks you are going to keep in your “new home” and where you are going to place the brooder. In a house with dimensions of 700 x 500 x 500 mm, hundreds of quails will fit quite comfortably. After about two weeks, the chicks will become crowded, and you will have to think about resettling the kids or about getting a more spacious quail house.
What is needed for construction
Consider what is needed to make a brooder for quails measuring 700 x 500 x 500 mm. The internal height of the room is 400 mm. Here is an interesting video:
The construction of the brooder is carried out in the following sequence.
- Container.
- The bottom of the cage and litter box.
- Installation of lighting system and heat source.
To make a quail brooder with your own hands, you will need.
- Plywood sheet 1520 x 1520 mm.
- PVC panel.
- Metal grid.
- Self-tapping screws
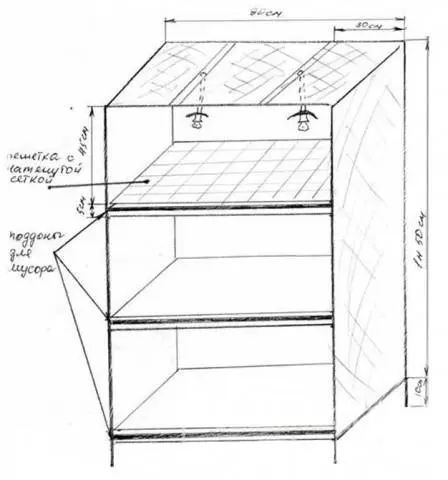
The dimensions of the side walls of the brooder (2 pcs) are 480 x 800 mm. The dimensions of the ceiling, bottom and rear wall are 700 x 500 mm. In addition, two bottom parts with a mesh (660 x 20 mm) and two skids for a pallet (640 x 50 mm) are made. Door dimensions – 400 x 445 mm.
Collect the brooder in the following sequence. To extend the pallet, the same principle applies as for furniture drawers. They make 2 end strips and 4 plywood strips for the sidewalls.
For stiffeners, a wooden beam is used, only 4 parts. The stiffeners are fixed on the side walls with self-tapping screws. After that, three walls are interconnected using self-tapping screws.
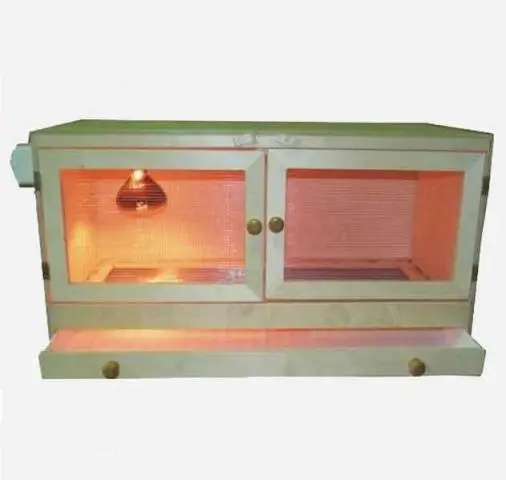
Before assembling the front of the brooder, a frame is made. Loops are mounted on the front of the side strips. Now you need to mount the doors. They can be made with or without mesh. You need to make sure that the doors open freely.
Now it remains to connect the ceiling and bottom of the brooder. The bottom is mounted according to the sandwich principle: the mesh is inserted between the planks and fixed with self-tapping screws. Care must also be taken to mount a fine-mesh bottom for newborn quails. It must be used so that the kids do not fail.
The principle of mounting the manure collector is the same as for the bottom part of the brooder (galvanized metal or plastic is used instead of the mesh in the “sandwich”). To the outer part of the pallet, you need to fix the bar from the plywood sheet. Litter will not spill out.
The last stage of building a brooder is the installation of infrared lamps. If the room turned out to be spacious enough, then they can be installed on the back wall. The thermometer to control the air temperature is placed in such a way that its scale can be seen through the door.
Brooder feeders are preferably bunker type, which are attached to one of the walls. For the manufacture of trays, a metal profile or a plastic pipe is used. End parts are equipped with plugs. So that the chicks do not litter with food, it is covered with a metal mesh. Drinkers in a brooder can be used of these types.
- Open
- Cup.
- Vacuum.
- Nipple.
The last option is the most preferable. Birds will not splash water.
Features of heating and lighting
The option with infrared lamps is not a bad thing, but for a very large number of chicks this method is by no means economical. If you use a large number of these lamps, energy costs will increase. Therefore, for large brooders, it is advisable to use film elements for the “warm floor” system. And a low-power light bulb is quite enough to light the quail.
Brooder Tips
- Chicks should be settled in new housing no earlier than six hours after birth. The chicks will have time to dry and get used to the environment.
- Don’t forget to watch the young quails. If they lose their feather, then there are drafts. At the same time, we must not forget about ventilation. The brooder should be free of dust and hydrogen sulfide odor.
- The quail is a rather nervous and shy bird, so it is important not to approach the brooder unnecessarily.
- If by the time the chicks appeared, you did not have time to build a high-quality “housing” for the young, you can use a cardboard box with ventilation holes and a light bulb installed inside for a temporary settlement.
Of course, a brooder can be purchased ready-made. But doing it with your own hands is not at all difficult, interesting and not at all burdensome for the wallet!