


Contents
Such a hydraulic structure as a well, equipped on your personal plot, makes it possible to satisfy all the household needs of the owner. But in order to be able to approach it in any weather, and the mine is not clogged with surface water, garbage, it is necessary to properly equip this territory. The blind area around the well is within the power of everyone, there are many ways to make it. To decide on a specific option, you need to familiarize yourself with the advantages and disadvantages of the most common types.

Why do you need a blind area around the well
The presence of a blind area around sewer manholes and wells allows you to reliably protect them from getting inside not only atmospheric precipitation, but also chemicals. It is necessary to eliminate stagnation and accumulation of water near the walls of hydraulic structures. In addition, the blind area prevents depressurization of the seams under the influence of moisture.
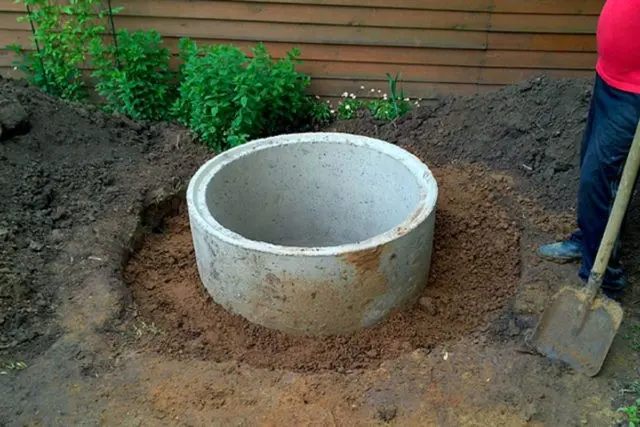
The main task of building a well in a country house, a personal plot is the extraction of clean drinking water. That is why you need to have an idea of how not only to properly install concrete rings in the shaft, but also to make the approach to the source convenient and safe. And most importantly, do not let the water become contaminated, especially during the spring thaw. If melt water mixes with well water, then it cannot be consumed until summer.

The danger of wastewater lies in causing serious harm to human health in the form of the development of all kinds of diseases, since with them the remains of fertilizer compositions, feces, wood ash, sand, small chips and other debris enter the well. The do-it-yourself blind area of the well ensures the purity of drinking water and unhindered access to the water source at any time of the year.
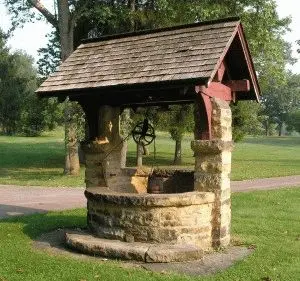
The device of the blind area around the well
The blind area is a waterproof coating, concrete or asphalt, made of paving slabs, arranged around hydraulic structures. In width, it can reach several meters, be 1-3 rings thick. The device of such a protective blind area from rainwater and floods has a lower (underlying) layer and an upper (moisture-proof) layer. To enhance the effect under the bottom layer, it is still good to lay a mixture of sand and fine gravel.
The main advantage is a long service life, from 10 years. They have a sufficient margin of safety and a high degree of resistance to corrosive changes.
Options for blind area around the well
You can make a blind area for a sewer well using one of the materials: clay, reinforced concrete, concrete mass, waterproofing and sand. To do this, you need to familiarize yourself with the main points of the device of each of the options.
Solid varieties of blind area for wells:
- Clay, consisting of a layer of well-compacted clay, which is placed in a recess of a specific size. This method is relatively inexpensive, the material can be easily obtained, but the disadvantage of this method is the appearance of dirt on the surface of the natural flooring, sticky and slippery if water gets on it. To prevent injury and make the blind area of clay comfortable to use, it is also necessary to additionally provide a protective coating.

- Concrete. For manufacturing, it will be necessary to make a wooden formwork installed on a layer of gravel according to the size of the future blind area. To extend the service life of the concrete blind area, a reinforcing mesh is used before pouring the working solution. In addition, an important point is the presence of a waterproofing layer between the outer walls of the well and the concrete mass. Thanks to this technique, it will be possible to eliminate the rigid adhesion of the well ring and the hardened concrete mass.

But this version of the blind area also has a weak side – frequent chips and cracks on the surface, which not only allow rainwater to penetrate inside the well, but also spoil the appearance of such a flooring. Cracks can be repaired, but if there are serious violations in manufacturing technology, the integrity of the hydraulic structure will be damaged. This occurs as a result of the action of frost heaving forces, with a rigid connection with the upper ring of the well, a rupture occurs, the lower ring is disconnected from the upper one. It is through the resulting gap that soil, garbage, and sewage enter the mine to drinking water.
A solid blind area is made of clay or concrete mortar 20-30 cm thick, its width can be 1,2-2,5 m (along the entire perimeter of the hydraulic structure).
Soft blind area. This type of protective flooring for a well implies the presence of a waterproofing material, on top of which a layer of sand is laid. It is noteworthy that this design allows you to equip it with a decorative coating, a green carpet – a lawn. The soft blind area is also good because for its manufacture there is no need to make excessive efforts, to purchase expensive materials.
Among the positive aspects of the use of soft blind area can be noted:
- small financial costs;
- there is no possibility of damage to the well shaft (along the seam);
- simplicity in arrangement;
- can be repaired at any time;
- long service life (from 50 years);
- there are no difficulties in the case of dismantling activities;
- the possibility of making it yourself;
- if the work is done correctly, the displacement of the ring is excluded;
- due to the compaction of the soil, there are no hidden voids;
- high strength characteristics in relation to the well;
- resistance to seasonal soil fluctuations;
- waterproofing material lasts almost 100 years;
- various options for decorating the blind area (from wooden flooring to laying stone).
Dimensions of the blind area around the well
The optimal diameter of the protective flooring when arranging the area around the well is 3-4 m. It is made 0,4-05 m deep. The sewer blind area is performed in exactly the same way, its size should not be less than 1,2 m.
Do-it-yourself blind area around the well: step by step instructions
Compliance with certain rules when arranging a blind area around a water well, sewer or any other hydraulic structure is the key to the success of this event. Such facilities will be easy to operate and maintain.
How to tile a well
In order for the tiles around the well in the country house to have a presentable appearance and serve as long as possible, it is necessary to adhere to the following technology:
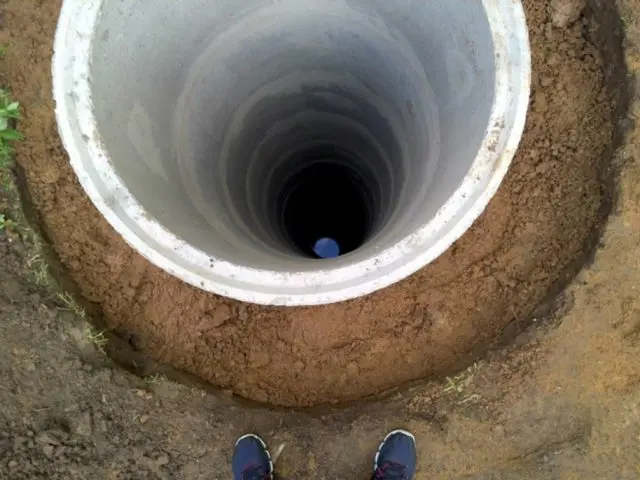
- Dig a trench around the well shaft, removing the fully fertile topsoil. It is necessary to reach the level of the mainland rock. Often the depth of the trench is 40-50 cm. Here, in the process of forming the site, it is important to achieve a slight slope from the walls of the mine.
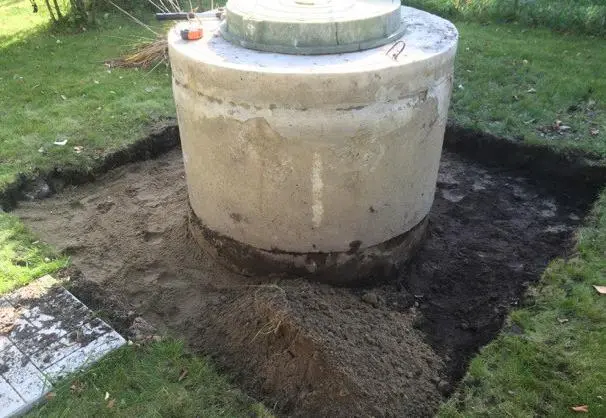

- It is good to compact the bottom of the trench and lay a thin layer of sand.

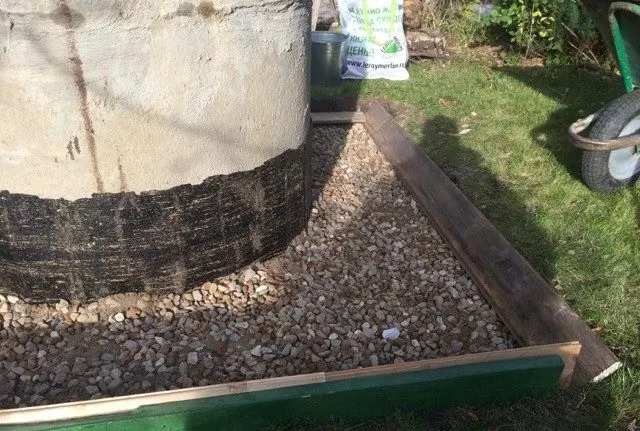
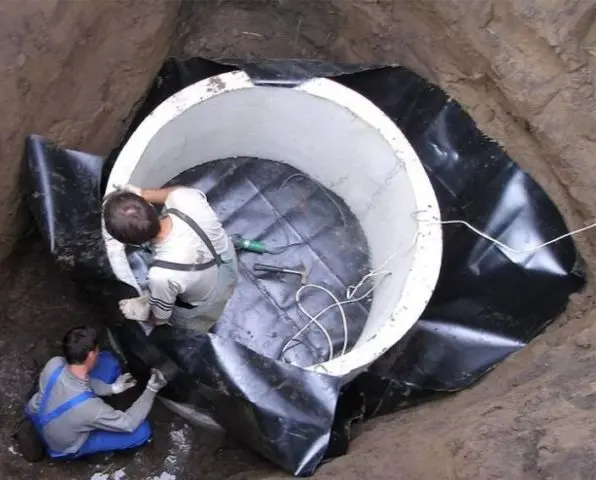
- Lay a waterproofing film on the bottom of the well, line its walls with it. Using adhesive tape, you need to fix the upper edge of the film on the ring. To avoid damage to the material, it must be laid without undue tension, allowing folds in reserve.


- Fill the hole with sand or use another material. It is important here that the selected filler can freely pass water, excluding its accumulation on the surface. The area around the well must be dry. Alternatively, a multi-layer construction of different materials is allowed.
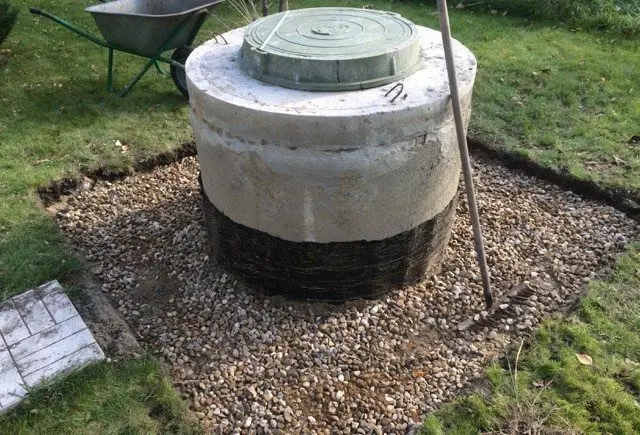

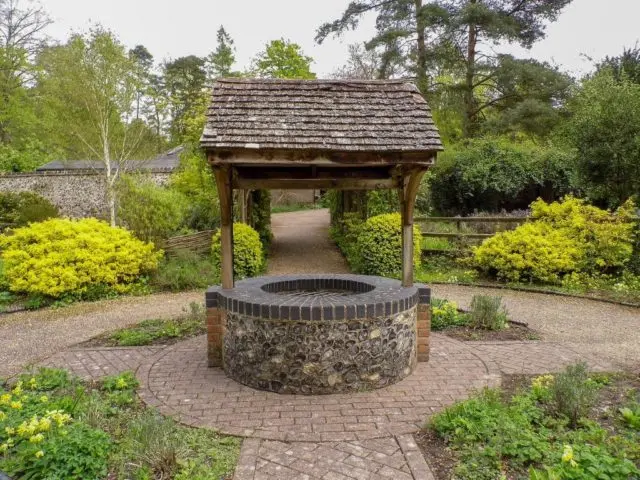
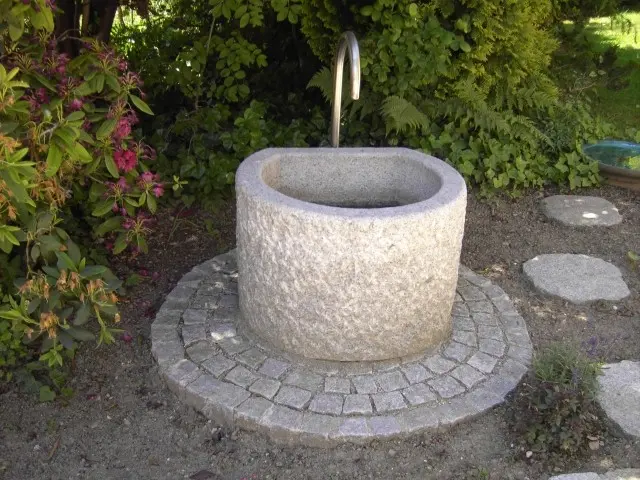
- When the drainage cushion is ready, paving slabs are laid around the well. You can also decorate the site with large pebbles. The laying of paving stones around the well is carried out in the same way as the tile, it also looks original and beautiful.
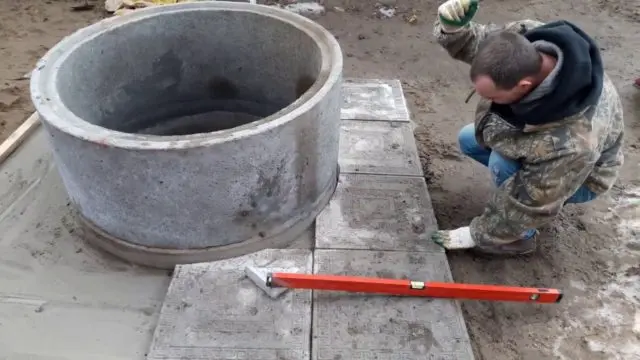

Laying tiles around the well with your own hands is available to everyone, you should not experiment, but it is better to use the simplest technology. It is necessary to spread geotextiles on an evenly scattered layer of sand, pour a thin layer of dry cement on top. After that, it is necessary to lay out the decorative elements, there are many options for laying tiles around the well, and align with a mallet (by tapping). Control the level of the site with a rail. Ultimately, all components of the decorative coating should be in the same plane. In order for the cement to set, the surface of the blind area is poured with water.
Choosing paving slabs or paving stones for arranging the area around the well is quite profitable. The material is distinguished by aesthetics, durability, resistance to adverse environmental factors. In case of dismantling, it is easy to remove.
Clay pavement around the well
Before carrying out construction work, regardless of the type of blind area, the well needs to be settled, the earth around it should sag. For the soil to stabilize, you must wait at least six months. The blind area of a clay well is considered the most affordable option for arranging the territory, but there is one caveat: due to the freezing of bulk soil layers, there is a high probability of destruction of the seam between the first two rings.
The work algorithm provides for the following actions:
- Dig a trench 1,2-1,5 m deep and 0,7-1 m wide.
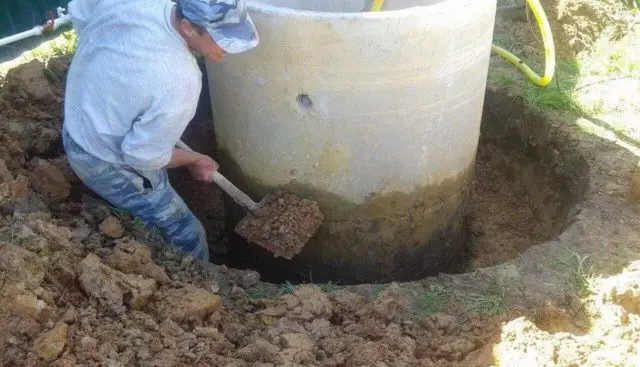

- Lay a layer of soft oily clay. It’s good to tamp her down. If this is done poorly, then voids will form that will allow groundwater to pass directly into the well shaft. As a result, pathogenic microorganisms will multiply in drinking water, and putrefactive processes will begin. Such problems will entail cleaning and disinfection of the well. If vertical defects (cracks) appear in the blind area, then you can try to repair it by removing the old clay and laying in a new one.
- After compacting the surface, a layer of crushed stone is laid, another suitable material.

With a competent approach, the clay blind area in the section is a hemisphere, where water flows to the outer edge due to a slight slope. It is this design that prevents moisture from accumulating on the surface, but goes into loose soil, leaving the water in the well in its pure form. But to improve the appearance and ease of use, it is recommended to cover the clay with another layer – waterproof.
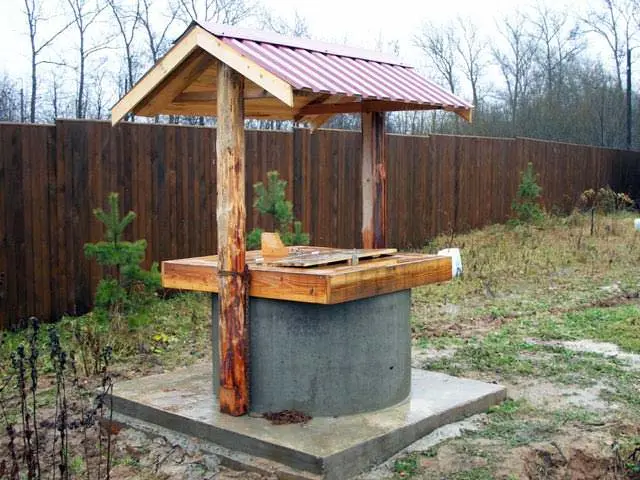
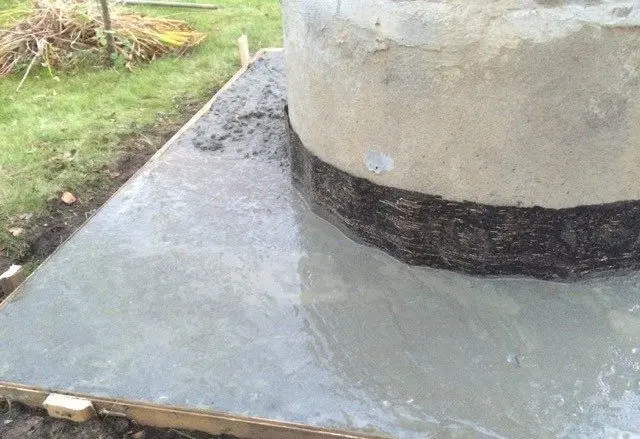
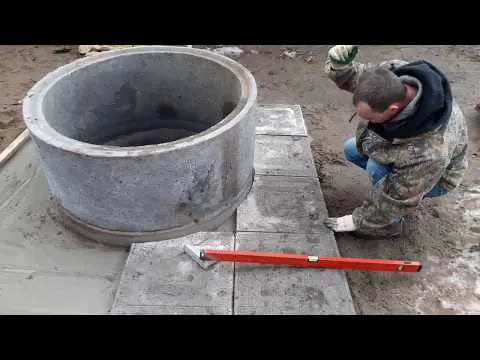
Concrete pavement around the well
Subject to all norms and requirements, the concrete version of the arrangement of the site around the well is durable, strong and has a smooth surface.
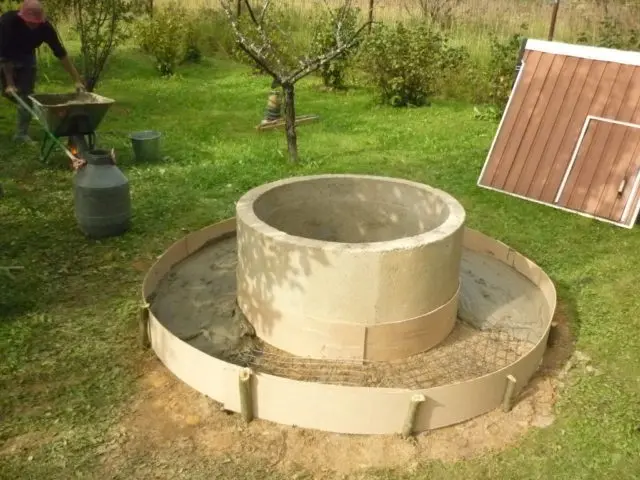
The step-by-step process of creating a blind area is as follows:
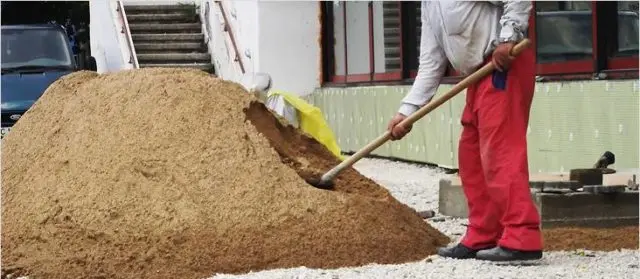
- Remove the top layer of fertile soil (up to 50 cm).

- Pour sand (layer thickness 15-20 cm), pour water when laying each layer. Lay the same layer of gravel or crushed stone of fine fraction. Be sure to maintain a slight slope to the walls of the well. Make formwork from improvised materials.
- Wrap the trunk of the structure with roofing felt, a waterproofing film. This technique will eliminate the creation of a monolith of the protective flooring and the well.
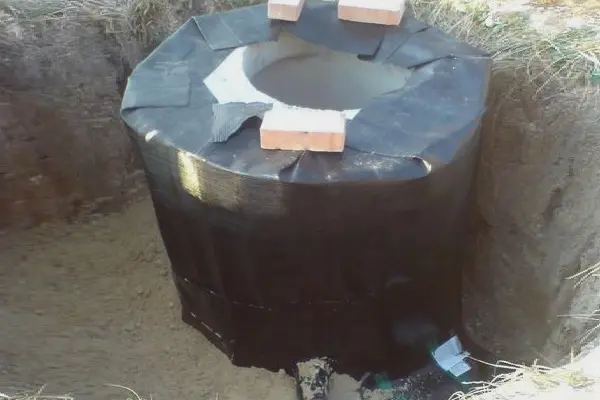

- Fill with concrete.

The use of rolled material does not allow the upper ring to come off when the soil freezes or protrudes. Also, the tightness of the seams between the rings will not be violated. It is rolled waterproofing that allows the blind area to move freely around the mine.
Soft blind area around the well
To make this version of a protective flooring with a decorative finish, you must:
- Build a foundation out of clay. The layer should be thin, its task is to cover the entire area. Be sure to maintain a slight slope.
- Fix the waterproofing material on the shaft ring. In order to avoid displacement of the soil under the paving slabs, it is necessary to fold the insulating film in the zone of its contact with the soil.
- A layer of sand must be laid on top of the waterproofing and compacted. The next layer is geotextile.
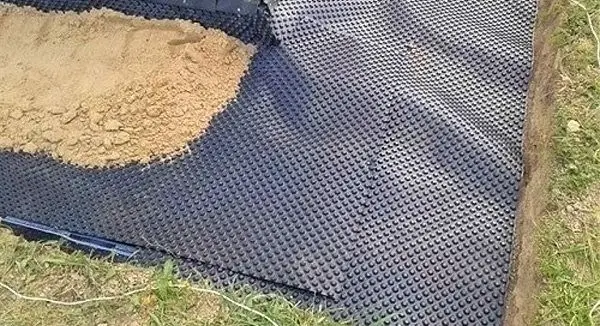

- Lay either paving slabs, or crushed stone, pebbles.
Tips and Tricks
Using a typical design for a blind area around a well, the following recommendations must be followed:
- It is not necessary to start arranging the site immediately after installing the rings; at least six months must pass before the start of construction work.
- The presence of a waterproofing layer significantly increases the effectiveness of the measures taken. The material will prevent the occurrence of undesirable consequences.
- To enhance the effect during the creation of the structure, it is necessary to use a special mesh or reinforcement.
- To give the site originality, it is good to use paving slabs, and there is a large assortment of colors, configurations, and sizes on the market.
- After laying tiles on a cement-sand base, it is not recommended to step on it for the first two days. Also, heavy objects should not be placed on top.
- If it started to rain immediately after the completion of construction work, the site must be covered with polyethylene, otherwise it will be washed away.
- Seam processing must be done only after the base is securely fixed.
- In addition to using paving slabs for decorative design, it is also effective to line the site with garden parquet, saw cut wood, and natural stone.
- The optimal time for a blind area is dry, warm weather, which occurs in May, September.
Conclusion
The blind area around the well can be made according to one of the options described above. But it is best to give preference to soft structures that have a long service life, do not cause difficulties during installation, and do not require significant costs. The main thing when arranging the site with your own hands is not to violate the technology so that in the future you do not have to redo it.